Bose FreeSpace DS 40F Installationsanleitung
Vorschau ausblenden
Andere Handbücher für FreeSpace DS 40F:
- Installationsanleitung (25 Seiten) ,
- Installationsanleitung (16 Seiten) ,
- Installationsanleitung (19 Seiten)
* For use by professional installers only.
* Kun til brug for erfarne installatører.
* Montage ausschließlich durch ausgebildetes Installationspersonal.
* Para uso exclusivo de instaladores capacitados.
* Réservé aux installateurs ayant suivi une formation.
* Solo per l'uso da parte di installatori professionisti.
* Uitsluitend voor gebruik door ervaren installateurs.
* Ska endast användas av utbildade installatörer.
®
Bose
FreeSpace
®
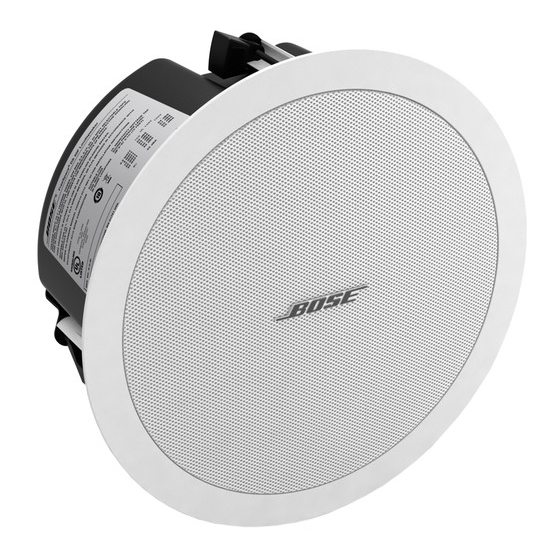
DS 40F Loudspeaker
Installation Guide*
Installationsvejledning*
Installationsanleitung*
Guía de instalación*
Guide d'installation*
Guida all'installazione*
Installatiehandleiding*
Installationsanvisning*

Verwandte Anleitungen für Bose FreeSpace DS 40F


Inhaltszusammenfassung für Bose FreeSpace DS 40F
- Seite 1 ® ® Bose FreeSpace DS 40F Loudspeaker Installation Guide* Installationsvejledning* Installationsanleitung* Guía de instalación* Guide d’installation* Guida all’installazione* Installatiehandleiding* Installationsanvisning* * For use by professional installers only. * Kun til brug for erfarne installatører. * Montage ausschließlich durch ausgebildetes Installationspersonal.
- Seite 2 ® FreeSpace DS 40F Loudspeaker Paint shield 6.38" 162.2 mm 5.73" 145.6 mm 9.94" 11.81" 252.4 mm 300.0 mm 10.26" 2.76" 260.7 mm 70.1 mm Hole cutout diameter 10.5" (267 mm) Maximum ceiling thickness 2.76" (70.1 mm) Loudspeaker weight 8.25 lb. (3.74 kg) Højttalers vægt Maksimal loftstykkelse Højttalers vægt...
- Seite 3 Installation Requirements Installation Installation • Choose a mounting position, method, and hardware consistent • Pour le montage, choisissez une position, une méthode et des with local building codes and regulations. composants conformes aux codes et réglementations en vigueur. • It is the responsibility of the installer to ensure the safety of the •...
- Seite 4 2. Plaque de montage en faux-plafond Bose ® ® 3. A. Bose Tile Bridge 3. A. Plaque de renfort pour plafond à dalles Bose B. Bose ® Adjustable Tile Bridge B. Plaque de renfort ajustable pour plafond à dalles Bose ®...
- Seite 5 Wiring the Loudspeaker With use of direct input terminals Wire gauge requirements from loudspeaker line wiring to loudspeaker terminals: Use 18 AWG (0.8 mm ) to 14 AWG (2.0 mm ) size wire only. Ved anvendelse af direkte indgangsterminaler Krav til ledningens tykkelse fra højttalers tilslutning til indgangsterminaler: Brug kun 18 AWG (0,8 mm ) til 14 AWG (2,0 mm )-kabler.
- Seite 6 Wiring the Loudspeaker Preparing the wire Préparation du câble Dénuder la gaine externe (A) et une partie plus courte de l’isolant Trim back the outer jacket (A) and some of the wire insulation (B) to des fils (B) afin d’exposer la longueur de fil nu (C) nécessaire au expose enough bare wire (C) to attach to the terminals.
- Seite 7 Wiring the Loudspeaker *Optional wiring knockout *Débouchure facultative A second wire hole is available for running separate wires in and out Un second orifice est disponible pour le passage de fils séparés en of the loudspeaker. Use a flathead screwdriver to remove the knock- entrée et sortie de l’enceinte.
- Seite 8 Met de keramische aansluitklem, thermoschakelaar (zekering) en ® Spezifikationen (siehe Seite 15). bedrading die worden geleverd bij Bose Keramische aansluitklem en thermoschakelaar, kunt u de luidsprekerbox zo installeren dat Der keramische Block, die Sicherung und die Kabel, die Sie mit den kortsluiting wordt voorkomen wanneer één luidsprekerbox uitvalt...
- Seite 9 Wiring the Loudspeaker IN/OUT IN/OUT IN/OUT IN/OUT *Optional wiring knockout *Débouchure facultative A second wire hole is available for running separate wires in and out Un second orifice est disponible pour le passage de fils séparés en of the loudspeaker. Use a flathead screwdriver to remove the knock- entrée et sortie de l’enceinte.
- Seite 10 Installing the Loudspeaker 10.5" 267 mm Installing the loudspeaker in a ceiling Einbauen der Lautsprecher in eine Decke 1. Remove cutting template from box. 2. Trace hole onto ceiling or tile — 10.5" (267 mm) diameter. 1. Nehmen Sie die Schneidvorlage aus dem Kasten. 3.
- Seite 11 Installing the Loudspeaker Installation de l’enceinte en plafond De luidspreker monteren in een plafond 1. Retirer le gabarit de découpe de l’emballage. 1. Neem de montagesjabloon uit de doos. 2. Tracer au plafond ou sur le carrelage un trou de 270 mm de 2.
- Seite 12 Installing the Loudspeaker NOT INCLUDED: safety cable Using a safety cable Utilisation du câble de sécurité en • Some regional construction codes require the use of a secondary supplément method of securing loudspeakers to support structures to provide additional safety. •...
- Seite 13 Tap Settings 2.5W* 8Ω NC** 100V * Factory default ** NC: No Connection (do not use) * Fabriksstandard ** NC: Ingen forbindelse (undgå brug) * Werkseitiger Standard ** NC: Keine Verbindung (nicht verwenden) * Ajuste de fábrica ** NC: Sin conexión (no utilizar) * Position par défaut ** NC : Non connecté...
- Seite 14 Grille Options Attaching the grille Removing the grille Using both hands, press the grille into place. Use a flathead screwdriver to gently remove the grille from the loud- speaker body. Be careful not to apply too much force, as that may cause the grille to bend.
-
Seite 15: Safety And Regulatory Compliance
Safety and Regulatory Compliance The DS 40F has passed extensive testing and complies with the following specifications and uses: LISTED to ANSI/UL 1480-2005 • Fire Protective Signaling Use – UL Category UUMW, File Number S 3241. Control Number 42S9. Not for use with DC-supervised systems. •... - Seite 16 ©2010 Bose Corporation, The Mountain Framingham, MA 01701-9168 USA AM325610 Rev.02 pro.Bose.com...