Herunterladen Inhalt Inhalt Diese Seite drucken
Ferm CRM1041 Originalbetriebsanleitung

Ferm CRM1041 Originalbetriebsanleitung

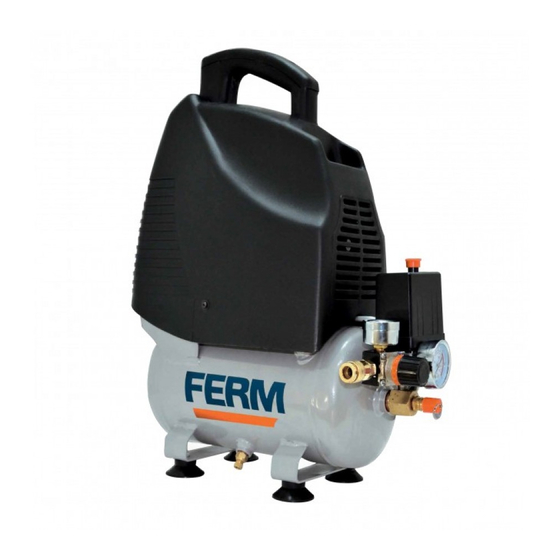
Oelfreier kompressor 1.5hp-1100w-6l

Werbung

Verfügbare Sprachen
  • DE

Verfügbare Sprachen

  • DEUTSCH, seite 9
EN
DE
NL
FR
ES
IT
HU
CRM1041 Ma 1403-18.indd 1
4/24/14 10:16 AM

Werbung

Inhaltsverzeichnis
loading

Inhaltszusammenfassung für Ferm CRM1041

  • Seite 1 CRM1041 Ma 1403-18.indd 1 4/24/14 10:16 AM...
  • Seite 2 Fig. A Ferm CRM1041 Ma 1403-18.indd 2 4/24/14 10:16 AM...
  • Seite 3 Fig. F Ferm CRM1041 Ma 1403-18.indd 3 4/24/14 10:16 AM...
  • Seite 4 Ferm CRM1041 Ma 1403-18.indd 4 4/24/14 10:16 AM...
  • Seite 5: Safety Instructions

    10. Pressure pipe • N.B.: some parts of the compressor such as 11. Drain cock the head and the feed-through pipes may 12. Rubber feet reach high temperatures. Do not touch these Ferm CRM1041 Ma 1403-18.indd 5 4/24/14 10:16 AM...
  • Seite 6 10° (fig.3), in a well ventilated area, protected against atmospheric factors and not in explosive surroundings. If the surface area is Ferm CRM1041 Ma 1403-18.indd 6 4/24/14 10:16 AM...
  • Seite 7 May be caused by the valves (C-C2) or a It is possible to set the operating pressure by gasket (B1-B2) being broken. (fig. 14) using the turning knob on the reduction • Replace the damaged part. Ferm CRM1041 Ma 1403-18.indd 7 4/24/14 10:16 AM...
  • Seite 8 It is recommended to disassemble the suction filter Inhalt every 50 operating hours and to clean the filter element by blowing it with compressed air (fig. 15). 1. Gerätedaten It is recommended that the filter element is 2. Sicherheitsvorschriften Ferm CRM1041 Ma 1403-18.indd 8 4/24/14 10:16 AM...
  • Seite 9: Gerätedaten

    Gefahr von Beschädigungen am Gerät verwenden (Abb. 5 und 6). bei Nichteinhaltung der • Kinder und Tiere weit vom Funktionsbereich Sicherheitsvorschriften in dieser des Geräts entfernt halten. Anleitung. • Wenn Sie den Kompressor für Anstricharbeiten verwenden: Ferm CRM1041 Ma 1403-18.indd 9 4/24/14 10:16 AM...
  • Seite 10: Stromversorgung

    Folgendes ausgeführt werden. Wenn nicht bereits muss sichergestellt sein, dass der Erdleiter geschehen, bringen Sie die Gummifüße wie in angeschlossen ist. Wenden Sie sich bei Zweifeln Abb. 2 dargestellt am Gerät an. Stellen Sie den Ferm CRM1041 Ma 1403-18.indd 10 4/24/14 10:16 AM...
  • Seite 11: Wartung

    Der Druckwächter und die Schalter auf der • Nach Anschluss des Kompressors an das Zentraleinheit müssen ausgeschaltet sein, Stromnetz den Kessel bei Maximaldruck mit Stellung „0”. Luft füllen und die ordnungsgemäße Funktion • Der Lufttank ist vollständig druckentlastet Ferm CRM1041 Ma 1403-18.indd 11 4/24/14 10:16 AM...
  • Seite 12: Reinigung

    Serviceadresse in Verbindung. Im hinteren Teil Reinigung dieser Anleitung befindet sich eine ausführliche Reinigen Sie das Gerätegehäuse regelmäßig mit Übersicht über die Teile, die bestellt werden einem weichen Tuch, vorzugsweise nach jeder können. Ferm CRM1041 Ma 1403-18.indd 12 4/24/14 10:16 AM...
  • Seite 13: Veiligheidsvoorschriften

    Speciale veiligheidsvoorschriften • Waarschuwing! De compressor mag alleen Voor de Europese markt is de tank van deze worden gebruikt in daarvoor geschikte ruimtes compressoren gebouwd volgens de Richtlijn (met goede ventilatie en een Ferm CRM1041 Ma 1403-18.indd 13 4/24/14 10:16 AM...
  • Seite 14 Geen voorwerpen en handen binnenin de worden als schakelaar, maar moet in een beschermingsroosters steken om fysieke stopcontact gestoken worden dat werkt schade en schade aan de compressor te met een aangepaste differentiële voorkomen. schakelaar (magneto thermisch). Ferm CRM1041 Ma 1403-18.indd 14 4/24/14 10:16 AM...
  • Seite 15 100 cm van de klok mee, wordt de druk verhoogd. wand wordt geplaatst (afb. 4). • Door het verdraaien tegen de wijzers van de klok in, wordt de druk verlaagd. Ferm CRM1041 Ma 1403-18.indd 15 4/24/14 10:16 AM...
  • Seite 16 (C-C2) of van een pakking (B1-B2). schone omgeving werkt; en vaker als de omgeving • De beschadigde kleppen vervangen. waarin de compressor staat erg stoffig is. De compressor produceert condenswater dat zich Ferm CRM1041 Ma 1403-18.indd 16 4/24/14 10:16 AM...
  • Seite 17 Indique un risque de décharges Contenus électriques. 1. Données de l’appareil 2. Règles de sécurité Attention: le compresseur est 3. Utilisation 4. Entretien susceptible de redemarrer automatiquement en cas de black-out et Ferm CRM1041 Ma 1403-18.indd 17 4/24/14 10:16 AM...
  • Seite 18 Contrôlez toujours que la tension à l’entrée de possède une ventilation adéquate. l’appareil est la même que la tension réseau c) Protégez-vous le nez et la bouche au moyen indiquée sur la plaquette de l’appareil. Le Ferm CRM1041 Ma 1403-18.indd 18 4/24/14 10:16 AM...
  • Seite 19 La pression de étagère, assurez-vous qu’elles ne pourront pas fonctionnement se règle au moyen du bouton de Ferm CRM1041 Ma 1403-18.indd 19 4/24/14 10:16 AM...
  • Seite 20 L’utilisateur peut entendre un • Tournez ensuite lentement le robinet de sifflement du pressostat. Il s’agit d’un vidange (10) sur le côté inférieur du réservoir phénomène normal qui cesse avant que le ouvert. Ferm CRM1041 Ma 1403-18.indd 20 4/24/14 10:16 AM...
  • Seite 21 11. Llave de desagüe Los números contenidos en el texto siguiente 12. Pies de goma se refieren a las ilustraciones de la página 2 - 13. Tanque 14. Filtro aéreo 15. Interruptor de sobrecarga Ferm CRM1041 Ma 1403-18.indd 21 4/24/14 10:16 AM...
  • Seite 22: Normas De Seguridad

    Nota: algunas partes del compresor como el amarillo/verde. No conecte nunca este cable a un cabezal y los tubos de alimentación directa terminal que esté bajo carga eléctrica. pueden alcanzar altas temperaturas. No toque Ferm CRM1041 Ma 1403-18.indd 22 4/24/14 10:16 AM...
  • Seite 23 “I”. El funcionamiento del compresor es totalmente automático. El regulador de presión hará detener el compresor cuando se haya alcanzado el valor máximo y volverá a Ferm CRM1041 Ma 1403-18.indd 23 4/24/14 10:16 AM...
  • Seite 24 Limpie con regularidad la carcasa de la máquina mantenimiento mínimo. El funcionamiento con un paño suave, preferiblemente después de continuo y satisfactorio depende del cuidado de la cada uso. Mantenga las ranuras de ventilación Ferm CRM1041 Ma 1403-18.indd 24 4/24/14 10:16 AM...
  • Seite 25 5. Regolatore di pressione 6. Raccordo rapido (uscita) 7. Manometro (pressione del serbatoio) 8. Manometro (pressione regolata) 9. Valvola di sicurezza 10. Condotto in pressione 11. Rubinetto di scarico 12. Piedini in gomma Ferm CRM1041 Ma 1403-18.indd 25 4/24/14 10:16 AM...
  • Seite 26: Istruzioni Di Sicurezza

    Non indirizzare il getto d’aria verso persone o nel regolatore di pressione. Le riparazioni devono animali (fig. 20). essere eseguite da centri di assistenza autorizzati o • Non trasportare il compressore con il serbatoio altri centri qualificati. pressurizzato. Ferm CRM1041 Ma 1403-18.indd 26 4/24/14 10:16 AM...
  • Seite 27 Dopo aver estratto il compressore dall’imballo originale (fig. 1), avere controllato che sia in perfette Fig. 14 condizioni e che non abbia subito danni durante il Non è necessario far funzionare sempre l’utensile Ferm CRM1041 Ma 1403-18.indd 27 4/24/14 10:16 AM...
  • Seite 28 (10) sul lato inferiore del serbatoio per aprirla. compressore raggiunga una pressione di 1,5 bar. • La condensa presente fuoriesce dal serbatoio. • Controllare che la valvola di scarico (10) sia chiusa a fondo. Ferm CRM1041 Ma 1403-18.indd 28 4/24/14 10:16 AM...
  • Seite 29: A Gép Adatai

    Le condizioni di garanzia si trovano sulla scheda di 1. Burkolat garanzia, allegata a parte. 2. Fogantyú 3. Kapcsoló 4. Automatikus leállító 5. Nyomásszabályzó 6. Gyorscsatlakozó (kimenet) 7. Nyomásmérő (nyomásszabályzó) 8. Nyomásmérő (tartály) 9. Biztonsági szelep 10. Nyomóvezeték 11. Leeresztőcsap 12. Rubber feet Ferm CRM1041 Ma 1403-18.indd 29 4/24/14 10:16 AM...
  • Seite 30: Biztonsági Útmutatások

    állat felé (20. ábra). Ne feledje, hogy a zöld vagy a sárga-zöld vezeték • Ne hordozza a kompresszort, amikor a tartály a földelő vezeték. Ezt a zöld vezetéket terhelés nyomás alatt van. alatt soha ne csatlakoztassa a terminálhoz. Sec7:30 Ferm CRM1041 Ma 1403-18.indd 30 4/24/14 10:16 AM...
  • Seite 31: A Gép Kezelése

    Tekintettel a tartály lábait, szerelje fel őket a 2. ábra szerint. nyomáscsökkentő szeleppel ellátott Lapos vagy olyan felületre helyezze, amelynek kompresszorokra, szükséges az üzemi nyomás lejtése legfeljebb 10° (3. ábra); olyan helyre tegye, helyes beállítása. amelynek jó a szellőzése, időjárástól védve van, Az üzemi nyomás beállítása elvégezhető a Sec7:31 Ferm CRM1041 Ma 1403-18.indd 31 4/24/14 10:16 AM...
  • Seite 32 • Ha nehezen indul a kompresszor, az alkatrész), lépjen kapcsolatba a szervizzel, alábbiakat ellenőrizze: amelynek címét a garanciakártyán találja. • az hálózati feszültség megfelel-e a Kézikönyvünk végén találja a megrendelhető kompresszor adattábláján feltüntetett alkatrészek robbantott ábráit Sec7:32 Ferm CRM1041 Ma 1403-18.indd 32 4/24/14 10:16 AM...
  • Seite 33: Spare Parts List

    Position. 706018 Gasket set 14+17+19 706027 Filter 706019 Drain cock 706020 Rubber feet 34TILL37 706021 Quick coupling 706022 Reduce valve 706023 Manometer 706024 Connection piece 706025 Safety valve 706026 Automatic pressure switch Ferm CRM1041 Ma 1403-18.indd 33 4/24/14 10:16 AM...
  • Seite 34: Exploded View

    Exploded view Ferm CRM1041 Ma 1403-18.indd 34 4/24/14 10:16 AM...
  • Seite 35 It is our policy to continuously improve our products and we therefore reserve the right to change the product specification without prior notice. Ferm BV • Lingenstraat 6 • 8028 PM • Zwolle The Netherlands Ferm CRM1041 Ma 1403-18.indd 35...
  • Seite 36 CRM1041 Ma 1403-18.indd 36 4/24/14 10:16 AM...

Inhaltsverzeichnis