Herunterladen Inhalt Inhalt Diese Seite drucken
Inhaltsverzeichnis

Werbung

Verfügbare Sprachen

Verfügbare Sprachen

KOMPAKT-AUDIO-SYSTEM
CHAÎNE AUDIO COMPACTE
CADENAS MICRO COMPACTAS
KOMPAKT AUDIOSYSTEM
SISTEMA COMPATTO AUDIO
COMPACT AUDIOSYSTEEM
COMPACT AUDIO SYSTEM
MODELL
MODELLO
MODÈLE
MODEL
MODELO
MODEL
MODELL
XL-3000H
BEDIENUNGSANLEITUNG
MODE D'EMPLOI
MANUAL DE MANEJO
BRUKSANVISNING
MANUALE DI ISTRUZIONI
GEBRUIKSAANWIJZING
OPERATION MANUAL
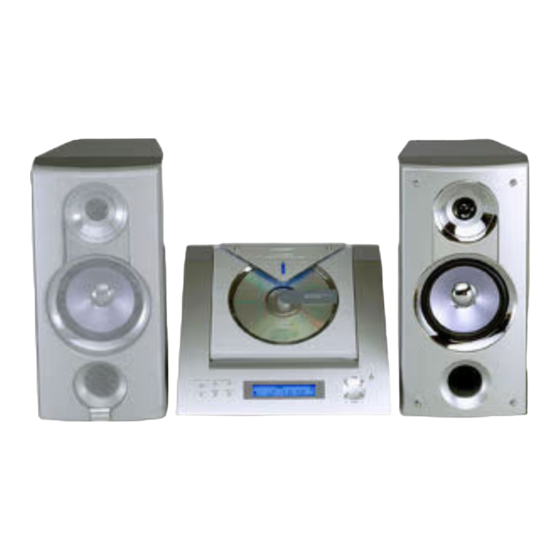
Kompakt-Audio-System XL-3000H besteht aus XL-3000H (Hauptgerät) und
CP-XL3000H (Lautsprechersystem).
Chaîne Audio Compacte XL-3000H composé de XL-3000H (appareil prin-
cipal) et de CP-XL3000H (enceintes acoustiques).
Cadenas Micro Compactas XL-3000H que consta de XL-3000H (aparato
principal) y CP-XL3000H (sistema de altavoces).
XL-3000H Kompakt Audiosystem bestående av XL-3000H (huvudenhet)
och CP-XL3000H (högtalarsystem).
Sistema compatto audio XL-3000H consiste di XL-3000H (apparecchio
principale) e CP-XL3000H (diffusori).
XL-3000H Compact Audiosysteem bestaande uit XL-3000H (hoofdtoestel)
en CP-XL3000H (luidsprekersysteem).
XL-3000H Compact Audio System consisting of XL-3000H (main unit) and
CP-XL3000H (speaker system).
DEUTSCH
Siehe Seiten i bis v und D-1 bis D-32.
FRANÇAIS
Se reporter aux pages i à v et F-1 à F-32.
Consulte las páginas i al v y S-1 al S-32.
ESPAÑOL
SVENSKA
Hänvisa till sidorna i till v och V-1 till V-32.
Leggere le pagine i a v e I-1 a I-32.
ITALIANO
NEDERLANDS
Raadpleeg de bladzijden i t/m v en N-1 t/m N-32.
ENGLISH
Please refer to pages i to v and E-1 to E-32.

Werbung

Inhaltsverzeichnis

Fehlerbehebung

loading

Inhaltszusammenfassung für Sharp XL-3000H

  • Seite 1 CP-XL3000H (diffusori). SISTEMA COMPATTO AUDIO XL-3000H Compact Audiosysteem bestaande uit XL-3000H (hoofdtoestel) COMPACT AUDIOSYSTEEM en CP-XL3000H (luidsprekersysteem). COMPACT AUDIO SYSTEM XL-3000H Compact Audio System consisting of XL-3000H (main unit) and CP-XL3000H (speaker system). MODELL MODELLO MODÈLE MODEL MODELO...
  • Seite 2 Quest’apparecchio è conforme ai requisiti delle direttive 89/ 336/EEC e 73/23/EEC, come emendata dalla direttiva 93/ 68/EEC. Dichiarazione di conformità La società SHARP ELECTRONICS EUROPE GmbH dichiara che il prodotto SHARP SISTEMA COMPATTO AUDIO XL- SISTEMA COMPATTO AUDIO XL- 3000H 3000H è...
  • Seite 3 Bei Einstellung der ON/STAND-BY-Taste auf STAND-BY ist die Quando il tasto ON/STAND-BY si trova in posizione STAND-BY, Netzspannung immer noch im Gerät vorhanden. all’interno dell’apparecchio c’è ancora la corrente. Wenn die ON/STAND-BY-Taste auf STAND-BY eingestellt wird, Se il tasto ON/STAND-BY si trova nella posizione STAND-BY, kann das Gerät unter Verwendung der Timer-Betriebsart oder l’unità...
  • Seite 4 Vorsicht: Warning: Das Gerät weder Tropf- noch Spritzwasser aussetzen. To prevent fire or shock hazard, do not expose this appli- Ansonsten besteht die Gefahr eines Brandes oder ance to dripping or splashing. No objects filled with liquids, elektrischen Schlages. Es sollten keine mit Flüssigkeiten such as vases, shall be placed on the apparatus.
  • Seite 5 VORSICHT CAUTION Verwendung von Regelungen oder Einstellungen bzw. Use of controls, adjustments or performance of procedures other than Durchführung von anderen Verfahren als die hierin angegebenen those specified herein may result in hazardous radiation exposure. kann zum Aussetzen gefährlicher Strahlung führen. As the laser beam used in this compact disc player is harmful to Da der in diesem Compact Disc Player verwendete Laserstrahl the eyes, do not attempt to disassemble the cabinet.
  • Seite 6 Eigenschaften der Laserdiode Material: GaAIAs Wellenlänge: 780 nm Emissionsdauer: kontinuierlich Laser-Ausgang: max. 0,6 mW Caractéristiques de la diode laser Matière: GaAIAs Longueur d’onde: 780 nm Durée d’émission: ininterrompue Puissance de sortie laser maximale: 0,6 mW Características del diodo láser Material: GaAIAs Longitud de onda: 780 nm Duración de emisión : continua Salida de láser: máx.
  • Seite 7: Inhaltsverzeichnis

    DEUTSCH Inhalt Zubehör Seite Prüfen Sie, ob die folgenden Zubehörteile vorhanden sind. „ Allgemeine Informationen Zubehör ..........1 Zur Beachtung .
  • Seite 8: Zur Beachtung

    Der Betrieb des Produktes mit einer Spannung, die höher ist als die angegebene, ist gefährlich und kann zu Brand 10 cm 10 cm oder anderem Unfall durch Beschädigung führen. SHARP kann nicht für Schäden verantwortlich gemacht werden, die aus Betrieb mit einer unvorschriftsmäßigen Spannung resultieren. 30 cm z CD-Spieler arbeiten mit einem Laser-Abtaster, der bei direk- tem Ansehen zu Augenschäden führen kann.
  • Seite 9: Bedienungselemente Und Anzeigen

    Bedienungselemente und Anzeigen „ Frontplatte Bezugsseite 1. CD-Fach ......... 12 2.
  • Seite 10 „ Lautsprechersystem 1. Hochtöner 2. Tieftöner 3. Baßreflex-Öffnung <Der Boden des Gerätes> 4. Lautsprecherklemmen MODEL NO. XL-3000H Lautsprecher-Frontverkleidungen sind abnehmbar: COMPACT AUDIO SYSTEM Es ist sicherzustellen, daß nichts beim Abneh- 230 V 50 Hz 40 W men der Frontverkleidungen mit den Lautspre- SERIAL NO.
  • Seite 11 „ Fernbedienung Bezugsseite 1. Fernbedienungssender ......8 2. Netz-/Bereitschaftstaste ......9 3.
  • Seite 12: Anschluß Des Systems

    Anschluß des Systems UKW-Antenne Rechter Linker Lautsprecher MW-Rahmenantenne Lautsprecher MD-Recorder nicht mitgeliefert Videorecorder, DVD-Player usw. nicht mitgeliefert Wandsteckdose (Wechselspannung 230 V, 50 Hz) Rechter Linker Lautsprecher Lautsprecher Weißer Streifen Schwarz DEUTSCH...
  • Seite 13: Anschluß Der Antennen

    „ Anschluß der Antennen Hinweise: z Wenn eine UKW-Außenantenne benutzt wird, den mitgelieferten Mitgelieferte UKW-Antenne: UKW-Antennendraht von der Buchse FM 75 OHMS trennen. Den UKW-Antennendraht an die Buchse z Beim Verwenden einer MW-Außenantenne unbedingt den Draht der FM 75 OHMS anschließen und danach in MW-Rahmenantenne angeschlossen halten.
  • Seite 14: Fernbedienung

    Fernbedienung „ Einsetzen der Batterien „ Test der Fernbedienung Die Fernbedienung direkt auf den Fernbedienungssensor am Gerät Den Batteriefachdeckel entfernen. richten. Die Batterien entsprechend der im Batteriefach angegebe- nen Polarität einsetzen. Die Fernbedienung kann im unten gezeigten Bereich verwen- Beim Einsetzen oder Entnehmen der Batterien nach den Bat- det werden: terieklemmen hin drücken.
  • Seite 15: Allgemeine Regelung

    Allgemeine Regelung „ Einschalten der Stromversorgung Zum Einschalten der Stromversorgung die ON/STAND-BY-Taste drücken. Einstellen des Gerätes auf Bereitschafts-Betriebsart: Die ON/STAND-BY-Taste erneut drücken. „ Ändern der Helligkeit des Displays (2 Stu- fen) Per Druck auf die DIMMER-Taste auf der Fernbedienung können Sie die Helligkeit des Displays schalten.
  • Seite 16: Klangregelung

    Klangregelung „ Baßregelung Bedienung durch den Hauptgerät: 1 Die BASS/TREBLE-Taste drücken, bis "BASS" auf dem Display erscheint. 2 Zur Baßregelung innerhalb von 5 Sekunden die Taste VOLUME oder ) drücken. Bedienung durch die Fernbedienung: Zur Baßregelung die Taste BASS ( oder ) drücken.
  • Seite 17: Einstellen Der Uhr

    Einstellen der Uhr Innerhalb von 1 Minute die PRESET ( oder ) drücken, um die Stunde einzustellen, und dann die MEMORY-Taste betätigen. z Wenn die 12-Stunden-Anzeige gewählt wird, schaltet "AM" auto- matisch auf "PM". Innerhalb von 1 Minute die PRESET ( oder ) drücken, um die Minuten einzustellen, und dann die MEMORY-Taste...
  • Seite 18: Abspielen Einer Cd

    Abspielen einer CD Zum Einschalten des Gerätes die ON/STAND-BY-Taste drücken. Die FUNCTION-Taste drücken, bis "CD STOP" oder "NO DISC" auf dem Display erscheint. z Bei der Bedienung durch die Fernbedienung die CD-Taste drücken. z Wenn keine Disc eingelegt wird, wird "NO DISC" anstatt "CD STOP"...
  • Seite 19: Pflege Der Compact Discs

    Unterbrechen der Wiedergabe: Vorsicht: z Den CD-Fachdeckel von der Hand nicht stoppen oder bewegen. Bedienung durch den Hauptgerät: Es kann zu Störungen des Geräts führen. -Taste drücken. z Darauf achten, daß sich Sie die Finger im CD-Fachdeckel nicht Um die Wiedergabe von derselben Stelle an fortzusetzen, die klemmen.
  • Seite 20: Auffinden Des Titelanfangs

    Wiederholte Wiedergabe und Abspielen einer CD (Fortsetzung) Zufallswiedergabe „ Auffinden des Titelanfangs Sie können eine der CD-Wiedergabe-Betriebsarten auswählen: "Wieder- Weitergehen zum Anfang des nächsten Titels: holte Wiedergabe", "Zufallswiedergabe" und "Normale Wiedergabe". Während der Wiedergabe die -Taste weniger als 0,5 Sekunden drücken.
  • Seite 21: Programmierte Wiedergabe

    Programmierte Wiedergabe Durch Bestimmen von Titeln von 1 bis 99 können Sie bis zu 20 Titel Die MEMORY/SET(MEMORY)-Taste drücken, um die Titel- zur Wiedergabe in gewünschter Reihenfolge auswählen. nummer zu sichern. Gesamte Spielzeit Wiedergabefolge Für weitere Titel die Schritte 2 - 3 wiederholen. Bis zu 20 Ti- tel können programmiert werden.
  • Seite 22: Rundfunkempfang

    Rundfunkempfang Zum Einschalten des Gerätes die ON/STAND-BY-Taste drücken. Die FUNCTION-Taste drücken, bis "FM" oder "AM" auf dem Display erscheint. Bei der Bedienung durch die Fernbedienung die TUNER- und dann die BAND-Taste drücken, um "FM" oder "AM" zu wählen. Die TUNING-Taste ( oder ) drücken, um den ge- wünschten Sender einzustellen.
  • Seite 23 Empfangen einer UKW-Stereosendung: Die FUNCTION (BAND)-Taste drücken, so daß die "ST"-Anzeige aufleuchtet. z " " erscheint, wenn eine UKW-Sendung in Stereo ist. UKW-Stereo-Betriebsartenanzeige UKW-Stereo-Empfangsanzeige z Bei schwachem UKW-Empfang die FUNCTION (BAND)-Taste drücken, so daß die "ST"-Anzeige erlischt. Der Empfang schaltet auf Mono, und der Klang wird klarer.
  • Seite 24: Empfangen Des Gespeicherten Senders

    Empfangen des gespeicherten Senders „ Abspeichern eines Senders „ Abrufen eines gespeicherten Senders Sie können 30 MW- und UKW-Sender abspeichern und per Tasten- Die PRESET ( oder )-Taste weniger als 0,5 Sekunden drük- druck abrufen. (Vorabstimmung) ken, um den gewünschten Sender zu wählen. Die Schritte 1 - 3 im Abschnitt "Rundfunkempfang"...
  • Seite 25: Benutzen Des Radio-Daten-Systems (Rds)

    Benutzen des Radio-Daten-Systems (RDS) „ Durch RDS gebotene Informationen RDS ist ein Rundfunkdienst, der heute von einer zunehmenden Zahl von UKW-Sendern angeboten wird. Diese UKW-Sender Bei jedem Druck auf die DISPLAY-Taste ändert sich das Display senden neben ihren regulären Programmsignalen zusätzliche wie folgt: Signale.
  • Seite 26 Benutzen des Radio-Daten-Systems (RDS) (Fortsetzung) Beschreibungen der PTY(Programmartenkennung)-Codes, TP LIGHT M Populäre, klassische Musik. Zum Beispiel Instru- (Verkehrsfunkkennung) und TA (Verkehrsdurchsagekennung). mentalmusik und Vokal- oder Chorwerke. Sie können die folgenden PTY-, TP- und TA-Signale suchen und empfangen. CLASSICS Aufführungen von hauptsächliche Orchesterstük- ken, Sinfonien, Kammermusik usw.
  • Seite 27: Benutzen Des Automatischen Senderspeichers (Aspm)

    „ Benutzen des automatischen Senderspei- COUNTRY Songs, die aus der musikalischen Tradition der Südstaaten von Amerika entstehen oder sie fortset- chers (ASPM) zen. Charakterisiert durch eine schlichte Melodie In der ASPM-Betriebsart sucht der Tuner automatisch nach neuen und narrative Handlung. RDS-Sendern.
  • Seite 28: Abrufen Von Abgespeicherten Sendern

    Benutzen des Radio-Daten-Systems (RDS) (Fortsetzung) Abbrechen der ASPM-Operation: Erneutes Speichern eines Sendernamens beim Abspeichern Während des Sendersuchlaufs die ASPM-Taste drücken. des falschen Namens: Die bereits abgespeicherten Sender bleiben im Speicher. Es kann möglich sein, mit Hilfe der ASPM-Funktion Sendernamen abzuspeichern, wenn viel Rauschen vorhanden ist oder wenn das Hinweise: Signal zu schwach ist.
  • Seite 29 Wenn Sie den Verkehrsfunk auswählen: Innerhalb von 4 Sekunden die Taste PRESET ( oder Wenn Sie in Schritt 3 den Verkehrsfunk (TP) auswählen, erscheint "TP". (Dies bedeutet nicht, daß Sie zu der Zeit die Verkehrsinforma- ) drücken, um die Programmart auszuwählen. tion hören können.) Wenn eine Verkehrsinformation gesendet wird, erscheint "TA".
  • Seite 30: Automatisches Empfangen Des Gewünschten Programms (Eon-Pty)

    Benutzen des Radio-Daten-Systems (RDS) (Fortsetzung) „ Automatisches Empfangen des gewünsch- Innerhalb von 4 Sekunden die PTY.TI-Taste drücken. ten Programms (EON-PTY) Wenn die gewünschte Programmart gesendet wird, schaltet das Radio automatisch auf sie. Einen RDS-Sender einstellen (wenn ein Sendername angezeigt wird). z Die gewählte Programmart und "WAITING"...
  • Seite 31: Automatisches Empfangen Der Verkehrsinformation (Eon-Ti)

    „ Automatisches Empfangen der Verkehrsin- Innerhalb von 4 Sekunden die PTY.TI-Taste drücken. formation (EON-TI) Wenn die Verkehrsinformation gesendet wird, schaltet das Radio automatisch auf sie. Einen RDS-Sender einstellen (wenn ein Sendername angezeigt wird). z "TI" und "WAITING" erscheinen je 2 Sekunden lang. z "TI"...
  • Seite 32 Benutzen des Radio-Daten-Systems (RDS) (Fortsetzung) „ Hinweise zum RDS-Betrieb In den folgenden Fällen wird die EON-Bereitschafts-Betriebsart abgebrochen. Wenn ein der folgenden Ereignisse eintritt, bedeutet dies nicht, z Wenn Sie die ON/STAND-BY-Taste drücken, um in die Bereit- daß das Gerät defekt ist: schafts-Betriebsart zu schalten.
  • Seite 33: Timer- Und Sleep-Funktion

    Timer- und Sleep-Funktion Dies kann nur mit der Fernbedienung betätigt werden. Zum Einschalten der Stromversorgung die ON/STAND- Timer-Wiedergabe: BY-Taste drücken. Zu der voreingestellten Zeit schaltet sich das Gerät ein und gibt die gewünschte Tonquelle (CD, Tuner) wieder. Die Taste CD oder TUNER drücken, um die gewünschte Sleep-Funktion: Funktion zu wählen.
  • Seite 34 Timer- und Sleep-Funktion (Fortsetzung) Hinweise: z Wenn der Timer einmal eingestellt wird, wird die Einstellung Innerhalb von 1 Minute die Taste PRESET ( oder gehalten, bis eine neue Zeit eingegeben wird. drücken, um die zu startende Minute zu bestimmen, z Bei der Timer-Wiedergabe mit Hilfe eines anderen Geräts, das und dann die MEMORY-Taste betätigen.
  • Seite 35: Sleep-Funktion

    „ Sleep-Funktion „ Gleichzeitiges Benutzen der Timer- und Sleep-Funktion Die gewünschte Tonquelle wiedergeben. Beispiel: Einschlafen und Erwachen über denselben Rundfunksen- Die SLEEP-Taste drücken. Sie können nur dieselbe Tonquelle wiedergeben (die Funktion kann nicht umgeschaltet werden). Die Einschlafzeit einstellen (siehe links, Schritte 1 - 2). Während der Sleep-Timer eingestellt ist, die gewünsch- Ändern der Einschlafzeit: te Abspielzeit einstellen (Schritte 4 - 6 auf Seite 27 - 28).
  • Seite 36: Erhöhen Des Systems

    Erhöhen des Systems „ Wiedergabe der Töne vom Videorecorder, Das Anschlußkabel gehört nicht zum Lieferumfang. Kaufen Sie ein im Handel erhältliches Kabel wie unten dargestellt. DVD-Player usw. 1 Mit Hilfe eines Anschlußkabels den Videorecorder, DVD-Player Videorecorder, usw. an die Buchse VIDEO/AUX IN anschließen. DVD-Player usw.
  • Seite 37: Fehlersuche

    Fehlersuche Wartung „ Wenn Störung auftritt „ Reinigen der CD-Abtasterlinse Wenn dieses Produkt von starker externer Interferenz (mechani- Den Abtaster nicht berühren. Falls Fingerabdrücke auf den Abtaster scher Stoß, übermäßige statische Elektrizität, anormale Speise- geraten oder sich Staub darauf ablagert, ihn vorsichtig mit einem spannung infolge von Blitz usw.) beeinflußt oder falsch betrieben Wattestäbchen reinigen.
  • Seite 38: Technische Daten

    Technische Daten „ CD-Player Bedingt durch fortlaufende technische Verbesserungen behält sich SHARP das Recht vor, das Design und die Spezifikationen ohne vorherige Ankündigung ändern zu können. Die angegebenen Lei- Compact Disc Player stungswerte stellen die Nennwerte einer in Serienherstellung produ-...
  • Seite 39 FRANÇAIS Table des matières Accessoires Page Vérifier que les accessoires ci-dessous sont présents dans l'embal- „ Informations générales lage. Accessoires ......... 1 Précautions .
  • Seite 40: Précautions

    10 cm 10 cm sur une tension plus élevée est dangereux et risque de provo- quer un incendie ou tout autre type d'accident. SHARP ne sera 30 cm pas tenu pour responsable des dommages causés par le non- respect de la tension spécifiée.
  • Seite 41: Commandes Et Voyants

    Commandes et voyants „ Façade Page de référence 1. Compartiment CD ....... . 12 2.
  • Seite 42: Panneau Arrière

    8. Prise d'entrée CA ....... . 6, 7 „ Enceinte acoustique <Fond de l'appareil> MODÈLE N˚ XL-3000H 1. Tweeter CHAÎNE AUDIO COMPACTE 2.
  • Seite 43 „ Télécommande Page de référence 1. Émetteur de télécommande ......8 2. Touche marche/attente ....... 9 3.
  • Seite 44: Raccordement Du Système

    Raccordement du système Antenne FM Enceinte droite Cadre-antenne PO Enceinte gauche Enregistreur de MD non fourni Magnétoscope, lecteur de DVD, etc. non fourni Prise murale (230 V CA, 50 Hz) Enceinte droite Enceinte gauche Ligne blanche Noir FRANÇAIS...
  • Seite 45: Raccordement Des Antennes

    „ Raccordement des antennes Notes: z Pour utiliser une antenne extérieure FM, débrancher l'antenne Antenne FM fournie: FM de la prise FM 75 OHMS. Raccorder l'antenne FM à la prise FM z Pour utiliser une antenne extérieure PO, laisser le cadre-antenne 75 OHMS et diriger l'antenne FM vers PO branché...
  • Seite 46: Télécommande

    Télécommande „ Mise en place des piles „ Essai de la télécommande Diriger la télécommande vers le capteur placé sur l'appareil. 1 Retirer le couvercle. Installer les piles en respectant les polarités indiquées dans La télécommande peut être utilisée dans le rayon illustré ci- le logement de piles.
  • Seite 47: Commande Générale

    Commande générale „ Pour allumer l'appareil Appuyer sur la touche ON/STAND-BY pour allumer l'appareil. Pour mettre l'appareil en attente: Réappuyer sur la touche ON/STAND-BY. „ Pour modifier la luminosité de l'affichage (2 niveaux) On peut assombrir ou éclaircir l'afficheur en pressant la touche DIM- MER de la télécommande.
  • Seite 48: Réglage Du Son

    Réglage du son „ Réglage des graves Appareil principal: 1 Agir sur la touche BASS/TREBLE pour afficher "BASS". 2 Avant 5 secondes, appuyer sur la touche VOLUME ( pour régler les graves. Télécommande: Appuyer sur la touche BASS ( ) pour régler les graves. „...
  • Seite 49: Réglage De L'horloge

    Réglage de l'horloge Avant 1 minute, appuyer sur la touche PRESET ( ) pour régler les heures et puis appuyer sur la touche MEMORY. z S'il s'agit de l'affichage 12 heures, "AM" passe automatique- ment à "PM". Avant 1 minute, appuyer sur la touche PRESET ( Cette opération ne se fait que par la télécommande.
  • Seite 50: Écoute De Cd

    Écoute de CD Appuyer sur la touche ON/STAND-BY pour allumer l'ap- pareil. Appuyer sur la touche FUNCTION jusqu'à ce que l'ap- pareil affiche "CD STOP" ou "NO DISC". z Pour télécommander l'opération, appuyer sur la touche CD. z Si aucun disque n'est mis en place, l'appareil affiche "NO DISC"...
  • Seite 51 Interruption de la lecture: Attention: z Ne pas arrêter ou toucher le couvercle CD à la main. L'appareil Appareil principal: peut mal fonctionner. Appuyer sur la touche z Veiller à ne pas se pincer le doigt dans le compartiment CD. Pour relancer la lecture, réappuyer sur la touche z S'il se produit une panne de courant alors que le compartiment est Télécommande:...
  • Seite 52: Répétition Et Lecture Au Hasard

    Répétition et lecture au hasard Écoute de CD (suite) „ Pour localiser un morceau On peut sélectionner l'un des modes de lecture CD: "répétition", "lecture au hasard" et "lecture normale". Pour passer au morceau suivant: En mode CD, agir sur la touche RANDOM/REPEAT de la Appuyer, en cours de lecture, sur la touche (moins de 0,5 se- télécommande pour sélectionner un mode de lecture.
  • Seite 53: Lecture Des Morceaux Programmés

    Lecture des morceaux programmés On peut sélectionner 20 morceaux (maxi) en spécifiant des numé- Appuyer sur la touche MEMORY/SET(MEMORY) pour ros entre 1 et 99 pour la lecture dans un ordre souhaité. stocker le numéro de morceau. Ordre de lecture Temps de lecture total Renouveler les étapes 2 - 3 pour d'autres morceaux.
  • Seite 54: Écoute De La Radio

    Écoute de la radio Appuyer sur la touche ON/STAND-BY pour allumer l'ap- pareil. Agir sur la touche FUNCTION pour afficher "FM" ou "AM". Pour télécommander l'opération, appuyer sur la touche TUNER et puis sur la touche BAND afin de sélectionner "FM" ou "AM". Appuyer sur la touche TUNING ( ) pour faire l'ac- cord sur la station souhaitée.
  • Seite 55 Pour recevoir une émission FM stéréo: Appuyer sur la touche FUNCTION (BAND) pour allumer le voyant "ST". z " " apparaît lorsque l'émission FM captée est en stéréo. Voyant de mode FM stéréo Voyant de réception FM stéréo z Si la réception en FM n'est pas bonne, appuyer sur la touche FUNCTION (BAND) pour éteindre "ST".
  • Seite 56: Écoute D'une Station Mise En Mémoire

    Écoute d'une station mise en mémoire „ Mise en mémoire d'une station „ Rappel d'une station mémorisée Il est possible de stocker 30 stations en PO et en FM et de les rap- Sélectionner la station souhaitée en appuyant sur la touche peler par une simple pression d'une touche (accord de présélec- PRESET ( ) moins de 0,5 seconde.
  • Seite 57: Radio Data System (Rds)

    Radio Data System (RDS) „ Informations données par RDS RDS est un service de radiodiffusion qu'offrent de plus en plus de stations FM. Elles peuvent diffuser leurs programmes avec Chaque fois que la touche DISPLAY est pressée, l'affichage signaux supplémentaires tels que leur nom de station, informa- change comme suit: tions sur les types de programmes (sports, musiques, etc.).
  • Seite 58 Radio Data System (RDS) (suite) Codes PTY (type de programme), TP (information routière) et LIGHT M Musique classique générale, non spécialisée. Ins- TA (annonce routière). trumentale, vocale ou choeur. On peut rechercher et recevoir les signaux PTY, TP et TA suivants. CLASSICS Musique orchestrale, symphonies, musique de NEWS...
  • Seite 59 „ Mémorisation automatique de stations COUNTRY Musique populaire issue de la tradition musicale dans le sud des États-Unis. Caractérisée par une (ASPM) mélodie directe et une façon narrative. En mode ASPM, le tuner recherche automatiquement de nouvelles NATION M Musique populaire du monde en version originale et stations RDS.
  • Seite 60 Radio Data System (RDS) (suite) Pour interrompre l'opération ASPM en cours: Pour refaire la mémorisation d'un nom de station erroné: Appuyer sur la touche ASPM. La fonction ASPM ne permettra pas de stocker des noms de station Les stations préalablement mises en mémoire restent inchangées. en mémoire si la réception est parasitée ou trop faible.
  • Seite 61 Si on choisit le programme d'informations routières: Avant 4 secondes, appuyer sur la touche PRESET ( Si on désigne le programme routier (TP) à l'étape 3, "TP" apparaît. (Cela ne signifie pas que les informations routières sont en cours de ) pour sélectionner le type de programme.
  • Seite 62 Radio Data System (RDS) (suite) „ Pour écouter automatiquement le pro- Avant 4 secondes, appuyer sur la touche PTY.TI. gramme souhaité (EON-PTY) Lorsqu'une émission du type souhaité commence, l'appareil y passe automatiquement. Faire l'accord sur une station RDS (lorsqu'un nom de station est affiché).
  • Seite 63 „ Pour écouter automatiquement les infor- Avant 4 secondes, appuyer sur la touche PTY.TI. mations routières (EON-TI) Lorsque les informations routières commencent, le tuner y passe automatiquement. Faire l'accord sur une station RDS (lorsqu'un nom de station est affiché). z L'appareil affiche respectivement "TI" et "WAITING" pour 2 secondes.
  • Seite 64 Radio Data System (RDS) (suite) „ Notes pour le fonctionnement RDS Le mode d'attente EON est annulé dans les cas suivants. z Lorsqu'on appuie sur la touche ON/STAND-BY pour passer en Il ne s'agit pas d'un mauvais fonctionnement même si l'un des attente.
  • Seite 65: Opérations Programmées Et Mise En Arrêt Différée

    Opérations programmées et mise en arrêt différée Cette opération ne se fait que par la télécommande. Appuyer sur la touche ON/STAND-BY pour allumer l'ap- Lecture programmée: pareil. L'appareil s'allume et reproduit une source souhaitée (CD, tuner). Mise en arrêt différée: Appuyer sur la touche CD ou TUNER pour sélectionner Le tuner et le CD peuvent être éteint automatiquement.
  • Seite 66 Opérations programmées et mise en arrêt différée (suite) Notes: z L'heure d'opération une fois programmée, l'appareil la conser- Avant 1 minute, appuyer sur la touche PRESET ( vera à moins qu'on ne la modifie. ) pour déclarer les minutes de départ, puis appuyer z Pour effectuer la lecture programmée avec un élément raccordé...
  • Seite 67: Mise En Arrêt Différée

    „ Mise en arrêt différée „ Pour utiliser l'opération programmée et la mise en arrêt différée Allumer la source souhaitée. Exemple: s'endormir et se réveiller en écoutant la radio Il n'est pas possible d'utiliser deux sources différentes pour s'endor- Appuyer sur la touche SLEEP. mir et se réveiller.
  • Seite 68: Enrichissement Du Système

    Enrichissement du système „ Écoute du son en provenance d'un magné- Le câble de raccordement n'est pas fourni. Se procurer un câble vendu dans le commerce. toscope, un lecteur DVD, etc. Magnétoscope, 1 Utiliser un câble de raccordement pour brancher un magnétosco- lecteur de DVD, etc.
  • Seite 69: Dépannage

    Dépannage Entretien „ En cas de dérangement „ Nettoyage de la cellule porte-laser CD Si l'appareil a subi une force extérieure (chocs, électricité statique, Ne pas toucher la cellule porte-laser. S'il y a une trace de doigt ou surtension due à un foudre, etc.) ou une mauvaise manipulation, il de la poussière dessus, nettoyer doucement la cellule porte-laser peut mal fonctionner.
  • Seite 70: Fiche Technique

    Fiche technique „ Lecteur CD SHARP se réserve le droit d'apporter des modifications à la présen- tation et aux caractéristiques des appareils à fin d'amélioration. Les valeurs indiquées dans ce document sont les valeurs nominales des Type Lecteur de disque compact appareils de série mais de légères différences peuvent être consta-...
  • Seite 71: Accessories

    ENGLISH Contents Accessories Page Please confirm that the following accessories are included. „ General Information Accessories ......... 1 Precautions .
  • Seite 72: Precautions

    30 cm (12") accident causing damage. SHARP will not be held responsible for any damage resulting from use of this unit with a voltage other than that which is specified.
  • Seite 73: Controls And Indicators

    Controls and Indicators „ Front panel Reference page 1. CD Compartment ....... . . 12 2.
  • Seite 74: Rear Panel

    1. Tweeter 2. Woofer <The bottom of the unit> 3. Bass Reflex Duct 4. Speaker Terminals MODEL NO. XL-3000H COMPACT AUDIO SYSTEM Speaker grilles are removable: 230 V 50 Hz 40 W Make sure nothing comes into contact with the SERIAL NO.
  • Seite 75 „ Remote control Reference page 1. Remote Control Transmitter ......8 2. On/Stand-by Button ....... . . 9 3.
  • Seite 76: System Connections

    System Connections FM aerial Right speaker AM loop aerial Left speaker MD recorder not supplied VCR, DVD, etc. not supplied Wall socket (AC 230 V, 50 Hz) Right speaker Left speaker White line Black ENGLISH...
  • Seite 77: Aerial Connection

    „ Aerial connection Notes: z When an external FM aerial is used, disconnect the supplied FM Supplied FM aerial: aerial wire from the FM 75 OHMS socket. Connect the FM aerial wire to the FM z When using an external AM aerial, be sure to keep the wire of the 75 OHMS socket and position the FM AM loop aerial connected.
  • Seite 78: Remote Control

    Remote Control „ Battery installation „ Test of the remote control Face the remote control directly to the remote sensor on the unit. 1 Remove the battery cover. Insert the batteries according to the direction indicated in The remote control can be used within the range shown below: the battery compartment.
  • Seite 79: General Control

    General Control „ To turn the power on Press the ON/STAND-BY button to turn the power on. To set the unit to stand-by mode: Press the ON/STAND-BY button again. „ To change the display brightness (2 levels) You can switch the display brightness by pressing the DIMMER but- ton on the remote control.
  • Seite 80: Sound Control

    Sound Control „ Adjusting the bass Main unit operation: 1 Press the BASS/TREBLE button until "BASS" appears on the display. 2 Within 5 seconds, press the VOLUME ( ) button to adjust the bass. Remote control operation: Press the BASS ( ) button to adjust the bass.
  • Seite 81: Setting The Clock

    Setting the Clock Within 1 minute, press the PRESET ( ) button to adjust the hour and then press the MEMORY button. z When the 12-hour display is selected, "AM" will change au- tomatically to "PM". Within 1 minute, press the PRESET ( ) button to adjust the minutes and then press the MEMORY button.
  • Seite 82: Listening To A Cd

    Listening to a CD Press the ON/STAND-BY button to turn the power on. Press the FUNCTION button until "CD STOP" or "NO DISC" appears on the display. z When operating with the remote control, press the CD but- ton. z If no disc is loaded, the display will be "NO DISC" instead of "CD STOP".
  • Seite 83 To interrupt playback: Caution: z Do not stop or move the CD compartment cover manually. It Main unit operation: Press the button. may cause malfunctions to the unit. z Be careful not to jam your fingers in the CD compartment To resume playback from the same point, press the button again.
  • Seite 84: Repeat Or Random Play

    Repeat or Random Play Listening to a CD (continued) „ To locate the beginning of a track You can select one of the CD playback mode; "Repeat play", "Ran- dom play" and "Normal play". To move to the beginning of the next track: When in the CD mode, press the RANDOM/REPEAT Press the button for less than 0.5 seconds during playback.
  • Seite 85: Programmed Play

    Programmed Play By specifying tracks from 1 to 99, you can choose up to 20 selec- Press the MEMORY/SET(MEMORY) button to save the tions for playback in the order you like. track number. Playback order Total playback time Repeat steps 2 - 3 for other tracks. Up to 20 tracks can be programmed.
  • Seite 86: Listening To The Radio

    Listening to the Radio Press the ON/STAND-BY button to turn the power on. Press the FUNCTION button until "FM" or "AM" ap- pears on the display. When operating with the remote control, press the TUNER but- ton, and then the BAND button to select "FM" or "AM". Press the TUNING ( ) button to tune in to the de- sired station.
  • Seite 87 To receive an FM stereo transmission: Press the FUNCTION (BAND) button to display the "ST" indicator. z " " will appear when an FM broadcast is in stereo. FM stereo mode indicator FM stereo receiving indicator z If the FM reception is weak, press the FUNCTION (BAND) button to extinguish the "ST"...
  • Seite 88: Listening To The Memorised Station

    Listening to the memorised station „ Memorising a station „ To recall a memorised station You can store 30 AM and FM stations in memory and recall them at Press the PRESET ( ) button for less than 0.5 seconds to the push of a button.
  • Seite 89: Using The Radio Data System (Rds)

    Using the Radio Data System (RDS) „ Information provided by RDS RDS is a broadcasting service which a growing number of FM stations provide. These FM stations send additional signals Each time the DISPLAY button is pressed, the display will along with their regular programme signals.
  • Seite 90 Using the Radio Data System (RDS) (continued) Descriptions of the PTY (Programme Type) codes, TP (Traffic LIGHT M Classical music for general, rather than specialist Programme) and TA (Traffic Announcement). appreciation. Examples of music in this category You can search for and receive the following PTY, TP and TA sig- are instrumental music, and vocal or choral works.
  • Seite 91 „ Using the Auto Station Programme Mem- COUNTRY Songs which originate from, or continue the musical tradition of the American Southern States. Charac- ory (ASPM) terised by a straightforward melody and narrative Whilst in the ASPM operation mode, the tuner will automatically story line.
  • Seite 92: To Recall Stations In Memory

    Using the Radio Data System (RDS) (continued) To stop the ASPM operation before it is complete: To store a station name again if the wrong name was stored in Press the ASPM button whilst it is scanning for stations. memory: The stations which are already stored in memory will be kept there.
  • Seite 93 If you select the traffic programme: Within 4 seconds, press the PRESET ( ) button to If you select the traffic programme (TP) in step 3, "TP" will appear. (This does not mean that you can listen to the traffic information at select the programme type.
  • Seite 94 Using the Radio Data System (RDS) (continued) „ To automatically play the desired pro- Within 4 seconds, press the PTY.TI button. gramme (EON-PTY) When the desired type of programme is broadcast, the radio switches to it automatically. Tune in to an RDS station (when a station name is dis- played).
  • Seite 95 „ To automatically play the traffic information Within 4 seconds, press the PTY.TI button. (EON-TI) When the traffic information is broadcast, the radio switches to it automatically. Tune in to an RDS station (when a station name is dis- played). z "TI"...
  • Seite 96 Using the Radio Data System (RDS) (continued) „ Notes for RDS operation In the following cases, the EON stand-by mode will be can- celled. If any of the following events occur, it does not mean that the z When you press the ON/STAND-BY button to enter the stand-by unit is faulty: mode.
  • Seite 97: Timer And Sleep Operation

    Timer and Sleep Operation This may be operated only with the remote control. Press the ON/STAND-BY button to turn the power on. Timer playback: The unit turns on and plays the desired source (CD, tuner) at the Press the CD or TUNER button to select the desired preset time.
  • Seite 98 Timer and Sleep Operation (continued) Notes: z Once the time is set, the setting will be retained until a new time Within 1 minute, press the PRESET ( ) button to is entered. specify the minute to start, then press the MEMORY z When performing timer playback using another unit connected to button.
  • Seite 99: Sleep Operation

    „ Sleep operation „ To use timer and sleep operation together Example: To fall asleep and wake to the same radio station Play back the desired sound source. You can play back the same source only (the function cannot be switched).
  • Seite 100: Enhancing Your System

    Enhancing Your System „ Listening to the playback sounds from The connection lead is not included. Purchase a commercially avail- able lead as shown below. VCR, DVD, etc. Use a connection lead to connect the VCR, DVD, etc. to the VID- VCR, DVD, etc.
  • Seite 101: Troubleshooting

    Troubleshooting Maintenance „ If trouble occurs „ Cleaning the CD pickup lens When this product is subjected to strong external interference Do not touch the laser pickup lens. If fingerprints or dust accumulate (mechanical shock, excessive static electricity, abnormal supply on the pickup, clean it gently with a dry cotton swab.
  • Seite 102: Specifications

    Specifications „ CD player As part of our policy of continuous improvement, SHARP reserves the right to make design and specification changes for product improvement without prior notice. The performance specification fig- Type Compact disc player ures indicated are nominal values of production units. There may be...
  • Seite 103 MEMORANDUM/MÉMORANDUM/MEMORÁNDUM/ANTECKNINGAR/ANNOTAZIONI/MEMORANDUM/MEMO...
  • Seite 104 SHARP CORPORATION 9906 TINSZ0089SJZZ B0102.HK...

Inhaltsverzeichnis