Herunterladen Inhalt Inhalt Diese Seite drucken
Inhaltsverzeichnis

Werbung

Verfügbare Sprachen
  • DE

Verfügbare Sprachen

  • DEUTSCH, seite 1
Bedienungs- und Aufstellanleitung
D
Fireplace user instruction
GB
Cheminée, mode d'emploi
FR
Istruzioni per uso e installazione
I
Kandalló használati útmutató
HU
Typ 113 80
Typ 113 81
Myro
Myra

Werbung

Inhaltsverzeichnis
loading

Inhaltszusammenfassung für Wamsler 113 80

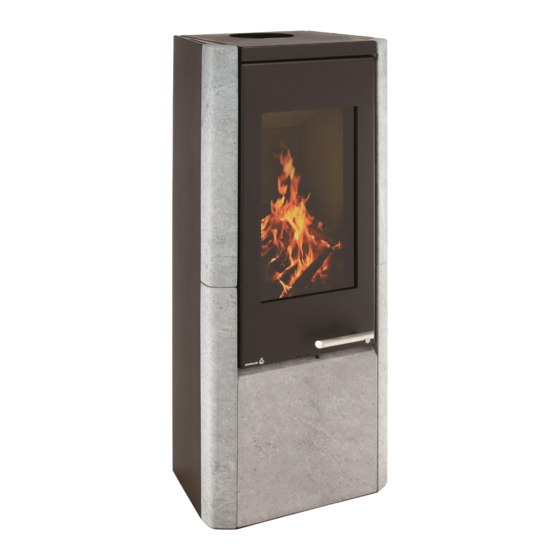
  • Seite 1 Bedienungs- und Aufstellanleitung Fireplace user instruction Cheminée, mode d’emploi Istruzioni per uso e installazione Kandalló használati útmutató Typ 113 80 Typ 113 81 Myro Myra...
  • Seite 2: Inhaltsverzeichnis

    Vorwort Sehr verehrter Kunde, wir beglückwünschen Sie zum Erwerb unseres Kaminofens. Sie haben die richtige Wahl getroffen. Mit dem Kauf dieses Produktes haben Sie die Garantie für • Hohe Qualität durch Verwendung bester und bewährter Materialien • Funktionssicherheit durch ausgereifte Technik, die streng nach der europäischen Norm EN 13240 geprüft ist (Geräte sind für die Mehrfachbelegung geeignet) •...
  • Seite 3: Sicherheitshinweise

    SICHERHEITSHINWEISE Die Geräte sind nach DIN EN 13240 geprüft (Typenschild). Bei der Aufstellung und dem abgasseitigen Anschluss sind die anwendbaren nationa- len und europäischen Normen, örtliche und baurechtliche Vorschriften/Normen (z.B. DIN 18896, DIN 4705, DIN EN 13384, DIN 18160, DIN EN 1856-2, DIN EN 15287 u.a.) sowie feuerpolizeiliche Bestimmungen (z.B.
  • Seite 4 21. Wenn Ausbesserungen oder Erneuerungen vorgenommen werden müssen, wenden Sie sich bitte rechtzeitig unter Angabe der genauen Art.Nr. und Fert.Nr. an Ihren Fachhändler. Es sind nur Original Wamsler - Ersatzteile zu verwenden. 22. Arbeiten, wie insbesondere Installation, Montage, Erstinbetriebnahme und Servicear- beiten sowie Reparaturen, dürfen nur durch einen ausgebildeten Fachbetrieb (Hei-...
  • Seite 5: Bedienung

    1. Bedienung 1.1 Geräteaufbau Abgasstutzen hinten Brennstoffwähler an der Rückwand Typschild an der Rückwand Abgasstutzen oben Ausmauerung Fülltür Aschenkasten Türgriff Primärluftschieber...
  • Seite 6: Inbetriebnahme

    1.2 Inbetriebnahme Brennstoffe Ein raucharmer und störungsfreier Betrieb des Gerätes sowie die für den Schornsteinzug von 12 Pa angegebene Nennwärmeleistung sind u.a. nur gewährleistet, wenn keine ande- ren als die nachstehenden aufgeführten Brennstoffe verwendet werden. Verwenden Sie nur natur belassenes, trockenes Scheitholz mit einer Restfeuchte von max. 20% und Braunkohlenbriketts.
  • Seite 7: Außerbetriebnahme

    Füllmengen / Anzünden: 8 kW NWL Scheitholz max. 2 kg, ca. 2-3 kleine Scheite pro Füllung, bei Anzündvorgang Holz kreuzschlichten, Scheitholzlänge max. 25-33 cm, Durchmesser Ø 5 - 12 cm, Rundlinge spalten, max. 2,6 kg/h NWL Braunkohlebrikett max. 2,2 kg (ca. 3 Stk.) auf Grundglut aufle- gen, max.
  • Seite 8: Hinweise Zum Heizen

    1.4 Hinweise zum Heizen Der Kaminofen darf nur mit geschlossener Fülltür (Heiztür) betrieben werden. Diese darf nur zum Anheizen, Nachlegen oder Reinigen des Feuerraums geöffnet werden (evtl. Zugprobleme bei weiteren am Schornstein angeschlossenen Geräten). Eine abgestimmt zugeführte Sekundärluft (Bild 4) sorgt für die Nachverbrennung der im Abgas enthaltenen brennbaren Bestandteile.
  • Seite 9 Reinigen Sie Ihre Sichtscheibe vor der ersten Benutzung mit einem feuchten saube- ren Tuch. Verreiben Sie danach einige Tropfen eines Pflegemittels für Glaskeramik Scheiben mit einem Küchenpapier auf beiden Seiten der Scheibe. Nach dem Nachwischen und Trockenpolieren ist die hochwertige Oberfläche mit ei- nem unsichtbaren Film überzogen, dieser hilft die Scheibe sauber zu halten und er- leichtert bei regelmäßiger Wiederholung die Reinigung.
  • Seite 10 Bild 2 Bild 3 Bild 4 Bild 5...
  • Seite 11: Störungsursachen, Behebung

    1.6 Störungsursachen, Behebung Art der Störung mögliche Ursache Behebung Geruchbildung: Austrocknung der angewen- Den Ofen entsprechend der deten Schutzfarbe. Verdamp- Bedienungsanleitung mehrere fung von Ölresten Stunden in Kleinstellung be- treiben. Danach für mehrere Stunden auf maximale Leis- tung heizen. • •...
  • Seite 12: Aufstellung

    2. Aufstellung 2.1 Vorschriften Bei der Aufstellung und dem abgasseitigen Anschluss sind die anwendbaren nationalen und europäischen Normen, örtliche und baurechtliche Vorschriften/Normen (z.B. DIN 18896, DIN 4705, DIN EN 13384, DIN 18160, DIN EN 1856-2, DIN EN 15287 u.a.) sowie feuerpolizeiliche Bestimmungen (z.B. FeuVO) zu beachten. Lassen Sie das Gerät nur von einem qualifizierten Fachmann aufstellen und anschließen.
  • Seite 13: Schornsteinanschluss

    Boden vor dem Ofen Fußböden aus brennbarem Material, wie Teppich, Parkett oder Kork, müssen unter dem Ofen sowie von der Feuerraumöffnung 50 cm nach Vorne und 30 cm seitlich durch einen Belag aus nicht brennbaren Baustoffen, z.B. Keramik, Stein, Glas oder einer Bodenplatte aus Stahl, ersetzt oder geschützt werden.
  • Seite 15: Technische Daten

    3. Technische Daten 3.1 Maßzeichnungen Typ 113 80 Myro...
  • Seite 16 Typ 113 81 Myra...
  • Seite 17: Maße Und Gewichte

    Die angeführten Abmessungsangaben sind zur Information! Wir behalten uns das Recht von Konstruktionsänderungen vor, falls diese das technische Niveau erhöhen, oder die Qualität ver- bessern! 3.3 Technische Daten 113 80 / 81 Nennwärmeleistung 8 kW Raumheizvermögen bei Zeitheizung in m³...
  • Seite 20 Foreword Dear Customer! Thank you for choosing our product! By purchasing this product you receive guarantee for • good quality originating from the usage of the finest and proven materials, • operating security which is controlled according to German and European norms (Corresponds to the standards EN 13240) •...
  • Seite 21: Safety Instructions

    SAFETY INSTRUCTIONS The stoves are tested to EN 13240 (see identification plate). For installation and for flue gas connections, the requirements of the Fire Regula- tions (FeuVO in Germany) apply, as well as local building regulations such as the following technical standards DIN 18896, DIN 4705, EN 13384, DIN 18160, EN 1856-2 and EN 15287.
  • Seite 22 and young people under 16 must not use the stove unless supervised by an adult who is responsible for them. 15. Make sure that the ash pan is always fully pushed in, until it touches the back. Never remove ashes while still hot (fire risk). 16.
  • Seite 23: Usage

    1. Usage 1.1 Structure of the equipment Smoke tude end back side Fuel selector on the rear wall model plate on the rear wall smoke tube end over furnace chamber furnance chamber door ash bin door knob primary air regulator...
  • Seite 24: Installation

    1.2 Installation Fuels Low smoke, trouble-free operation of the stove and a supply of heat at the nominal level with a chimney draught of 12 Pa are only guaranteed when you use the following fuels and no others. Only use natural, dry chopped firewood with a remaining humidity of max. 20%, and lignite (brown coal) briquettes.
  • Seite 25: Putting Out Of Operation

    Warning! Upon the first kindling, smoke and unpleasant smell may be gener- ated. Always ensure the proper ventilation of the room (by opening windows and doors), and heat the fireplace at maximum rated heating performance. If with the first heating the maximum temperature is not reached, the above- mentioned effects may as well arise later on.
  • Seite 26: Cleaning And Maintenance

    gloves provided. Please, be careful not to dispose glowing materials into the waste bin. Ensure that the ashtray should be fully pushed into the equipment. Warning! In order to keep the air clean and safeguard the fireplace, do not ex- ceed the specified maximum fuel quantity, otherwise overheating may occur, which potentially damage the equipment.
  • Seite 27 Picture 2 Picture 3 Picture 4 Picture 5 Picture 6...
  • Seite 28: Potential Problems And How To Tackle Them

    1.6 Potential problems and how to tackle them Kind of operating Possible reasons Solution problem Odour formation Curing of the applied pre- Operate the fire-place on a ventive lacquer. low heating level according Steaming oil remains. to the instructions manual for a few hours.
  • Seite 29: Placing

    2. Placing 2.1 Prescriptions For installation and for connection of flue, the requirements of the Fire Regulations (FeuVO in Germany) apply, as well as local building regulations such as the follow- ing technical standards DIN 18896, DIN 4705, EN 13384, DIN 18160, EN 1856-2 and EN 15287.
  • Seite 30: Connection Of The Fireplace

    Floor in front of and under the fireplace Floors made from combustible materials, such as carpets, parquet floors or cork is to be protected by a shield of non-combustible material – for example ceramics, stone, glass or steel – placed under the fireplace so that it should reach out to 50 cm in front and 30 cm besides.
  • Seite 31 Incorrect Correct min.50cm Tightening cross section of the chimney because the smoke tube is pushed into the chimney too much Obstruction , because the min.30cm smoke tubes are led as facing each other Faulty draught, because a fire-place’s door (not in use) is open False air because of an open tube joint...
  • Seite 32: Technical Specification

    3. Technical specification 3.1 Dimensional drawings Typ 113 80 Myro...
  • Seite 33 Typ 113 81 Myra...
  • Seite 34: Dimension

    The specified dimensions and weights are approximate values, and thus have only informative purposes. We reserve the right to modify the designs as required in terms of technology or quality! 3.3 Datas 113 80 / 81 Type Nominal performance 8 kW...
  • Seite 35 Préambule Cher Client, Nous vous félicitons d’avoir acheté un poêle Wamsler. Vous avez fait le bon choix car ce produit est pour vous une garantie de grande qualité, grâce à l’emploi de matériaux excellents et éprouvés de sécurité de fonctionnement, grâce à une technique parfaitement au point et sévèrement contrôlée selon la norme européenne EN 13240.
  • Seite 36 Pour les préserver il faut veiller à respecter les quantités maximum de bois (indiquées dans cette notice) et éviter les chocs lors de l'introduction des bûches. Ainsi vous pourrez profiter de votre poêle plusieurs saisons sans les remplacer. La pierre ollaire est un produit naturel avec des nuances de couleur et des veines, en aucun cas l'aspect de la pierre est un motif de réclamation.
  • Seite 37: Consignes De Securite

    CONSIGNES DE SECURITE 1. Les appareils ont été contrôlés selon les normes EN 13240 (Plaque signalétique). 2. Pour la mise en place des appareils et le raccordement aux cheminées d’évacuation des gaz, on devra observer les exigences énoncées par les directives concernant les appa- reils de chauffage (FeuVO en Allemagne) ainsi que les normes DIN 18896, DIN 4705, EN 13384, DIN 18160, EN 1856-2 et EN 15287.
  • Seite 38 moins de16 ans ne peuvent commander ou charger la cuisinière sans qu’un adulte char- gé de l’éducation ne soit présent. 15. On doit toujours veiller à ce que le bac à cendre soit poussé jusqu’à la butée. Il ne faut pas jamais jeter la cendre chaude (danger d’incendie).
  • Seite 39: Utilisation

    1. Utilisation 1.1 Description de l’appareil Sélecteur de combus- tible (sur l'arrière du poêle) Plaque signalétique Buse d’évacuation des fumée Garniture intérieure - brique Porte foyère Cendrier Poignée d’ouvertu Réglage d’air primaire fig. 1...
  • Seite 40: Mise En Service

    1.2 Mise en service Combustible Ce poêle à bois convient aux combustibles suivants : Bois bûches de longueur au maximum 25cm TOUT COMBUSTIBLE AUTRE QUE LE BOIS EN BUCHEs EST INTERDIT. Les feuillus durs (chêne, hêtre, frêne, châtaignier, charme, noyer, fruitiers, etc.) four- nissent un bois de chauffage de meilleure qualité, qui dégage plus de chaleur en brû- lant plus longtemps que les résineux.
  • Seite 41: Extinction

    Réglage d’air primaire : Réglage air primaire Sélecteur Utilisation combustible 8 kW Allumage Puissance nominale bois Puissance nominale lignite Mise hors service Le premier allumage : ATTENTION : Il est normal que lors des premières utilisations de votre appareil, il y ait un dégagement d'odeurs et de fumées dues à...
  • Seite 42: Nettoyage Et Entretien

    1.5 Nettoyage et entretien Une diminution des performances de chauffage est presque toujours la conséquence d'un mauvais entretient du poêle et du conduit d'évacuation des fumées. Vous devez faire ramoner votre conduit de cheminée au moins 2 fois par an ou plus en cas d'utilisation intensive de votre poêle.
  • Seite 43 Attention N’utilisez jamais de détergent agressif, d’éponges abrasives ou tout autre produit d’entretien récurant. Fig. 2 Fig. 3 Fig. 4 Fig. 5 Fig. 6...
  • Seite 44: Anomalies

    1.6 Anomalies Probleme Cause Solution Dégagement Durcissement de la peinture et Chauffez le poêle comme décrit d’odeur évaporation des résidus d’ pendant quelques heures sur la huile. position minimum. Ensuite le faire chauffer au maximum pendant quelques heures. Dégagement de Capacité...
  • Seite 45: Installation

    2. Installation 2.1 Prescriptions d’installation Le bon fonctionnement de votre poêle est fortement lié à la qualité de son ins- tallation. L'installation doit être effectuée par un professionnel ou une personne qualifiée. Cette notice comprend des recommandations propres à votre poêle. Il est im- pératif de suivre ces recommandations pour bénéficier des meilleures perfor- mances mais aussi de la garantie sur cet appareil.
  • Seite 46: Distances Minimum

    2.3 Distances minimum Tous les matériaux de construction combustibles, meubles, ou tissus de décoration doivent être protégés contre la chaleur à proximité du poêle. Pour cela vous devez prendre en compte les distances de sécurité décrits ci-dessous : Distance de sécurité dans la zone de rayonnement (fig 8). Dans la zone visible du feu (zone de rayonnement) une distance minimum de 80 cm (mesure A) doit être respectée entre les matériaux combustibles, (meubles, tissus de décoration, etc) et la façade du poêle.
  • Seite 47: Raccordement Au Conduit De Cheminée

    2.4 Raccordement au conduit de cheminée Le conduit: Le poêle doit être raccordé à un conduit qui convient pour des combustibles solides conformément à la norme française DTU 24.1 P1 / 51-201 relative aux travaux de fumisterie. Pour un bon fonctionnement il est impératif que votre conduit de fumée soit compatible avec votre poêle.
  • Seite 48: Données Technipues

    3. Données technipues 3.1 Plans avec les dimensions Typ 113 80 Myro...
  • Seite 49 Typ 113 81 Myra...
  • Seite 50: Dimensions

    La taille apparaitre et les donnée informer de caractéres! Notre firmée la structure modification entretenir doit, en tant qu’ils levent technique niveau ou ils amé- liorent le qualité! 3.3 Data 113 80 / 81 Type 8 kW - Puissance nominale...
  • Seite 51: Gentilissimo Cliente

    Gentilissimo Cliente, ci complimentiamo con Lei per aver acquistato questa stufa da riscaldamento e per l’ottima scelta effettuata! Questo prodotto Le garantisce • qualità elevata grazie all’utilizzo di ottimi materiali testati • funzionamento sicuro grazie alle avanzate tecnologie verificate in modo rigoroso in base alla norma europea EN 13240 •...
  • Seite 52: Avvertenze Di Sicurezza

    AVVERTENZE DI SICUREZZA L’ apparecchio e i suoi dispositivi sono stati testati sulla base della norma EN 13240 o se- condo EN 12815 (vedi targa di identificazione). Per un funzionamento ottimale della Sua stufa è fondamentale che la canna fumaria alla quale volete effettuare il collegamento sia in condizioni perfette.
  • Seite 53 Per eventuali riparazioni o sostituzioni contattare tempestivamente il proprio rivenditore avendo cura di comunicare l’esatto n° di articolo e di serie dell’apparecchio. Tutti i componen- ti dovranno essere sostituiti esclusivamente con pezzi originali Wamsler. Eventuali lavori, in particolare l’installazione, il montaggio, la prima accensione, nonché i servizi di assistenza e di riparazione possono essere eseguiti solo da una ditta specializzata (in impianti di riscaldamento o riscaldamento ad aria).
  • Seite 54: Istruzioni Per L'uso

    1. Istruzioni per l’uso 1.1 Struttura stufa Uscita fumi Scelta combustibile D’aria bocchettone Uscita fumi Muratura Sportello Cassetto cenere Maniglia Leva aria primaria...
  • Seite 55: Accensione

    1.2 Accensione Combustibili Per garantire un corretto funzionamento della stufa e una formazione minima di fumo devono essere utilizzati esclusivamente i combustibili elencati di seguito: legna secca allo stato naturale con umidità massima del 20% e mattonelle di lignite. La leva di regolazione dell’aria secondaria è montata sul lato posteriore. Per il legno impostarla sulla posizione 2 “H”, per la lignite sulla posizione 1 “K”.
  • Seite 56 Impostazione aria di combustione: Le leve devono sempre trovarsi al centro dei simboli. Posizione Posizione leva aria primaria Combustibile scelta combu- stibile 8 kW Accensione Potenza termica Ceppi di legna ca. 0,75 h nominale Mattonelle di Potenza termica ca. 1 h lignite nominale Spegnimento...
  • Seite 57: Spegnimento

    Attenzione! Aprendo lo sportello del focolare potrebbe verificarsi un’uscita di fumo dovuta ad un utilizzo improprio o ad uno scarso tiraggio della canna fumaria. Si racco- manda pertanto di aprire lo sportello lentamente, e solo di qualche centimetro, prima di aprirlo completamente. Prima di aprire lo sportello per la ricarica di combustibile, assicurarsi che nel focolare vi sia solo il letto di brace e che le fiamme siano tutte spente.
  • Seite 58: Pulizia E Manutenzione

    1.5 Pulizia e manutenzione Un buon utilizzo dell’apparecchio associato ad un’accurata pulizia e manutenzione garantiscono la stabilità dei valori e una lunga durata nel tempo dell’ apparecchio. Ciò consente di risparmiare preziose risorse, rispettare l’ambiente ed evitare ulteriori spe- se. Per procedere alla pulizia tirare in avanti il parafiamma (fig. 6, n° 2). In questo modo è...
  • Seite 59 Fig 2. Fig 3 Fig 4 Fig 5 Fig 6...
  • Seite 60: Cause E Risoluzione Anomalie

    1.6 Cause e risoluzione anomalie Tipo di anomalia Cause possibili Rimedi Formazione di odori: Asciugatura della vernice Lasciare la stufa in funzione per utilizzata ed evaporazione diverse ore sulla posizione mi- dei residui di olio. nima così come indicato nelle istruzioni per l’uso.
  • Seite 61: Installazione

    2. Installazione 2.1 Prescrizioni e norme • Leggere attentamente il contenuto del presente manuale, in quanto fornisce im- portanti indicazioni ed istruzioni riguardanti l’installazione, l’uso, la manutenzione e soprattutto la sicurezza del prodotto. • L’installazione e l’uso delle apparecchiature, deve avvenire esclusivamente in ambiente giudicato idoneo dagli enti preposti e soprattutto in conformità...
  • Seite 62: Collegamento Alla Canna Fumaria

    Oggetti all’interno della zona di irraggiamento Per gli elementi costruttivi, i mobili e i tessuti di arredamento infiammabili situati nella zona di irraggiamento della stufa è necessario rispettare una distanza minima 80 cm (A), misurati dal bordo anteriore dell’apertura del focolare. La distanza di sicurezza si riduce ai 40 cm (B) qualora di fronte all’elemento sia installata una protezione areata (v.
  • Seite 63 tra stufa e canna fumaria deve avere un diametro equivalente a quella del bocchet- tone di uscita fumi della stufa. Tratti orizzontali superiori ai 0,5 metri devono avere una pendenza di 10 gradi rispetto alla canna fumaria. Tubi non isolati termicamente o con andamento orizzontale non devono avere una lunghezza superiore ad un metro.
  • Seite 64 sere effettuata una verifica del funzionamento del sistema di evacuazione fumi con appropriato metodo di calcolo fluidodinamico (UNI 9615). − E’ consigliato che il condotto fumario sia dotato di una camera per raccolta materiali solidi ed eventuali condense, situata sotto l’imbocco del canale da fu- mo, in modo da essere facilmente apribile ed ispezionabile da sportello a tenuta d’aria.
  • Seite 65 Inclinazione del tetto Altezza della zona di reflusso Z (m) C (°) 1,85 1,00 0,50 1,50 1,30 0,80 1,30 2,00 1,50 1,20 2,50 2,10...
  • Seite 66 REALIZZAZIONE DELL’ALLACCIAMENTO ALLA CANNA FUMARIA • Eseguire il collegamento dell’apparecchio alla canna fumaria del camino esi- stente, assicurandosi che il tubo di uscita fumi non occupi la sezione libera del- la canna fumaria. • Utilizzare esclusivamente tubi adatti allo smaltimento dei fumi della combustio- •...
  • Seite 67: Schede Tecniche

    NOTA : Il locale di installazione non deve essere messo in depressione da appa- recchiature quali ad esempio: cappe di aspirazione,camini, canne fumarie,ecc.., presenti nel locale stesso o nei locali adiacenti posti in comunicazione. 3. Schede tecniche 3.1 Disegni dimensionali e dati Typ 113 80 Myro Typ 113 81 Myra...
  • Seite 68: Dimensioni

    196,5 Queste dimensioni sono indicate a solo scopo informativo! Ci riserviamo il diritto di apportare eventuali modifiche strutturali a vantaggio del progresso tecnologico o del miglioramento qualitativo! 3.3 Dati 113 80 / 81 Tipo 8 kW Potenza termica nominale Volume riscaldabile in m³ per utilizzo non continuo secondo DIN 18893/TAB.
  • Seite 69 Előszó Tisztelt Vásárló! Köszönjük megtisztelő bizalmát, hogy a mi kandallónkat választotta! Helyesen döntött. Ezen termék megvásárlásával Ön garanciát kap: a legjobb és már bevált anyagok felhasználásával a jó minőségre • a működési biztonságra, amelyet a német és európai normák szerint •...
  • Seite 70: Biztonsági Előírások

    BIZTONSÁGI ELŐÍRÁSOK 1. A készülékek a EN 13240 vagy a EN 12815 norma alapján bevizsgálásra kerültek (készülék típusát meghatározó tábla). 2. A beállításhoz és a kéménycsatlakoztatáshoz az adott ország tüzvédemi rendelkezéseit kell betartani. A készülék tökéletes működéséhez a kéménynek, amelyre a készüléket akarja csatlakoztatni, tökéletes állapotban kell lennie.
  • Seite 71 17. Ha javításokat vagy felújításokat kell végezni, kérjük időben, forduljon szakszervizhez, a pontos cikkszám és gyártási szám megadásával. Csak eredeti Wamsler alkatrészeket szabad használni. 18. A szilárd tüzelésű készülék, az égéshez szükséges levegőt, az azt körülvevő helyiségből vonja el. Ez abban az esetben biztosított, ha 1 kW névleges fűtőértékre 4 légköbméter térfogat esik.
  • Seite 72: Használat

    1. Használat 1.1 A kandalló felépítése Füstcsőcsonk hátsó Tüzelőanyag választó Típustábla a hátfalon Füstcsőcsonk felső Falazat Tüzelőajtó Hamuláda Fatároló ajtó Tüzelőajtó fogantyú Primer levegőszabályzó...
  • Seite 73: Üzembe Helyezés

    1.2 Üzembe helyezés Tüzelőanyagok: A készülék az alábbiakban felsorolt tüzelőanyagokkal használható. Csak ez által biztosítható a „füstszegény” és zavarmentes üzemeltetés. Csak száraz fát használjon max. 20 % nedvességtartalommal. Tüzelőanyag-fajták Fűtőérték kb. kJ/kg Barnaszénbrikett 19.500 Kemény fa 15.900 Puhafa 11.500 1.táblázat Levegőszabályozó-beállítás: A levegőszabályzó...
  • Seite 74: Üzemen Kívül-Helyezés

    ELSŐ BEGYÚJTÁS Figyelem! Az első begyújtásnál füst és kellemetlen szagok képződhetnek. Feltétlenül gondoskodjon a helyiség megfelelő szellőzéséről (ablakok és ajtók nyitása), és legalább egy órán át a maximális fűtőteljesítményen fűtsön. Amennyiben az első fűtésnél nem éri el a maximális hőmérsékletet, úgy ezek a jelenségek később is felléphetnek még.
  • Seite 75: Tisztítás És Gondozás

    A szekunder levegő gondoskodik a füstgázban található éghető összetevők utólagos elégetéséről. Ez a környezetet kímélő, füst és koromszegény égést jelenti. Amennyiben a kandallóját az átmeneti időben üzembe helyezné, akkor ellenőrizze előzetesen a kéményhuzatot, mivel ez magas külső hőmérsékletnél nagyon csekély lehet.
  • Seite 76 Kép 2 Kép 3 Kép 4 Kép 5 Kép 6...
  • Seite 77: Üzemzavar-Okok, Elhárításuk

    1.6 Üzemzavar-okok, elhárításuk Lehetőséges okai: Üzemzavar fajtája Elhárítás: A felhasznált védőfesték A kandallót több órán át kis fokozaton Szagképződés: kikeményedése üzemeltetni. Ezek után több órára, maximális teljesítményre felfűteni. Olajmaradékok kigőzölgése Szakemberrel vizsgáltassa meg a fűteni Csak jól kiszárított fát kívánt helyiség hősszükségletét. alkalmazzunk.
  • Seite 78: Elhelyezés

    2. Elhelyezés 2.1 Előírások Az elhelyezésnél és a füstcsőoldali becsatlakoztatásnál az egyes vonatkozó építési rendelkezések tűzvédelmi követelményeit kell figyelembe venni. Az Ön kandallójának kifogástalan működése érdekében a kéménynek, amibe a készülékét akarja becsatlakoztatni, kifogástalan állapotban kell lennie. 2.2 Elhelyezési helység Mivel a kandalló...
  • Seite 79: Kéménycsatlakozás

    A kandalló alatti padlózat Az éghető anyagokból készült padlót, mint pl. szőnyeg, parketta, vagy parafa, a kandalló alatt, valamint a tűztér előtt 50 cm-re és oldalt cm-re egy nem éghető anyagból készült burkolóval kell védeni, mint pl.: kerámia-, kő-, üveg-padló, vagy fém 2.4 Kéménycsatlakozás Figyelem!
  • Seite 80 Helyes Helytelen min.50cm Kémény keresztmetszet szűkítésa túlzottan betolt füstcső miatt. Torlódás az egymással szembe bevezetett füstcsövek miatt. min.30cm Hibás huzat a nem használt tűzhely nyitott ajtaja miatt. Fals levegő nyitott csőcsatlakozó miatt. Fals levegő tö- mítetlen csőcsat- lakozás miatt. Hamis levegő beáram- lása nyitott vagy tömítetlen kémény- tisztító...
  • Seite 81: Műszaki Adatok

    3. Műszaki adatok 3.1 Méretrajz Typ 113 80 Myro...
  • Seite 82 Typ 113 81 Myra...
  • Seite 83: Méret Adatok

    (kg) (kg) W20001138010 1244 152,5 W20001138110 1244 196,5 3.3 Műszaki jellemzők Típus 113 80 / 113 81 Névleges teljesítmény 18893/TAB 2 DIN szabvány szerinti fűtőképesség m³ -kedvező -kevésbé kedvező -kedvezőtlen fűtési feltételeknél Fűtőanyag: Fa / Barnaszén Füstgázértékek: - füstgáz áramlás: 7,5 / 6,8 g/s - átlagos füstgáz hőmérséklet...
  • Seite 84 Haus – und Küchentechnik GmbH Adalperostr. 86 D – 85737 Ismaning Telefon +49 (0)89 32084-0 Telefax +49 (0)89 32084-294 www.wamsler.eu...

Diese Anleitung auch für:

113 81MyroMyra

Inhaltsverzeichnis