Maico EN 20 Montageanleitung Und Betriebsanleitung
Vorschau ausblenden
Andere Handbücher für EN 20:
- Montage- und betriebsanleitung (29 Seiten) ,
- Montage- und betriebsanleitung (29 Seiten)

Verwandte Anleitungen für Maico EN 20


Inhaltszusammenfassung für Maico EN 20
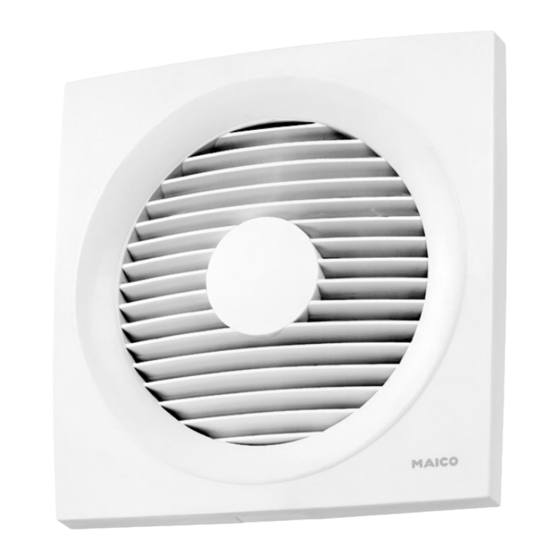
- Seite 1 Wandeinbauventilatoren Wall-mounted fans Ventilateurs muraux EN 20 ENR 20 EN 25 ENR 25 EN 31 ENR 31 Montage- und Betriebsanleitung Mounting and Operating instructions Instructions de montage et Mode d´empoi www.maico-ventilatoren.com...
-
Seite 5: Wandeinbauventilatoren
Wandeinbauventilatoren Produktbeschreibung EN..-Ventilatoren zum Entlüften. Nur in Kombina- EN 20/ENR 20, EN 25/ENR 25 tion mit Außenklappe „MK“, „BK“ oder „AS“. und EN 31/ENR 31 ENR..-Ventilatoren mit Reversierbetrieb zum Ent- oder Belüften. Nur in Kombination mit Außen- 1. Warnsymbole in dieser Anleitung klappe „MK“... -
Seite 6: Montage
VORSICHT sicherung im Sicherungskasten ausschalten! • Flanschhülse spannungsfrei einbauen! Veränderungen und Umbauten am Gerät sind Für ebenen Untergrund sorgen. nicht zulässig und entbinden MAICO von jeglicher Gewährleistung und Haftung. • Wichtige Hinweise Gerät nie ohne Innenabdeckung und nur mit •... - Seite 7 • Gerät elektrisch anschließen, siehe Schalt- Innenabdeckung [1] an Position [B] vorsichtig und bilder Seite 16...19. mit geeignetem Bohrer durchbohren. Die Boh- rung verhindert Nässe- und Keimbildung im Lebensgefahr durch Stromschlag! Ventilatorgehäuse. Netzsicherung ausschalten! GEFAHR Gerätebeschädigung bei Kurzschluss! Schutzleiter und nicht benötigte Adern ab- schneiden und isolieren! VORSICHT An Klemmenleiste [5] den Ventilator und an...
-
Seite 8: Störungsbehebung
Fixing screw (to be supplied by the customer) Rating plate Acknowledgements © Maico Elektroapparate-Fabrik GmbH. This instruction is a transla- tion of the German original operating instructions. We are not responsible for mistakes or printing errors and retain the right to make... -
Seite 9: Technical Data
Only in combination with external Modifications and alterations to the unit are not shutter "MK" or "BK". • permitted and release MAICO from any guarantee EN.. and ENR.. fans are equipped with a thermal obligations and liability. •... -
Seite 10: Installation
into the terminal box, in the case of an electrically 6. Installation operated external shutter. In order to stop moisture Faulty operation and unit damage getting into the terminal box, make sure that the caused by a rubbing impeller with hole in the grommet is circular and slightly smaller incorrect installation. -
Seite 11: Fault Rectification
• Drill through the internal cover [1] at position [B] 9. Fault rectification carefully and with a suitable drill bit. The hole prevents the build up of damp and bacteria in the Danger to life! Unit is powered up. fan housing. Switch the mains fuse off. - Seite 12 Cheville (à fournir par le client) Vis de fixation (à fournir par le client) Mentions légales © MAICO Elektroapparate Fabrik GmbH. Cette instruction est une Plaque signalétique traduction de l'instruction allemande originale. Sous réserve de fautes d'impression, d'erreurs et de modifications techniques.
- Seite 13 • min. 105 mm Toute modification ou transformation de l'appareil Epaisseur de cloison EN/ENR 31 = min. 130 mm est interdite et dégage MAICO de toute garantie • Veiller à respecter une distance suffisante par ou responsabilité. •...
- Seite 14 Installation au plafond (non illustré) D Percer le passe-câble [T...] souhaité du manchon • de bride de façon circulaire et y introduire le câble Procéder à l'installation au plafond comme décrit secteur [L]. sous Encastrement mural. E Fixer le manchon de bride [3] avec un matériel Risque de court-circuit et d'endom- approprié...
-
Seite 15: Dépannage
8. Nettoyage 10. Élimination Danger de mort, l'appareil est sous Ne pas éliminer avec le reste des déchets! tension ! L'appareil contient certaines matières recyclables, mais aussi d'autres substances DANGER Mettre le fusible secteur hors service ! Ne qui ne doivent pas être éliminées avec le pas mettre l'appareil dans l'eau ! •... - Seite 16 Schaltbilder / Wiring diagrams / Schémas de connexions EN 20 S1 Ein/Aus über: – Ausschalter EN 25 – Thermostat TH.. EN 31 – Hygrostat HY5 – mit Ein/Aus-Schalter – Luftqualitätsregler EAQ – with On/Off switch Leitung nur für Klappe MK..
- Seite 17 Ein/Aus ENR 20 Umschaltung ENR 25 Entlüftung/Belüftung ENR 31 – Klemme 5: Entlüftung – mit Ein/Aus-Schalter und – Klemme 6: Belüftung Wechselschalter Leitung nur für Klappe MK.. – with On/Off switch and reversing switch On/Off – avec interrupteur Marche/Arrêt Switching: air extraction/ventilation et commutateur inverseur E N R 2 0...
- Seite 18 W/WU1 Wendeschalter ENR 20 mit Ein/Aus ENR 25 Leitung nur für ENR 31 Klappe MK.. – mit Wendeschalter W/WU1 – with W/WU1 reversing switch W/WU1 Reversing switch W / W U 1 3 4 5 6 with On/Off – avec commutateur inverseur Cable only for W/WU1 MK..
- Seite 19 5-Stufentransformator ENR 20 (Ein/Aus, 5 Drehzahlen) ENR 25 Wechselschalter ENR 31 (Entlüftung – Belüftung) – mit 5-Stufentransformator T R E . . 3 2 1 Leitung nur für TRE… und Wechselschalter Klappe MK.. – with TRE… 5-step transformer 5-step transformer and reversing switch (On/Off, 5 speeds) –...
- Seite 20 Maico Elektroapparate-Fabrik GmbH · Steinbeisstraße 20 · 78056 Villingen-Schwenningen · Germany · Service +49 7720 694 447 · technik@maico.de...