Topcom butler 920 Bedienungsanleitung
Inhaltsverzeichnis
Verfügbare Sprachen
Verfügbare Sprachen
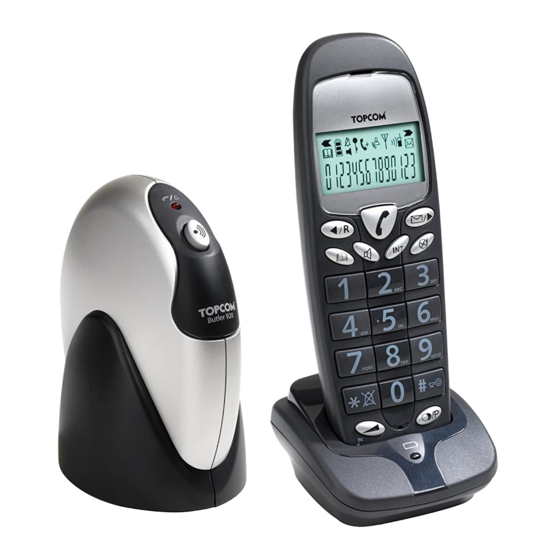
BUTLER 920
User Guide / Handleiding / Manuel d'utilisateur
Bedienungsanleitung / Manuale d'uso
v 1.1
To use 'Caller ID' (display caller), this service has to be activated on your
phone line. Normally you need a separate subscription from your telephone
company to activate this function. If you don't have the Caller ID function on
your phoneline, the incoming telephone numbers will NOT be shown on the
display of your telephone.
Om de 'Nummerweergave' te kunnen gebruiken, moet deze dienst geac-
tiveerd zijn op uw telefoonlijn. Om deze dienst te activeren, hebt U hiervoor
meestal een apart abonnement van uw telefoonmaatschappij nodig. Indien U
geen nummerweergavefunctie hebt op uw telefoonlijn, zullen de inkomende
telefoonnummers NIET op de display van uw toestel verschijnen.
Pour utiliser la fonction 'Caller ID/Clip' (affichage de l'appelant), ce service
doit être activé sur votre ligne téléphonique. Généralement, vous avez besoin
d'un abonnement séparé de votre compagnie de téléphone pour activer cette
fonction. Si vous n'avez pas la fonction 'Caller ID - Affichage Appelant' sur
votre ligne téléphonique, les numéros de téléphone entrants n'apparaîtront
PAS sur l'écran de votre téléphone.
Zur Verwendung der 'Rufnummernanzeige' muss dieser Dienst erst für Ihre
Telefonleitung freigegeben werden. Zur Aktivierung dieser Dienstleistung
benötigen Sie meistens ein separates Abonnement Ihrer Telefongesell-
schaft.Wenn Sie für Ihre Telefonleitung keine Rufnummernanzeigefunktion
haben, erscheinen die eingehenden Telefonnummern NICHT im Display
Per utilizzare la funzione „Caller ID" (visualizzazione chiamante), è necessa-
rio che questo servizio sia attivato sulla propria linea telefonica. General-
mente, è necessario sottoscrivere un abbonamento separato con la propria
società telefonica, per poter attivare questa funzione. Se la propria linea tele-
fonica non è dotata della funzione „Caller ID", i numeri telefonici delle chia-
mate in arrivo NON verranno visualizzati sul display del proprio telefono. In
caso di chiamata entrante, suona soltanto il ricevitore e non la base.
Important
Belangrijk
Important
Wichtig
Ihres Gerätes.
Importante
Inhaltsverzeichnis
Fehlerbehebung

Verwandte Anleitungen für Topcom butler 920


Inhaltszusammenfassung für Topcom butler 920
- Seite 1 Normally you need a separate subscription from your telephone company to activate this function. If you don’t have the Caller ID function on your phoneline, the incoming telephone numbers will NOT be shown on the BUTLER 920 display of your telephone. Belangrijk Om de ‘Nummerweergave’...
- Seite 2 UK To be connected to the public analogue telephone network. NL Geschikt voor aansluiting op het openbare analoog geschakelde telefoonnetwerk. Butler 920 FR Il est destiné à être raccordé au réseau de télécommunication public. DE Kompatibel für den analogen telefonanschluss.
- Seite 6 7.5 Mémoriser un numéro à partir de la liste d'appels......52 8 Enregistrer/supprimer un combiné ..........53 8.1 Enregistrer un combiné sur une base Topcom Butler 920 ....53 8.2 Supprimer un combiné de la base Topcom Butler 920 ...... 54 9 Transfert d'appel et interphone entre deux combinés ....
- Seite 7 8 Ein Mobilteil an- oder abmelden........... 70 8.1 Ein Mobilteil an der Topcom Butler 920 Basisstation anmelden..70 8.2 Ein Mobilteil von einer Topcom Butler 920 Basisstation abmelden . 72 9 Anrufweiterleitung und Interne Anrufe von einem Mobilteil zum einem anderen................. 73 9.1 Anrufweiterleitung und Konferenzschaltung während eines...
-
Seite 62: Deutsch
Sicherheitshinweise D e u t s c h 1 Sicherheitshinweise • Verwenden Sie nur den mitgelieferten Netzadapter. Verwenden Sie keine fremden Adapter, da die Akkuzellen beschädigt werden könnten. • Verwenden Sie nur aufladbare Batterien des gleichen Typs. Verwenden Sie niemals normale, nicht-aufladbare Batterien. Achten Sie beim Einlegen der Batterien auf richtige Polarität (wie im Batteriefach des Mobilteils angegeben). -
Seite 63: Basisstation
Display 9. Rufton EIN/AUS-Taste 10.Speichertaste 11.Freisprechtaste 12.Flash R / Scroll-Taste 2.2 Basisstation 13.LED: Visuelles Anrufsignal / Mobilteil wird benutzt 14.Paging / Weiterleitung 2.3 Ladegerät 15.LED: Mobilteil auf Ladegerät 3 Display Sie sind online Weitere Ziffern links Neue Nummern in der Weitere Ziffern rechts Anrufliste Batteriestandanzeige... -
Seite 64: Installation
Installation 4 Installation 4.1 Basisstation Verbinden Sie das eine Ende des Telefonkabels mit dem Telefon und das andere Ende mit dem Telefonwandanschluss. Stecken Sie den kleinen Stecker des Netzadapters in das Telefon und das andere Ende des Adapterkabels in die Steckdose. - Rückseite der Basisstation - A.Telefonwandanschluss B.Netzkabel... -
Seite 65: Mobilteil
Anzeige Batterie schwach 4.3 Mobilteil Legen Sie 2 wiederaufladbare Batterien (AAA) in das Batteriefach des Mobilteils ein. - Rückseite des Mobilteils - A.Abdeckung B.Wiederaufladbare Batterien 5 Anzeige Batterie schwach Wenn die Batterie leer ist, funktioniert das Mobilteil nicht mehr. Wenn eine Batterie vollständig leer ist und Sie stellen das Mobilteil nur für kurze Zeit auf die Basisstation, so zeigt die Batterieanzeige voll aufgeladen an. -
Seite 66: Verwendung Des Mobilteils
Verwendung des Mobilteils 6 Verwendung des Mobilteils 6.1 Abgehende Anrufe Anruf tätigen Drücken Sie die Verbindungstaste. Geben Sie die Telefonnummer ein. g h i j k l m n o Drücken Sie die Verbindungstaste, um das Gespräch zu beenden. Anrufen mit Vorwählen Geben Sie die Telefonnummer ein. -
Seite 67: Ankommende Anrufe
Verwendung des Mobilteils Die Telefonnummer wird automatisch gewählt. Drücken Sie die Verbindungstaste erneut, um das Gespräch zu beenden. 6.2 Ankommende Anrufe Bei einem ankommenden Anruf klingelt das Mobilteil und der Basisstation und die LED "Visuelles Anrufsignal" der Basisstation blinkt. Drücken Verbindungstaste, ankommende Gespräch anzunehmen. -
Seite 68: Eine Kurzwahlnummer Anrufen
Verwendung des Mobilteils 6.5 Eine Kurzwahlnummer anrufen Drücken Sie die Speichertaste gefolgt von der g h i j k l m n o Speichernummer (0-9). Drücken Sie die Verbindungstaste. Die Telefonnummer wird automatisch gewählt. Drücken Sie die Verbindungstaste erneut, um das Gespräch zu beenden. -
Seite 69: Ruftonlautstärke Und Melodie Einstellen
Verwendung des Mobilteils Nach 2 Sekunden verschwindet die Flashzeit-Einstellung wieder vom Display. 6.9 Ruftonlautstärke und Melodie einstellen Mobilteil-Melodie Halten Sie die Melodietaste gedrückt, bis Sie die eingestellte Melodie hören. Wählen Sie die gewünschte Melodie (1-9) oder geben g h i j k l m n o Sie eine Zahl (1-9) ein. -
Seite 70: Wahlverfahren Einstellen
Bei einem falschen Wahlverfahren werden die Telefonnummern nicht korrekt oder gar nicht gewählt. 7 Anruferkennung (CLIP) Das Topcom Butler 920 zeigt die Telefonnummer ankommender Anrufe an. Diese Funktion kann nur genutzt werden, wenn Sie von Ihrem Netzanbieter für diesen Dienst angemeldet sind. Für weitere Informa- tionen setzen Sie sich bitte mit Ihrem Netzanbieter in Verbindung. -
Seite 71: Neue Anrufe
Anruferkennung (CLIP) 7.1 Neue Anrufe Befindet sich ein neuer entgangener Anruf in der Anrufliste, blinkt das CLIP-Symbol im Display. 7.2 Anrufliste aufrufen Drücken Sie die Taste Anrufliste. Der zuletzt empfangene Anruf wird angezeigt. Wenn die Liste leer ist, erscheint "NO CLIP" im Display. Folgende Anzeige erscheint im Display. -
Seite 72: Eine Nummer Aus Der Anrufliste Löschen
Drücken Speichertaste. 8 Ein Mobilteil an- oder abmelden 8.1 Ein Mobilteil an der Topcom Butler 920 Basisstation anmelden Sie können bis zu 4 Mobilteile an einer Basisstation anmelden. Jedes Mobilteil ist bei Lieferung an der Basisstation angemeldet. Sie müssen das Mobilteil nur anmelden, wenn •... - Seite 73 Ein Mobilteil an- oder abmelden Die folgende Beschreibung gilt nur für Topcom Butler 920 Mobilteile und Basisstation! Halten Sie die Paging-Taste an der Basisstation für 10 Sekunden gedrückt. Die LED Mobilteil auf Ladestation an der Basisstation blinkt 1 Minute schnell.
-
Seite 74: Ein Mobilteil Von Einer Topcom Butler 920 Basisstation Abmelden
Ein Mobilteil an- oder abmelden 8.2 Ein Mobilteil von einer Topcom Butler 920 Basisstation abmelden Sie können ein Mobilteil von einer Basisstation abmelden, um ein anderes Mobilteil anzumelden. Halten Sie die rechte Scroll-Taste 3 Sekunden lang gedrückt. Halten Sie die Stummschalttaste 3 Sekunden lang gedrückt. -
Seite 75: Anrufweiterleitung Und Interne Anrufe Von Einem Mobilteil Zum Einem Anderen
Anrufweiterleitung und Interne Anrufe von einem Mobilteil 9 Anrufweiterleitung und Interne Anrufe von einem Mobilteil zum einem anderen Diese Funktion kann nur genutzt werden , wenn mindestens 2 Mobilteile (z. B.: Twin/Triple/Quatro-Version) an der gleichen Basisstation angemeldet sind. 9.1 Anrufweiterleitung und Konferenzschaltung während eines externen Gesprächs Drücken Sie während eines externen Gesprächs die INT-Taste und anschließend die Nummer des Mobilteils... -
Seite 76: Problemlösung
Problemlösung Drücken Sie die Verbindungstaste, um das Gespräch zu beginnen. Jetzt können Sie intern sprechen. Drücken Sie die Verbindungstaste, um das Gespräch zu beenden. 10 Problemlösung Störung Mögliche Ursache Lösung Kein Display Batterien nicht geladen Überprüfen Sie die Position der Batterien Batterien aufladen Mobilteil ist Mobilteil einschalten... -
Seite 77: Technische Daten
Technische Daten Störung Mögliche Ursache Lösung Die Basisstation hat Überprüfen Sie die keine Stromzufuhr Stromverbindung zur Basisstation Das Mobilteil ist nicht Melden Sie das an der Basisstation Mobilteil an der angemeldet Basisstation an Mobilteil klingeln Die Ruftonlautstärke ist Passen Sie die nicht ausgeschaltet oder zu Ruftonlautstärke an... -
Seite 78: Voreinstellungen
Geräts erfüllen. Bei einem Austausch können Farbe und Modell vom eigentlich erworbenen Gerät abweichen. Das ursprüngliche Kaufdatum bestimmt den Beginn der Garantiezeit. Die Garantiezeit verlängert sich nicht, wenn das Gerät von Topcom oder einem seiner autorisierten Service-Zentren ausgetauscht oder repariert wird. -
Seite 79: Garantieausschlüsse
Betrieb verursacht werden sowie Defekte, die durch die Verwendung von Nicht-Originalteilen oder die Verwendung von nicht von Topcom empfohlenem Zubehör entstehen, werden nicht von der Garantie abgedeckt. Schnurlose Telefone von Topcom wurden so konstruiert, dass sie ausschließlich mit wiederaufladbaren Batterien funktionieren. Ein durch nicht-wiederaufladbare Batterien verursachter Schaden fällt nicht unter die Garantieleistung.