Werbung
Quicklinks
EN Instruction manual
SAFETY
Instruction Manual
Istruzioni per l'uso
EN
IT
• By ignoring the safety instructions the
Gebruiksaanwijzing
Bruksanvisning
manufacturer can not be hold responsible for
NL
SV
the damage.
Mode d'emploi
Instrukcja obsługi
FR
PL
• If the supply cord is damaged, it must be
Bedienungsanleitung
Návod na použití
DE
CS
replaced by the manufacturer, its service
Manual de instrucciones
Návod na použitie
agent or similarly qualified persons in order to
ES
SK
avoid a hazard.
Manual de Instruções
PT
• Never move the appliance by pulling the cord
and make sure the cord can not become
entangled.
• The appliance must be placed on a stable,
level surface.
• To protect yourself against an electric shock,
do not immerse the cord, plug or appliance in
the water or any other liquid.
•
Within an equilateral triangle, is used to
indicate that a specific component shall be
replaced only by the component specified in
that documentation for safety reason.
•
LIGHTNING FLASH WITH
CL-1496
ARROWHEAD SYMBOL - within an
equilateral triangle, is intended to alert the
C l o c k r a d i o
CL-1497
user to the presence of uninsulated
dangerous voltage within the products
CL-1498
PLL FM Radio - Projection
enclosure that may be of sufficient magnitude
to constitute a risk of electric shock to
PARTS DESCRIPTION / ONDERDELENBESCHRIJVING / DESCRIPTION DES PIÈCES /
persons.
TEILEBESCHREIBUNG / DESCRIPCIÓN DE LAS PIEZAS / DESCRIÇÃO DOS
• The mains plug is used as the disconnect
COMPONENTES / DESCRIZIONE DELLE PARTI / BESKRIVNING AV DELAR /
device and it shall remain readily operable. To
OPIS CZĘŚCI / POPIS SOUČÁSTÍ / POPIS SÚČASTÍ
completely disconnect the power input, the
Mains plug of the apparatus must be
10
2
3
4
5
disconnected from the mains Completely. The
mains plug should not be obstructed or should
be Easily accessed during intended use.
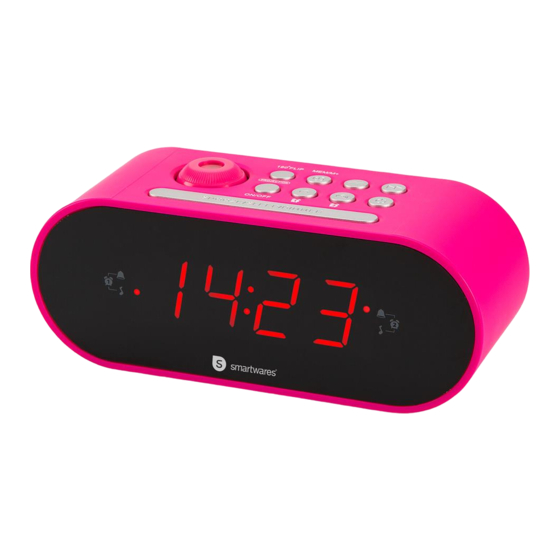
PARTS DESCRIPTION
1. Projection On/Off
2. Projection 180° flip
3. Clock adjust/ Memory/M+
4. Tune -/ Hours
5. Tune +/ Minutes
6. Alarm 1/ Volume down
7. Alarm 2/ Volume up
8. Radio On/Off
9. Snooze/ Sleep/ Dimmer
9
1
6
7
8
10. Projector/Angle/Sharpness Controller
BEFORE THE FIRST USE
• This unit is equipped with a battery backup system, which requires a
CR2032 lithium battery (not included). Place the battery in the battery
compartment and make sure that the + and – battery terminals
correspond with the symbols in the battery compartment. If an AC
power failure occurs, the clock will automatically switch to the battery
power and the internal clock memory will continue running (note that
the display is switched off and the radio won't operate). When the AC
power resumes, the unit automatically switches back to the AC power
and will return to normal operation.
USE
SETTING THE TIME
• Press and hold the Clock Adjust button, the time will start to flash.
• Press the Hour button to increase the hour, press and hold the button
to increase it quicker.
• Press the Minutes button to increase the minutes, press and hold the
button to increase it quicker.
• Once the time is set correctly, press the Clock Adjust button.
SETTING THE ALARM
• Please ensure the radio is OFF.
• Press and hold the Alarm 1 or Alarm 2 button to set the Alarm. The
alarm time will flash on the display.
WEEE LOGO
• Press the Hour button to increase the hour, press and hold the button
to increase it quicker.
• Press the Minutes button to increase the minutes, press and hold the
button to increase it quicker.
• To toggle between Buzzer and Radio alarm mode, press the Alarm 1/2
button again until the desired option is highlighted on the LED display.
SNOOZE FUNCTION
When the alarm rings, press down on top of the device to suspend the
alarm & to activate the snooze function, Beep or Radio alarm will stop
and will ring again after 9 minutes.
• If you want to disable the snooze function and stop the alarm
completely, press the ON/OFF Radio button. If you don't press any
button, the alarm will ring during 60 minutes and stop automatically.
LISTENING TO THE RADIO
• Press the Radio on/off button once to turn radio on.
• Set the volume to the dedesired level with the Volume + and Volume -
buttons.
• Use the "TUNE+" or "TUNE-" key to adjust the radio frequency.
• Press the Radio on/off button once to turn radio OFF.
• You can preset and store the frequency of 10 radio stations in the
memory.
• Set the radio to the desired station, and then press and hold the
MEMORY/M+ button and PO1 will flash on the screen.
• Press the MEMORY/M+ button to confirm setting to PO1 or wait 5
seconds for flashing to stop.
• Repeat the steps above to preset more radio stations.
• To recall a preset station, press the MEMORY/M+ button to toggle
through the current preset radio stations.
SLEEP TIMER OPERATION
• The sleep timer allows you to play music for a preset amount of time
ranging from 90 minutes to 10 minutes. It is commonly used by people
who prefer to go to sleep to music.
• In radio mode, Press the Snooze/Sleep/Dimmer button. The display
will show 90 minutes, your clock radio will turn off in 90 minutes.
• To change the number of minutes for the Sleep timer, press the
Snooze/Sleep/Dimmer button until you see the desired number of
minutes. The sleep timer decreases in increments of 10.
• To cancel the sleep timer, press and the Snooze/Sleep/Dimmer button
then press again until you see OFF in the display.
DIMMER CONTROL
• In radio off mode, Tap the DIMMER button to set the brightness of the
SERVICE.TRISTAR.EU
LED display to high, medium or low according to your ambient light
conditions.
PROJECTION FUNCTION
Tristar Europe B.V. | Jules Verneweg 87
5015 BH Tilburg | The Netherlands
• - This appliance is featured with a projection function and can be used in
• Druk op de knop Minuten om de minuten te verhogen. Houd ingedrukt
either clock or radio mode. You can use this appliance to project time on
voor een snelle verhoging van de minuten.
the ceiling or wall. Optimal projection distance ranges from ca. 90 to
• Om tussen de zoemer- en radioalarmmodus te schakelen, druk
270cm.
nogmaals op de knop Alarm 1/2 totdat de gewenste optie op het LED-
• Press the "Projection On/off" button to activate the projection. Adjust the
display is weergegeven.
projection brightness/focus by turning the adjustment wheel under the
SLUIMERFUNCTIE
projection lens. Press the "180° Flip" button to flip the projected time.
Druk bij het afgaan van het alarm op de bovenzijde van het apparaat om
• To deactivate projection function, simply press Projection ON/OFF
het alarm op te schorten en de sluimerfunctie te activeren. Het piep- of
button. The projection lens goes off.
radioalarm zal stoppen en na 9 minuten opnieuw afgaan.
• Druk om de sluimerfunctie uit te schakelen en het alarm volledig te
CLEANING AND MAINTENANCE
stoppen op de AAN/UIT draaiknop. Als u geen knop indrukt, zal de
• Clean the appliance with a damp cloth. Never use harsh and abrasive
wekker gedurende 60 minuten afgaan en daarna automatisch stoppen.
cleaners, scouring pad or steel wool, which damages the device.
NAAR DE RADIO LUISTEREN
• Never immerse the electrical device in water or any other liquid. The
• Druk eenmaal op de knop Radio aan/uit om de radio aan te zetten.
device is not dishwasher proof.
• Zet met de knoppen Volume + en Volume - het volume op het gewenste
niveau.
GUARANTEE
• Gebruik de "TUNE+" of "TUNE-" toets om de radiofrequentie in te
• This product is guaranteed for 24 months granted. Your warranty is valid
stellen.
if the product is used in accordance to the instructions and for the
• Druk eenmaal op de knop Radio aan/uit om de radio uit te zetten.
purpose for which it was created. In addition, the original purchase
• U kunt de frequentie van 10 radiostations in het geheugen opslaan.
(invoice, sales slip or receipt) is to be submitted with the date of
• Stel de radio op het gewenste station in en houd de knop GEHEUGEN/M
purchase, the name of the retailer and the item number of the product.
+ ingedrukt totdat PO1 op het display knippert.
• For the detailed warranty conditions, please refer to our service website:
• Druk op de knop GEHEUGEN/M+ om de instelling op PO1 te bevestigen
www.service.tristar.eu
of wacht 5 seconden totdat het knipperen stopt.
• Herhaal bovenstaande stappen om meerdere radiostations in het
ENVIRONMENT
geheugen op te slaan.
• Om een voorkeuzestation op te roepen, druk op de knop M+/
GEHEUGEN knop om de huidige voorkeuzestations te doorlopen.
This appliance should not be put into the domestic garbage at the
WERKING VAN DE SLAAPTIMER
end of its durability, but must be offered at a central point for the recycling
• De slaaptimer stelt u in staat om muziek af te spelen gedurende de tijd
of electric and electronic domestic appliances. This symbol on the
die u van tevoren hebt ingesteld tussen 90 en 10 minuten. Het wordt
appliance, instruction manual and packaging puts your attention to this
over het algemeen gebruikt voor personen die met muziek in slaap willen
important issue. The materials used in this appliance can be recycled. By
vallen.
recycling of used domestic appliances you contribute an important push to
• In de radiomodus, druk op de knop Sluimer/Slaap/Dimmer. Het display
the protection of our environment. Ask your local authorities for information
geeft 90 minuten weer om aan te geven dat uw wekkerradio over 90
regarding the point of recollection.
minuten uitgeschakeld zal worden.
• Om het aantal minuten voor de slaaptimer te wijzigen, druk op de knop
Support
Sluimer/Slaap/Dimmer totdat u het gewenste aantal minuten ziet. De
You can find all available information and spare parts at service.tristar.eu!
slaaptimer neemt af in stappen van 10 minuten.
• Om de slaaptimer te annuleren, druk herhaaldelijk op de knop Sluimer/
Slaap/Dimmer totdat UIT op het display verschijnt.
NL Gebruiksaanwijzing
DE DIMMER REGELEN
• In de radio uit-modus, druk op de knop DIMMER om de helderheid van
VEILIGHEID
het LED-display in te stellen op hoog, medium of laag overeenkomstig
• De fabrikant is niet aansprakelijk voor schade
het omgevingslicht.
voortvloeiend uit het niet opvolgen van de
PROJECTIEFUNCTIE
• - Dit apparaat is uitgerust met een projectiefunctie en kan zowel in de
veiligheidsinstructies.
klok- als radiomodus worden gebruikt. U kunt dit apparaat gebruiken om
de tijd op het plafond of de muur te projecteren. Het optimale
• Als het netsnoer beschadigd is, moet het
projectiebereik is tussen ca. 90 en 270 cm.
worden vervangen door de fabrikant, de
• Druk op de "Projectie aan/uit"-knop om de projectie te activeren. Draai
het instelwiel onder de projectielens om de helderheid/focus van de
onderhoudsmonteur van de fabrikant of door
projectie in te stellen. Druk op de "180° draaien"-knop om de
personen met een soortgelijke kwalificatie om
geprojecteerde tijd te draaien.
• Om de projectiefunctie uit te schakelen, druk op de knop Projectie AAN/
gevaar te voorkomen.
UIT. De projectielens stopt met werken.
• Verplaats het apparaat nooit door aan het snoer
REINIGING EN ONDERHOUD
te trekken. Zorg ervoor dat het snoer nergens in
• Reinig het apparaat met een vochtige doek. Gebruik nooit agressieve en
verstrikt kan raken.
schurende schoonmaakmiddelen, schuursponzen of staalwol; dit
beschadigt het apparaat.
• Het apparaat moet op een stabiele, vlakke
• Dompel het apparaat nooit onder in water of andere vloeistoffen. Het
ondergrond worden geplaatst.
apparaat is niet vaatwasserbestendig.
• Dompel het snoer, de stekker of het apparaat
GARANTIE
niet onder in water of andere vloeistoffen om
• Op dit product wordt een garantie van 24 maanden verleend. Uw
garantie is geldig indien het product is gebruikt in overeenstemming met
elektrische schokken te voorkomen.
de gebruiksaanwijzing en voor het doel waarvoor het gemaakt is. Tevens
dient de originele aankoopbon (factuur, kassabon of kwitantie) te worden
overlegd met daarop de aankoopdatum, de naam van de retailer en het
•
UITROEPTEKEN - in een gelijkbenige
artikelnummer van het product.
• Voor uitgebreide garantievoorwaarden verwijzen wij u naar onze
driehoek - wordt gebruikt om aan te geven dat
servicewebsite: www.service.tristar.eu
een specifiek onderdeel om veiligheidsredenen
MILIEU
alleen mag worden vervangen door het
onderdeel dat in de documentatie is
Dit apparaat mag aan het einde van de levensduur niet bij het
gespecificeerd.
normale huisafval worden gedeponeerd, maar moet bij een speciaal
inzamelpunt voor hergebruik van elektrische en elektronische apparaten
worden aangeboden. Het symbool op het apparaat, in de
•
LICHTFLITS MET PIJLSYMBOOL - in
gebruiksaanwijzing en op de verpakking attendeert u hierop. De in het
een gelijkbenige driehoek - wordt bedoeld als
apparaat gebruikte materialen kunnen worden gerecycled. Met het
recyclen van gebruikte huishoudelijke apparaten levert u een belangrijke
waarschuwing voor de aanwezigheid van
bijdrage aan de bescherming van ons milieu. Informeer bij uw lokale
ongeïsoleerde gevaarlijke voltage in de
overheid naar het inzamelpunt.
productbehuizing die sterk genoeg is om een
Support
U kunt alle beschikbare informatie en reserveonderdelen vinden op
risico van elektrische schok te vormen voor
service.tristar.eu!
personen.
• Met de netstekker kunt u het apparaat
FR Manuel d'instructions
afkoppelen en deze moet dus gemakkelijk
SÉCURITÉ
bereikbaar blijven. Haal om het apparaat
• Si vous ignorez les instructions de sécurité, le
volledig van de voeding af te koppelen de
fabricant ne saurait être tenu responsable des
netstekker volledig uit het stopcontact. De
dommages.
netstekker mag niet worden belemmerd en
• Si le cordon d'alimentation est endommagé, il
moet gemakkelijk toegankelijk zijn tijdens het
doit être remplacé par le fabricant, son
beoogde gebruik.
réparateur ou des personnes qualifiées afin
d'éviter tout risque.
ONDERDELENBESCHRIJVING
1. Projectie aan/uit
• Ne déplacez jamais l'appareil en tirant sur le
2. Projectie 180° draaien
cordon et veillez à ce que ce dernier ne soit pas
3. Klok instellen/ Geheugen/M+
4. Afstemmen -/ Uur
entortillé.
5. Afstemmen +/ Minuten
• L'appareil doit être posé sur une surface stable
6. Alarm 1/ Volume omlaag
7. Alarm 2/ Volume omhoog
et nivelée.
8. Radio aan/uit
• Afin de vous éviter un choc électrique,
9. Sluimer / Slaap / Dimmer
10. Projector/Hoek/Scherpteregelaar
n'immergez pas le cordon, la prise ou l'appareil
dans de l'eau ou autre liquide .
VOOR HET EERSTE GEBRUIK
• Dit apparaat is uitgerust met een batterij-backup-systeem. Het apparaat
vereist een CR2032 lithiumbatterij (niet inbegrepen). Plaats de batterij in
het batterijcompartiment. Zorg ervoor dat de batterijpolen (+/-)
•
POINT D'EXCLAMATION - Dans un
overeenkomen met de symbolen in het batterijcompartiment. Indien een
stroomstoring optreedt, zal de klok automatisch overschakelen naar
triangle équilatéral, il est utilisé pour indiquer
batterijstroom en het interne klokgeheugen blijven functioneren (de
qu'un composant spécifique peut uniquement
display wordt uitgeschakeld en de radio zal niet werken). Indien de
stroomstoring voorbij is, zal het apparaat automatisch overschakelen
être remplacé par le composant spécifié dans
naar netstroom en terugkeren naar normaal bedrijf.
cette documentation pour une raison de
GEBRUIK
sécurité.
DE TIJD INSTELLEN
• Houd de knop Klok instellen ingedrukt en de tijd knippert.
• Druk op de knop Uur om het uur te verhogen. Houd ingedrukt voor een
•
ÉCLAIR AVEC SYMBOLE DE FLÈCHE -
snelle verhoging van het uur.
Dans un triangle équilatéral, il est destiné à
• Druk op de knop Minuten om de minuten te verhogen. Houd ingedrukt
voor een snelle verhoging van de minuten.
avertir l'utilisateur de la présence de tension
• Eenmaal de tijd juist is ingesteld, druk op de knop Klok instellen.
HET ALARMEN INSTELLEN
dangereuse non-isolée à l'intérieur du boîtier du
• Zorg dat de radio UIT staat.
produit qui peut être de magnitude suffisante
• Houd de knop Alarm 1 of Alarm 2 ingedrukt om het alarm in te stellen.
De alarmtijd knippert op het display.
pour constituer un risque d'électrocution.
• Druk op de knop Uur om het uur te verhogen. Houd ingedrukt voor een
snelle verhoging van het uur.
DE Bedienungsanleitung
• La prise secteur sert de dispositif de
déconnexion et doit demeurer en état de
SICHERHEIT
fonctionnement. Pour être totalement
• Beim Ignorieren der Sicherheitshinweise kann
der Hersteller nicht für Schäden haftbar
déconnectée de l'alimentation, la fiche secteur
de l'appareil doit être débranchée
gemacht werden.
complètement du secteur. La fiche secteur ne
• Ist das Netzkabel beschädigt, muss es vom
Hersteller, dem Kundendienst oder ähnlich
doit pas être obstruée ou doit être facilement
accessible pendant l'utilisation prévue.
qualifizierten Personen ersetzt werden, um
Gefahren zu vermeiden.
DESCRIPTION DES PIÈCES
• Bewegen Sie das Gerät niemals durch Ziehen
1. Projection On/Off
2. Projection rotation 180°
am Kabel, und stellen Sie sicher, dass sich das
3. Réglage horloge /Mémoire /M+
Kabel nicht verwickelt.
4. Ajustement -/ Heures
5. Ajustement +/- Minutes
• Das Gerät muss auf einer ebenen, stabilen
6. Alarme 1/ Volume bas
Fläche platziert werden.
7. Alarme 2/ Volume haut
8. Radio On/Off
• Tauchen Sie zum Schutz vor einem
9. Rappel d'alarme /Veille /Atténuation
Stromschlag das Kabel, den Stecker oder das
10. Projecteur /Angle /Contrôleur de netteté
Gerät niemals in Wasser oder sonstige
AVANT LA PREMIÈRE UTILISATION
Flüssigkeiten.
• Cette unité bénéficie d'un système de batterie de secours nécessitant
une pile au lithium CR2032 (non fournie). Placez la pile dans son
compartiment et assurez-vous que les bornes + et – de la pile
correspondent aux symboles du compartiment de pile. En cas de
•
Das AUSRUFUNGSZEICHEN im
défaillance du secteur, l'horloge passe automatiquement sur
gleichseitigen Dreieck weist darauf hin, dass
l'alimentation de secours et la mémoire d'horloge interne continue de
fonctionner (notez que l'affichage s'éteint et la radio ne fonctionne pas).
bestimmte Komponenten aus
Dès que le courant est revenu, l'unité restaure automatiquement
Sicherheitsgründen nur durch Komponenten
l'alimentation secteur et reprend son fonctionnement normal.
ersetzt werden dürfen, die in der Dokumentation
UTILISATION
spezifiziert sind.
RÉGLAGE DE L'HEURE
• Appuyez sur la touche Réglage horloge sans la relâcher et l'heure
clignote.
• Appuyez sur le bouton Heure pour augmenter les heures. Appuyez sur le
•
Der BLITZ MIT DEM PFEIL im
bouton sans le relâcher pour aller plus vite.
gleichseitigen Dreieck weist den Benutzer auf
• Appuyez sur le bouton Minutes pour augmenter les minutes. Appuyez
sur le bouton sans le relâcher pour aller plus vite.
freiliegende gefährliche Spannung im Gehäuse
• Une fois l'heure correcte réglée, appuyez sur le bouton Réglage horloge.
des Geräts hin, die hoch genug ist, einen
RÉGLAGE DE L'ALARME
• Assurez-vous que la radio est coupée.
Stromschlag zu verursachen.
• Appuyez sur le bouton Alarme 1 ou Alarme 2 sans le relâcher pour régler
• Der Netzstecker dient zum Trennen des Geräts
l'Alarme. L'heure de l'alarme clignote à l'écran.
• Appuyez sur le bouton Heure pour augmenter les heures. Appuyez sur le
vom Stromnetz und muss jederzeit frei
bouton sans le relâcher pour aller plus vite.
zugänglich sein. Zum vollständigen Trennen
• Appuyez sur le bouton Minutes pour augmenter les minutes. Appuyez
sur le bouton sans le relâcher pour aller plus vite.
des Netzeingangs muss der Netzstecker des
• Pour alterner entre une alarme en mode buzzer ou radio, appuyez sur le
Geräts aus der Steckdose gezogen werden.
bouton Alarme 1/2 à nouveau pour surligner l'option voulue sur l'écran
LED.
Der Netzstecker sollte nicht blockiert werden,
FONCTION DE RAPPEL D'ALARME
sondern muss beim bestimmungsgemäßen
Lorsque l'alarme retentit, appuyez sur le haut de l'appareil pour suspendre
l'alarme et activer la fonction de rappel d'alarme. Le bip ou l'alarme radio
Gebrauch jederzeit frei zugänglich sein.
cesse et retentit à nouveau après 9 minutes.
• Pour désactiver la fonction de rappel d'alarme et couper complètement
TEILEBESCHREIBUNG
l'alarme, appuyez sur le bouton Radio Marche/Arrêt. En l'absence de
1. Projektion ein/aus
pression sur un bouton, l'alarme sonne 60 minutes et se coupe
2. Projektion 180° umdrehen
automatiquement.
3. Uhreinstellung/ Speicher/M+
ÉCOUTE DE LA RADIO
4. Senderwahl -/ Stunden
• Appuyez une fois sur le bouton Radio on/ off pour allumer la radio.
5. Senderwahl +/ Minuten
• Réglez le volume au niveau souhaité avec les boutons Volume + et
6. Alarm 1/ Lautstärke leiser
Volume -.
7. Alarm 2/ Lautstärke lauter
• Utilisez la touche "TUNE+" ou "TUNE-" pour régler la fréquence de radio.
8. Radio ein/aus
• Appuyez une fois sur le bouton Radio on/ off pour éteindre la radio.
9. Schlummer-/Einschlaf-/ Dimmer-Funktion
• Vous pouvez prérégler et stocker la fréquence de 10 stations de radio en
10. Projektions-/Winkel-/Schärfesteuerung
mémoire.
• Réglez la radio sur la station souhaitée. Ensuite, appuyez sur le bouton
VOR DER ERSTEN INBETRIEBNAHME
MÉMOIRE /M+ et PO1 clignote à l'écran.
• Dieses Gerät verfügt über ein Batteriepufferungssystem; es benötigt eine
• Appuyez sur le bouton MÉMOIRE /M+ pour confirmer le réglage de PO1
Lithium-Batterie des Typs CR2032 (nicht im Lieferumfang). Setzen Sie
ou attendez 5 secondes que le clignotement cesse.
die Batterie in das Batteriefach ein und vergewissern Sie sich, dass die +
• Répétez les étapes précédentes pour prérégler d'autres stations de
und - Batterieanschlüsse mit den Symbolen im Batteriefach
radio.
übereinstimmen. Tritt ein Stromausfall ein, schaltet die Uhr automatisch
• Pour rappeler une station préréglée, appuyez sur le bouton MÉMOIRE /
auf Batteriebetrieb um und der interne Uhrenspeicher läuft weiter
M+ afin d'alterner entre les stations de radio actuellement préréglées.
(beachten Sie, dass die Anzeige abgeschaltet wird und das Radio nicht
FONCTIONNEMENT DU MINUTEUR DE VEILLE
mehr funktioniert). Wenn die Stromversorgung wieder vorhanden ist,
• Avec le minuteur de veille, vous écoutez de la musique pendant un délai
schaltet das Gerät wieder automatisch auf die Stromversorgung um und
préréglé entre 90 minutes et 10 minutes. Il est habituellement utilisé par
läuft normal weiter.
les personnes qui préfèrent s'endormir en musique.
• En mode radio, appuyez sur le bouton Rappel d'alarme /Veille /
GEBRAUCH
Atténuation. L'écran indique 90 minutes. Votre radioréveil s'éteint dans
EINSTELLUNG DER ZEIT
90 minutes.
• Drücken und halten Sie die Uhreinstelltaste; die Zeit blinkt nun.
• Pour changer le nombre de minutes du minuteur de veille, appuyez sur
• Drücken Sie auf die Stundentaste, um die Stunden zu erhöhen. Drücken
le bouton Rappel d'alarme /Veille /Atténuation jusqu'à afficher le nombre
und halten Sie die Taste, um den Vorgang zu beschleunigen.
de minutes souhaité. Le minuteur de veille diminue par décréments de
• Drücken Sie auf die Minutentaste, um die Minuten zu erhöhen. Drücken
10.
und halten Sie die Taste, um den Vorgang zu beschleunigen.
• Pour annuler le minuteur de veille, appuyez sur le bouton Rappel
• Sobald die Zeit richtig eingestellt ist, drücken Sie auf die Uhreinstelltaste.
d'alarme /Veille /Atténuation puis appuyez à nouveau jusqu'à ce que
EINSTELLUNG DES ALARMS
OFF s'affiche.
• Stellen Sie bitte sicher, dass das Radio AUS ist.
COMMANDE D'ATTÉNUATION
• Drücken und halten Sie die Taste Alarm 1 oder Alarm 2, um den Alarm
• En mode radio off, touchez le bouton ATTÉNUATION pour régler la
einzustellen. Die Alarmzeit blinkt nun auf der Anzeige.
luminosité de l'écran LED sur haute, moyenne ou faible selon vos
• Drücken Sie auf die Stundentaste, um die Stunden zu erhöhen. Drücken
conditions d'éclairage ambiant.
und halten Sie die Taste, um den Vorgang zu beschleunigen.
FONCTION DE PROJECTION
• Drücken Sie auf die Minutentaste, um die Minuten zu erhöhen. Drücken
• - Cet appareil propose une fonction de projection, utilisable en mode
und halten Sie die Taste, um den Vorgang zu beschleunigen.
horloge ou radio. Vous pouvez utiliser cet appareil pour projeter l'heure
• Um zwischen dem Summer- und dem Radioalarm-Modus umzuschalten,
au plafond ou sur un mur. La distance optimale de projection est de 90 à
drücken Sie erneut auf die Taste Alarm 1/2, bis die gewünschte Option
270cm environ.
auf der LED-Anzeige hervorgehoben ist.
• Appuyez sur le bouton "Projection on/off" pour activer la projection.
SCHLUMMERFUNKTION
Ajustez la luminosité/mise au point de la projection en tournant la molette
Sobald der Wecker ertönt, drücken Sie auf die Oberseite des Gerätes, um
de réglage sous l'objectif de projection. Appuyez sur le bouton "Rotation
die Weckfunktion auf einen späteren Zeitpunkt zu verschieben und die
180°" pour inverser le temps de projection.
Schlummerfunktion zu aktivieren. Der Weckton bzw. der Radiowecker
• Pour désactiver la fonction de projection, appuyez simplement sur le
verstummt und ertönt nach 9 Minuten erneut.
bouton ON/OFF. L'objectif de projection s'éteint.
• Wenn Sie die Schlummerfunktion deaktivieren möchten und den Alarm
ganz abschalten möchten, drücken Sie auf die Radio EIN/AUS-Taste.
NETTOYAGE ET ENTRETIEN
Falls Sie auf keine Taste drücken, ertönt der Alarm 60 Minuten lang und
• Nettoyez l'appareil avec un chiffon humide. N'utilisez pas de produits
hört dann automatisch auf.
nettoyants agressifs ou abrasifs, de tampons à récurer ou de laine de
RADIO HÖREN
verre, ceux-ci pourraient endommager l'appareil.
• Drücken Sie ein Mal auf die Taste Radio ein/aus, um das Radio
• N'immergez jamais l'appareil dans l'eau ni aucun autre liquide. L'appareil
einzuschalten.
ne peut pas être nettoyé en lave-vaisselle.
• Stellen Sie die Lautstärke mit den Lautstärke + und Lautstärke - Tasten
wie gewünscht ein.
GARANTIE
• Mit der Taste "TUNE+" oder "TUNE-" die Radiofrequenz einstellen.
• Ce produit est garanti pour une période de 24 mois. Votre garantie est
• Drücken Sie ein Mal auf die Taste Radio ein/aus, um das Radio
valable si le produit est utilisé selon les instructions et pour l'usage
AUSZUSCHALTEN.
auquel il est destiné. De plus, la preuve d'achat d'origine (facture, reçu
• Sie können die Frequenz von 10 Radiostationen voreinstellen und
ou ticket de caisse) doit être présentée, montrant la date d'achat, le nom
abspeichern.
du détaillant et le numéro d'article du produit.
• Stellen Sie das Radio auf die gewünschte Station und drücken und
• Pour connaître les conditions de garantie détaillées, veuillez consulter
halten Sie anschließend die MEMORY/M+ Taste; PO1 blinkt nun auf
notre site Internet de service : www.service.tristar.eu
dem Bildschirm.
• Drücken Sie auf die MEMORY/M+ Taste, um die Einstellung auf PO1 zu
ENVIRONNEMENT
bestätigen, oder warten Sie 5 Sekunden, bis das Blinken aufhört.
• Wiederholen Sie die oben aufgeführten Schritte, um weitere
Radiostationen als Voreinstellung einzurichten.
Cet appareil ne doit pas être jeté avec les déchets ménagers à la
• Um eine voreingestellte Station wieder aufzurufen, drücken Sie auf die
fin de sa durée de vie, il doit être remis à un centre de recyclage pour les
Taste MEMORY/M+, um die aktuell voreingestellten Radiostationen
appareils électriques et électroniques. Ce symbole sur l'appareil, le
weiterzuschalten.
manuel d'utilisation et l'emballage attire votre attention sur un point
EINSCHLAF-TIMER-BETRIEB
important. Les matériaux utilisés dans cet appareil sont recyclables. En
• Der Einschlaf-Timer ermöglicht es, für eine voreingestellte Zeit zwischen
recyclant vos appareils, vous contribuez de manière significative à la
90 und 10 Minuten, Musik wiederzugeben. Diese Funktion verwenden
protection de notre environnement. Renseignez-vous auprès des autorités
normalerweise Personen, die gerne mit Musik einschlafen.
locales pour connaître les centres de collecte des déchets.
• Drücken Sie im Radiomodus auf die Schlummer-/Einschlaf-/Dimmer-
Taste. Auf der Anzeige erscheint 90 Minuten, und Ihr Radiowecker
Support
schaltet sich in 90 Minuten ab.
Vous pouvez trouver toutes les informations et pièces de rechange sur
service.tristar.eu !
Werbung

Verwandte Anleitungen für Audiosonic CL-1496


Inhaltszusammenfassung für Audiosonic CL-1496
- Seite 1 • LIGHTNING FLASH WITH UTILISATION • Om het aantal minuten voor de slaaptimer te wijzigen, druk op de knop spezifiziert sind. CL-1496 RÉGLAGE DE L'HEURE ARROWHEAD SYMBOL - within an Support Sluimer/Slaap/Dimmer totdat u het gewenste aantal minuten ziet. De •...
- Seite 2 • Um die Anzahl der Minuten für den Einschlaf-Timer zu ändern, drücken GARANTIA SŁUCHANIE RADIA rete dell'unità non deve essere ostacolato e Sie auf die Schlummer-/Einschlaf-/Dimmer-Taste, bis die gewünschte AJUSTE DE LA HORA • Este produto possui uma garantia de 24 meses. A sua garantia é válida •...
- Seite 3 • Ak chcete deaktivovať funkciu krátkeho spánku a celkom vypnúť budík, CL-1496 elektriska stötar på människor. • Pokud je napájecí kabel poškozen, musí být ČIŠTĚNÍ A ÚDRŽBA stlačte tlačidlo Rádio ZAP./VYP.