Audiosonic CL-1491 Bedienungsanleitung
Quicklinks
EN Instruction manual
SAFETY
Instruction Manual
Instrukcje użytkowania
EN
PL
•
By ignoring the safety instructions the manufacturer can not be hold
responsible for the damage.
Gebruiksaanwijzing
Istruzioni per l'uso
NL
IT
•
If the supply cord is damaged, it must be replaced by the
manufacturer, its service agent or similarly qualified persons in order
Mode d'emploi
Bruksanvisning
FR
SV
to avoid a hazard.
•
Never move the appliance by pulling the cord and make sure the cord
Bedienungsanleitung
Návod na použití
DE
CS
can not become entangled.
•
The appliance must be placed on a stable, level surface.
Manual de instrucciones
Návod na použitie
ES
SK
•
To protect yourself against an electric shock, do not immerse the
cord, plug or appliance in the water or any other liquid.
Manual de Instruções
PT
•
Within an equilateral triangle, is used to indicate that a specific
component shall be replaced only by the component specified in that
documentation for safety reason.
•
LIGHTNING FLASH WITH ARROWHEAD SYMBOL within an
equilateral triangle, is intended to alert the user to the presence of
uninsulated dangerous voltage within the products enclosure that may
be of sufficient magnitude to constitude a risk of electric shock to
persons.
•
The mains plug is used as the disconnect device and it shall remain
readily operable. To completely disconnect the power input, the Mains
plug of the apparatus must be disconnected from the mains
Completely. The mains plug should not be obstructed or should be
Easily accessed during intended use.
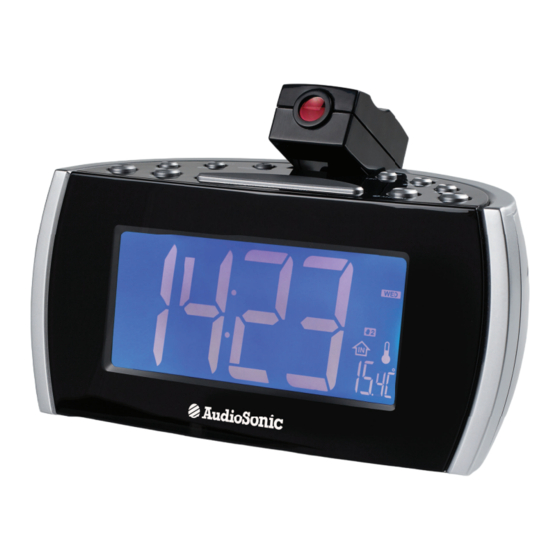
PARTS DESCRIPTION
1. Projection On/Off
2. Backwards/ Month Day/ DST
3. Alarm 1
4. Volume down
5. Volume up
6. Snooze/ Sleep/ Dimmer
7. Projection 180° flip/ projection temperature
8. Forward/ °C°F/ year
9. Alarm 2
10. Set.mem/ Memory+
11. On/ Off
C l o c k r a d i o
BEFORE THE FIRST USE
•
Plug the AC power cord to a household outlet AC source. This unit is
CL-1491
Projection - jumbo display
equipped with a battery back up system, it requires a 3V CR2032 flat
lithium battery (not included). Insert the battery in the battery
compartment, making certain that the positive and negative (+ and )
battery terminals are attached to the corresponding terminals on the
PARTS DESCRIPTION / ONDERDELENBESCHRIJVING / DESCRIPTION DES PIÈCES / TEILEBESCHREIBUNG /
plate in the battery compartment. If an AC power failure occurs, the
clock automatically switches to the battery power supply, the clock
DESCRIPCIÓN DE LAS PIEZAS / DESCRIZIONE DELLE PARTI / DESCRIÇÃO DOS COMPONENTES /
and timer memory continue running. When the AC power resumes,
BESKRIVNING AV DELAR / OPIS CZĘŚCI / POPIS SOUČÁSTÍ / POPIS SÚČASTÍ
the clock switches back to AC again.
USE
Time and calender
•
Press and hold the "SET/MEM/M+" button in standby mode to enter
time set mode, use the tune buttons to adjust the settings. Press the
"SET/MEM/M+" button to change the mode cycle as follows: Year →
3
2
1
7
8
9
date→ 12/24 H format → Real time Hour → Real time Min.
Alarm setting
•
Press the "alarm 1/2" button in standby mode to show the alarm time.
Press, press again and hold directly again(when the alarm time is still
displayed) to enter the alarm set mode. Use the tune buttons to adjust
the settings, press the alarm set button to confirm and change the
mode cycle as follows: Hour → Min → Weekday alarm→ wake tone
→ wake radio volume.
•
Different weekday modes:
–
15: Monday to Friday
–
17: Whole week
–
67: Saturday & Sunday
4
5
6
10
11
–
11: One day of week
Enable/ disable the alarm
•
Press and hold the "alarm 1/ 2" button to enable or disable the alarm.
Once the alarm is activated, the bell symbol will be appeared on the
display.
Snooze Function
•
When the alarm rings, press the "snooze" button to suspend the alarm
& to activate the snooze function, Beep or Radio alarm will stop and
will ring again after 9 minutes.
Stop the alarm
•
Press the "on/ off" button to stop the alarm completely.
Radio mode
Note: Ensure that the FM antenna is completely unrolled and extended to
have the best FM reception.
•
Press the Radio "on/ off" button to turn the unit on.
•
Use the "tune / +" button to select the desired radio station.
Set and recall the radio presets
•
Press and hold the "memory" button; "P01" will blink in the display.
Use the "tune+/ " button to select the desired preset station (P01
P10). Press the "memory" button again to set the preset.
•
For recalling preset stations, press the "memory" button repeatedly to
select the preset number.
Dimmer control
•
In standby mode, press the "dimmer" button to set the brightness of
the LCD display.
Sleep operation
•
When you listen to the radio, press the "sleep" button to enter into the
sleep mode. You can adjust the sleep timer from 90 minutes to 15
minutes by pressing this button repeatedly. When sleep timer is
selected, the unit will automatically turn off once time is up.
Daylight saving time (DST) mode
•
For countries with daylight saving time (DST) (one hour difference
between summer time and winter time), this clock radio offers you
DST option to adjust summer time. In standby mode press and hold
for 2 seconds the "DST" button. The clock advances by one hour. To
exit DST mode, repeat the above operation.
GUARANTEE
•
This product is guaranteed for 24 months granted. Your warranty is
valid if the product is used in accordance to the instructions and for
the purpose for which it was created. In addition, the original purchase
(invoice, sales slip or receipt) is to be submitted with the date of
purchase, the name of the retailer and the item number of the product.
•
For the detailed warranty conditions, please refer to our service
website: www.service.tristar.eu
ENVIRONMENT
This appliance should not be put into the domestic garbage at the end
of its durability, but must be offered at a central point for the recycling of
electric and electronic domestic appliances. This symbol on the appliance,
instruction manual and packaging puts your attention to this important
issue. The materials used in this appliance can be recycled. By recycling
of used domestic appliances you contribute an important push to the
protection of our environment. Ask your local authorities for information
regarding the point of recollection.
Support
You can find all available information and spare parts at service.tristar.eu!
NL Gebruiksaanwijzing
VEILIGHEID
•
Bij het niet opvolgen van de veiligheidsinstructies kan de fabrikant niet
verantwoordelijk worden gesteld voor de schade.
•
Als het netsnoer beschadigd is, moet het worden vervangen door de
fabrikant, de onderhoudsmonteur van de fabrikant of door personen
SERVICE.TRISTAR.EU
met een soortgelijke kwalificatie om gevaar te voorkomen.
•
Verplaats het apparaat nooit door aan het snoer te trekken. Zorg
ervoor dat het snoer nergens in verstrikt kan raken.
Tristar Europe B.V. | Jules Verneweg 87
•
Het apparaat moet op een stabiele, vlakke ondergrond worden
5015 BH Tilburg | The Netherlands
geplaatst.
•
Dompel het snoer, de stekker of het apparaat niet onder in water of
AVANT LA PREMIÈRE UTILISATION
andere vloeistoffen om elektrische schokken te voorkomen.
•
Enfichez le cordon CA dans une source CA à prise domestique. Cette
unité bénéficie d'un système de batterie de secours nécessitant une
ONDERDELENBESCHRIJVING
batterie lithium plate 3V CR2032 (non fournie). Insérez la batterie
1. Projectie Aan/Uit
dans son compartiment en vous assurant que les bornes positive et
2. Achteruit / Maand Dag / DST (Zomertijd)
négative (+ et ) de la batterie sont associées aux bornes
3. Alarm 1
correspondantes sur la plaque du compartiment de batterie. En cas
4. Volume omlaag
de panne d'alimentation CA, l'horloge passe automatiquement sur
5. Volume omhoog
l'alimentation de batterie et continue de fonctionner tout comme la
6. Sluimer / Slaap / Dimmer
mémoire de minuterie. Lorsque l'alimentation CA est rétablie, l'horloge
7. Projectie 180° draaien / Projectietemperatuur
passe à nouveau à l'alimentation CA.
8. Vooruit / °C°F / Jaar
9. Alarm 2
UTILISATION
10. Geheugen instellen / Geheugen +
Heure et calendrier
11. Aan / Uit
•
Appuyez sur le bouton "RÉGL/MÉM/M+" en mode veille pour accéder
au mode de réglage d'heure et utilisez les boutons d'ajustement pour
VOOR HET EERSTE GEBRUIK
définir les réglages. Appuyez sur le bouton "RÉGL/MÉM/M+" pour
•
Sluit het netsnoer aan op een stopcontact. Dit apparaat is uitgerust
changer le cycle de mode comme suit : Année → date→ Format
met een batterijbackupsysteem. Het apparaat vereist een 3V
12/24 H → Heure temps réel → Min. temps réel
CR2032 platte lithiumbatterij (niet inbegrepen). Plaats de batterij in
Réglage de l'alarme
het batterijcompartiment. Zorg ervoor dat de positieve en negatieve (+
•
Appuyez sur le bouton "alarme 1/2" en mode veille pour afficher
en ) contactpunten van de batterij zijn bevestigd aan de
l'heure d'alarme. Appuyez, appuyez à nouveau sans relâcher
overeenkomstige aansluitingen op de plaat in het
directement (lorsque l'heure d'alarme est encore affichée) pour passer
batterijcompartiment. Indien zich een stroomstoring voordoet, schakelt
au mode de réglage d'alarme. Utilisez les boutons d'ajustement pour
de klok automatisch over op de batterijvoeding en blijven de klok en
ajuster les réglages. Appuyez sur le bouton de réglage d'alarme pour
het timergeheugen werken. Als de netspanning hersteld is, schakelt
confirmer et changez le cycle de mode comme suit : Heure → Min →
de klok terug naar netvoeding.
Alarme jour de semaine → tonalité réveil → volume radio réveil
•
Différents modes de jour de semaine :
GEBRUIK
–
15 : Lundi à vendredi
Tijd en kalender
–
17 : Semaine entière
•
Houd in de standbymodus de "SET/MEM/M+"knop ingedrukt om de
–
67 : Samedi et dimanche
tijd in te stellen. Gebruik de afstemknoppen om de instellingen te
–
11 : Un jour par semaine
wijzigen. Druk op de "SET/MEM/M+"knop om de moduscyclus als
Activer /désactiver l'alarme
volgt te wijzigen: Jaar → Datum → 12/24uursformaat → Actuele tijd
•
Appuyez sur le bouton "alarme 1/ 2" sans le relâcher pour activer /
Uur → Actuele tijd Min.
désactiver l'alarme. Une fois l'alarme activée, le symbole de cloche
Alarminstelling
s'affiche à l'écran.
•
Druk in de standbymodus op de "Alarm 1/2"knop om de alarmtijd te
Fonction de rappel d'alarme
tonen. Druk één keer, druk nogmaals en houd ingedrukt (als de
•
Lorsque l'alarme retentit, appuyez sur le bouton "rappel d'alarme"
alarmtijd nog zichtbaar is) om het alarm in te stellen. Gebruik de
pour suspendre l'alarme et activer la fonction de rappel d'alarme. Le
afstemknoppen om de instellingen te wijzigen. Druk op de
bip ou l'alarme radio cesse et retentit à nouveau après 9 minutes.
alarminstelknop om de moduscyclus als volgt te wijzigen: Uur → Min.
Arrêter l'alarme
→ Weekdag alarm → Wekkertoon → Wekkerradiovolume.
•
Appuyez sur le bouton "on/ off" pour arrêter complètement l'alarme.
•
Verschillende weekdagmodi:
Mode radio
–
15: Maandag t/m vrijdag
Remarque : assurezvous que l'antenne FM est complètement déroulée et
–
17: Gehele week
déployée pour optimiser la réception FM.
–
67: Zaterdag & zondag
•
Appuyez sur le bouton Radio "on/ off" pour activer l'unité.
–
11: Eén dag van de week
•
Utilisez le bouton "réglage / +" pour sélectionner la station de radio
Het alarm inschakelen/uitschakelen
voulue.
•
Houd de "Alarm 1/2"knop ingedrukt om het alarm in of uit te
Régler et rappeler les préréglages radio
schakelen. Als het alarm geactiveerd is, zal het belsymbool op de
•
Appuyez sans le relâcher sur le bouton "mémoire" ; "P01" clignote à
display verschijnen.
l'affichage. Utilisez le bouton "réglage / +" pour sélectionner la station
Sluimerfunctie
préréglée voulue (P01P10). Appuyez à nouveau sur le bouton
•
Als het alarm afgaat, druk dan op de sluimerknop om het alarm op te
"mémoire" pour régler le préréglage.
schorten en de sluimerfunctie te activeren. Het piep of radioalarm zal
•
Pour rappeler les stations préréglées, appuyez sur le bouton
stoppen en na 9 minuten opnieuw afgaan.
"mémoire" de manière répétée pour sélectionner le numéro préréglé.
Het alarm stoppen
Commande d'atténuation
•
Druk op de aan/uitschakelaar om het alarm volledig te stoppen.
•
En mode veille, appuyez sur le bouton "atténuation" pour régler la
Radiomodus
luminosité de l'écran LCD.
Let op: Zorg ervoor dat de FMantenne volledig uitgerold en uitgeschoven
Activation de veille
is om de beste FMontvangst te verkrijgen.
•
Lorsque vous écoutez la radio, appuyez sur le bouton "veille" pour
•
Druk op de radio aan/uitknop om het apparaat in te schakelen
accéder au mode veille. Vous pouvez ajuster le minuteur de veille de
•
Gebruik de "Afstemmen +/" knop om het gewenste radiostation te
90 à 15 minutes en appuyant de manière répétée sur ce bouton.
selecteren.
Lorsque le minuteur de veille est sélectionné, l'unité se coupe
Radiovoorinstellingen instellen en oproepen
automatiquement une fois le délai écoulé.
•
Houd de geheugenknop ingedrukt. "P01" zal in de display knipperen.
Mode heure d'été
Gebruik de "Afstemmen +/" knop om het gewenste vooringestelde
•
Pour les pays appliquant un système d'heure d'été (une heure de
station te selecteren. Druk nogmaals op de geheugenknop om de
différence entre les heures d'hiver et d'été), ce radioréveil vous offre
voorinstelling in te stellen.
une option heure d'été pour cet ajustement. En mode veille, appuyez
•
Druk voor het oproepen van vooringestelde stations herhaaldelijk op
sur le bouton "heure d'été" sans le relâcher pendant 2 secondes.
de geheugenknop om het vooringestelde nummer te selecteren.
L'horloge avance d'une heure. Pour sortir du mode heure d'été,
Dimmerbediening
répétez l'opération précédente.
•
Druk in de standbymodus op de dimmerknop om de helderheid van
de LCDdisplay in te stellen.
GARANTIE
Slaapfunctie
•
Ce produit est garanti pour une période de 24 mois. Votre garantie est
•
Druk tijdens het luisteren naar de radio op de slaapknop om de
valable si le produit est utilisé selon les instructions et pour l'usage
slaapmodus te activeren. U kunt de slaaptimer van 90 minuten tot 15
auquel il est destiné. De plus, la preuve d'achat d'origine (facture,
minuten instellen door herhaaldelijk op deze knop te drukken. Als de
reçu ou ticket de caisse) doit être présentée, montrant la date d'achat,
slaaptimer geselecteerd is, zal het apparaat na het verstrijken van de
le nom du détaillant et le numéro d'article du produit.
tijd automatisch uitschakelen.
•
Pour connaître les conditions de garantie détaillées, veuillez consulter
Zomertijdmodus (DST)
notre site Internet de service : www.service.tristar.eu
•
Voor landen met zomertijd (DST) (één uur verschil tussen zomertijd
en wintertijd), biedt deze klokradio de DSToptie om de zomertijd in te
ENVIRONNEMENT
stellen. Houd in de standbymodus de DSTknop 2 seconden
Cet appareil ne doit pas être jeté avec les déchets ménagers à la fin de
ingedrukt. De klok gaat één uur vooruit. Herhaal de bovengenoemde
sa durée de vie, il doit être remis à un centre de recyclage pour les
handeling om de zomertijdmodus (DST) te verlaten.
appareils électriques et électroniques. Ce symbole sur l'appareil, le
manuel d'utilisation et l'emballage attire votre attention sur un point
GARANTIEVOORWAARDEN
important. Les matériaux utilisés dans cet appareil sont recyclables. En
•
Op dit product wordt een garantie van 24 maanden verleend. Uw
recyclant vos appareils, vous contribuez de manière significative à la
garantie is geldig indien het product is gebruikt in overeenstemming
protection de notre environnement. Renseignezvous auprès des autorités
met de gebruiksaanwijzing en voor het doel waarvoor het gemaakt is.
locales pour connaître les centres de collecte des déchets.
Tevens dient de originele aankoopbon (factuur, kassabon of kwitantie)
te worden overlegd met daarop de aankoopdatum, de naam van de
Support
retailer en het artikelnummer van het product.
Vous pouvez trouver toutes les informations et pièces de rechange sur
•
Voor uitgebreide garantievoorwaarden verwijzen wij u naar onze
service.tristar.eu !
servicewebsite: www.service.tristar.eu
DE Bedienungsanleitung
MILIEU
Dit apparaat mag aan het einde van de levensduur niet bij het normale
SICHERHEIT
huisafval worden gedeponeerd, maar moet bij een speciaal inzamelpunt
voor hergebruik van elektrische en elektronische apparaten worden
•
Beim Ignorieren der Sicherheitshinweise kann der Hersteller nicht für
Schäden haftbar gemacht werden.
aangeboden. Het symbool op het apparaat, in de gebruiksaanwijzing en
•
Ist das Netzkabel beschädigt, muss es vom Hersteller, dem
op de verpakking attendeert u hierop. De in het apparaat gebruikte
materialen kunnen worden gerecycled. Met het recyclen van gebruikte
Kundendienst oder ähnlich qualifizierten Personen ersetzt werden, um
Gefahren zu vermeiden.
huishoudelijke apparaten levert u een belangrijke bijdrage aan de
bescherming van ons milieu. Informeer bij uw lokale overheid naar het
•
Bewegen Sie das Gerät niemals durch Ziehen am Kabel, und stellen
inzamelpunt.
Sie sicher, dass sich das Kabel nicht verwickelt.
•
Das Gerät muss auf einer ebenen, stabilen Fläche platziert werden.
Support
•
Tauchen Sie zum Schutz vor einem Stromschlag das Kabel, den
U kunt alle beschikbare informatie en reserveonderdelen vinden op
Stecker oder das Gerät niemals in Wasser oder sonstige
Flüssigkeiten.
service.tristar.eu!
TEILEBESCHREIBUNG
FR Manuel d'instructions
1. Projektion ein/aus
2. Zurück/ Monat Tag/ Sommerzeit (DST)
SÉCURITÉ
3. Weckfunktion 1
•
Si vous ignorez les instructions de sécurité, le fabricant ne saurait être
4. Lautstärke leiser
tenu responsable des dommages.
5. Lautstärke lauter
•
Si le cordon d'alimentation est endommagé, il doit être remplacé par
6. Schlummer / Schlaf / Dimmer
le fabricant, son réparateur ou des personnes qualifiées afin d'éviter
7. Projektion 180° schwenken/ Projektion Temperatur
tout risque.
8. Vorwärts/ °C°F/ Jahr
•
Ne déplacez jamais l'appareil en tirant sur le cordon et veillez à ce
9. Weckfunktion 2
que ce dernier ne soit pas entortillé.
10. Speicher einst. / Speicher +
•
L'appareil doit être posé sur une surface stable et nivelée.
11. Ein / Aus
•
Afin de vous éviter un choc électrique, n'immergez pas le cordon, la
prise ou l'appareil dans de l'eau ou autre liquide .
VOR DER ERSTEN INBETRIEBNAHME
•
Stecken Sie den Netzstecker in eine Haushalts
DESCRIPTION DES PIÈCES
Wechselstromsteckdose. Dieses Gerät verfügt über ein
1. Projection On/Off
Batteriepufferungssystem; es benötigt eine flache 3V LithiumBatterie
2. Inversé/ Mois Jour/ Heure d'été
des Typs CR2032 (nicht im Lieferumfang). Setzen Sie die Batterie in
3. Alarme 1
das Batteriefach ein. Stellen Sie dabei sicher, dass die Plus und
4. Volume bas
MinusBatterieanschlüsse (+ und ) mit den entsprechenden
5. Volume haut
Anschlüssen auf der Platine im Batteriefach verbunden werden. Bei
6. Rappel d'alarme /Veille /Atténuation
einem Stromausfall schaltet die Uhr automatisch auf Batteriebetrieb
7. Projection rotation 180° / projection température
um, und Uhr und TimerSpeicher laufen weiter. Ist der Netzstrom
8. Avance /°C°F /année
wieder vorhanden, schaltet die Uhr wieder auf Netzbetrieb um.
9. Alarme 2
10. Régl.mém/ Mémoire+
GEBRAUCH
11. On/ Off
Zeit und Kalender
•
Drücken und halten Sie die Taste "SET/MEM/M+" im StandbyModus,
um den Zeiteinstellmodus aufzurufen. Verwenden Sie die
Sendereinstelltasten, um die Einstellungen zu ändern. Drücken Sie
auf die Taste "SET/MEM/M+", um den Moduszyklus wie folgt zu
USO
ändern: Jahr → Datum→ 12/24 HFormat → Echtzeit Stunde →
Hora y calendario
Echtzeit Min.
•
Apriete y mantenga el botón "SET/MEM/M+" en el modo de espera
Weckfunktion einstellen
para acceder al modo de ajuste de hora. Utilice los botones de
•
Drücken Sie auf die Taste "alarm 1/2" im StandbyModus, um die
sintonización para realizar los ajustes. Apriete el botón "SET/MEM/M
Weckzeit anzeigen zu lassen. Drücken Sie, drücken Sie erneut und
+" para cambiar el ciclo de modo como sigue: Año → Fecha →
halten Sie die Taste direkt danach (wenn die Weckzeit noch
Formato 12/24 H → Hora en tiempo real → Min. en tiempo real
angezeigt wird), um den Weckzeiteinstellmodus aufzurufen.
Ajustes de la alarma
Verwenden Sie die Sendertasten, um die Einstellungen zu ändern.
•
Apriete el botón "alarm 1/2" en el modo de espera para mostrar la
Drücken Sie auf die Weckzeiteinstelltaste, um die Einstellung zu
hora de alarma. Apriete, apriete de nuevo y mantenga directamente
bestätigen, und ändern Sie den Moduszyklus wie folgt: Stunde → Min
de nuevo (cuando aún se muestre la hora de alarma) para acceder al
→ WochentagWeckfunktion→ Weckton → WeckRadiolautstärke.
modo de ajuste de alarma. Utilice los botones de sintonización para
•
Verschiedene WochentagModi:
realizar los ajustes. Apriete el botón de ajuste de alarma para
–
15: Montag bis Freitag
confirmar y cambiar el ciclo de modo como sigue: Hora → Min. →
–
17: Ganze Woche
Alarma de día laborable→ Tono para despertar → Volumen de radio
–
67: Samstag & Sonntag
para despertar.
–
11: Ein Tag der Woche
•
Diferentes modos de días laborables:
Aktivierung / Deaktivierung der Weckfunktion
–
15: Lunes a viernes
•
Drücken und halten Sie die Taste "alarm 1/ 2", um die Weckfunktion
–
17: Toda la semana
zu aktivieren oder zu deaktivieren. Sobald die Weckfunktion aktiviert
–
67: Sábado y domingo
ist, erscheint das Glockensymbol auf der Anzeige.
–
11: Un día de la semana
Schlummerfunktion
Activar/desactivar la alarma
•
Sobald der Wecker ertönt, drücken Sie auf die Taste "snooze", um die
•
Apriete y mantenga el botón "alarm 1/ 2" para activar o desactivar la
Weckfunktion auf einen späteren Zeitpunkt zu verschieben und die
alarma. Una vez activada la alarma, el símbolo de la campana
Schlummerfunktion zu aktivieren. Der Weckton bzw. der Radiowecker
aparecerá en el visor.
verstummt und ertönt nach 9 Minuten erneut.
Función de repetición de alarma
Weckfunktion stoppen
•
Cuando suene la alarma, apriete el botón "snooze" para suspender la
•
Drücken Sie auf die Taste "on/ off", um die Weckfunktion komplett zu
alarma y activar la función de repetición de alarma. La alarma de
stoppen.
pitido o radio se detendrá y volverá a sonar tras 9 minutos.
Radiomodus
Detener la alarma
Hinweis: Vergewissern Sie sich, dass die FMAntenne vollkommen
•
Apriete el botón de encendido/apagado para parar la alarma
ausgerollt und ausgestreckt ist, um den besten FMEmpfang zu erzielen.
completamente.
•
Drücken Sie auf die Taste "on/ off" des Radios, um das Gerät
Modo de radio
einzuschalten.
Nota: Asegúrese de que la antena FM esté totalmente desplegada y
•
Verwenden Sie die Taste "tune / +", um die gewünschte Radiostation
extendida para tener la mejor recepción de FM.
zu wählen.
•
Apriete el botón de encendido/apagado de radio para encender la
Einstellung und Aufrufen der RadiostationsVoreinstellungen
unidad.
•
Drücken und halten Sie die Taste "memory"; "P01" blinkt nun in der
•
Utilice el botón "tune / +" para seleccionar la emisora de radio
Anzeige. Verwenden Sie die Taste "tune +/ ", um die gewünschte
deseada.
RadiostationsVoreinstellung (P01P10) zu wählen. Drücken Sie
Ajustar y recordar las presintonías de radio
erneut auf die Taste "memory", um die RadiostationsVoreinstellung
•
Apriete y mantenga el botón "memory"; "P01" parpadeará en el visor.
einzustellen.
Utilice el botón "tune / +" para seleccionar la emisora presintonizada
•
Um die RadiostationsVoreinstellungen wieder aufzurufen, drücken
deseada (P01P10). Apriete el botón "memory" de nuevo para ajustar
Sie wiederholt auf die Taste "memory", um die
la presintonía.
Voreinstellungsnummer zu wählen.
•
Para recordar las presintonías, apriete el botón "memory"
Dimmersteuerung
repetidamente para seleccionar el número de presintonía.
•
Drücken Sie im StandbyModus auf die Taste "dimmer", um die
Control de atenuación
Helligkeit der LCDAnzeige einzustellen.
•
En el modo de espera, apriete el botón "dimmer" para ajustar el brillo
Einschlafbetrieb
del visor LCD.
•
Wenn Sie Radio hören, drücken Sie auf die Taste "sleep", um den
Funcionamiento del temporizador de reposo
Einschlafmodus aufzurufen. Sie können den EinschlafTimer von 90
•
Cuando escuche la radio, apriete el botón "sleep" para acceder al
Minuten bis 15 Minuten einstellen, indem diese Taste wiederholt
modo de reposo. Puede ajustar el temporizador de reposo de 90 a 15
gedrückt wird. Ist der EinschlafTimer eingeschaltet, schaltet das
minutos apretando este botón repetidamente. Cuando se ha
Gerät automatisch ab, sobald die Zeit abgelaufen ist.
seleccionado el temporizador de reposo, la unidad se apagará
SommerzeitModus (DST)
automáticamente cuando haya transcurrido el tiempo.
•
Für Länder mit Sommerzeit (DST) (eine Stunde Unterschied zwischen
Modo de horario de verano (DST)
Summer und Winterzeit) bietet Ihnen dieses Uhrenradio die DST
•
Para los países con horario de verano (DST) (una hora de diferencia
Option, um die Sommerzeit anzupassen. Drücken und halten Sie im
entre la hora de verano y la de invierno), este radio reloj ofrece la
StandbyModus 2 Sekunden lang die Taste "DST". Die Uhr wird eine
opción DTS para ajustar la hora de verano. En el modo de espera,
Stunde vorgestellt. Um den DSTModus zu verlassen, wiederholen
apriete y mantenga el botón "DTS" durante 2 segundos. El reloj
Sie den Vorgang oben.
avanza una hora. Para salir del modo DST, repita la operación
anterior.
GARANTIE
•
Dieses Produkt hat eine Garantie von 24 Monaten. Der
GARANTÍA
Garantieanspruch gilt nur, wenn das Produkt gemäß den
•
Este producto cuenta con 24 meses de garantía. Su garantía es
Anweisungen und gemäß dem Zweck, für den es konzipiert wurde,
válida si el producto se utiliza de acuerdo con las instrucciones y el
benutzt wird. Der OriginalKaufbeleg (Rechnung, Beleg oder Quittung)
propósito para el que se creó. Además, debe enviarse un justificante
muss zusammen mit dem Kaufdatum, dem Namen des
de la compra original (factura, tíquet o recibo) en el que aparezca la
Einzelhändlers und der Artikelnummer des Produktes eingereicht
fecha de la compra, el nombre del vendedor y el número de artículo
werden.
del producto.
•
Detaillierte Informationen über die Garantiebedingungen finden Sie
•
Para más detalles sobre las condiciones de la garantía, consulte la
auf unserer ServiceWebsite unter: www.service.tristar.eu
página web de servicio: www.service.tristar.eu
UMWELT
MEDIO AMBIENTE
Dieses Gerät darf am Ende seiner Lebenszeit nicht im Hausmüll
Este aparato no debe desecharse con la basura doméstica al final de
entsorgt werden, sondern muss an einer Sammelstelle für das Recyceln
su vida útil, sino que se debe entregar en un punto de recogida para el
von elektrischen und elektronischen Haushaltsgeräten abgegeben
reciclaje de aparatos eléctricos y electrónicos. Este símbolo en el aparato,
werden. Das Symbol auf dem Gerät, in der Bedienungsanleitung und auf
manual de instrucciones y embalaje quiere atraer su atención sobre esta
der Verpackung macht Sie auf dieses wichtige Thema aufmerksam. Die in
importante cuestión. Los materiales utilizados en este aparato se pueden
diesem Gerät verwendeten Materialien können recycelt werden. Durch
reciclar. Mediante el reciclaje de electrodomésticos, usted contribuye a
das Recyceln gebrauchter Haushaltsgeräte leisten Sie einen wichtigen
fomentar la protección del medioambiente. Solicite más información sobre
Beitrag zum Umweltschutz. Fragen Sie Ihre örtliche Behörde nach
los puntos de recogida a las autoridades locales.
Informationen über eine Sammelstelle.
Soporte
Support
¡Puede encontrar toda la información y recambios en service.tristar.eu!
Sämtliche Informationen und Ersatzteile finden Sie unter service.tristar.eu!
PT Manual de Instruções
ES Manual de instrucciones
SEGURANÇA
SEGURIDAD
•
Se não seguir as instruções de segurança, o fabricante não pode ser
•
Si ignora las instrucciones de seguridad, eximirá al fabricante de toda
considerado responsável pelo danos.
responsabilidad por posibles daños.
•
Se o cabo de alimentação estiver danificado, deve ser substituído
•
Si el cable de alimentación está dañado, corresponde al fabricante, al
pelo fabricante, o seu representante de assistência técnica ou alguém
representante o a una persona de cualificación similar su reemplazo
com qualificações semelhantes para evitar perigos.
para evitar peligros.
•
Nunca desloque o aparelho puxando pelo cabo e certifiquese de que
•
Nunca mueva el aparato tirando del cable y asegúrese de que no se
este nunca fica preso.
pueda enredar con el cable.
•
O aparelho deve ser colocado numa superfície plana e estável.
•
El aparato debe colocarse sobre una superficie estable y nivelada.
•
Para se proteger contra choques eléctricos, não mergulhe o cabo, a
•
Para protegerse contra una descarga eléctrica, no sumerja el cable,
ficha nem o aparelho em água ou qualquer outro líquido.
el enchufe ni el aparato en el agua o cualquier otro líquido.
DESCRIÇÃO DAS PEÇAS
•
SIGNO DE EXCLAMACION dentro de un triángulo equilátero, se
1. Ligar/Desligar Projecção
utiliza para indicar que un componente específico debe sustituirse
2. Retroceder/Mês Dia/Hora de Verão
únicamente por el componente indicado en la documentación por
razones de seguridad.
3. Alarme 1
4. Diminuição de volume
•
SÍMBOLO DEL RAYO CON UNA FLECHA dentro de un triángulo
5. Aumento de volume
equilátero, indica al usuario que la caja del sistema puede contener
6. Suspensão/Dormir/Regulação da Intensidade da Luz
una tensión sin aislar de magnitud suficiente para constituir un riesgo
7. Volta de 180° da projecção/temperatura da projecção
de descarga eléctrica.
8. Avançar/°C°F/ano
•
El enchufe de red se utiliza para desconectar el dispositivo y debe
9. Alarme 2
poder accionarse fácilmente. Para desconectar completamente la
10. Def. mem/Memória+
entrada de alimentación, el enchufe de red del aparato debe
11. Ligar/Desligar
desconectarse de la red eléctrica. El enchufe de red no deberá
obstruirse o deberá permanecer fácilmente accesible durante el uso
ANTES DA PRIMEIRA UTILIZAÇÃO
previsto.
•
Ligue o cabo de alimentação de CA a uma tomada de CA doméstica.
Esta unidade está equipada com um sistema de pilha de reserva,
DESCRIPCIÓN DE LOS COMPONENTES
requer uma pilha de lítio plana CR2032 de 3V (não incluída). Coloque
1. Encendido/apagado de proyección
a pilha no compartimento da pilha, certificandose de que os terminais
2. Retroceso/ Mes día/ DST
positivo e negativo (+ e ) da pilha estão ligados aos terminais
3. Alarma 1
correspondentes da placa existente no compartimento da pilha. Se
4. Bajar volumen
ocorrer uma falha de corrente CA, o relógio muda automaticamente
5. Subir volumen
para a alimentação por pilha e a memória do relógio e do cronómetro
6. Repetición de alarma/ reposo/ atenuación
continuarão a funcionar. Assim que a corrente CA seja reposta, o
7. Giro de 180° de proyección/ temperatura de proyección
relógio muda novamente para CA.
8. Avance/ °C°F/ año
9. Alarma 2
UTILIZAÇÃO
10. Aj. mem./ Memoria+
Hora e calendário
11. Encender/ apagar
•
Prima e mantenha o botão "SET/MEM/M+" premido no modo de
espera para aceder ao modo de definição da hora, utilize os botões
ANTES DEL PRIMER USO
de sintonização para ajustar as definições. Prima o botão "SET/MEM/
•
Enchufe el cable eléctrico de CA a una toma doméstica de CA. Esta
M+" para percorrer os modos como se segue: Ano → Data →
unidad está equipada con un sistema de respaldo con pila. Es
Formato de 12/24 H → Hora em tempo real → Minutos em tempo
necesaria una pila de litio plana CR2032 de 3V (no incluida).
real.
Introduzca la pila en el compartimento de la pila, asegurándose de
Definição do alarme
que los terminales positivo y negativo (+ y ) de la pila coincidan con
•
Prima o botão "alarme 1/2" no modo de espera para mostrar a hora
los terminales correspondientes en la placa del compartimento de la
de activação do alarme. Prima, prima novamente e mantenha
batería. Si se produce un fallo de alimentación de CA, el reloj cambia
premido (enquanto a hora do alarme ainda estiver a ser apresentada)
automáticamente al suministro de la pila. El reloj y la memoria del
para entrar no modo de definição do alarme. Utilize os botões de
temporizador siguen funcionando. Cuando se reanuda la alimentación
sintonização para ajustar as definições, prima o botão de definição do
de CA, el reloj cambia de nuevo a CA.

Verwandte Anleitungen für Audiosonic CL-1491


Inhaltszusammenfassung für Audiosonic CL-1491
- Seite 1 C l o c k r a d i o afstemknoppen om de instellingen te wijzigen. Druk op de bip ou l'alarme radio cesse et retentit à nouveau après 9 minutes. RadiostationsVoreinstellung (P01P10) zu wählen. Drücken Sie Ajustar y recordar las presintonías de radio alarminstelknop om de moduscyclus als volgt te wijzigen: Uur → Min. BEFORE THE FIRST USE Arrêter l’alarme erneut auf die Taste "memory", um die RadiostationsVoreinstellung • Apriete y mantenga el botón "memory"; “P01” parpadeará en el visor. • Plug the AC power cord to a household outlet AC source. This unit is → Weekdag alarm → Wekkertoon → Wekkerradiovolume. • Appuyez sur le bouton "on/ off" pour arrêter complètement l'alarme. einzustellen. Utilice el botón "tune / +" para seleccionar la emisora presintonizada CL-1491 Projection - jumbo display • Verschillende weekdagmodi: equipped with a battery back up system, it requires a 3V CR2032 flat Mode radio • Um die RadiostationsVoreinstellungen wieder aufzurufen, drücken deseada (P01P10). Apriete el botón "memory" de nuevo para ajustar – 15: Maandag t/m vrijdag lithium battery (not included). Insert the battery in the battery Remarque : assurezvous que l'antenne FM est complètement déroulée et Sie wiederholt auf die Taste "memory", um die la presintonía. compartment, making certain that the positive and negative (+ and ) – 17: Gehele week déployée pour optimiser la réception FM.
- Seite 2 SK Používateľská príručka alarme para confirmar e percorra os modos como se segue: Horas → • W trakcie, gdy alarm emituje sygnał dźwiękowy nacisnąć przycisk • Tenere premuto il pulsante "Memoria"; sul display lampeggia il GARANTI Minutos → Alarme para dia da semana → som do despertar → „drzemka”, aby go wstrzymać i aktywować funkcję drzemki; sygnał messaggio "P01". Utilizzare il pulsante "sintonia + / " per selezionare • Denna produkt har en garanti på 24 månader. Din garanti är giltig om BEZPEČNOSŤ volume do rádio para despertar. dźwiękowy lub alarm radiowy przestanie być emitowany — ponowne la stazione radio preconfigurata (P01P10). Premere nuovamente il produkten används i enlighet med instruktionerna och för det ändamål • Diferentes modos de dia da semana: uruchomienie nastąpi po 9 minutach. pulsante "Memoria" per impostare la configurazione. som den tillverkades. Dessutom skall ursprungsköpet (faktura, • V prípade ignorovania týchto bezpečnostných pokynov sa výrobca – 15: Segunda a sexta Wyłączanie alarmu • Per richiamare le stazioni preconfigurate, premere ripetutamente il kassakvitto eller kvitto) vidimeras med inköpsdatum, återförsäljarens vzdáva akejkoľvek zodpovednosti za vzniknutú škodu. • Ak je napájací kábel poškodený, musí ho vymeniť výrobca, jeho – 17: Toda a semana • Nacisnąć przycisk „wł./wył”, aby całkowicie wyłączyć alarm. pulsante "Memoria" e selezionare il numero corrispondente. namn och artikelnummer på produkten. – 67: Sábado e domingo Tryb radia Controllo dimmer...