Inhaltsverzeichnis
Werbung
Quicklinks
Looking for more information?
Visit us on the web at http://www.artisan-scientific.com for more information:
• Price Quotations •
Drivers·
Technical Specifications. Manuals and Documentation
Artisan Scientific is
You~
Source for: Quality New and Certified-Used/Pre:-awned ECJuiflment
• Tens of Thousands of In-Stock Items
• Hundreds of Manufacturers Supported
• Fast Shipping and DelIve1y
• Leasing / Monthly Rentals
• Equipment Demos
• Consignment
Service Center Repairs
Experienced Engineers and Technicians on staff in our
State-of-the-art Full-Service In-House Service Center Facility
InstraView Remote Inspection
Remotely inspect equipment before purchasing with our
Innovative InstraView-website at http://www.instraview.com
We bUy used equipment! We also offer credit for Buy-Backs and Trade-Ins
Sell your excess. underutilized. and idle used equipment. Contact one of our Customer Service Representatives todayl
Talk to a live person: 88EM38-S0URCE fB88-887-68721 I Contact us
by
email:
sales@artisan-scientific.com
I Visit our website: http://www.artisan-scientific.com
Werbung
Inhaltsverzeichnis

Verwandte Anleitungen für BrandTech Transferpette-8


Inhaltszusammenfassung für BrandTech Transferpette-8
- Seite 2 BrandTech Scientific, Inc. · 11 Bokum Road · Essex, CT 06426-1506 · USA Phone: (860) 767-2562 · Fax: (860) 767-2563 · Internet: www.brandtech.com Artisan Scientific - Quality Instrumentation ... Guaranteed | (888) 88-SOURCE | www.artisan-scientific.com...
-
Seite 3: Inhaltsverzeichnis
Inhalt Contents Seite Page Sicherheitsbestimmungen Safety Instructions Verwendungszweck Purpose Einsatzbeschränkungen Operating Limitations Bedienelemente Operating Elements Handhabung Handling Pipettieren Pipetting Wartung Maintenance Justieren Adjustment Volumen kontrollieren Checking the volume Einzelteile Components Reinigung Cleaning Reparaturen Repairs Autoklavieren Autoclaving Störung – was tun? Trouble Shooting Technische Daten Specifi... -
Seite 4: Sicherheitsbestimmungen
- 4 - Vor Benutzung sorgfältig lesen! Read carefully before use! Sicherheitsbestimmungen Safety Instructions 1. Allgemeine Gefahrenhinweise und Sicherheitsvor- 1. Observe general hazard prevention instructions and schriften befolgen, z. B. Schutzkleidung, Augen- safety regulations; e.g., wear protective clothing, schutz und Schutzhandschuhe tragen. eye protection and gloves. -
Seite 5: Einsatzbeschränkungen
Einsatzbeschränkungen Operating Limitations Der Anwender muss die Eignung des Geräts für The user has to ensure the compatibility of the den Verwendungszweck selbst überprüfen. instrument with the intended application. Das Gerät kann nicht eingesetzt werden: This instrument cannot be used: - für Flüssigkeiten, die Polypropylen angreifen - for liquids incompatible with polypropylene - für Flüssigkeiten mit sehr hohem Dampfdruck... -
Seite 6: Bedienelemente
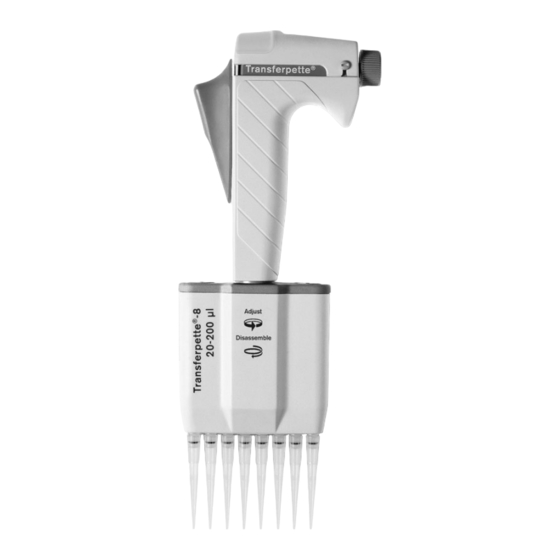
- 6 - Bedienelemente Operating Elements Pipettierknopf Pipetting key Abwerferhaube Ejector cap Volumeneinstellknopf Volume setting knob Griffteil Handle Pipettiereinheit Manifold Handhabung Handling Richtige Spitzen benutzen Use proper pipette tips Einwandfreie Ergebnisse sind nur bei Verwendung von Pipette performance can only be guaranteed if high- Qualitäts-Pipettenspitzen zu erreichen. -
Seite 7: Einstellen Der Pipettiereinheit
Einstellen der Pipettiereinheit Adjusting the manifold Die Pipettiereinheit lässt sich gegen den Uhr zei - The manifold can be rotated counterclockwise to ger sinn drehen, bis die Stellung zum Pipettieren am the most convenient pipetting position. be quem sten ist. Gegen den Uhrzeigersinn: Counterclockwise rotation Einstellung für bequemes Dosieren... -
Seite 8: Pipettieren
- 8 - Pipettieren Pipetting Probe aufnehmen Aspirating the sample Spitzen einmal mit der Probenfl üssigkeit Rinse the tips once with the sample liquid vorspülen („normale“ Pipettiergeschwin- (at normal pipetting speed). digkeit!). 1. Seitlichen Pipettierknopf bis zum ersten 1. Press the lateral pipetting key to the Anschlag (A) drücken. -
Seite 9: Probe Ausstoßen
Probe ausstoßen Discharging the sample Pipettenspitzen leicht an Gefäßwand Lightly place the pipette tips against the anlegen. wall of the vessel. – Pipettierknopf mit gleichmäßiger – Press the pipetting key down to the Geschwindigkeit bis Anschlag (A) stop (A) and hold it down. drücken und festhalten. - Seite 10 - 10 - Spitzen abwerfen (A) Ejecting the tips (A) Die Abwerferhaube im Bereich des Farb- Press the ejector cap down fi rmly in the codes kräftig niederdrücken (siehe Pfeil). region of the color code (see arrow). Festsitzende Spitzen einzeln mit Tips that are jammed on too tightly may der Hand ab zie hen.
-
Seite 11: Wartung
Wartung Maintenance Dichtigkeit kontrollieren Check for tightness In regelmäßigen Abständen die Dichtheit At regular intervals, check the pipetting ® ® des Pipettiersystems Transferpette system – consisting of Transferpette -12 und Pipettenspitzen prüfen. -12 and pipette tips – for tightness. Nach dem Aufsaugen der Probe: After drawing in the sample: Gerät ca. -
Seite 12: Justieren
- 12 - Justieren Adjustment Das Gerät ist permanentjustiert für The instrument is permanently adjusted wässrige Lösungen. Auf Lösungen for aqueous solutions. It can be adjusted unterschiedlicher Dichte und Viskosität for solutions of other density and kann das Gerät eingestellt werden. viscosity. -
Seite 13: Volumen Kontrollieren
6. Den zuvor gemessenen Istwert 6. Set to the previously measured actual einstellen. Volumeneinstellknopf value. Push back volume setting ca. 2 mm (ohne zu drehen) bis zum knob to the stop (approx. 2 mm), Anschlag einschieben. without turning it. 7. Distanzscheibe wieder über die 7. - Seite 14 - 14 - Volumen kontrollieren Checking the volume – Fortsetzung – – continued – Nennvolumen einstellen. Adjust volume to nominal capacity. Pipette konditionieren: Conditioning the pipette: Pipette vor der Prüfung konditionieren, indem mit To condition the pipette before testing, mount new neuen Pipettenspitzen fünfmal mit Prüffl...
-
Seite 15: Berechnung Von Richtigkeit (R%) Und Variationskoeffi Zient (Vk%)
Berechnung von Richtigkeit (R%) Calculation of accuracy (A%) und Variationskoeffi zient (VK%): and coeffi cient of variation (CV%): Richtigkeit (R%) und Variationskoeffi zient (VK%) Accuracy (A%) and coeffi cient (CV%) are calculated werden nach den Formeln der statistischen Qualitäts- according to the equations used in statistical quality kontrolle berechnet. -
Seite 16: Einzelteile
- 16 - Einzelteile Components Griffteil Handle Pipettiereinheit Manifold Pipettiergehäuse Manifold housing Schafteinheit Nose cone assembly Einzelschaft Individual nose cone Hubfeder Piston spring Kolben Piston Kolbenlagerbalken Piston support bar Pipettiergehäuse- Manifold housing Abdeckung cover Dichtung Seal Montageschlüssel Mounting tool Zentrale Füh rungs ach se Central guide rod Artisan Scientific - Quality Instrumentation ... -
Seite 17: Reinigung
Reinigung Cleaning ® Hinweis: Je nach Anwendungshäufi gkeit und der Note: The Transferpette -8/-12 requires regular pipettierten Medien ist die Transferpette ® -8/-12 maintenance, depending on frequency of use and regelmäßig zu warten. pipetted media. Gerät zerlegen Dismantling the instrument Hinweis: Über einer Schale arbeiten, um herausfal- Note: Work over a tray to collect any part that may fall lende Teile aufzufangen. -
Seite 18: Teile Reinigen
- 18 - Teile reinigen Cleaning the components - Einzelschäfte (➄), Kolben (➆), Kolbenlagerbalken (➇) - Clean single nose cones (➄), pistons (➆), piston sup- und Hubfedern (➅) (nur diese Teile) mit ge eig ne tem port bar (➇) and piston springs (➅) (these compo- Reinigungsmittel reinigen (z. -
Seite 19: Nach Dem Reinigen
- Kleinstes Volumen einstellen. - Set volume to minimum. - Dichtungen mit der fl achen Seite nach oben (Richtung - Push the seals on the pistons with the fl at side facing Griffteil) auf die Kolben schieben (➤ Abb. 4, Seite upward (direction of the handle) (➤... -
Seite 20: Reparaturen
- 20 - Reparaturen Repairs ➤ „Zubehör und Ersatzteile“, ➤ “Accessories and spare parts”, Seite 33-35. pages 33-35. Auswechseln von Ein zel - Replacing of single nose schäf ten und Dich tun gen cones and seals Entfernen eines Einzelschaftes Removing a single nose cone - Nennvolumen einstellen. - Seite 21 Hinweis: Note: Die Dichtung verbleibt entweder im The seal will either remain inside the Einzelschaft oder befi ndet sich nach nose cone, or will stay on the piston dem Entfernen des Schaftes auf dem after the nose cone is removed. Kolben und kann dann nach Be tä...
-
Seite 22: Auswechseln Der Hubfedern
- 22 - Auswechseln der Hubfedern Replacing the piston springs - Pipettiereinheit zerlegen (➤ Seite 17). - Disassemble the manifold (➤ page 17). - Neue Hubfedern (➅) einsetzen. - Insert new piston springs (➅). - Pipettiereinheit wieder zusammenbauen. - Reassemble the manifold. Auswechseln der Kolben Replacing the pistons - Pipettiereinheit vom Griffteil abschrauben. - Seite 23 - Push the mounting tool ( ) on a - Montageschlüssel ( ) auf Kol ben (➆) piston (➆). aufstecken. - Turn counterclockwise to loosen and - Durch Drehen gegen den Uhrzei- remove the piston (➆) along with the gersinn einzelnen Kolben (➆) (inkl. spring ( ).
-
Seite 24: Auswechseln Der V-Ringe (O-Ring) Am Schaft
- 24 - Auswechseln der V-Ringe Replacement of nose cone (O-Ring) am Schaft V-rings (O-rings) Benötigtes Material: Required materials: 1 V-Ring Demontagehilfe 1 V-Ring removal tool (square) 1 V-Ring Montagehilfe* 1 V-Ring mounting tool (cone shaped)* Ersatz-V-Ringe (O-Ringe) Replacement V-rings (O-rings) * Die Montagehilfe wird nur für Gerätegröße 2,5-25 µl, * The mounting tool is only necessary for replacing the V-rings 5-50 µl,10-100 µl, 20-200 µl und 30-300 µl benötigt. -
Seite 25: To Remove An Old V-Ring (O-Ring)
Alten V-Ring (O-Ring) To remove an old V-ring entfernen: (O-ring): 1. Demontagehilfe unter dem Schaft 1. Position the square removal tool positionieren. under one of the nose cones. 2. Demontagehilfe so weit wie möglich 2. Move the tool up against the nose as nach oben gegen den Schaft drü- far as possible to push the V-ring (O- cken, um den V-Ring (O-Ring) aus... -
Seite 26: Neuen V-Ring (O-Ring) Montieren
- 26 - Neuen V-Ring (O-Ring) Mounting a new V-ring montieren: (O-ring): 4. Nur für Gerätegröße 2,5-25 µl, 4. Only for instruments of size 2.5- 5-50 µl,10-100 µl, 20-200 µl und 25 µl, 5-50 µl, 10-100 µl, 20- 30-300 µl: Montagehilfe auf den 200 µl and 30-300 µl: Slide the Schaft stecken. -
Seite 27: Nach Jedem Wechsel Der Kompletten Pipettiereinheit
6. Montagehilfe entfernen. Korrekten 6. Remove the mounting tool. Check Sitz des V-Rings (O-Ring) überprüfen. correct seat of the V-ring (O-ring). If Falls dieser verdreht ist, V-Ring (O- twisted, turn it several times around Ring) einige Male in der Nut drehen, the nose cone to restore the V-ring bis korrekter Sitz gegeben ist. -
Seite 28: Autoklavieren
- 28 - Autoklavieren Autoclaving Achtung: Attention: Nur die Pipettiereinheit darf autoklaviert werden! Only the manifold may be autoclaved. Eject the tips Spitzen vorher abwerfen! Zur Desinfektion des Griff- before autoclaving! For disinfection the handle you teils können handelsübliche Desinfektionslösungen may use commercially available disinfecting solutions verwendet werden, soweit sie PP nicht angreifen. -
Seite 29: Störung - Was Tun
Störung – was tun? Störung Mögliche Ursachen Was tun? Pipettenspitze tropft - Spitze sitzt nicht fest - Spitze fest aufdrücken. oder Volumen zu klein Nur geeignete Qualitätsspitzen verwenden, Seite 6. - V-Ring (O-Ring) am Einzelschaft - V-Ring (O-Ring) am Schaft aus- beschädigt wechseln. - Seite 30 - 30 - Trouble Shooting Problem Possible Cause Corrective Action Pipette tip leaks or - Tip does not sit properly - Press tip on fi rmly. Use only suitable volume too low high-quality tips, page 6. - Damaged V-ring (O-ring) on single - Replace V-ring (O-ring) on nose cones.
-
Seite 31: Technische Daten/Specifi Cations
Technische Daten/Specifi cations 20 ° C Die in der ISO 8655 festgelegten Fehlergrenzen werden nicht überschritten. The error limits of ISO 8655 are not exceeded. Volumen Farbcode Richtigkeit (R%)* Variationskoeffi zient (VK%)* Volume Color code Accuracy (A%)* Coeffi cient of variation (CV%)* 8- / 12-Kanal 8- / 12-channel ≤... -
Seite 32: Bestelldaten
- 32 - Bestelldaten Ordering Data ® ® ® ® µl Transferpette Transferpette µl Transferpette Transferpette Best.-Nr. Best.-Nr. Cat. No. Cat. No. 0,5 - 10 27036 00 27036 20 0.5 - 10 27036 00 27036 20 - 20 27036 02 27036 22 - 20 27036 02... - Seite 33 Einzelschäfte (2 Stk., inkl. Dichtungen und Montageschlüssel) Individual nose cone (2 pieces, incl. seals and mounting tool) Für Volumen, µl Best.-Nr. For capacity, µl Cat. No. 0,5 - 7033 31 0.5 - 7033 31 7033 32 7033 32 2,5 - 7033 33 2.5 - 7033 33...
- Seite 34 - 34 - V-Ringe (24 Stück), inkl. Demontage- und Montagehilfe V-Rings (Set of 24), incl. removing and mounting device (für 10 µl und 20 µl ohne Montagehilfe) (except 10 µl and 20 µl capacity: no mounting tool needed) Für Volumen, µl Best.-Nr.
- Seite 35 Die ausführliche Prüfanweisung steht unter The detailed testing instruction can be downloaded www.brandtech.com zum Download bereit. from www.brandtech.com. Artisan Scientific - Quality Instrumentation ... Guaranteed | (888) 88-SOURCE | www.artisan-scientific.com - 35 -...
-
Seite 36: Zur Reparatur Einsenden
➤ Bitte klären Sie mit BrandTech Scientifi c, Inc. die ➤ Therefore, contact BrandTech Scientifi c, Inc. and Rücksendungs-Voraussetzungen bevor Sie das obtain return authorization before sending your Gerät zum Service einschicken. -
Seite 37: Mängelhaftung
Mängelhaftung Warranty Wir haften nicht für Folgen unsachgemäßer Behand- We shall not be liable for the consequences of improper lung, Verwendung, Wartung, Bedienung oder nicht handling, use, servicing or unauthorized repairs of the autorisierter Reparatur des Gerätes oder für Folgen nor- instrument or the consequences of normal wear and maler Abnutzung, insbesondere von Verschleißteilen wie tear especially of wearing parts such as pistons, seals,...