Dietz 66030 Bedienungsanleitung
Can bus interface

Verwandte Anleitungen für Dietz 66030


Inhaltszusammenfassung für Dietz 66030
- Seite 1 CAN BUS Interface Bedienungsanleitung Instruction manual 66030 Vertriebs-GmbH ● Maybachstr. 10 ● 67269 Grünstadt ● info@dietz.biz ● ® Audiotechnik Dietz www.dietz.biz ® Vertriebs-GmbH ● Germany Copyright © by Audiotechnik Dietz Rev 23, Stand: 05 / 2015...
-
Seite 2: Inhaltsverzeichnis
References of legal regulations for operation ............................15 General advice ......................................15 General safety instructions ..................................16 Important notes ....................................... 17 Operating mode 66030 .................................... 17 Assignment of the wires with loose ends (Interface) ..........................17 Installation ....................................... 18 Self recognition and functions .................................. 19 Additional functions setting .................................. -
Seite 3: Lieferumfang
Garantieanspruch. Allgemeine Hinweise Sehr verehrter Kunde, vielen Dank, dass Sie sich für ein Produkt der Firma Audiotechnik Dietz entschieden haben. Sie haben eine hervorragende Wahl getroffen. Bei der Entwicklung des Produktes wurde besonders auf Ihre persönliche Sicherheit, kombiniert mit bestmöglichstem Bedienungskomfort, modernem Design und aktuelle Produktionstechniken geachtet. -
Seite 4: Allgemeine Sicherheitshinweise
Verletzung des Auges führen kann. Achtung ! Legen Sie keine Magnete oder magnetische Werkzeuge auf die Artikel. Dies kann zur Beschädigung des Artikels oder Datenverlust führen. ® Vertriebs-GmbH ● Germany Copyright © by Audiotechnik Dietz Rev23 Stand: 05 / 2015... -
Seite 5: Wichtige Hinweise
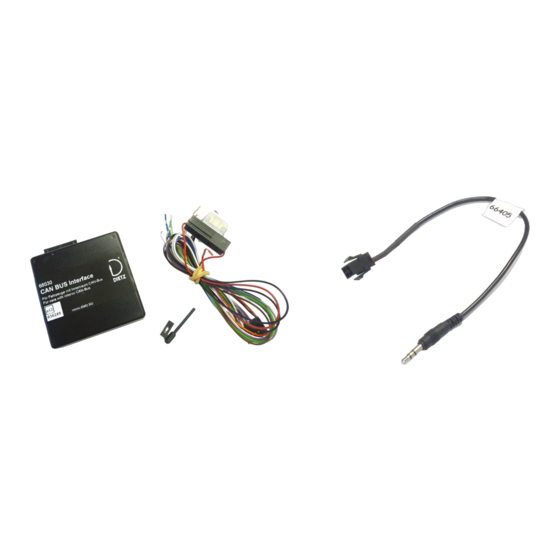
Die Lenkradfernbedienung wird nur adaptiert, wenn diese im Originalzustand des Fahrzeugs vorhanden ist und über den CAN Datenbus mit dem Original Radio kommuniziert. Kompatible Geräte zur Adaption der Lenkradfernbedienung mit 66030 über Radiospezifischen Adapter: ( ! Dieser ist zusätzlich zu bestellen und liegt nicht dem Interface bei ! ) 66401: ALPINE 66403: CLARION –... -
Seite 6: Kabelbelegung (Interface)
Masse für Piezo für PDC-Reaktivierung Achtung: Bei PDC Tonaktivierung, z.B. bei BMW, benutzen Sie für den Anschluss des Piezo-Summers (optionale Dietz Art. Nr. 66429) folgende Kabel: Masse (Piezo/schwarz) an gelb/weiß vom Interface; Plus (Piezo rot) an pink (Zündung) vom Interface Installation Es ist Wichtig, dass der Jumper JP1 in der richtigen Position für ALPINE und SONY... -
Seite 7: Selbstständiges Anlernen Und Funktionen
Interface nicht richtig angeschlossen, z.B. können die Leitungen „Can High“ und „Can Low“ vertauscht sein. Nun können sie, wie in der Tabelle beschrieben, die gewünschte Radiomarke wieder einstellen. ® Vertriebs-GmbH ● Germany Copyright © by Audiotechnik Dietz Rev 20, Stand: 01 / 2015... -
Seite 8: Zusätzliche Funktionseinstellungen
Deutsch Zusätzliche Funktionseinstellungen Das Interface 66030 bietet die Möglichkeit verschiedene Einstellungen spezifisch zu ändern. Voraussetzung zum Ändern dieser Einstellungen ist, dass das Interface korrekt mit dem CAN Datenbus verbunden ist, d.h. die grüne LED leuchtet. Start der Programmierung: Sobald die grüne LED leuchtet muss 3-mal der versenkte Taster gedrückt werden. - Seite 9 IGNITION OUPUT FOR THE DURATION OF IGNITION ALFA MITO 20 MINUTES, CONNECTING AND DISCONNECTING THE BOARD WITHIN 3 SECOND AMPLI WAKE UP OFF AMPLI WAKE UP ON AMPLI FORD F150 ® Vertriebs-GmbH ● Germany Copyright © by Audiotechnik Dietz Rev 20, Stand: 01 / 2015...
-
Seite 10: Psa Einstellungsmenü
Deutsch Das Interface 66030 erlaubt es bei Fahrzeugen CITROËN, PEUGEOT und OPEL die Systemeinstellungen für Uhrzeit, Datum, Sprache und Allgemeine Einstellungen zu ändern auch wenn das originale Radio ausgebaut ist. PSA Einstellungsmenü Das Einstellungsmenü ist zeitlich begrenzt. Änderungen müssen innerhalb von 30 Sekunden vorgenommen werden, da sonst das Interface in den normalen Modus zurück... - Seite 11 Einstellungsmenü automatisch beendet. Um erneut in das Einstellungsmenü zu wechseln reicht es aus die Taste VOLUME + zu drücken. Um die Einstellungen zu beenden muss die Zündung ausgeschaltet und der Zündschlüssel gezogen werden. ® Vertriebs-GmbH ● Germany Copyright © by Audiotechnik Dietz Rev 20, Stand: 01 / 2015...
-
Seite 12: Opel Einstellungsmenü
Um die Minuten einstellen zu können muss die Taste ◄► gedrückt werden. Der Cursor wechselt dann von der Stunden zu der Minuten Anzeige. Die Minuten können mit den Tasten SEEK+ bzw. SEEK- geändert werden. ® Vertriebs-GmbH ● Germany Copyright © by Audiotechnik Dietz Rev23 Stand: 05 / 2015... - Seite 13 Wenn alle Einstellungen vorgenommen wurden wechselt das Einstellungsmenü automatisch in den normalen Modus zurück. Danach muss zum Abschluss die Zündung ausgeschaltet und der Zündschlüssel abgezogen werden. ® Vertriebs-GmbH ● Germany Copyright © by Audiotechnik Dietz Rev 20, Stand: 01 / 2015...
-
Seite 14: Wartungshinweise
0,068 kg Abmessungen: 70 x 70 x 30 mm Das Gerät ist für den automotiven Bereich gedacht und hat daher eine Lebensdauer von maximal 10 Jahren. ® Vertriebs-GmbH ● Germany Copyright © by Audiotechnik Dietz Rev23 Stand: 05 / 2015... -
Seite 26: Geschwindigkeitssignal Bei Vw Fahrzeugen Manuell Einstellen
If the speed signal does not protocol press and keep the work after this setting repeat button pressed till the LED this procedure so the LED light green. blink 50 times. ® Vertriebs-GmbH ● Germany Copyright © by Audiotechnik Dietz Rev23 Stand: 05 / 2015... -
Seite 27: Can Bus Anschluß / Can Bus Connection / Collegamenti Can Bus / Connexions Can Bus
!!! ACHTUNG BEI DODGE NITRO KÖNNEN DIE CAN BUS LEITUNGEN AUCH VERTAUSCHT IM FAHRZEUG VORKOMMEN !!! !!! ATTENSION IN DODGE NITRO THE CAN BUS WIRES COULD BE SWAPPED IN THE VEHICLE !!! ® Vertriebs-GmbH ● Germany Copyright © by Audiotechnik Dietz Rev 20, Stand: 01 / 2015... - Seite 28 Vertriebs-GmbH ● Germany ® Copyright © by Audiotechnik Dietz Rev23 Stand: 05 / 2015...
- Seite 29 English ® Audiotechnik Dietz Vertriebs-GmbH Maybachstr. 10 D-67269 Grünstadt Germany info@dietz.biz www.dietz.biz ® Vertriebs-GmbH ● Germany Copyright © by Audiotechnik Dietz Rev 20, Stand: 01 / 2015...