Alphacool NexXxoS XP3 Light Handbuch
Vorschau ausblenden
Andere Handbücher für NexXxoS XP3 Light:
- Anleitung (49 Seiten) ,
- Anleitung (2 Seiten) ,
- Bedienungsanleitung (52 Seiten)
Quicklinks
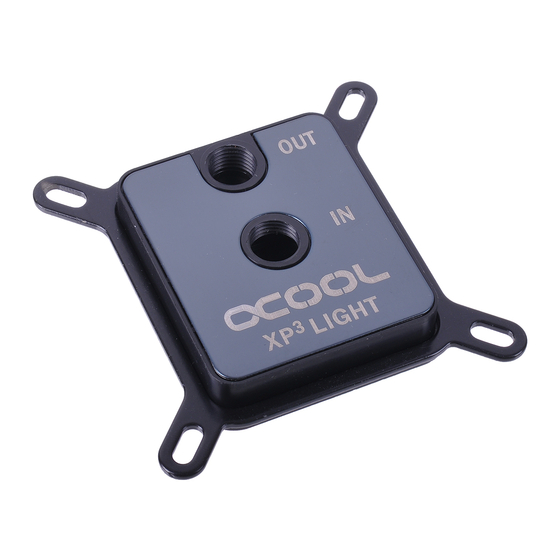
Attaching hoses
Attaching hoses
4.
- Verschlauchen - Installation tuyaux
- Verschlauchen - Installation tuyaux
• Start with attaching the hoses to the cooler
• Beginnen Sie mit der Verschlauchung des
(materials not included).
Kühlers (Material nicht im Lieferumfang
Screw in hose connectors
enthalten)
Slide on hoses
Attach caps
Safety Notice
Sicherheitshinweise
Please ensure your hardware and cooler
Überzeugen Sie sich bitte von der Funktion
system is functioning correctly (leak tight-
Ihrer Hardware sowie des Kühlsystems
ness, pump function and fans). This minimi-
(Dichtheit, Pumpenfunktion und Lüfter).
zes the effort required to find the source
Sie minimieren so den Aufwand bei der
of any possible problems. Alphacool does
Suche möglicher Fehlerquellen. Alphacool
not assume the manufacturer's warranty for
übernimmt
the electronic parts and components. Instal-
Herstellers der elektronischen Bauteile
ling the cooling system is at your own risk.
und
Kühlsystems erfolgt auf eigenes Risiko.
Alphacool International GmbH
Marienberger Str. 1
38122 Braunschweig
Head Offi ce:
+49 (0) 531 28874 - 0
Fax:
+49 (0) 531 28874 - 21
E-Mail:
info@alphacool.com
• Commencez l'installation des tuyaux du
refroidisseur (matériel non inclus)
Visser raccords
Schlauchanschlüsse eindrehen
Installer tuyaux
Schläuche aufschieben
Installer écrous
Kappen aufsetzen
Consignes de sécurité
Assurez le fonctionnement correct de vos
composantes et de votre système. (Étan-
chéité, pompe, ventilateurs)
minimisez les efforts dans la recherche
des erreurs possibles. Alphacool ne por-
nicht
die
Garantie
des
te pas de garantie sur des composantes
électroniques. L'installation du système de
Komponenten. Die
Montage
des
refroidissement est à votre propre risque.
General Manager:
Fabian Noelte
WEEE-Reg.-Nr.:
DE 54464644
Trade Register:
Amtsgericht Braunschweig
HRB 202390
VAT.ID.Nr.:
DE27058421
Tax number:
13/207/02047
Scope of delivery
Ainsi vous
CPU
Cooler
mounting
screws
Note the safety instructions
Preparing the hardware
1.
1. Removing the old cooler:
• Place the hardware onto anti-static mat
• Remove the original cooler
Remove screws and loosen bracket
Detach fan connection
2. Cleaning the hardware:
• Clean the rest of the thermal paste from the CPU
Use a cloth or cotton swab
Ethyl alcohol works well for cleaning
off dried thermal paste
3. Applying thermal paste:
• Apply pea-sized drops to the CPU
• Using a plastic strip or similar, spread a thin, even
layer (<0.5mm thickness)
NexXxoS XP³ Light
Lieferumfang
Intel
AMD
bracket
bracket
nuts
washers
knurled
springs thermal
hexagonal
grease
bolt
head screw
Beachten Sie die Sicherheitshinweise
- Vorbereitung der Hardware - Préparation des composants
1. Demontage des alten Kühlers:
1.Démontage refroidisseur
• Hardware auf antistatische Unterlage legen
• Poser composantes sur support antistatique
• Demontieren Sie den Original-Kühler
• Démontage refroidisseur originale
Schrauben entfernen und
Halterung lösen
Lüfter Anschluss abziehen
2. Nettoyage des composantes
2. Reinigen der Hardware:
• Enlevez les restes de pâte thermique du
• Entfernen Sie Reste der Wärmeleitpaste von der
processeur
der CPU
Nehmen Sie ein Tuch oder
Wattestäbchen zur Hilfe
3. Déployer pâte thermique
Spiritus eignet sich gut zum Entfernen
eingetrockneter Wärmeleitpaste
• Mettre noisette de pâte thermique sur
3. Auftragen der Wärmeleitpaste:
processeur
• Erbsengroßen Klecks auf CPU auftragen
• Etaler à l'aide d'une bande en plastique (couche
• Mit Hilfe eines Plastikstreifens oder Ähnlichem zu
einer gleichmäßigen, dünnen Schicht verteilen
(< 0,5mm Schichtdicke)
Contenue de livraison
Intel
backplate
rubber
pad
Suivez les les instructions de sécurité
Dévisser et retirer fixation
Déconnecter ventilateur
A l'aide d'un tissu ou coton-tige
Alcool ménagère est idéale pour la
nettoyage de pâte thermique sèche
uniforme de < 0,5mm)

Verwandte Anleitungen für Alphacool NexXxoS XP3 Light


Inhaltszusammenfassung für Alphacool NexXxoS XP3 Light
- Seite 1 Sie minimieren so den Aufwand bei der minimisez les efforts dans la recherche of any possible problems. Alphacool does Suche möglicher Fehlerquellen. Alphacool des erreurs possibles. Alphacool ne por- not assume the manufacturer’s warranty for übernimmt...
- Seite 2 Intel mounting AMD mounting - Montage Intel - Installation Intel - Montage AMD - Installation AMD Intel 771, 775 • Select the correct materials according to the diagram AM3+ 1150/51 • The included back plate is required for mounting 1155/56 •...