HP DesignJet T1700 Anleitung Zum Zusammenbau
Vorschau ausblenden
Andere Handbücher für DesignJet T1700:
- Benutzerhandbuch (193 Seiten) ,
- Einführende informationen (84 Seiten) ,
- Hinweise (20 Seiten)
Quicklinks
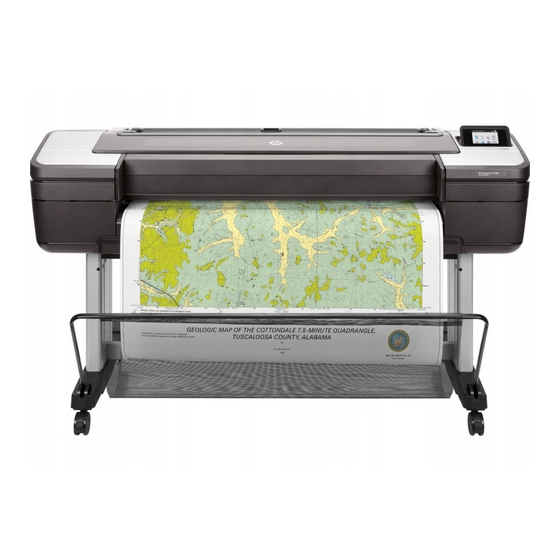
HP DesignJet T1700
Printer Series
Assembly instructions
EN
Instructions d'assemblage
FR
Anleitung zum Zusammenbau
DE
Istruzioni per l'installazione
IT
Instrucciones de montaje
ES
Instruções de montagem
PT
Instructies voor het opstellen
NL
تعليمات التجميع
AR
*W6B56-90004*
W6B56-90004
© Copyright 2017 HP Development Company, L.P.
Large Format Division
Camí de Can Graells 1-21 · 08174
Sant Cugat del Vallès
Barcelona · Spain
All rights reserved
Hardware Setup:
EN
1- Assemble the stand
2- Attach the printer body to the stand assembly
3- Set up the printer
4- Printhead and cartridge setup
5- Connectivity & Mobile Printing
Software setup:
Now, it's easy to print large-format documents from virtually anywhere,
using your laptop, printer touchscreen, iPhone®, or iPad®.
Install the product software from www.hp.com/go/T1700/drivers
Installation du matériel :
FR
1- Assemblage du support
2- Fixation de l'imprimante au support
3- Configuration de l'imprimante
4- Installation des têtes d'impression et des cartouches
5- Connectivité et impression mobile
Installation du logiciel :
Il est désormais facile d'imprimer des documents grand format depuis
quasiment n'importe où à l'aide d'un ordinateur portable, de l'écran tactile
de l'imprimante, d'un iPhone® ou d'un iPad®.
Installation du logiciel du produit à partir de www.hp.com/go/T1700/drivers
DE
Hardware-Setup:
1- Zusammenbauen des Standfußes
2- Aufsetzen des Druckers auf den
Standfuß
3-Einrichten des Druckers
4- Einrichten von Druckköpfen und Patronen
5- Verbindung und HP Mobile Printing
Software-Setup:
Das Drucken großformatiger Dokumente von nahezu jedem Standort aus
mit Ihrem Notebook, Drucker-Touchscreen,
iPhone® oder iPad® ist nun einfacher denn je.
Installieren Sie die Produktsoftware von: www.hp.com/go/T1700/drivers
IT
Installazione dell'hardware:
1- Assemblaggio del piedistallo
2- Fissare il corpo della
stampante al piedistallo
3-Installazione della stampante
4 - Installazione delle cartucce e delle testine di stampa
5- Connettività e soluzioni "mobili" per la stampa
Impostazione del software:
Ora è semplice stampare documenti di grande formato da praticamente
qualsiasi posizione utilizzando il laptop, lo schermo a sfioramento della
stampante, l'iPhone® o l'iPad®.
Installare il software del prodotto da: www.hp.com/go/T1700/drivers
1
Instalación del hardware:
ES
1- Montaje del soporte
2- Una la estructura de la impresora al conjunto del soporte
3-Con iguración de la impresora.
4- Instalación del cabezal de impresión y el cartucho
5-Conectividad e impresión desde dispositivos móviles
Instalación del software:
Ahora resulta muy fácil imprimir documentos de gran formato desde
prácticamente cualquier lugar mediante un portátil, la pantalla táctil de
la impresora, un iPhone® o un iPad®.
Instale el software del producto desde: www.hp.com/go/T1700/drivers
PT
Configuração de hardware:
1- Monte a base
2- Conecte a impressora à
montagem da base
3- Instalar a impressora
4 - Configuração de cartucho de tinta e cabeçotes de impressão
5- Conectividade e impressão móvel
Configuração de software:
Agora, é fácil imprimir documentos em grandes formatos de
praticamente qualquer lugar usando olaptop, a tela sensível ao toque
da impressora, o iPhone® ou o iPad®.
Instale o software do produto pelo site: www.hp.com/go/T1700/drivers
Installatie van de hardware:
NL
1- De voet in elkaar zetten
2- Bevestig het hoofdbestanddeel van de printer aan de gemonteerde
staander
3- De printer opstellen
4- Installatie van printkop en cartridge
5- Connectiviteit en mobiel afdrukken
Installatie van de software:
Nu kunt u eenvoudig documenten van groot formaat vanaf vrijwel elke
locatie af te drukken, met behulp van uw laptop,
uw printertouchscreen, iPhone® of iPad®.
Installeer de productsoftware via: www.hp.com/go/T1700/drivers
"2 - تثبيت جسم الطابعة بتجميع
4 - تعيين إعدادات الخرطوشة و ر أس الطباعة
5 - االتصال والطباعة باستخدام األجهزة المحمولة
أصبح اآلن من السهل طباعة المستندات ذات التنسيقات
الكبيرة أينما كنت باستخدام الكمبيوتر المحمول أو شاشة
اللمس الموجودة في الطابعة أو
:قم بتثبيت البرنامج الخاص بالمنتج من
www.hp.com/go/T1700/drivers
:إعداد الجهاز
AR
1 - تجميع الحامل
الحامل
3 - إعداد الطابعة
:إعداد البرنامج
أو
.
®iPhone
®iPad

Verwandte Anleitungen für HP DesignJet T1700


Inhaltszusammenfassung für HP DesignJet T1700
- Seite 1 Agora, é fácil imprimir documentos em grandes formatos de praticamente qualquer lugar usando olaptop, a tela sensível ao toque Installation du logiciel du produit à partir de www.hp.com/go/T1700/drivers da impressora, o iPhone® ou o iPad®. Instale o software do produto pelo site: www.hp.com/go/T1700/drivers Hardware-Setup: 1- Zusammenbauen des Standfußes...
- Seite 2 Remarque : Rouleau et câbles LAN non inclus. • Le temps requis pour l’assemblage de l’imprimante est d’environ 110 minutes. • Pour télécharger les pilotes d’imprimante, rendez-vous à l’adresse suivante : www.hp.com/go/T1700/drivers Lesen Sie diese Anleitungen sorgfältig durch. Dieses Dokument enthält Anleitungen für den Zusammenbau des Druckers.
- Seite 3 Assemble the stand Assemblage du support Zusammenbauen des Standfußes Assemblaggio del piedistallo Montaje del soporte Monte a base De voet in elkaar zetten تجميع الحامل 40’ Place the cross brace on the floor with the letters L and R Locate the stand pieces and remove the following: 1. Right Fix one foot to a leg with 8 screws.
- Seite 4 Slot the other leg onto the cross brace making sure that the Fix the leg to the cross brace with 3 screws at the inner Slot a leg onto the cross brace to install the leg with the long Fix the leg to the cross brace with 3 screws at the inner basket supports located on the feet (1 on each foot) are on the side of the foot as shown in the image.
- Seite 5 X2+2 Attach the outside of the leg to the cross brace with 2 Fully tighten all the stand’s screws. Fix the cross bar to the bottom of the legs with 4 screws Turn the stand upright. screws. Repeat the process with the other leg. At this point two spare screws should remain.
- Seite 6 Attach the printer body to the stand assembly Fixez l’imprimante à l’assemblage du support Anbringen des Druckers auf dem Ständer Fissare il corpo della stampante al gruppo del piedistallo Coloque el cuerpo de la impre- sora en el montaje del soporte Acople o corpo da impressora na montagem do suporte To finish the stand assembly check that the 4 wheels are...
- Seite 7 There is a round yellow button protruding from the top of Remove the tape from the transparent covering that Open the transparent covering and remove the desiccant Remove the small flaps from each of the foam end pieces. one stand leg, and a square green button protruding from protects the product.
- Seite 8 Locate the 4 black screws. Fix the printer to the stand from underneath with the 4 Check that the wheels on the stand are locked. Place the stand on the product slowly and carefully, so that black screws. the colored buttons on the legs fit into the corresponding holes in the product.
- Seite 9 Make sure there is nothing on the printer. Hold the product by the foam end pieces and rotate it until Remove the foam end pieces. Remove the transparent covering from the product. Rotate the product 90°. it stands on its feet, with all four wheels in contact with the IMPORTANT: While you rotate, keep the roll feeds face down- floor.
- Seite 10 Remove the tape from the stand, and unfold the fabric. Pass the fabric through to the front of the printer and then Clip the basket frame to the feet. Press firmly until it clicks Install the pocket at the back of the printer. insert the frame.
- Seite 11 Set up the printer Configuration de l’imprimante Einrichten des Druckers Installazione della stampante Configuración de la impresora Instalar a impressora De printer opstellen إعداد الطابعة 15’ Remove the orange tape pieces from the product, except Open the Window. You will see a cardboard support attached to the product for the ones coming from inside the product.
- Seite 12 90º 90º Carefully lift the cardboard support up and out of the Inside the right-hand side of the product, you will see a piece Remove the cardboard carefully. It will not be needed again Turn the cardboard support 90° to the right. product.
- Seite 13 7-15’ If you find a USB flash drive in a plastic bag inside the box, it Connect the power cable to the printer, and the outlet. Remove the orange tapes and unlock the wheels. Move the Connect the network cable. contains the latest Firmware.
- Seite 14 Installatie van printkop en car- On the front panel, the HP logo appears. Please wait a while. Remove the plastic film covering the window and the plastic When prompted by the front panel to insert the ink cartrid- You will then be prompted to select the language of the...
- Seite 15 10’ Insert the ink cartridges one-by-one (x6). Each cartridge is The cartridges must be inserted the right way around: the ink The printer now prepares the ink system for use. When the ink system is ready, the front panel will prompt marked with its own color, and should be inserted only into outlet in the catridge should meet the ink inlet in the slot.
- Seite 16 Open the window and pull the blue printhead cover handle Push the handle back to raise the lid to access the setup Look at each setup printhead to verify that it has ink inside. Remove and discard all the setup printheads. You may need The setup printheads only purpose is to prevent ink loss up and towards you to release the latch.
- Seite 17 Insert the printheads one by one. Push each printhead into When all of the setup printheads have been removed, press Unwrap each printhead and remove all orange parts. The printhead is designed to be inserted into any available slot. “Next”on the front panel. The front panel prompts you to Once the printhead is inserted into a slot it sets up to work only with the slot until it clicks into place.
- Seite 18 10’ Ensure that the end of the blue handle catches the wire loop Pull the handle down to close the cover. Close the top cover. The product checks and prepares the Once the printhead check has finished the product will be on the near side of the carriage.
- Seite 19 Add the removable stop to the spindle to keep the roll in From the front of the product, place the spindle into the If the blue removable stop is on the spindle, remove it. Load When the front panel prompts you to load paper for print- the roll onto the spindle as indicated in the image.
- Seite 20 Feed the leading edge of the paper into the product until the The front panel will display a series of messages showing HP DesignJet T1700dr only: Paper load on lower roll; Go The product will proceed to align the printheads. This process the progress of the printhead alignment.
- Seite 21 Open the roll cover. Remove the spindle. Load the roll onto the spindle. Follow the steps 64 and 65. From the back of the product, place the spindle into the Feed the leading edge of the paper into the product until the product takes hold of it.
- Seite 22 3- Con las soluciones de impresión móvil HP puede imprimir directamente desde su smartphone o tablet en tres 3-With HP Mobile Printing Solutions you can print straight from your smartphone or tablet in just a few simple steps pasos sencillos desde donde se encuentre; con el sistema operativo del dispositivo móvil o enviando un correo wherever you are;...
- Seite 23 البريد اإللكتروني الخاص بالطابعة للطباعة عبر البريد اإللكتروني وتجنب التجارب المتكررة مع التحقق من األخطاءHPGL/2 وTiff وJPEG وPDF بم ز ايا االكتشاف التلقائي للطابعات والتجهيز السريع لملفات www.hp.com/go/designjetclick : ومعاينة الطباعة في الوقت الفعلي. قم بالتنزيل منPDF في 23 23...
- Seite 24 - Per la stampa in Android, installare il componente aggiuntivo HP Print Service da Google Play. . لتعزيز قد ر ات الطباعة لديك من هاتف ذكي أو كمبيوتر لوحيHP Smart App -نك أيض ً ا تحميل تطبيق - È inoltre possibile scaricare l’app HP Smart App (iOS/Android) per ottimizzare le capacità di stampa da uno smartphone o http://www.hp.com/go/designjetmobility :لمزيد...
- Seite 25 If you are the printer administrator you can change the status to lock mode, customize your printer’s email address, or manage the printer security (you will need the printer code and an account at HP Connected.
- Seite 28 ويجب عدم اعتبار أي مما ورد في هذه الوثيقة على أنه بمثابة ضمان © Copyright 2017 HP Development Company, L.P. مسؤوليتها عن أية أخطاء فنية أو تحريرية أو أيةHP إضافي. تخلي شر كة .أخطاء ناتجة عن الحذف وردت في هذا المستند...