Werbung
Quicklinks
Somfy worldwide
Danmark
www.somfy.com
Tel: +45 65 32 57 93
Argentina: Somfy
Argentina
Export: Somfy Export
Smoove 1 IN io
Tel: +55 11 (0) 4737-3700
Tel: + 33 4 50 96 70 76
Tel: + 33 4 50 96 75 53
Smoove 1 IN A/M io
Australia: Somfy PTY LTD
Tel: +61 (2) 8845 7200
Finland: Somfy Nordic AB
Finland
Smoove 1 O/C io
Austria: Somfy GesmbH
Tel: +358 (0)9 57 130 230
Tel: +43 (0) 662 62 53 08 - 0
France : Somfy France
Belgium: Somfy Belux
Tel. : +33 (0) 820 374 374
Tel: +32 (0) 2 712 07 70
Germany: Somfy GmbH
Brasil: Somfy Brasil Ltda
Tel: +49 (0) 7472 930 0
Tel/fax: +55 11 3695 3585
Greece: Somfy Hellas S.A.
Canada: Somfy ULC
Tel: +30 210 6146768
Tel: +1 (0) 905 564 6446
Hong Kong: Somfy Co. Ltd
China: Somfy China
Tel: +852 (0) 2523 6339
Co. Ltd
Tel: +8621 (0) 6280 9660
Hungary : Somfy Kft
Tel: +36 1814 5120
Croatia: Somfy
FR - Notice d'installation
NL - Installatiegids
Predstavništvo
India: Somfy India PVT Ltd
DE - Gebrauchsanleitung
Tel: +385 (0) 51 502 640
Tel : +(91) 11 4165 9176
IT - Guida all'installazione
Cyprus: Somfy Middle East
Indonesia: Somfy Jakarta
Tel: +357(0) 25 34 55 40
Representative Of¿ ce
Tel: +(62) 21 719 3620
Czech Republic: Somfy,
spol. s r.o.
Iran: Somfy Iran
Tel: (+420) 267 913 076-8
Tel: +98-217-7951036
Denmark: Somfy Nordic
Italy: Somfy Italia s.r.l
A
FR - Par la présente Somfy déclare que le produit est
conforme aux exigences essentielles et aux autres
A
B
dispositions pertinentes de la directive 1999/5/CE.
Une déclaration de conformité est mise à disposition à
l'adresse internet www.somfy.com/ce.
DE - Hiermit erklärt Somfy, dass sich dieses Produkt in
Übereinstimmung mit den grundlegenden Anforderungen
und den anderen relevanten Vorschriften der Richtlinie
1999/5/EG be¿ ndet. Eine Konformitätserklärung ist unter
der Internetadresse www.somfy.com/ce verfügbar.
IT - Somfy dichiara che il dispositivo è conforme ai
D
E
requisiti essenziali e alle altre disposizioni pertinenti della
Direttiva 1999/5/CE. La dichiarazione di conformità è
disponibile all'indirizzo Internet www.somfy.com/ce.
NL - Bij deze verklaart Somfy dat het product voldoet aan
de essentiële eisen en aan de andere beschikkingen van
richtlijn 1999/5/CE. Een conformiteits-verklaring staat ter
beschikking op de website www.somfy.com/ce.
C
D
1
2
F
G
1
PROG.
15 m
2
868.95 MHz
1 2
4 3
PROG. (i)
Somfy SAS, capital 20.000.000 Euros, RCS Annecy 303.970.230
Tel: +39-024847181
Poland: Somfy Sp z o.o.
Taïwan: Somfy
FR
1. Introduction
Tel: +48 (22) 50 95 300
Development and Taiwan
Japan: Somfy KK
Le Smoove 1 est un point de
Branch
Tel: +81 (0)45 481 6800
Portugal: Somfy Portugal
commande mural radio sans ¿ l qui permet
Tel: +886 (0) 2 8509 8934
Tel. +351 229 396 840
Jordan: Somfy Jordan
de piloter des applications utilisant la
Thailand: Bangkok
Tel: +962-6-5821615
Romania: Somfy SRL
technologie radio io-homecontrol®,
Regional Of¿ ce
Tel.: +40 - (0)368 - 444 081
Kingdom of Saudi Arabia:
Tel: +66 (0) 2714 3170
telles que les stores, les volets roulants,
Somfy Saoudi
Russia: Somfy LLC.
Tunisia: Somfy Tunisia
les lumières, les fenêtres de toit, etc.
Riyadh :
Tel: +7 495 781 47 72
Tel: +216-98303603
Le Smoove 1 peut être associé avec des
Tel/Fax: +966 1 47 23 020
Serbia: Somfy Predstavništvo
Jeddah :
Turkey: Somfy TurkeyMah.
cadres et des enjoliveurs intermédiaires
Tel: 00381 (0)25 841 510
Tel: +966 2 69 83 353
Tel: +90 (0) 216 651 30 15
répondant à la norme DIN 49075.
Singapore: Somfy PTE Ltd
Kuwait: Somfy Kuwait
United Arab Emirates:
Tel: +65 (0) 6383 3855
Tel/Fax: +965 4348906
Somfy Gulf
io-homecontrol
®
repose sur une technologie avancée, sécurisée et sans-fil, facile à
Slovak republic: Somfy,
Tel: +971 (0) 4 88 32 808
Lebanon:
installer. Les produits io-homecontrol
spol. s r.o.
Tel: +961 (0) 1 391 224
United Kingdom: Somfy
confort, de sécurité et d'économies d'énergie.
Tel: +421 337 718 638
Limited
Malaisia: Somfy Malaisia:
Tel: +421 905 455 259
Tel: +44 (0) 113 391 3030
Tel: +60 (0) 3 228 74743
South Korea: Somfy JOO
United States: Somfy
Mexico: Somfy Mexico SA
Tel: +82 (0) 2594 4331
Systems
2. Sécurité
Tel: 52 (55) 4777 7770
Spain: Somfy Espana SA
Tel: +1 (0) 609 395 1300
Morocco: Somfy Maroc
Tel: +34 (0) 934 800 900
2.1. Sécurité et responsabilité
Tel: +212-22443500
Sweden: Somfy Nordic AB
Avant d'installer et d'utiliser ce produit, lire
Netherlands: Somfy BV
Tel: +46 (0) 40 16 59 00
attentivement cette notice.
Tel: +31 (0) 23 55 44 900
Switzerland: Somfy A.G.
Ce produit Somfy doit être installé par
Norway: Somfy Nordic
Tel: +41 (0) 44 838 40 30
un professionnel de la motorisation et de
Norge
Syria: Somfy Syria
Tel: +47 41 57 66 39
l'automatisation de l'habitat auquel cette
Tel: +963-9-55580700
notice est destinée. L'installateur doit
par ailleurs, se conformer aux normes et
à la législation en vigueur dans le pays
B
d'installation, et informer ses clients des
d
conditions d'utilisation et de maintenance
C
du produit.
a
Toute utilisation hors du domaine
d'application dé¿ ni par Somfy est interdite.
Elle entraînerait, comme tout irrespect
b
des instructions ¿ gurant dans cette notice,
l'exclusion de la responsabilité et de la
garantie Somfy.
c
Avant toute installation, véri¿ er la
compatibilité de ce produit avec les
équipements et accessoires associés.
e
2.2. Consignes spéci¿ ques de sécurité
F
Pour ne pas endommager le Smoove 1 :
Éviter les chocs !
g
1)
1 2
Éviter les chutes !
2)
Ne pas faire de projection de liquides ni
4 3
3)
l'immerger.
f
h
Ne pas utiliser de produits abrasifs ni de
4)
solvants pour le nettoyer.
i
3. Contenu
Figure A
Q. Désignation
Plaque de ¿ xation pour Smoove 1 io,
Smoove 1 O/C io et Smoove 1 A/M io
E
1
ou Plaque de ¿ xation pour Smoove 1 IN
io et Smoove 1 A/M IN io
1 2
1 2
1
1
2
2
1
Cadre Somfy (optionnel)
Module Smoove 1 io
1
ou Smoove 1 O/C io
ou Smoove 1 A/M io
4 3
4 3
4. Mise en service
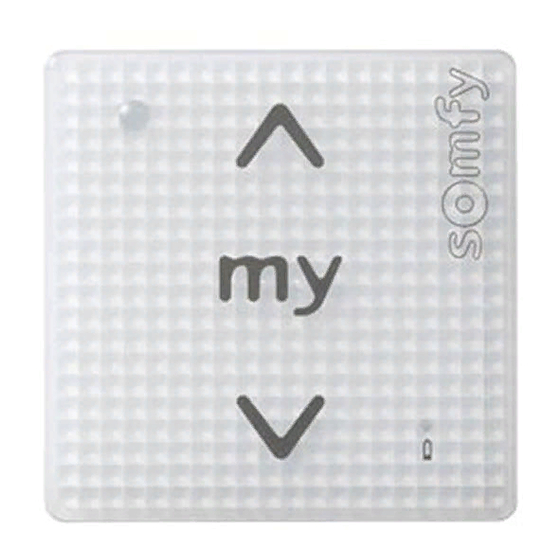
4.1. Le Smoove 1 en détails
1 2
Figure B
4 3
a)
Touche sensitive
ou
allumer, ouvrir, orienter et augmenter
l'éclairage ou le chauffage).
b)
Touche sensitive
(stopper, aller en
1 2
1 2
position favorite).
c)
Touche sensitive
ou
(descendre, éteindre, fermer, orienter et
diminuer l'éclairage ou le chauffage).
d)
Voyant témoin d'appui sur les touches et
4 3
4 3
boutons du module.
4
4
3
3
e)
Voyant "Pile faible".
f)
Sélecteur A/M
g)
Bouton On/Off.
h)
Sélecteur de mode
i)
Bouton PROG.
4.2 Bouton ON/OFF
H
Figure C
1
2
Le bouton ON/OFF permet d'activer ou
5 5
m m
de désactiver le clavier sensitif selon le
Ø 3 mm
descriptif ci-après, cependant le bouton
prog. reste actif :
Appuyer sur le bouton
6 0
ON =
jusqu'à la ¿ n des bips : le
m m
Activation du
voyant témoin s'allume ¿ xe :
8 0
clavier
- les touches sensitives sont
m m
actives
Appuyer sur le bouton
jusqu'à la ¿ n des bips et
OFF =
du clignotement du voyant
Désactivation
3
témoin :
du clavier
- les touches sensitives sont
inactives
Pour éviter une consommation inutile
de la batterie, il est recommandé de
remettre le module en OFF tant que celui-ci
n'est pas installé sur le mur.
4.3 Sélecteur A/M (Smoove 1 A/M io)
Figure D
DE
1)
Mode Automatique
(
) :
1. Einleitung
Automatik-Betrieb
1)
L'application répond à toutes les
Der Smoove 1 ist ein drahtloser
points de commandes (commandes
Funkwandsender, mit dem Sie Anwendungen
générales, horloges...) avec lesquels il
ansteuern können, die mit der Funktechnik
est programmé.
io-homecontrol® ausgestattet sind, wie z. B.
Manueller Betrieb
2)
Mode Manuel
(
) :
Jalousien, Rollläden, Lampen, Dachfenster usw.
2)
L'application répond uniquement
Der Smoove 1 kann zusammen mit Rahmen
und Adaptern verwendet werden, die der
au Smoove 1. Les autres points de
DIN-Norm 49075 entsprechen.
commandes (commandes générale,
horloges...) sont désactivées.
io-homecontrol
®
bietet eine fortschrittliche und sichere Radio-Funktechnologie, die einfach
zu installieren ist. io-homecontrol
®
gekennzeichnete Produkte kommunizieren miteinander,
wodurch Komfort, Sicherheit und Energieeinsparungen sichergestellt werden.
®
communiquent entre eux pour offrir plus de
www.io-homecontrol.com
2. Sicherheitshinweise
4.4
4.4
Sélecteur de mode
2.1. Sicherheit und Gewährleistung
Figure E
Mit dem MODE-Wahlschalter können Sie
Lesen Sie bitte vor der Installation und
Le sélecteur de mode permet de choisir
einen Steuerungsmodus entsprechend der
Verwendung dieses Produkts diese
un mode de pilotage en fonction de
angesteuerten Anwendung auswählen.
Gebrauchsanleitung sorgfältig durch.
Wenn Sie einmal drücken, leuchtet die
l'application commandée.
1)
Dieses Somfy-Produkt muss von einer
1)
Appuyer une fois, le numéro s'allume.
fachlich quali¿ zierten Person für Antriebe und
2)
Wenn Sie ein weiteres Mal drücken, wechselt
2)
Appuyer une nouvelle fois, le mode
Automatisierungen im Haustechnikbereich
installiert werden, für die diese Anleitung bestimmt
bascule vers le numéro supérieur.
ist. Außerdem muss die fachlich quali¿ zierte
-
Modus 1:
Mode 1 :
Pour piloter les volets roulants,
-
Person die gültigen Normen und Vorschriften des
Garagentoren und anderen Toren.
les fenêtres, les portes de garage, les
Modus 2:
Landes befolgen, in dem das Produkt installiert
-
portails,
wird, und ihre Kunden über die Betriebs- und
Heizungen (Intensität).
Mode 2 :
Pour piloter les lumières et le
-
Wartungsbedingungen des Produkts informieren.
-
Modus 3:
chauffage,
Rollläden mit einstellbaren Lamellen.
Jede Verwendung, die nicht dem von Somfy
Mode 3 :
Pour piloter les stores vénitiens
-
Modus 4:
bestimmten Anwendungsbereich entspricht, gilt
-
et les volets roulants à lames orientables,
niedriger und hoher Geschwindigkeit.
als nicht bestimmungsgemäß. Im Falle einer
Mode 4 :
Pour piloter des stores vénitiens
-
nicht bestimmungsgemäßen Verwendung,
4.5. Einlernen des Smoove 1 in eine
ayant une vitesse lente et une vitesse
wie auch bei Nichtbefolgung der Hinweise
Anwendung ohne eingelernten lokalen
rapide.
in dieser Anleitung, entfällt die Haftung und
io-Funksender
GewährleistungspÀ icht von Somfy.
4.5. Enregistrer le Smoove 1 dans
Lesen Sie die Gebrauchsanleitung für den
Prüfen Sie vor der Montage die Kompatibilität
une application non équipée de point
io-Antrieb oder den io-Empfänger.
dieses Produkts mit den vorhandenen
de commande local io
4.6. Hinzufügen/Löschen eines Smoove 1
Ausrüstungs- und Zubehörteilen.
Se référer à la notice du moteur io ou du
récepteur io.
2.2. Spezi¿ sche Sicherheitshinweise
Die Vorgehensweise für das Hinzufügen und
4.6. Ajout/Suppression d'un Smoove 1
Vermeidung von Schäden am Produkt:
Löschen eines io-Funksenders ist identisch.
Vermeiden Sie Stöße.
1)
Figure F
Wenn Sie einen Smoove 1 hinzufügen
2)
Lassen Sie es nicht fallen.
oder löschen möchten, verwenden Sie den
La procédure à suivre pour l'ajout ou la
3)
Tauchen Sie das Produkt nicht in
lokalen io-Funksender
suppression d'un point de commande io est
Flüssigkeiten und schützen Sie es vor
Anwendung eingelernt ist.
identique.
Spritzwasser.
Bei Bedarf aktivieren Sie das Modul Smoove 1
Pour ajouter ou supprimer un Smoove 1,
4)
Verwenden Sie zur Reinigung des Produkts
(siehe Kapitel „ON/OFF-Taste").
utiliser le point de commande local io
keine Scheuer- oder Lösungsmittel.
Bringen Sie die Anwendung in eine mittlere
déjà associé à l'application.
3. Lieferumfang
Position.
Si nécessaire activer le module Smoove 1
Abb. A
1)
Halten Sie die PROG-Taste auf dem bereits
voir chapitre « Bouton ON/OFF »
Placer l'application en position médiane.
Anz. Beschreibung
1)
Faire un appui long sur le bouton PROG
Befestigungsplatte für Smoove 1 io,
du point de commande local Somfy io
A
Smoove 1 O/C io und Smoove 1 A/M io
A
déjà associé, jusqu'au va-et-vient de
1
oder Befestigungsplatte für Smoove 1
l'application : le moteur io ou récepteur
B
2)
Drücken Sie kurz die PROG-Taste (i) auf dem
IN io und Smoove 1 A/M IN io
B
io est en mode programmation
1
Somfy-Rahmen (optional)
C
pendant 2 min.
C
D
Faire un appui bref sur le bouton
Modul Smoove 1 io
2)
D
1
oder Modul Smoove 1 O/C io
E
PROG (i) du Smoove 1: l'application
E
oder Modul Smoove 1 A/M io
effectue un va-et-vient : le Smoove 1
F
5. Installation
F
est enregistré ou supprimé.
4. Inbetriebnahme
5. Installation
4.1. Smoove 1 im Detail
Figure G
Abb. B
Frequenz betrieben werden, kann zu Störungen
L'utilisation d'appareils radios (par
führen und die Leistungen des Produkts
a)
Sensortaste
oder
(auf-/einfahren,
(monter,
exemple un casque radio Hi-Fi) utilisant
einschalten, öffnen, neigen und Intensität
beeinträchtigen.
la même fréquence peut engendrer des
Die Beschaffenheit des Gebäudes, in dem
erhöhen).
-
interférences et réduire les performances du
das Produkt verwendet wird, kann die
b)
Sensortaste
(stoppen, in die
produit.
Funkreichweite einschränken.
Lieblingsposition fahren).
Die Funkreichweite beträgt 15 m.
-
Le bâtiment dans lequel le produit est
c)
Sensortaste
oder
(ab-/ausfahren,
utilisé peut réduire la portée radio.
ausschalten, schließen, neigen und Intensität
La portée radio est de 15 m.
verringern).
d)
Statusanzeige LED, die die Aktivierung der
einem Metallrahmen, da dies die Funkreichweite
Ne jamais installer le Smoove 1 à
Tasten des Moduls anzeigt.
einschränken könnte.
proximité ou sur des surfaces
Überprüfen Sie die Funkreichweite, bevor Sie
e)
Statusanzeige LED „Batteriespannung
métalliques ni avec un cadre métallique,
den Smoove 1 io befestigen.
niedrig".
ceci peut réduire la portée radio.
f)
A/M-Wahlschalter
Das Produkt muss auf einer Innenwand,
Contrôler la portée radio avant de ¿ xer le
g)
ON/OFF-Taste
möglichst mit einer glatten OberÀ äche
Smoove 1 io.
angebracht werden.
h)
MODE-Wahlschalter
Ce produit doit être installé sur une paroi
Lassen Sie das Modul während der verschiedenen
i)
PROG-Taste
et Somfy recommande que cette surface
Einlernphasen auf der Befestigungsplatte bzw. im
4.2 ON/OFF-Taste
soit plane.
Rahmen. Dies erleichtert die Durchführung der
Abb. C
Laisser le module dans la plaque de ¿ xation ou
entsprechenden Vorgänge.
dans le cadre lors des différentes phases de
Mit der ON/OFF-Taste aktivieren und deaktivieren
programmation pour faciliter les manipulations.
Sie das Sensortastenfeld wie nachstehend
beschrieben. Die PROG-Taste bleibt immer
nicht versehentlich Befehle ausgelöst werden.
Ne pas poser le module sur sa face
aktiv:
Der einwandfreie Betrieb ist nur dann garantiert,
avant (côté touches) pour éviter tout
wenn das Modul eine eindeutige und trockene
envoi d'ordres involontaires.
Halten Sie die ON/OFF-Taste
Berührung (ohne Handschuhe) erhält.
Le fonctionnement est garanti uniquement
gedrückt, bis das akustische
ON =
avec un touché tactile propre et sec (pas de
Signal ausgeht: Die
5.1 Installation des Funksenders
Tastenfeld
gants).
Statusanzeige LED leuchtet
Smoove 1
aktivieren
konstant:
5.1 Installation du point de
- die Sensortasten sind aktiv
commande Smoove 1
Bringen Sie die Befestigungsplatte an (Somfy
1)
Halten Sie die ON/OFF-Taste
Figure H
OFF =
gedrückt, bis das akustische
1)
Fixer la plaque de ¿ xation à l'aide de vis
Tastenfeld
Signal ausgeht und die
Platzieren Sie den Somfy-Rahmen auf der
2)
(Somfy recommande l'utilisation de vis
deaktivieren
Statusanzeige LED blinkt:
- die Sensortasten sind inaktiv
de 3 mm de diamètre à tête fraisé).
Befestigen Sie das Modul auf der Anordnung
Um Batteriespannung zu sparen, emp¿ ehlt
3)
Placer le cadre Somfy sur la plaque de
2)
es sich, das Modul auszuschalten (OFF),
¿ xation.
bis es an der Wand angebracht ist.
3)
Clipper le module sur l'ensemble (Cadre
4.3 A/M-Wahlschalter (Smoove 1 A/M io)
+ plaque de ¿ xation).
Abb. D
IT
1. Introduzione
(
):
1)
Modalità automatica
Smoove 1 io è un punto di comando
Die Anwendung reagiert auf alle
Il prodotto portante risponde a tutti i punti
radio wireless da parete che consente
Bedieneinheiten (Sender, Zeitschaltuhren
di comando (comandi generali, orologi,
di controllare svariati prodotti portanti,
usw.), für die sie eingelernt wurde.
ecc.) con i quali è programmato.
come tende, tapparelle, luci, lucernari,
(
):
Modalità manuale
2)
ecc., utilizzando la tecnologia radio
Die Anwendung reagiert nur auf den
Il prodotto portante risponde solo a
io-homecontrol®.
Smoove 1. Die anderen Bedieneinheiten
Smoove 1. Gli altri punti di comando
(Sender, Zeitschaltuhren usw.) sind
Smoove1 può essere utilizzato con telai e
(comandi generali, orologi, ecc.) sono
deaktiviert.
¿ niture intermedie conformi alla norma
disattivati.
DIN 49075.
®
io-homecontrol
offre una avanzata tecnologia in radio frequenza sicura e facile da
installare. Tutti i prodotti contraddistinti dal marchio io-homecontrol
automaticamente tra loro per offrire maggiore comfort, sicurezza e risparmio energetico.
www.io-homecontrol.com
MODE-Wahlschalter
Abb. E
4.4
2. Sicurezza
Selettore della modalità
Figura E
2.1. Sicurezza e responsabilità
Il selettore della modalità permette di
Leggere attentamente la presente guida
selezionare una modalità di controllo,
prima di installare e utilizzare il prodotto.
a seconda del prodotto portante controllato.
Nummer auf.
Questo prodotto Somfy deve essere
1)
Premere una volta e il numero si
installato da un professionista di impianti
illuminerà.
der Modus zur nächst höheren Nummer.
di motorizzazione e domotica, al quale è
2)
Premere ancora una volta e la modalità
destinata la presente guida. L'installatore
Steuerung von Rollläden, Fenstern,
passerà al numero superiore successivo.
deve inoltre conformarsi alle norme e alla
Modalità 1:
Steuerung von Beleuchtungen und
legislazione vigente nel paese di installazione
-
porte di garage, cancelli
e informare i propri clienti circa le condizioni di
Modalità 2:
Steuerung von Jalousien und
utilizzo e manutenzione del prodotto.
-
del riscaldamento
È vietato utilizzare il dispositivo per prodotti
Steuerung von Jalousien mit
Modalità 3:
-
diversi da quelli de¿ niti da Somfy. Il mancato
tapparelle con stecche regolabili
rispetto di tale prescrizione e delle istruzioni
Modalità 4:
-
fornite nella presente guida comporta la
velocità lenta e veloce.
decadenza della garanzia e solleva Somfy da
qualsiasi responsabilità.
4.5. Programmazione di Smoove 1 in
un prodotto portante non dotato di
Prima di iniziare l'installazione, veri¿ care
punto di comando io locale
la compatibilità del prodotto con le
apparecchiature e gli accessori associati.
Consultare la guida del motore io o del
ricevitore io.
Abb. F
2.2. Istruzioni di sicurezza speci¿ che
4.6. Aggiunta/Eliminazione di un
Per evitare danni a Smoove 1:
Smoove 1
1)
Evitare gli urti!
Figura F
2)
Non farlo cadere!
3)
Non versare liquidi sul prodotto e non
Le procedure per aggiungere o eliminare un
, der bereits in der
immergerlo.
punto di comando io sono identiche.
4)
Non utilizzare prodotti abrasivi o solventi
Per aggiungere o eliminare un punto di
comando Smoove 1, utilizzare il punto di
per la sua pulizia.
comando io locale
3. Indice
prodotto portante.
Figura A
Se necessario, attivare il modulo Smoove 1,
eingelernten lokalen Somfy io-Funksender
vedere la sezione "Tasto ON/OFF".
Q. Descrizione
gedrückt, bis die Anwendung mit einer
Portare il prodotto portante a metà altezza.
Piastra di montaggio per Smoove 1 io,
kurzen Auf-/Abbewegung bestätigt: Der
Premere e tenere premuto il tasto sul
A
1)
Smoove 1 O/C io e Smoove 1 A/M io o
io-Antrieb oder io-Empfänger be¿ ndet sich
punto di comando locale io Somfy
1
jetzt für 2 Minuten in Lernbereitschaft.
Piastra di montaggio per Smoove 1 IN
già associato, ¿ no a quando il prodotto
B
io e Smoove 1 A/M IN io
controllato si muove avanti e indietro:
Smoove 1: Die Anwendung bestätigt mit
1
Telaio Somfy (opzionale)
C
il motore io o il ricevitore io resta in
einer kurzen Auf-/Abbewegung:
D
modalità di programmazione per 2 minuti.
Modulo Smoove 1 io
Der Smoove 1 ist jetzt eingelernt bzw.
1
E
o Modulo Smoove 1 O/C io
Premere brevemente il tasto PROG (i) su
2)
gelöscht.
o Modulo Smoove 1 A/M io
F
Smoove 1: il prodotto portante controllato
si muove avanti e indietro: Smoove 1 è
4. Messa in servizio
Abb. G
programmato o eliminato.
Die Verwendung von Funkgeräten (z. B.
4.1. Smoove1 nel dettaglio
5. Installazione
Funk-Kopfhörern),
die
mit
derselben
Figura B
Figura G
a)
Tasto a s¿ oramento
o
(alzare,
L'utilizzo di apparecchiature radio (ad
accendere, aprire, orientare e aumentare
esempio, cuf¿ e radio Hi-Fi) funzionanti
l'illuminazione o il riscaldamento).
alla stessa frequenza potrebbero causare
b)
Tasto a s¿ oramento
(arrestare,
interferenze e compromettere le prestazioni
raggiungere la posizione preferita).
del prodotto.
c)
Tasto a s¿ oramento
or
La struttura dell'edi¿ cio in cui viene
-
(abbassare, spegnere, chiudere, orientare
Installieren Sie den Smoove 1 nicht in der
utilizzato il prodotto potrebbe ridurre la
Nähe von oder auf MetallÀ ächen oder mit
e ridurre l'illuminazione o il riscaldamento).
portata radio.
d)
Spia che indica l'attivazione dei tasti e dei
La portata radio è di 15 m.
pulsanti del modulo.
Non installare mai Smoove 1 in
e)
Spia "Batteria quasi scarica".
prossimità di o su super¿ ci metalliche
f)
Selettore A/M
né con un telaio in metallo, in quanto
g)
Tasto ON/OFF
potrebbero ridurre la portata radio.
h)
Selettore della modalità
Prima di installare Smoove 1 io, veri¿ care la
i)
Tasto PROG
portata radio. Questo prodotto deve essere
4.2 Tasto ON/OFF
installato su una parete interna e Somfy
Figura C
consiglia che tale super¿ cie sia piatta.
Lasciare il modulo nella piastra di montaggio
Il tasto ON/OFF si utilizza per attivare o
Legen Sie das Modul nicht auf der
o nel telaio durante le varie operazioni di
disattivare il tastierino a s¿ oramento come
Frontplatte (Seite mit den Tasten) ab, damit
programmazione per agevolarne l'esecuzione.
descritto di seguito. Il tasto PROG resta
Non appoggiare il modulo sul pannello
comunque attivo:
anteriore (il lato con i tasti) per evitare
Tenere premuto il tasto ¿ no al
Tasto ON =
l'emissione accidentale di comandi.
termine del segnale acustico: la
attivazione del
Il funzionamento è garantito solo se i tasti
spia resta accesa con luce ¿ ssa:
tastierino
del modulo vengono s¿ orati in modo diretto e
- i tasti a s¿ oramento sono attivi
Tenere premuto il tasto ¿ no al
preciso (senza guanti).
Abb. H
Tasto OFF =
termine del segnale acustico, la
5.1 Installazione del punto di comando
disattivazione
spia lampeggia:
Smoove 1
emp¿ ehlt Flachkopfschrauben, Durchmesser
del tastierino
- i tasti a s¿ oramento sono
Figura H
inattivi
3 mm).
Utilizzare le viti per ¿ ssare la piastra di
Per evitare di sprecare la carica della
1)
montaggio (Somfy consiglia di utilizzare
batteria, si consiglia di spegnere il
Befestigungsplatte.
viti a testa svasata da 3 mm di diametro).
modulo (pulsante OFF) ¿ no alla sua
installazione sulla parete.
2)
Posizionare il telaio Somfy sulla piastra di
(Rahmen + Befestigungsplatte).
montaggio.
4.3 Selettore A/M (Smoove 1 A/M io)
Figura D
3)
Fissare il telaio alla piastra di montaggio
(telaio + piastra di montaggio).
NL
1. Inleiding
(
):
1)
Automatische modus
(
De Smoove 1 is een draadloze
De toepassing reageert op alle
muurzender waarmee toepassingen uitgerust
bedieningspunten (algemene besturingen,
met de draadloze io-homecontrol®-technologie,
klokken enz.) waarmee ze geprogrammeerd is.
zoals zonwering, rolluiken, verlichting,
(
):
Handmatige modus
(
):
2)
dakvensters enzovoort, kunnen bediend worden.
De toepassing reageert alleen op de
De Smoove 1 kan gebruikt worden in combinatie
Smoove 1. De andere bedieningspunten
met kaders en sierdeksels die voldoen aan de
(algemene besturingen, klokken enz.)
norm DIN 49075.
worden gedeactiveerd.
io-homecontrol
®
biedt een geavanceerde en veilige radiografische technologie die
eenvoudig te installeren is. Producten van het merk io-homecontrol
®
communiceren met
®
si interfacciano
elkaar, wat het bedieningsgemak, de veiligheid en de energiebesparing bevorderd.
www.io-homecontrol.com
www.io-homecontrol.com
4.4
2. Veiligheid
Modusschakelaar
Afbeelding E
2.1. Veiligheid en aansprakelijkheid
De modusschakelaar wordt gebruikt om een
Lees deze handleiding zorgvuldig door alvorens
bedieningsmodus te kiezen in functie van de
dit product te installeren en in gebruik te nemen.
bediende toepassing.
Dit Somfy-product moet geïnstalleerd worden
1)
Wanneer u één keer drukt, licht het nummer
door een professionele installateur van
op.
motoriserings- en huisautomatiseringssystemen,
2)
Druk nogmaals om het modusnummer te
voor wie deze handleiding bestemd is. Daarnaast
verhogen.
moet de installateur zich houden aan de geldende
Modus 1:
Voor de bediening van rolluiken,
normen en wetgeving in het land waar het product
-
controllo di tapparelle, ¿ nestre,
ramen, garagepoorten, hekken,
geïnstalleerd wordt en zijn klanten informatie
Modus 2:
Voor de bediening van verlichting en
geven over de bediening en het onderhoud van
-
controllo dell'illuminazione e
verwarming,
het product.
Modus 3:
Voor de bediening van jaloezieën en
-
Elk gebruik dat buiten het door Somfy
controllo di veneziane e
rolluiken met kantelbare lamellen,
omschreven toepassingsgebied valt is verboden.
Modus 4:
Voor de bediening van jaloezieën
-
Dit, alsook het niet naleven van de hierna
controllo di veneziane con
met lage en hoge snelheid.
gegeven instructies, doet de garantie vervallen
en ontheft Somfy van elke aansprakelijkheid.
4.5. De Smoove 1 programmeren in
een toepassing zonder lokaal io-
Controleer of dit product compatibel is met de
bedieningspunt
aanwezige apparatuur en accessoires alvorens
met de installatie te beginnen.
Zie de handleiding van de io-motor of de
io-ontvanger.
2.2. Bijzondere veiligheidsrichtlijnen
4.6. Een Smoove 1 toevoegen/wissen
Om schade aan de Smoove 1 te voorkomen:
Afbeelding F
1)
Vermijd schokken!
2)
Laat hem niet vallen!
Het toevoegen of wissen van een
3)
Mors geen vloeistof op het product of dompel
io-bedieningspunt verloopt volgens dezelfde
het niet onder in vloeistof.
procedure.
4)
Gebruik geen schurende producten of
Gebruik het lokale io-bedieningspunt
oplosmiddelen om het product schoon te
al aan de toepassing is gekoppeld om een
maken.
Smoove 1 toe te voegen of te wissen.
già associato al
Activeer indien nodig de Smoove 1-module zoals
3. Inhoud
beschreven in de paragraaf "Aan/uit-toets
Afbeelding A
(ON/OFF)".
Stel de toepassing in op de middenpositie.
Q. Beschrijving
Houd de programmeertoets (PROG) op het al
1)
Montageplaat voor Smoove 1 io,
gekoppelde lokale Somfy io-bedieningspunt
A
Smoove 1 O/C io en Smoove 1 A/M io
ingedrukt tot de toepassing heen en
1
of montageplaat voor Smoove 1 IN io en
weer beweegt: de io-motor of io-ontvanger
B
Smoove 1 A/M IN io
staat nu gedurende 2 minuten in de
1 Somfy-kader (optioneel)
C
programmeerstand.
D
Smoove 1 io-module
Druk kort op de programmeertoets (PROG)
2)
E
1
of Smoove 1 O/C io-module
(i) van de Smoove 1: de toepassing
of Smoove 1 A/M io-module
F
beweegt heen en weer: de Smoove 1 is nu
geprogrammeerd of gewist.
4. Inbedrijfstelling
5. Installatie
4.1. De Smoove 1 in detail
Afbeelding G
Afbeelding B
Het gebruik van radioapparatuur (bv. een
a)
Aanraakgevoelige toets
of
draadloze
hi¿ -hoofdtelefoon)
(ophalen, inschakelen, openen, kantelen en
dezelfde
frequentie
werkt,
lichtsterkte of verwarming verhogen).
veroorzaken en de prestaties van het product
b)
Aanraakgevoelige toets
(stoppen, naar
negatief beïnvloeden.
voorkeurpositie gaan).
Het gebouw waarin het product gebruikt wordt,
-
c)
Aanraakgevoelige toets
of
kan het draadloze bereik verminderen.
(neerlaten, uitschakelen, sluiten, kantelen en
Het draadloze bereik bedraagt 15 m.
lichtsterkte of verwarming verlagen).
Installeer de Smoove 1 nooit in de buurt
d)
Controlelampje dat aangeeft dat de toetsen
van of op metalen oppervlakken of in een
van de module actief zijn.
metalen kader, want hierdoor kan het draadloze
e)
Controlelampje "laag batterijniveau".
bereik afnemen.
f)
A/M-keuzeschakelaar
Controleer het draadloze bereik alvorens de
g)
Aan/uit-toets (ON/OFF)
Smoove 1 io te monteren.
h)
Modusschakelaar
Dit product moet binnen geïnstalleerd worden
i)
Programmeertoets (PROG)
en Somfy raadt aan het product op een vlak
4.2 Aan/uit-toets (ON/OFF)
wandoppervlak te monteren.
Afbeelding C
Laat de module in de montageplaat of het kader
zitten tijdens de verschillende programmeerstappen
Met de aan/uit-toets (ON/OFF) kunt u het
om het uitvoeren van de handelingen te
aanraakgevoelige toetsenbord activeren of
vergemakkelijken.
deactiveren
zoals
hieronder
beschreven.
Leg de module niet op zijn voorpaneel (de
De programmeertoets (PROG) blijft echter
kant met de toetsen) om het ongewild
actief:
verzenden van commando's te vermijden.
Houd de toets ingedrukt tot
Een goede bediening is slechts gegarandeerd
ON =
het geluidssignaal stopt: het
als de module met schone en droge handen
toetsenbord
controlelampje blijft branden:
activeren
- de aanraakgevoelige toetsen
(geen handschoenen) aangeraakt wordt.
zijn actief
5.1 Installatie van het Smoove 1-
Houd de toets ingedrukt tot
bedieningspunt
OFF =
het geluidssignaal stopt en het
Afbeelding H
toetsenbord
controlelampje knippert:
Zet de montageplaat vast met schroeven
deactiveren
- de aanraakgevoelige toetsen
1)
(Somfy raadt het gebruik van schroeven
zijn niet actief
met verzonken kop en een diameter van
Om de batterij te sparen, raden wij aan de
3 mm aan).
module niet in te schakelen voordat ze op
de muur bevestigd is.
2)
Plaats het Somfy-kader op de montageplaat.
4.3 A/M-keuzeschakelaar (Smoove 1 A/M io)
3)
Klik de module vast op het geheel
Afbeelding D
(kader + montageplaat).
The images are not contractually binding. - PATENTS AND DESIGN PATENTS PENDING FOR SOME COUNTRIES (e.g. : US) - 1/2
):
dat
die
op
kan
storingen
Werbung

Verwandte Anleitungen für SOMFY Smoove 1 IN io


Inhaltszusammenfassung für SOMFY Smoove 1 IN io
- Seite 1 Heizungen (Intensität). e informare i propri clienti circa le condizioni di geven over de bediening en het onderhoud van FR - Par la présente Somfy déclare que le produit est d’installation, et informer ses clients des Mode 2 : Pour piloter les lumières et le Modalità...
- Seite 2 Speicherzellen und Batterien gehören nicht in den Hausmüll. Entsorgen Sie sie entsprechend den di raccolta locale. geltenden Vorschriften im Handel oder bei den kommunalen Sammelstellen. 10 sec. The images are not contractually binding. - Copyright © 2010 Somfy SAS. All rights reserved.- 05/2010 - 2/2...