Herunterladen Inhalt Inhalt Diese Seite drucken
Vorschau ausblenden Andere Handbücher für VDP3000ST:

Werbung

Verfügbare Sprachen
  • DE

Verfügbare Sprachen

VDP
P3000S
DMX
-CONTRO
DMX
-GESTUU
STRO
OBOSCOP
ESTR
ROBOSCO
DMX
-GESTEU
USER M
MANUAL
GEBRU
IKERSHAND
NOTICE
E D'EMPLOI
MANUA
AL DEL USUA
BEDIEN
NUNGSANLE
ST
OLLED S
STROBE –
URDE ST
ROBOSC
PE À PIL
LOTAGE D
OPIO CO
ONTROLA
UERTES S
STROBOS
DLEIDING
ARIO
ITUNG
– 3000W
W
COOP – 3
3000 W
DMX – 3
000 W
ADO POR
R DMX – 3
SKOP – 3
3000W
2
8
 
1
4
 
2
0
 
2
6
 
3000W

Werbung

Inhaltsverzeichnis
loading

Inhaltszusammenfassung für HQ Power VDP3000ST

  • Seite 1 P3000S -CONTRO OLLED S STROBE – – 3000W -GESTUU URDE ST ROBOSC COOP – 3 3000 W STRO OBOSCOP PE À PIL LOTAGE D DMX – 3 000 W ESTR ROBOSCO OPIO CO ONTROLA ADO POR R DMX – 3 3000W -GESTEU UERTES S...
  • Seite 2 • This device is design ned for professio onal use on stag ge, in discos, th heatres, etc. The e VDP3000ST shou ld only be used indoors with th he included pow er adapter conn nected to an alte ernating curren t of max.
  • Seite 3: Installation

    The installation has to be approved by an expert before the device is taken into service. b) Lamp Power Setting The VDP3000ST can be set at high or low power setting. The high power setting provides you maximum flash intensity, the low power setting reduces the output by approximately 50% and extends the lamp lifetime.
  • Seite 4 Connect the provided XLR cable to the female 3-pin XLR output of your controller and the other side to the male 3-pin XLR input of the VDP3000ST. Multiple VDP3000STs can be linked through serial linking. The linking cable should be a two-core screened cable with XLR input and output connectors.
  • Seite 5 In the case of the 4-channel VDP3000ST, you will have to set the start address of the first VDP3000ST to 1, the second VDP3000ST to 5 (1 + 4), the third to 9 (5 + 4) and so on. •...
  • Seite 6 VDP3000ST Rev 01 • DMX Control Modes DIP switch 10 must always be set to OFF. • Mode Setting The remote controller is powered through the master fixture. Set DIP switches 2 and 3 to ON to select the master fixture. Connect the slave fixtures and set DIP switch 2 to ON.
  • Seite 7: Cleaning And Maintenance

    3-pin XLR cable. The controller is able to control up to 20 fixtures. Remove the terminator from the last VDP3000ST in the chain when using the VDP3000RC controller. Install a signal splitter after the first fixture if necessary.
  • Seite 8 VDP300 00ST Rev 01 GEBRU UIKERSHA ANDLEID DING 1. Inl eiding Aan alle e ingezetenen v van de Europe ese Unie Belangr ijke milieu-inf formatie betre effende dit pro oduct Dit symbool op p het toestel of de verpakking geeft aan dat, a als het na zijn le evenscyclus wor weggeworpen,...
  • Seite 9 De installatie moet voor het eerste gebruik gekeurd worden door een expert. b) Vermogeninstelling van de lamp De VDP3000ST heeft twee vermogeninstellingen nl. hoog en laag. Aan hoog vermogen levert de lamp de maximale flitsintensiteit; aan laag vermogen wordt de intensiteit met ongeveer 50 % verminderd maar wordt de levensduur van de lamp verlengd.
  • Seite 10 VDP3000ST Rev 01 C) Lamp • Plaats of vervang een lamp enkel wanneer het toestel niet is aangesloten op het lichtnet. • Laat een lamp afkoelen voor u ze vervangt: de bedrijfstemperatuur van een lamp ligt rond de 700 °C.
  • Seite 11 3-pin XLR-ingan ng van de VDP3 3000ST. U kun nt verscheidene VDP3000ST’s elkaar ko oppelen met beh hulp van een se eriële koppeling. Gebruik daarvo oor een 2-aderi ge afgeschermd...
  • Seite 12 VDP3000ST Rev 01 4-kanaals aanstuurmodus In de 4-kanaals aanstuurmodus kunt u, net zoals in de 3-kanaals aanstuurmodus, de flitsintensiteit, flitsduur en flitssnelheid instellen. Bovendien beschikt u over een 4 kanaal met geprogrammeerde effecten. Selecteer de 4-kanaals aanstuurmodus door DIP-schakelaar 4 op ON te plaatsen.
  • Seite 13: Afstandsbediening (Optie)

    Met de afstandsbediening kunt u de functies van 20 stroboscopen gemakkelijker aansturen. Sluit de VDP3000RC aan de stroboscoop met een 3-pin XLR-kabel. Verwijder de eindweerstand uit de laatste VDP3000ST in de reeks indien u een VDP3000RC-afstandsbediening gebruikt. Installeer een splitter na de eerste stroboscoop indien nodig.
  • Seite 14 VDP300 00ST Rev 01 OTICE D ’EMPLOI 1. Int troduction Aux rési idents de l'Uni ion européenn Des info ormations envi ironnementale es importantes s concernant c ce produit Ce symbo ole sur l'appare il ou l'emballage e indique que l’ élimination d’un n appareil en fin n de vie peut po...
  • Seite 15: General Guidelines

    Toute modification de l’appareil est interdite pour des raisons de sécurité. • N’utiliser votre VDP3000ST qu’à sa fonction prévue. Tout autre usage peut causer des courts- circuits, des brûlures, des électrochocs etc. Un usage impropre annule d'office la garantie. •...
  • Seite 16 VDP3000ST Rev 01 c) Ampoule • Déconnecter l’appareil du réseau électrique avant d’installer ou de remplacer une ampoule. • Laisser refroidir une ampoule avant de la remplacer; elle peut atteindre une température de 700 °C. • Éviter de toucher une ampoule halogène les mains nues. Remplacer l’ampoule à...
  • Seite 17 Par conséquent, un ajustement des réglages d’un canal n’influence que l'appareil sur ce canal. Pour le VDP3000ST à 4 canaux, l’adresse de départ du premier appareil est 1, du deuxième 5 (1 + 4), du troisième 9 (5 + 4), etc.
  • Seite 18 VDP3000ST Rev 01 Mode 4 canaux ème Le mode 4 canaux permet de régler l’intensité, la durée et la vitesse des éclats. En outre, il offre un 4 canal avec des effets préprogrammés. Sélectionner le mode 4 canaux en plaçant l’interrupteur DIP n° 4 sur ON.
  • Seite 19: Entretien

    La télécommande vous permet d’actionner les fonctions de 20 stroboscopes. Raccorder le VDP3000RC au stroboscope en utilisant un câble XLR à 3 broches. Retirer la résistance de terminaison du dernier VDP3000ST dans la série lors de l’utilisation de la VDP3000RC. Installer un répartiteur après le premier stroboscope si nécessaire.
  • Seite 20 VDP300 00ST Rev 01 NUAL DEL L USUAR 1. Int troducción A los ciu udadanos de la a Unión Europe Importa antes informac ciones sobre e el medio ambie ente concernie ente a este pro oducto Este símbolo en este aparato o o el embalaje indica que, si t ira las muestras...
  • Seite 21: Montaje Del Aparato

    Por razones de seguridad, las modificaciones no autorizadas del aparato están prohibidas. • Utilice sólo el VDP3000ST para aplicaciones descritas en este manual a fin de evitar p.ej. cortocircuitos, quemaduras, descargas eléctricas, etc. Un uso desautorizado puede causar daños y anula la garantía completamente.
  • Seite 22 Conecte el cable con conector XLR (incl.) a la salida XLR hembra de 3 polos del controlador y el otro conector XLR macho de 3 polos a la entrada del VDP3000ST. Es posible conectar varios VDP3000ST en serie. Use un cable blindado de doble hilo conductor con conectores XLR de entrada y de salida.
  • Seite 23 Por lo tanto, cambiar los ajustes de un solo canal sólo afecta al canal en cuestión. Para el VDP3000ST de 4 canales, la dirección inicial del primer aparato es 1. Introduzca 5 (1 + 4) para el segundo aparato, introduzca 9 (5 + 4) para el tercer aparato, etc.
  • Seite 24 VDP3000ST Rev 01 • Dirección DMX Ponga el interruptor DIP n° 10 en la posición OFF. • Seleccionar el modo El mando a distancia funciona con el estroboscopio maestro. Ponga los interruptores DIP n° 2 y 3 en la posición ON para seleccionar el estroboscopio maestro. Conecte los estroboscopios esclavos al estroboscopio maestro.
  • Seite 25: Mando A Distancia (Opcional)

    El mando a distancia le permite activar las funciones de 20 estroboscopios. Conecte el VDP3000RC con un cable XLR de 3 polos al estroboscopio. Saque la terminación del último VDP3000ST de la serie al utilizar el VDP3000RC. Instale un separador después del primer estroboscopio si fuera necesario.
  • Seite 26 VDP300 00ST Rev 01 BEDIE ENUNGS ANLEITU 1. Ein nführung An alle E Einwohner der r Europäischen n Union Wichtige e Umweltinfor rmationen übe er dieses Produ Dieses Symbo ol auf dem Prod dukt oder der Ve erpackung zeigt t an, dass die En ntsorgung diese Produktes na ch seinem Lebe...
  • Seite 27: Das Gerät Montieren

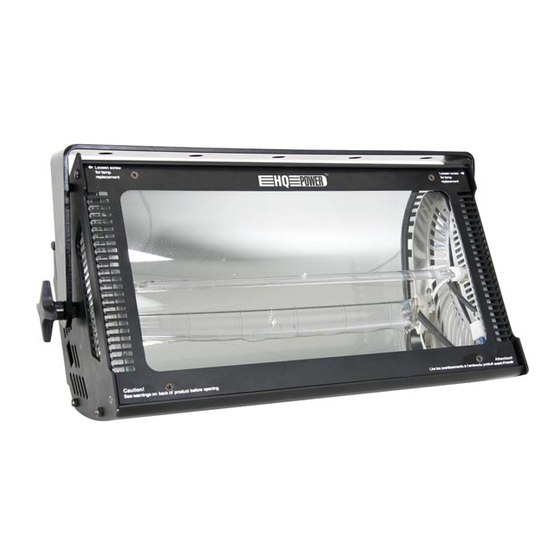
    Die Installation muss vor Inbetriebnahme von einem Experten genehmigt werden. b) Leistungsstufe der Lampe Das VDP3000ST hat zwei Leistungsstufen nl. hoch und niedrig. An eine hohe Leistung liefert die Lampe die max. Blitzintensität; an eine niedrige Leistung wird die Intensität um etwa 50 % verringert aber die Lebensdauer der Lampe wird verlängert.
  • Seite 28 VDP3000ST Rev 01 c) Lampe • Setzen Sie eine Lampe nur bei uneingeschaltetem Gerät ein und wechseln Sie jede beschädigte Lampe. • Die Lampen können eine Temperatur von bis zu 700°C erreichen. Lassen Sie die Lampen deshalb erst abkühlen. •...
  • Seite 29 VDP300 00ST Rev 01 EIN EIN ZIGER BLITZ: Drücken Sie de en Einstellknopf f für einen einzig gen Blitz, um de en einzigen Blitzmod us auszuwählen n. Setzen Sie die e Blitzgeschwind digkeit mit eine m Druck auf de en Einstellknopf für einen ein nzigen Blitz im k...
  • Seite 30 VDP3000ST Rev 01 4-Kanal-Modus Im 4--Kanal-Modus können Sie, genauso wie beim 3- Kanal-Modus, die Blitzintensität, Blitzdauer und Blitzgeschwindigkeit einstellen. Außerdem verfügen Sie über einen vierten Kanal mit programmierten Effekten. Wählen Sie den 4- Kanal-Modus aus, indem Sie DIP-Schalter 4 auf ON stellen.
  • Seite 31: Wartung

    Mit dieser Fernbedienung können Sie die Funktionen von 20 Stroboskopen einfacher ansteuern. Verbinden Sie die VDP3000RC über ein 3-pol. XLR-Kabel mit dem Stroboskop. Trennen Sie den Abschlusswiderstand vom letzten VDP3000ST der Serie wenn Sie eine VDP3000RC-Fernbedienung verwenden. Installieren Sie einen Splitter nach dem ersten Stroboskop wenn nötig.
  • Seite 32 de aankoopsom bij ontdekking van een gebrek tot één jaar na aankoop en levering, of een vervangend product tegen 50% van de kostprijs of terugbetaling van 50 % bij ontdekking na één jaar tot 2 Velleman® Service and Quality Warranty jaar.
  • Seite 33 - tout dommage à l’appareil qui résulte d’une utilisation incorrecte ou Die oben stehende Aufzählung kann eventuell angepasst différente que celle pour laquelle il a été initialement prévu comme werden gemäß der Art des Produktes (siehe décrit dans la notice ; Bedienungsanleitung des Gerätes).

Inhaltsverzeichnis