Herunterladen Inhalt Inhalt Diese Seite drucken
Inhaltsverzeichnis

Werbung

Verfügbare Sprachen

Verfügbare Sprachen

Houd, wanneer u contact opneemt met de serviceafdeling, het complete typenummer bij de hand.
En cas de contact avec le service après-vente, ayez auprès de vous le numéro de type complet.
Halten Sie die vollständige Typennummer bereit,
wenn Sie mit der Kundendienstabteilung Kontakt aufnehmen.
When contacting the service department, have the complete type number to hand.
Sørg for at have hele typenummeret klar, når serviceafdelingen kontaktes.
Ha hele typenummeret for hånden når du kontakter serviceavdelingen.
Ilmoita huoltoon yhteyttä ottaessasi täydellinen tyyppinumero.
Ha det kompletta typnumret till hands när du tar kontakt med serviceavdelningen.
Adressen en telefoonnummers van de serviceorganisatie vindt u op de garantiekaart.
Les adresses et les numéros de téléphone du service après-vente se trouvent sur la carte de garantie.
Adressen und Telefonnummern der Kundendienstorganisation fi nden Sie auf der Garantiekarte.
You will fi nd the addresses and phone numbers of the service organisation on the guarantee card.
Adressen og telefonnummeret til servicevirksomheden fi ndes på garantikortet.
Du fi nner adresser og telefonnumre til serviceorganisasjonen på garantikortet.
Huoltopisteiden osoitteet ja puhelinnumerot löytyvät takuukortista.
Adresser och telefonnummer till serviceorganisationen hittar du på garantikortet.
Gebruiksaanwijzing
Oven
Mode d'emploi
Four
Bedienungsanleitung
Ofen
Instructions for use
Oven
OX6411B

Werbung

Inhaltsverzeichnis
loading

Inhaltszusammenfassung für Atag OX6411B

  • Seite 1 You will fi nd the addresses and phone numbers of the service organisation on the guarantee card. Adressen og telefonnummeret til servicevirksomheden fi ndes på garantikortet. Du fi nner adresser og telefonnumre til serviceorganisasjonen på garantikortet. Huoltopisteiden osoitteet ja puhelinnumerot löytyvät takuukortista. Adresser och telefonnummer till serviceorganisationen hittar du på garantikortet. OX6411B...
  • Seite 2 Handleiding NL 1 - NL 18 Notice dútilisation FR 1 - FR 18 Anleitung DE 1 - DE 18 Manual EN 3 - EN 22 Brugsvejledning DA 3 - DA 22 Bruksanvisning NO 3 - NO 22 Bruksanvisning SV 3 - SV 22 Käyttöohje FI 3 - FI 22 Gebruikte pictogrammen - Pictogrammes utilisés - Benutzte Piktogramme...
  • Seite 3: Inhaltsverzeichnis

    Inhoud Bedieningspaneel ............2 Toestelbeschrijving .
  • Seite 4: Bedieningspaneel

    Bedieningspaneel 1. FUNCTIEKNOP 3. TEMPERATUURKEUZEKNOP 2. DISPLAY 4. TIJDKEUZEKNOP...
  • Seite 5: Toestelbeschrijving

    Toestelbeschrijving Bedieningspaneel Bovenelement Niveau Niveau Niveau Niveau Niveau Ovenverlichting Glazen ovendeur Deurgreep LET OP De inschuifniveaus zijn van beneden naar boven genummerd. De niveaus 4 en 5 worden voornamelijk gebruikt voor de grillfunctie.
  • Seite 6: Toebehoren

    Toebehoren De onderstaande toebehoren worden met de oven meegeleverd: Voorzijde Bakplaat Ovenrooster De bakplaat gebruikt u voor het Het ovenrooster gebruikt u voor bakken van koekjes of ander plaat- ovenschotels, bakblikken, roosteren gebak en grillen. Bij het verwijderen van het ovenrooster uit de oven dient u deze iets op te tillen.
  • Seite 7: Het Gebruik Van Deze Handleiding

    Het gebruik van deze handleiding Bedankt voor de aanschaf van deze ATAG inbouwoven. Deze handleiding bevat belangrijke veiligheidsvoorschriften en essentiële infor- matie over het gebruik en het onderhoud van uw nieuwe oven. Lees deze handleiding zorgvuldig voordat u het apparaat gebruikt en bewaar hem als naslagwerk voor toekomstig gebruik.
  • Seite 8: Veiligheidsvoorschriften (Vervolg)

    Veiligheidsvoorschriften (vervolg) Veiligheid tijdens gebruik Dit apparaat is alleen voor huishoudelijk gebruik bestemd. Gebruik het uitsluitend voor het bereiden van gerechten. Tijdens gebruik wordt de binnenzijde van de oven zeer heet. Raak de elementen en het intereur pas aan nadat de oven volledig is afgekoeld. Bewaar geen brandbare materialen in de oven.
  • Seite 9: Inbouwen En Aansluiten

    Inbouwen en aansluiten Veiligheidsvoorschriften voor het inbouwen Dit toestel mag alleen door een hiertoe bevoegd installateur geïnstalleerd worden. Hierbij dienen de bijgevoegde installatievoorschriften en de plaatselijk geldende veiligheidsvoorschriften gevolgd te worden. Controleer voordat u met inbouwen begint of het aansluitpunt spanningsloos is. Schakel zonodig de zekering in de meterkast uit.
  • Seite 10: Inbouwen En Aansluiten (Vervolg)

    De aansluiting voor de aardedraad is gemerkt met het aardeteken ( De wandcontactdoos moet na het inbouwen van de oven bereikbaar blijven. Atag kan geen aansprakelijkheid aanvaarden voor ongelukken die onstaan door het ontbreken van of een foutief aangesloten aardverbinding.
  • Seite 11: Ingebruikname

    Ingebruikname Instellen van de klok Zodra het toestel is aangesloten licht het display op het bedieningspaneel kort op. Na 3 seconden verschijnt ‘12:00’ in het display. Druk op de Stel met de Druk op de tijdkeuzeknop. tijdkeuzeknop het tijdkeuzeknop. ‘12:’ gaat knipperen. gewenste uur in.
  • Seite 12: De Oven Gebruiken

    De oven gebruiken De snel voorverwarmen( ) functie gebruiken Gebruik de snel voorverwarmen functie om de oven in een mum van tijd op de gewenste temperatuur te brengen totdat het voorverwarmen klaar is. Schakel daarna naar de ovenfunctie alvorens door te gaan. De snel voorverwarmen functie is niet nodig voorafgaand aan het grillen van een gerecht.
  • Seite 13: Testgerechten

    De oven gebruiken (vervolg) Testgerechten Volgens de EN 60350 standaard. 1. Bakken De aanbevelingen voor bakken zijn van toepassing op een voorverwarmde oven. Kook- Inschuif- Temp. Gerecht Toebehoren Ovenfunctie duur °C niveau min. Boven- en Klein gebak Bakplaat 170-190 15-25 onderwarmte Ovenrooster en Boven- en...
  • Seite 14: Reinigen En Onderhoud

    Reinigen en onderhoud Maak de oven en toebehoren pas schoon nadat deze volledig zijn afgekoeld. Oveninterieur Voor het reinigen van de oven gebruikt u een schone doek en een sopje van een mild schoonmaakmiddel. Gebruik geen schuurmiddelen of schuursponsjes. Gebruik een speciale ovenreiniger om hardnekkige vlekken te verwijderen. De ovenwanden reinigen met een sopje van een schoonmaakmiddel en een nylon borstel.
  • Seite 15: Deur Verwijderen

    Reinigen en onderhoud (vervolg) Deur verwijderen In het dagelijks gebruik hoeft de deur niet verwijderd te worden. Volg onderstaande instructies bij het verwijderen van de deur, bijvoorbeeld voor het reinigen. Let op: de deur is zwaar. ° Open de deur en Sluit de deur ongeveer 70 °...
  • Seite 16: Vervangen Van De Lamp

    Trek de stekker van de oven uit het stopcontact of schakel de zekering in de meterkast uit. Leg een doek op de ovenbodem om een vallend afdekkapje of lamp te beschermen. U kunt de lamp bestellen bij de Atag Klantenservice. Vervangen van de ovenlamp en reinigen van het beschermkapje 1.
  • Seite 17: Storingen

    Controleer of de zekering in de meterkast defect is. De oven is correct ingesteld maar wordt niet warm Mogelijk is er een probleem met het elektrische circuit in de oven. Bel de Atag klantenservice. Het display toont een foutcode Er is een storing in het elektrische circuit van de oven. Bel de Atag klantenservice.
  • Seite 18: Fout- En Veiligheidscodes

    Fout- en veiligheidscodes Fout- en veiligheids- Algemene functies Oplossing codes Deze foutcodes duiden op ver- Neem contact op met de Atag minderde prestaties en problemen klantenservice wanneer deze met de veiligheidsvoorzieningen. foutmelding zich voordoet. Schakel de oven onmiddelijk uit. -SE-...
  • Seite 19: Afvoeren Toestel En Verpakking

    Afvoeren toestel en verpakking Bij de vervaardiging van dit toestel is gebruik gemaakt van duurzame materialen. Dit toestel moet aan het eind van zijn levenscyclus op verantwoorde wijze worden afgevoerd. De over- heid kan u hierover informatie verschaffen. De verpakking van het toestel is recyclebaar. Gebruikt kunnen zijn: karton;...
  • Seite 21 Index Commandes du four ............2 Pièces et caractéristiques .
  • Seite 22: Commandes Du Four

    Commandes du four 1. BOUTON DE SÉLECTION DE LA FONCTION 2. FENÊTRE D’AFFICHAGE 3. BOUTON DE COMMANDE DE LA TEMPÉRATURE 4. BOUTON DE SÉLECTION DE L’HEURE...
  • Seite 23: Pièces Et Caractéristiques

    Pièces et caractéristiques Tableau de commande Eléments chauffants supérieurs Niveau Niveau Niveau Niveau Niveau Lumière du four Porte vitrée Poignée de la porte AVERTISSEMENT Les niveaux correspondants aux différentes hauteurs sont numérotés de bas en haut. Les niveaux 4 et 5 servent essentiellement à la fonction gril.
  • Seite 24: Accessoires

    Accessoires Les accessoires suivants sont fournis avec le four front Plaque à pâtisserie Grille métallique La plaque à pâtisserie peut être utili- Une grille métallique pour les plats, sée pour la préparation de gâteaux, les moules à gâteaux, les plaques à de cookies et d’autres pâtisseries.
  • Seite 25: Utilisation De Ce Manuel

    Utilisation de ce manuel Merci d’avoir choisi un four encastrable Atag. Ce manuel d’utilisation présente des informations importantes en matière de sécurité et vous fournit des in- structions vous aidant à faire fonctionner l’appareil et à assurer son entretien. Veuillez lire très attentivement ce manuel d’utilisation avant d’utiliser votre four et conservez-le précieusement en vue d’une consultation ultérieure.
  • Seite 26: Sécurité Pendant Le Fonctionnement De L'appareil

    Consignes de sécurité (suite) Sécurité pendant le fonctionnement de l’appareil Ce four est réservé à la cuisson d’aliments dans le cadre d’un usage domestique uniquement. Lorsque le four fonctionne, la chaleur des surfaces internes suf t pour brûler. Ne touchez pas les éléments chauffants ou les surfaces internes du four avant qu’ils n’aient eu le temps de refroidir.
  • Seite 27: Installation

    Installation Consignes de sécurité pour le technicien L’installation électrique de cet appareil doit être effectuée uniquement par un électricien quali é.Le four doit être installé conformément aux instructions fournies. Après l’installation, retirez la protection en vinyle de la porte. L’installation doit garantir une protection contre toute exposition à des pièces sous tension. Les éléments dans lesquels l’appareil est encastré...
  • Seite 28: Installation (Suite)

    Installation (suite) Assurez-vous que le four est maintenu correctement en le xant de part et d’autre à l’aide de vis. Une fois l’appareil installé, retirez le lm protecteur en vinyle recouvrant la porte du four ainsi que celui situé sur chacune des parois internes du four.
  • Seite 29: Avant De Commencer

    Avant de commencer Réglage de l’horloge Lorsque l’appareil est mis sous tension pour la première fois, l’af chage du tableau de commande s’allume brièvement. Après 3 secondes, une icône représentant une horloge et l’af chage 12:00 se mettent à clignoter. Appuyez sur le Tournez le bouton de Appuyez sur le...
  • Seite 30: Utilisation Du Four

    Utilisation du four Utilisation du mode Préchauffage rapide ( Utilisez la fonction PRÉCHAUFFAGE RAPIDE pour que la température atteigne la valeur réglée à la n du préchauffage. Passez ensuite en mode Cuisson avant de continuer. La fonction PRÉCHAUFFAGE RAPIDE n’est en revanche pas nécessaire lorsque vous souhaitez faire griller des aliments.
  • Seite 31: Essais De Plats

    Utilisation du four (suite) Essais de plats Conformément à la norme EN 60350 1. Faire cuire de la pâte crue Les types de cuisson recommandés sont valables four préchauffé. Temps de Mode de Temp. Plats Accessoires Niveau cuisson en cuisson en °C min.
  • Seite 32: Nettoyage Et Entretien

    Nettoyage et entretien Assurez-vous que le four et les accessoires ont suf samment refroidis avant de les nettoyer. Intérieur du four Nettoyez le revêtement de protection catalytique émaillé à l’aide d’eau chaude savonneuse et d’une brosse en nylon souple. N’utilisez pas d’éponges à récurer ou de produits abrasifs. Utilisez un nettoyant spécial pour four a n d’enlever les tâches résistantes.
  • Seite 33: Retrait De La Porte

    Nettoyage et entretien (suite) Retrait de la porte Dans le cadre d’une utilisation normale, il n’est pas nécessaire de retirer la porte. Si toutefois le retrait est nécessaire, pour le nettoyage par exemple, suivez les instructions ci-dessous. ATTENTION : La porte du four est lourde. °...
  • Seite 34: Remplacement De L'ampoule

    Nettoyage et entretien (suite) Remplacement de l’ampoule ATTENTION: Risque de choc électrique Avant de remplacer une ampoule du four, suivez la procédure ci-dessous: Éteignez le four. Débranchez le four. Protégez l’ampoule électrique et son cache en verre en recouvrant le plancher du four avec un linge.
  • Seite 35: Pannes

    Consultez les indications ci-dessous pour trouver une solution. Si vous n’y parvenez pas, téléphonez alors au Service Client Atag. Que faire si le four ne chauffe pas? Véri ez si l’une des solutions suivantes permet de résoudre le problème: Le four n’est peut-être pas allumé.
  • Seite 36: Codes D'erreur Et De Sécurité

    Solution et de sécurité Une défaillance du four peut Contactez le service après- en réduire les performances vente ATAG le plus proche. et représenter un danger pour - SE - l’utilisateur. Ne tentez pas de vous en servir. Dispositif d’arrêt de sécurité...
  • Seite 37: Élimination De L'appareil Et De L'emballage

    Élimination de l’appareil et de l’emballage Des matériaux durables ont été utilisés dans la fabrication de cet appareil. Cet appareil doit être éliminé de façon appropriée à la n de son cycle de vie. Les autorités peuvent vous renseigner à ce sujet. L’emballage de l’appareil est recyclable.
  • Seite 39 Inhalt Bedienelemente des Backofens ..........2 Beschreibung .
  • Seite 40: Bedienelemente Des Backofens

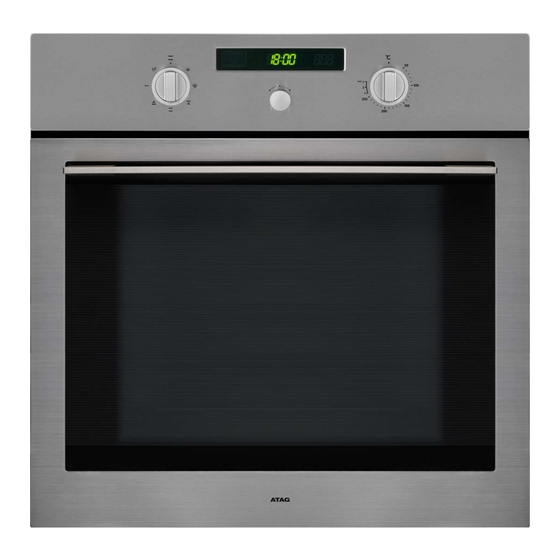
    Bedienelemente des Backofens 1. FUNKTIONSWAHLSCHALTER 3. TEMPERATURWAHLSCHALTER 2. ANZEIGEFENSTER 4. ZEITWAHLSCHALTER...
  • Seite 41: Beschreibung

    Beschreibung Bedienfeld Oberes Heizelement Einschubhöhe Einschubhöhe Einschubhöhe Einschubhöhe Einschubhöhe Backofenbeleuchtung Gerätetür aus Glas Türgriff ACHTUNG Die Einschubhöhen sind von unten nach oben nummeriert. Die Einschubhöhen 4 und 5 werden vor allem für die Grillfunktion verwendet.
  • Seite 42: Zubehör

    Zubehör Das folgende Zubehör ist im Lieferumfang des Backofens enthalten: Vorseite Backblech Ofenrost Das Backblech kann für die Zuberei- Der große Rost kann zum Grillen tung von Kuchen, Keksen und Biskuit und Braten von Gerichten verwendet verwendet werden. werden. Wenn Sie den Rost her- aus nehmen, müssen Sie et etwas aufheben.
  • Seite 43: Arbeiten Mit Dieser Bedienungsanleitung

    Sie den Stecker aus der Steckdose. Unsachgemäß durchgeführte Reparaturen können Sie und andere erheblichen Risiken aussetzen. Wenn Ihr Backofen repariert werden muss, setzen Sie sich bitte über Ihren Fachhändler mit dem Atag-Kundendienst in Verbindung. Um unsichere Situationen zu vermeiden, muss ein beschädigtes Anschlusskabel durch den Kundendienst ausgetauscht werden.
  • Seite 44: Sicherheit Beim Betrieb

    Vorsichtsmaßnahmen (Fortsetzung) Sicherheit beim Betrieb Stellen Sie sicher, dass das Gerät ausgeschaltet ist, bevor Sie die Glühlampe auswechseln, da sonst die Gefahr eines elektrischen Schlags besteht. Während des Betriebs werden die inneren Ober ächen des Ofens sehr heiß. Dieser Backofen ist ausschließlich für das Garen von Speisen in privaten Haushalten ausgelegt. Während des Betriebs werden die Innenwände des Backofens so heiß, dass sie Verbrennungen verursachen können.
  • Seite 45: Einbauen Und Installation

    Einbauen und Installation Sicherheitshinweise für die Installation Die Installation dieses Ofens darf nur von einem zugelassenen Elektriker durchgeführt werden. Der Installateur ist dafür verantwortlich, das Gerät an das Stromnetz anzuschließen und dabei die relevanten Sicherheitsbestimmungen zu beachten. Bevor Sie mit dem Einbau beginnen, kontrollieren Sie, ob der Anschluss von der Stromversorgung getrennt ist.
  • Seite 46: Einbauen Und Installation (Fortsetzung)

    Der Backofen wird über die ( )-Klemme geerdet. Wenn der Backofen mit einem Stecker an das Stromnetz angeschlossen wird, muss dieser Stecker auch nach dem Einbau des Backofens zugänglich bleiben. ATAG übernimmt keine Haftung bei Unfällen, die auf fehlende oder fehlerhafte Erdung zurückzuführen sind.
  • Seite 47: Einstellungen

    Einstellungen Zeit einstellen Wenn der Ofen erstmals an das Netz angeschlossen wird, leuchtet sein Display kurz auf und nach 3 Sekunden wird die Uhrzeit 12:00 blinkend angezeigt. Wenn Sie den Drehen Sie den Wenn Sie den Zeitwahlschalter Zeitwahlschalter, Zeitwahlschalter drücken, beginnt die um die Stunden drücken, beginnt die Stundenanzeige zu...
  • Seite 48: Verwenden Des Ofens

    Verwenden des Ofens Verwenden des Modus zum schnellen Vorheizen ( Verwenden Sie die Funktion zum SCHNELLEN VORHEIZEN, um die eingestellte Temperatur bis zum Ende des Vorheizens zu erreichen Damit verkürzen Sie Ihre Wartezeit beim Vorheizen drastisch. Wechseln Sie dann zum Kochmodus, ehe Sie fortfahren. Sie brauchen die Funktion SCHNELL VORHEIZEN beim Grillen von Gerichten jedoch nicht zu verwenden.
  • Seite 49: Testgeschirr

    Verwenden des Ofens (Fortsetzung) Testgeschirr Gemäß EN 60350 1. Backen Die Backempfehlungen beziehen sich auf den vorgeheizten Ofen. Einschub- Temperatur Garzeit Gericht Zubehör Ofenfunktion °C (min.) höhe Kleiner Backblech Normalbetrieb 170-190 15-25 Kuchen Backform auf Großem Rost Fettfreier Normalbetrieb 160-180 25-35 Biskuit (Dunkel beschichtet,...
  • Seite 50: Reinigung Und P Ege

    Reinigung und P ege Stellen Sie sicher, dass der Ofen und das Zubehör vor dem Reinigen abgekühlt sind. Das Innere des Ofens Zum Reinigen der Innen ächen des Ofens verwenden Sie ein sauberes Tuch und ein mildes Reinigungsmittel oder warmes Seifenwasser. Verwenden Sie keine Scheuer- oder Reinigungsschwämme.
  • Seite 51: Ausbau Der Gerätetür

    Reinigung und P ege (Fortsetzung) Ausbau der Gerätetür Im Normalfall darf die Ofenklappe nicht entfernt werden, sondern nur, wenn dies beispielsweise zum Reinigen erforderlich ist. VORSICHT: Die Ofenklappe ist schwer. ° Öffnen Sie die Tür Schließen Sie die Gerätetür halb (etwa 70 °). Fassen und lassen Sie Sie die Ofenklappe mit beiden Händen in der Mitte die Clips an den...
  • Seite 52: Austauschen Der Glühbirne

    Schützen Sie die Glühbirne im Ofen und die Glaskappe durch ein Tuch auf dem Ofenboden vor Zerbrechen. Glühbirnen können Sie beim ATAG-Kundendienst erwerben. Hintere Backofenlampe austauschen und Glasabdeckung reinigen 1. Drehen Sie die Kappe gegen den Uhrzeigersinn, um sie zu entfernen, und nehmen Sie den Metall- und den Blechring heraus.
  • Seite 53: Störungen

    Kleinigkeit, die Sie selbst beheben können. Überprüfen Sie mithilfe der untenstehenden Anweisungen, ob Sie eine Lösung nden können. Ist das nicht der Fall, dann rufen Sie den Atag-Kundendienst an. Was ist zu tun, wenn der Ofen nicht aufheizt? Kontrollieren Sie die folgenden Punkte: Ist evtl.
  • Seite 54: Fehler- Und Sicherheitscodes

    (siehe Abschnitt ‘Verwenden des Modus zum schnellen Vorheizen’). 1) * Bezeichnet alle Zahlen oder Zeichen. Technische Daten Modell OX6411B Eingangsspannung und Frequenz 230 V ~ 50 Hz Ausgangsleistung max. 3400 W Abmessungen (B x H x T) 598 x 595 x 566 mm Gehäuse...
  • Seite 55: Entsorgung Des Geräts Und Der Verpackung

    Entsorgung des Geräts und der Verpackung Bei der Herstellung des Geräts wurden dauerhafte Materialien verwendet. Am Ende seines Lebenszyklus muss das Gerät auf verantwortliche Weise entsorgt werden. Einschlägige Infor- mationen erhalten Sie bei den zuständigen Behörden. Die Verpackung des Geräts kann dem Recycling zugeführt werden. Folgende Materialien kön- nen verwendet worden sein: Karton;...
  • Seite 57 CONTENTS Control panel Oven features Accessories Using this manual Safety instructions Installation and connection Settings Setting the clock Child safety function Setting the cook time Settings Using the oven Cleaning and care Troubleshooting Error and safety codes Technical specifications Disposal of appliance and packaging EN 3...
  • Seite 58: Control Panel

    CONTROL PANEL 1. FUNCTION SELECT KNOB 3. TEMP CONTROL KNOB 2. WINDOW DISPLAY 4. TIME SELECT KNOB EN 4...
  • Seite 59: Oven Features

    OVEN FEATURES Control panel Top heating elements Level Level Level Level Level Oven light Glass door Door handle Note • Shelf levels are numbered from the bottom up. • The levels 4 and 5 are mainly used for grill mode. EN 5...
  • Seite 60: Accessories

    ACCESSORIES The following accessories are provided with your oven: Baking tray The baking tray could be used for the preparation of cakes, cookies and other pastries. Front Wire rack The wire rack should be used for dishes, cake tins, roasting and grilling trays. If you remove the wire rack completely out off the oven, you must lift it a little at the end.
  • Seite 61: Using This Manual

    USING THIS MANUAL Thank you for purchasing an ATAG built-in oven. First read the user instructions carefully and completely before starting to use the appliance, and keep them carefully for future reference. EN 7...
  • Seite 62: Safety Instructions

    • Repairs should be performed by a licensed technician only. Improper repair may result in considerable danger to you and others. If your oven needs repair, contact the Atag Customer Service or your dealer. • If the supply cord is defective, it must be replaced by a special cord or assembly available from the manufacturer or an authorised service agent.
  • Seite 63 SAFETY INSTRUCTIONS lack of experience and knowledge, provided they are supervised and instructed in the safe use of the appliance and understand the associated dangers. Do not allow children to play with the appliance. Do not allow children to clean or maintain the appliance unless supervised.
  • Seite 64: Installation And Connection

    INSTALLATION AND CONNECTION Safety instructions for the installation This oven may be installed only by an approved electrician. The installer is responsible for connecting the appliance to the mains and in so doing for observing the relevant safety regulations. • Ensure protection from live parts when installing the oven. •...
  • Seite 65 INSTALLATION AND CONNECTION 1. Fix the oven on both sides using screws. 2. After installation, remove the vinyl protective film from the door to the appliance and the protective film from the interior surfaces of the oven. Connecting to the mains power supply •...
  • Seite 66: Setting The Clock

    SETTINGS Setting the Clock When the power is first supplied to the oven, the display on the control panel will light briefly. After 3 seconds, you will see ‘12:00’ in the display. Press the Time Select Knob, the hour fi gures blink. Turn the Time Select Knob, set the desired time in hours.
  • Seite 67: Setting The Cook Time

    SETTINGS Setting the Cook Time You can use the ‘set cook time function’ in operating status. Turn the Time Select Knob, set the cook time. Press the Time Select Knob to confi rm. • While it is operating, press the Time Select Knob to display the clock for the current time.
  • Seite 68: Using The Oven

    USING THE OVEN Using the Fast Preheating ( ) mode If you use the FAST PREHEATING option, you can increase the temperature up to the set value in no time. This will drastically shorten your waiting time until the preheating is done. Use the FAST PREHEATING option to increase the temperature to the set value until the preheating is completed.
  • Seite 69 USING THE OVEN Bottom Heat + Convection The heat generated by the lower heating system and the convection is shared evenly in the oven by fans. This function should be used for pizzas, bread and cakes. Suggested temperature: 190 °C Large Grill Heat is emitted from the large area grill.
  • Seite 70: Cleaning And Care

    CLEANING AND CARE Make sure the oven and accessories are cool before cleaning. Oven interior • For cleaning the interior of the oven, use a clean cloth and a mild cleaning product or warm soapy water. • Do not hand-clean the door seal. •...
  • Seite 71 CLEANING AND CARE Door removal For normal use, the oven door must not be removed but if removal is necessary, for example, for cleaning purposes, follow these instructions. CAUTION: The oven door is heavy. Open the door and fl ip open the clips at both hinges completely.
  • Seite 72 3. Protect the oven light bulb and the glass cap by laying a cloth on the bottom of the oven compartment. Bulbs can be purchased from the ATAG Customer Service. Rear oven lamp 1. Remove the cap by turning anticlockwise and remove the metal ring, the sheet ring and clean the glass cap.
  • Seite 73 TROUBLESHOOTING If you have problems with your oven, try the solutions suggested below. They may save you the time and inconvenience of an unnecessary service call. What should I do if the oven doesn’t heat up? Check to see if one of the following actions resolves the issue: •...
  • Seite 74 ERROR AND SAFETY CODES Code General Function Solution An error of the oven may cause Call local ATAG customer service. low performance and problems in safety. Stop using the oven immediately. -SE- SAFETY SHUTOFF Turn the oven off and remove food.
  • Seite 75: Technical Specifications

    TECHNICAL SPECIFICATIONS Model OX6411B Power Source 230 V ~ 50 Hz Output Rating max. 3400 W Dimensions (W x H x D) 598 x 595 x 566 mm Outside 440 x 365 x 405 mm Oven cavity net. Volume (usable capacity)
  • Seite 76: Disposal Of Appliance And Packaging

    DISPOSAL OF APPLIANCE AND PACKAGING Sustainable materials have been used during manufacture of this appliance. This appliance must be disposed of responsibly at the end of its service life. The government can provide you with information about this. The appliance packaging is recyclable. The following may have been used: •...

Inhaltsverzeichnis