Herunterladen Inhalt Inhalt Diese Seite drucken
Laserworld DS-2000RGB Bedienungsanleitung

Laserworld DS-2000RGB Bedienungsanleitung

Diode series
Vorschau ausblenden Andere Handbücher für DS-2000RGB:

Werbung

Verfügbare Sprachen

Verfügbare Sprachen

Manual / Bedienungsanleitung / Mode d'emploi
Diode Series
DS-2000RGB | DS-3000RGB
DS-1800G | DS-1600B | DS-5500B
Please spend a few minutes to read this manual fully
before operating this laser!
Bitte lesen Sie diese Bedienungsanleitung sorgfältig
vor Inbetriebnahme dieses Showlasersystems!
Avant d'utiliser cet appareil pour la première fois nous vous recommandons
de lire cette notice d'utilisation!
English
Deutsch
Français
04/2018

Werbung

Inhaltsverzeichnis
loading

Inhaltszusammenfassung für Laserworld DS-2000RGB

  • Seite 1 Manual / Bedienungsanleitung / Mode d‘emploi Diode Series DS-2000RGB | DS-3000RGB DS-1800G | DS-1600B | DS-5500B Please spend a few minutes to read this manual fully before operating this laser! Bitte lesen Sie diese Bedienungsanleitung sorgfältig vor Inbetriebnahme dieses Showlasersystems! Avant d’utiliser cet appareil pour la première fois nous vous recommandons...
  • Seite 2 Due to continual product developments and technical improvements, La- serworld (Switzerland) AG reserves the right to make modifications to its products. This manual and its content have been made with due care but Laserworld (Swit- zerland) AG cannot however, take any responsibility for any errors, omissions or any resulting damages forthwith.
  • Seite 3: Inhaltsverzeichnis

    Manual: Diode Series Content: Product and package contents Preliminary warning notices Initial operations, safety instructions Working on the device Service notes Warnings and other notices on the device Device connections Operation Final statement Technical data sheet Laser specifications page 3 / 36...
  • Seite 4: Product And Package Contents

    Manual: Diode Series 1. Product and package contents Please check if all listed parts are included and undamaged. Included in delivery: 1 x laser projector 2 x keys 1 x manual 1 x power cable 1 x interlock bridge 2. Preliminary warning notices 1.
  • Seite 5: Working On The Device

    Switch off device when it is not nee- during transportation. Look after your ded. Diodes are switched on and can Laserworld product. wear out even if there is no visible la- • To increase durability of your laser, ser output.
  • Seite 6: Warnings And Other Notices On The Device

    Manual: Diode Series • Removal of the warranty label as well • Please ensure the fans and heatsinks are as damages to the device caused by clear from dust and debris otherwise the improper handling, neglect of the sa- risk of overheating may occur. If the unit fety instructions and service notes will and airways appear to be blocked then void the warranty.
  • Seite 7: Operation

    Fuse There is a fuse at the rear side of the device. If the fuse should blow, please change it by a new one. If the problems recurs, please contact your dealer or the Laserworld service department. Key Switch There is a key switch at the back of the laser system.
  • Seite 8 Manual: Diode Series Zoom Use the Zoom-X / Zoom-Y knobs to change the pattern size on the X resp. Y axis. Modes / Functions The modes can be selected by the ‚MODE‘ button below the LED display. Use the ‚UP‘ or ‚DOWN‘...
  • Seite 9 Manual: Diode Series Channel Value Function 5 Y-axis movement no movement 1 - 167 manual positioning 168 - 188 movement top to bottom (slow to fast) 189 - 209 movement bottom to top 210 - 254 movement top to bottom no movement 6 Zoom 0 - 10...
  • Seite 10 ILDA control: Connect your device („ILDA IN“) via an ILDA cable to an interface / controller. ILDA mode starts immediately. Use a laser control software, e.g. Laserworld Showeditor, to run the device. Use „ILDA OUT“ to connect it to another device.
  • Seite 11 Manual: Diode Series Convergence settings for dichros - Service openings Settings for convergence must be made while the laser unit is running, therefore please take care about your safety first - don‘t look directly at the laser beam! There is a flap on the panel on the right side (seen from front side). Unscrew the screws and carefully remove the flap.
  • Seite 12: Final Statement

    Due to continual product developments, please check for the latest update of this product manual at www.laserworld.com. If you do have any further questions, then please contact your dealer/place of purchase or use our contact section on our website.
  • Seite 13 Manual: Diode Series Inhaltverzeichnis: Lieferumfang & Hinweise Einleitende Warnhinweise Schritte zur Inbetriebnahme, Sicherheitshinweise Sicherheitshinweise für Arbeiten am Gerät Pflege- und Wartungshinweise Warnhinweise und Spezifikationen am Gerät Geräteanschlüsse & Bedienelemente Bedienung Abschließende Erklärung Technische Daten Laserleistungsdaten page 13 / 36...
  • Seite 14: Lieferumfang & Hinweise

    Manual: Diode Series 1. Lieferumfang & Hinweise Bitte prüfen Sie, ob Sie die Lieferung vollständig erhalten haben und die Ware unbeschädigt ist. Im Lieferumfang enthalten sind: 1 x Laserprojektor 2 x Schlüssel 1 x Bedienungsanleitung 1 x Stromkabel 1 x Interlock-Bridge 2.
  • Seite 15: Sicherheitshinweise Für Arbeiten Am Gerät

    Lasersystems stark ver- Erschütterung oder Schläge vermeiden. kürzen und führen zum Erlöschen des Bitte das Produkt bestmöglich schützen. Gewährleistungsanspruchs. Laserworld bietet entsprechendes Equip- ment an. • Das Gerät nicht schnell hintereinander Ein- und Ausstecken/-schalten, da dies die Lebensdauer der Laserdiode erheb- lich verkürzen kann!
  • Seite 16 Manual: Diode Series • Um die Lebensdauer Ihres Lasers zu erhö- gung. Auch wenn die Diode nicht hen, schützen Sie das Gerät vor Überhit- leuchtet: Sie ist in Betrieb, solange zung: das Gerät angeschaltet ist. Immer für ausreichende Belüftung • Lüfter und Kühlkörper (Kühlrippen usw.) sorgen.
  • Seite 17: Geräteanschlüsse & Bedienelemente

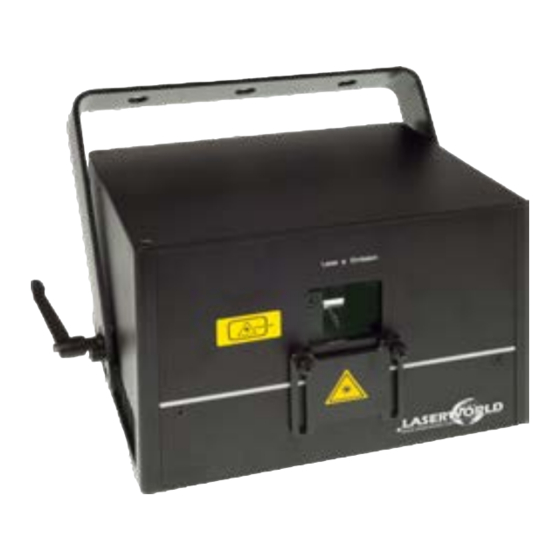
    Manual: Diode Series 7. Geräteanschlüsse & Bedienelemente X / Y Spiegelung Mikrofon- Mikrofon Modusauswahl, LED Display sensitivität DMX-Adressierung, usw. Interlock An-/ Schlüssel- Auschalter schalter Ausgang Sicherung Scan Safety Eingang Strom- versorgung Mustergröße Zoom ILDA Eingang Öse zur Befesti- ILDA Ausgang gung eines Sicherheitsfangseils page 17 / 36...
  • Seite 18: Bedienung

    Schnittstelle. Um die ILDA-in-Schnittstelle zu verwenden muss ein ILDA-Kabel über ein kompatibles Interface mit einem Computer verbunden werden. Nun kann der Laser über die zuvor installierte Showlasersoftware (z.B. Laserworld Showeditor) angesteuert wer- den. Die ILDA-out Schnittstelle ist dafür gedacht, das Gerät mit einem weiteren zu ver- binden.
  • Seite 19 Manual: Diode Series Mustergröße / Zoom Über die Zoom-X / Zoom-Y Knöpfe können die Mustergröße an der X- bzw. Y-Achse geändert werden. Modi Die Modi können über den ‚MODE‘ Knopf unter dem LED Display ausgewählt werden. Über die ‚UP‘ oder ‚DOWN‘ Knöpfe kann die gewünschte DMX-Adressierung eingestellt werden und durch Drücken des ‚DIR‘...
  • Seite 20 Manual: Diode Series Kanal Wert Funktion Keine Bewegung 4 Horizontale Bewegung 1 - 167 Manuelle Positionierung / Offset 168 - 188 Links-rechts-Bewegung (schneller werdend) 189 - 209 Rechts-links-Bewegung 210 - 254 Links-rechts-Bewegung Keine Bewegung 5 Vertikale Bewegung Keine Bewegung 1 - 167 Manuelle Positionierung 168 - 188 Abwärtsbewegung (schneller werdend)
  • Seite 21 ILDA Ansteuerung: Das Gerät („ILDA IN“) über ILDA Kabel mit einem Interface / Controller verbinden. Die Ansteuerung erfolgt anschließend über Lasersteuersoftware, wie z.B. Laserworld Showeditor. Der Anschluss „ILDA OUT“ dient dazu, das Gerät mit einem weiteren zu verbinden. • Master-Slave-Modus: Um Daisy Chain bzw.
  • Seite 22: Konvergenzeinstellung Der Dichros - Serviceöffnung

    Manual: Diode Series 10. Gerät ausschalten Um das Gerät vollständig auszuschalten, „OFF“ am An- / Ausschalter drücken, den Schlüssel auf „OFF“ drehen und von der Stromversorgung trennen. Konvergenzeinstellung der Dichros - Serviceöffnung Konvergenzeinstellungen werden bei laufenden Geräten vorgenommen, achten Sie deshalb besonders auf ihre Sicherheit.
  • Seite 23: Abschließende Erklärung

    Sollten Änderungen an dieser Bedienungsanleitung vorgenommen werden, können wir Sie darüber nicht in Kenntnis setzen. Bitte kontaktieren Sie für Fragen Ihren Händler. Für Servicefragen wenden Sie sich bitte an Ihren Händler oder aber an Laserworld. Verwenden Sie auschließlich Laserworld-Ersatzteile. Änderungen vorbehalten. Aufgrund der Datenmenge kann keine Gewähr für die Richtigkeit der Angaben gegeben werden.
  • Seite 24 Manual: Diode Series Table des matières: Contenu et informations Avertissements d’usage et précautions avant d’utiliser cet appareil Démarches pour la mise en service, mesures de précaution Instructions de sécurité pour le travail avec l’appareil Soin et entretien Description de l’appareil et mesures de sécurité Comment brancher l’appareil Utilisation et fonctionnement Explication finale...
  • Seite 25: Contenu Et Informations

    6. Protéger le laser de l’humidité et des projections d’eau. Aucune bouteille contenant un liquide ne doit être posée sur l’appareil ou à proximité. En cas de rupture du sigle de garantie, Laserworld décline toute responsabilité et votre appareil ne sera dès lors plus sous garantie! 3.
  • Seite 26: Instructions De Sécurité Pour Le Travail Avec L'appareil

    Manual: Diode Series exposure). d’accidents. 10. Si l’appareil a été exposé à de gran- 5. Dans certains pays il est nécessaire de des fluctuations de température, ne faire certifier l’installation laser par un l’allumez pas tout de suite car la conden- organisme de vérification agréé.
  • Seite 27: Soin Et Entretien

    Nous vous recommandons de transpor- le câble d’alimentation du projecteur ter l’appareil laser à l’abri de secousses. laser. Même si la diode n’émet pas, elle Laserworld propose différentes solutions reste sous tension (courant de stand-by). de protection du matériel (flightcase) •...
  • Seite 28: Comment Brancher L'appareil

    Manual: Diode Series 7. Comment brancher l’appareil - connectiques Miroitement X / Y Réglage de Microphone Accès menu pour régla- Display LED la sensibilité ges, DMX, etc. Interlock du micro Interrupteur Interrupteur général à clé Sortie DMX Fusible Scan Safety Entrée DMX Alimentation électrique...
  • Seite 29: Utilisation Et Fonctionnement

    ILDA. Dès lors, vous pouvez contrôler le laser via le logiciel de gestion préalablement installé sur votre ordinateur (par exemple Laserworld Showedi- tor). La sortie ILDA (ILDA-OUT) est utilisée pour connecter ce projecteur laser à un second système laser.
  • Seite 30 Manual: Diode Series Réglage de la taille de projection / Zoom Utilisez les potentiomètres de réglage Zoom-X et Zoom-Y pour changer la taille de pro- jection pour les axes de projection (X,Y). Modes / Fonctions Les modes de fonctionnement peuvent être sélectionnés via le bouton ‚MODE‘ situé en dessous de l‘affichage LCD.
  • Seite 31 Manual: Diode Series Canal Valeur Fonction Pas de mouvement 4 Mouvement horizontal 1 - 167 Positionnement manuel / offset 168 - 188 Mouvement gauche-droite (vitesse croissante) 189 - 209 Mouvement droite-gauche 210 - 254 Mouvement gauche-droite Pas de mouvement Pas de mouvement Mouvement vertical 1 - 167 Positionnement manuel...
  • Seite 32 Connectez le câble ILDA entre l‘entrée „ILDA IN“ du projecteur laser et l‘interface laser. Le contrôle aura ainsi uniquement lieu via logiciel de gestion laser sur ordinateur tel que le logiciel Laserworld Showeditor. La sortie „ILDA OUT“ sert à connecter un autre pro- jecteur laser sur le même signal ILDA.
  • Seite 33 Manual: Diode Series 10. Éteindre le projecteur Pour complètement éteindre votre projecteur, basculez l‘interrupteur sur „OFF“ , tournez l‘interrupteur à clé sur „OFF“ et déconnectez le câble d‘alimentation de l‘appareil. Réglage de la convergence des faisceaux via dichros - accès Les réglages de la convergence des couleurs s‘effectuent en ayant l‘appareil sous tension, en projection laser.
  • Seite 34 Veuillez-vous renseigner sur notre site internet ou auprès de votre marchand. Pour les questions liées au service, demandez à votre marchand ou adressez-vous à Laser- world. Utilisez uniquement des pièces de rechange Laserworld. Nous nous réservons le droit d’effectuer des modifications, améliorations à ce mode d’emploi. Laserworld décline toute res- ponsabilité...
  • Seite 35 ILDA, DMX, mode auto, mode musical, Maître-Esclave Power supply: Stromversorgung: 85 - 250 V AC 50/60 Hz internal Alimentation: Power consumption: 45 W (DS-2000RGB); 80 W (DS-3000RGB); Stromaufnahme: 70 W (DS-1800G); Consommation: 60 W (DS-1600B); 130 W (DS-5500B) Operating temperature: Betriebstemperatur: +10°...
  • Seite 36 Manual: Diode Series page 36 / 36...

Diese Anleitung auch für:

Ds-3000rgbDs-1800gDs-1600bDs-5500b

Inhaltsverzeichnis