Herunterladen Inhalt Inhalt Diese Seite drucken
Laserworld Diode Series Bedienungsanleitung

Laserworld Diode Series Bedienungsanleitung

Vorschau ausblenden Andere Handbücher für Diode Series:

Werbung

Verfügbare Sprachen

Verfügbare Sprachen

Manual / Bedienungsanleitung / Mode d'emploi
Diode Series
DS-1000RGB | DS-2000RGB | DS-3000RGB
DS-1800G | DS-3000G
DS-1600B | DS-5500B
Please spend a few minutes to read this manual fully
before operating this laser!
Bitte lesen Sie diese Bedienungsanleitung sorgfältig
vor Inbetriebnahme dieses Showlasersystems!
Avant d'utiliser cet appareil pour la première fois nous vous recommandons
de lire cette notice d'utilisation!
English
Deutsch
Français
05/2019

Werbung

Inhaltsverzeichnis
loading

Inhaltszusammenfassung für Laserworld Diode Series

  • Seite 1 Manual / Bedienungsanleitung / Mode d‘emploi Diode Series DS-1000RGB | DS-2000RGB | DS-3000RGB DS-1800G | DS-3000G DS-1600B | DS-5500B Please spend a few minutes to read this manual fully before operating this laser! Bitte lesen Sie diese Bedienungsanleitung sorgfältig vor Inbetriebnahme dieses Showlasersystems! Avant d’utiliser cet appareil pour la première fois nous vous recommandons...
  • Seite 2 Laserworld (Switzerland) AG reserves the right to make modifications to its products. This manual and its content have been made with due care but Laserworld (Switzerland) AG cannot however, take any res- ponsibility for any errors, omissions or any resulting damages forthwith. The brands and product names mentioned in this manual are trade marks or registered trade marks of their respective owners.
  • Seite 3: Inhaltsverzeichnis

    Manual: Diode Series Content: Product and package contents Preliminary warning notices Initial operations, safety instructions Working on the device Service notes Warnings and other notices on the device Device connections General Operation Operation Modes FB4 version Final statement Technical data sheet...
  • Seite 4: Product And Package Contents

    Manual: Diode Series 1. Product and package contents Please check if all listed parts are included and undamaged. Included in delivery: 1 x laser projector 2 x keys 1 x manual 1 x power cable 1 x interlock bridge 1 x hex key 2.
  • Seite 5: Working On The Device

    Manual: Diode Series 10. If the device has been exposed to great 12. Ensure sufficient ventilation and do not temperature changes, do not switch it place the device on any warm or heat ra- diating surface. Especially the ventilati- on immediately. Condensation (or any...
  • Seite 6: Warnings And Other Notices On The Device

    Manual: Diode Series • Removal of the warranty label as well • Please ensure the fans and heatsinks are as damages to the device caused by clear from dust and debris otherwise the improper handling, neglect of the sa- risk of overheating may occur. If the unit...
  • Seite 7 Manual: Diode Series DS-1000RGB X / Y inversion microphone microphone On/Off switch DIP switches sensitivity Scan Safety key switch Interlock LAN / ShowNET Interlock Out DMX in power connection DMX out ILDA in loop for ILDA out safety cord FB4 version...
  • Seite 8: General Operation

    Fuse There is a fuse at the back side of the device. If the fuse should blow, please exchange it with a new one. If the problems recurs, please contact your dealer or the Laserworld service department. Safety Presets This device has an integrated Scan Safety (SFS).
  • Seite 9: Operation Modes

    Manual: Diode Series Turn device off To turn off the device, use the power button („OFF“), turn the key to ‚OFF‘ and disconnect the power cable from the mains. 9. Operation Modes (Firmware version: 20190520x - Admin tool: v1.33) This laser system can be operated in many different operation modes. It is possible to...
  • Seite 10 Manual: Diode Series The software can be downloaded for free on: https://www.showeditor.com After downloading and installing the software, open the .exe file on the computer and use the software to operate the show laser system. Details on installation and use of the software please find on the aforementioned web- site.
  • Seite 11 Manual: Diode Series Select the *.ild files to be uploaded from the computer (left side) to the integrated SD card memory (right side). Click on the button with the two arrows to the right to upload the *.ild files to the integ- rated SD card.
  • Seite 12 Manual: Diode Series Stand-Alone Mode / Automatic Mode / Playback Mode Dip switch setting switch On (1) / Off (0) In stand-alone mode the ILDA files on the integrated SD card are triggered automatically. This setting is especially suitable for demo purposes or for fixed laser installations.
  • Seite 13 Manual: Diode Series Master-Slave-Mode: Sound-to-Light MASTER unit: switch On (1) / Off (0) SLAVE units: switch On (1) / Off (0) To have the same effects show on all connected units, it is required to have the same pattern sets on all SD cards inside the units.
  • Seite 14 Manual: Diode Series Click on ‚Store Data‘ to save the changes. Click on ‚OK‘ twice and wait until another win- dow opens that asks to restart the ILDA interface. To do so, switch the laser system off and on again.
  • Seite 15 Manual: Diode Series (1) DJ Mode To get laser output, DMX channel 1 needs to have a value greater than 0 (recommended 64 to 192) Channel Mode Value Function 1 Intensity Laser off 1 - 255 Increase intensity (full intensity = 255) 2 Pattern selection Blackout (000.ild must not exist)
  • Seite 16 Manual: Diode Series Channel Mode Value Function 12 Color effects 0 - 127 Smooth color fade effect to the re-color effect extended Value of channel 11 must be >15! 128 - 192 Blocking color effect to the re-color effect Value of channel 11 must be >15!
  • Seite 17: Professional Mode

    Manual: Diode Series (2) Professional Mode Channel Mode Value Function 1 Intensity Prof. Laser off 1 - 255 Increase intensity (full intensity = 255) 2 Pattern selection Prof. Blackout (000.ild must not exist) 1 - 255 Display patterns from SD card: 1 = 001.ild...
  • Seite 18 Manual: Diode Series Channel Mode Value Function 17 Strobe Prof. 0 - 15 None 16 - 255 Increasing strobe effect 18 Scan speed Prof. 0 - 15 Default 16 - 255 Increasing scan speed (from 5 kpps to 40 kpps) 19 Safety zone size Prof.
  • Seite 19 Manual: Diode Series Network Operation Important: Only ShowNET interfaces and potentially an ArtNet controller must be used in the same net- work. Avoid using other network devices in the same network. Avoiding connectivity issues, Troubleshooting: - Make sure that no firewall is blocking the network traffic between the computer and the show laser device.
  • Seite 20 192.168.0.100 (subnet = 255.255.255.0) ILDA Streaming The Laserworld ShowNET interface is capable to act as range extender for ILDA signals by tranforming an incoming ILDA signal on the ILDA IN interface to a standard UDP network signal and transferring this signal back to standard ILDA in a receiver unit (obviously an external ShowNET interface is required as sender for this kind of application!) .
  • Seite 21 Manual: Diode Series Dip switch setting switch On (1) 0000 -> IP sender: 192.168.2.70 sends to 192.168.2.50 sender: 0 / Off 0001 -> IP sender: 192.168.2.71 sends to 192.168.2.51 receiver: 1 0010 -> IP sender: 192.168.2.72 sends to 192.168.2.52 0011 -> IP sender: 192.168.2.73 sends to 192.168.2.53 0100 ->...
  • Seite 22 The following operation instructions only apply, if the Diode Series laser has been purchased with built-in Pangolin FB4. With built-in Pangolin FB4 interface, the Diode Series laser can be controlled over LAN (network cable) or ILDA cable. It is possible either to connect a LAN cable directly from the PC (laptop / tablet) to the laser, or use a network infrastructure (switch, router).
  • Seite 23: Final Statement

    Due to continual product developments, please check for the latest update of this product manual at www.laserworld.com. If you do have any further questions, then please contact your dealer/place of purchase or use our contact section on our website.
  • Seite 24 Anleitung: Diode Serie Inhaltverzeichnis: Lieferumfang & Hinweise Einleitende Warnhinweise Schritte zur Inbetriebnahme, Sicherheitshinweise Sicherheitshinweise für Arbeiten am Gerät Pflege- und Wartungshinweise Warnhinweise und Spezifikationen am Gerät Geräteanschlüsse & Bedienelemente Bedienung Betriebsmodi FB4-Version Abschließende Erklärung Technische Daten Laserleistungsdaten Seite 1 / 21...
  • Seite 25: Lieferumfang & Hinweise

    Anleitung: Diode Serie 1. Lieferumfang & Hinweise Bitte prüfen Sie, ob Sie die Lieferung vollständig erhalten haben und die Ware unbeschädigt ist. Im Lieferumfang enthalten sind: 1 x Laserprojektor 2 x Schlüssel 1 x Bedienungsanleitung 1 x Innensechskant-Schlüssel 1 x Interlock-Bridge 1 x Stromkabel 2.
  • Seite 26: Sicherheitshinweise Für Arbeiten Am Gerät

    Halten Sie das Gerät trocken und Erschütterung oder Schläge vermeiden. schützen Sie es vor Nässe, Regen und Bitte das Produkt bestmöglich schützen. Spritzwasser. Laserworld bietet entsprechendes Equip- Schalten Sie das Gerät aus, wenn es ment an. nicht benutzt wird. Trennen Sie hier- •...
  • Seite 27: Geräteanschlüsse & Bedienelemente

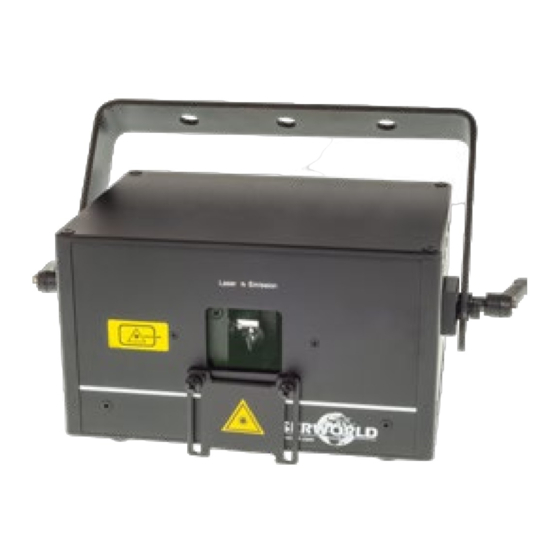
    Anleitung: Diode Serie • Durch das Entfernen des Garantiela- leuchtet: Sie ist in Betrieb, solange bels erlischt jeglicher Anspruch auf das Gerät angeschaltet ist. Gewährleistung. Schäden am Gerät, • Lüfter und Kühlkörper (Kühlrippen usw.) die durch unsachgemäßer Handha- müssen frei von Staubansammlungen bung, Nichtbeachtung der Sicher- und Ablagerungen sein, da sonst die Ge- heits-, Pflege- und Wartungshinweise...
  • Seite 28 Anleitung: Diode Serie DS-1000RGB X / Y Spiegelung Mikrofon Mikrofon- An- / Ausschalter DIP-Schalter sensitivität Scan Safety Schlüssel- Interlock schalter Interlock Ausgang LAN / ShowNET DMX Eingang Strom- versorgung DMX Ausgang ILDA Eingang Öse für Sicher- ILDA Ausgang heitsfangseil FB4 Version LAN-Anschluss als Verbindung zum Computer mit Pangolin Software An-/...
  • Seite 29: Bedienung

    Auf der Geräterückseite befindet sich eine Sicherung. Sollte diese durchbrennen, bitte mit einer neuen austauschen. Sollte das Problem weiterhin bestehen, bitte den Händler oder einen Servicemitarbeiter von Laserworld kontaktieren. Schlüsselschalter An der Rückseite des Lasersystems befindet sich ein Schlüsselschalter. Eine Laserausgabe kann nur erfolgen, wenn der Schlüssel (im Lieferumfang enthalten) mit dem Schlüssel-...
  • Seite 30: Betriebsmodi

    Admin-Tool herunterladen Zum Testen des Lasersystems und für andere Zwecke, wie z.B. speichern von ILDA-Da- teien auf der integrierten SD-Karte, kann das Admin-Tool hier heruntergeladen werden: https://www.laserworld.com/shownet_mainboard Öffnen Sie „ShowNET-Admin_Tool.exe“, wenn diese Anleitung auf das Admin-Tool Bezug nimmt. WICHTIG: Es ist nicht möglich, mit dem Admin-Tool auf den Laser zuzugreifen, wenn gleichzeitig eine Lasersoftware auf den Showlaser zugreift (Showeditor, Showcontroller, etc.).
  • Seite 31 Anleitung: Diode Serie Verwenden Sie ein Ethernet-Kabel (RJ45-Standard), um den LAN-Anschluss des Show- lasers mit dem Computer zu verbinden. Mit Netzwerk-Switches können mehrere Laser gleichzeitig verbunden und angesteuert werden. Die Software kann kostenlos hier heruntergelanden werden: https://www.showeditor.com Nach dem Herunterladen und der Installation der Software öffnen Sie die dazugehörige .exe-Datei auf Ihrem Computer, um den Showlaser mit der Software zu steuern.
  • Seite 32 Falls Sie die integrierte microSD-Karte im Gehäuse austauschen möchten, wenden Sie sich bitte an die Laserworld Serviceabteilung. Aufgrund der Vielzahl der am Markt verfügbaren microSD-Karten kann nicht garantiert werden, dass alle Karten mit dem Mainboard kompatibel sind. Die Verwendung von SD- Karten in Standardgröße (max.
  • Seite 33: Automatikmodus

    Anleitung: Diode Serie Automatikmodus DIP-Schalter Einstellung Schalter An (1) / Aus (0) 0 Im Automatikmodus werden die *.ild-Dateien auf der integrierten SD-Karte automatisch abgespielt. Dieser Modus eignet sich besonders für feste Installationen. Der Automatik-Modus bietet eine weitere Einstellung: Standardmäßig werden alle auf der SD-Karte befindlichen ILDA-Dateien nacheinander abgespielt.
  • Seite 34: Master-Slave Im Musikmodus

    Anleitung: Diode Serie Master-Slave im Musikmodus MASTER-Projektor: Schalter An (1) / Aus (0) 0 SLAVE-Projektoren Schalter An (1) / Aus (0) 0 Damit auf allen Projektoren dieselben Effekte dargestellt werden, müssen auf allen in- tegrierten SD-Karten dieselben *.ild-Dateien in derselben Reihenfolge gespeichert sein. Master-Slave im Demo-Modus MASTER-Projektor: Schalter...
  • Seite 35 Anleitung: Diode Serie Klicken Sie auf ‚Store Data‘ , um die Änderungen zu speichern. Klicken sie zwei Mal auf ‚OK‘ und warten Sie, bis sich ein weiteres Fenster öffnet, das Sie dazu auffordert, das ILDA- Interface neu zu starten. Schalten Sie dazu den Laser aus und wieder an. Weitere Informationen und Details entnehmen Sie bitte dem folgenden Kapitel: DMX-Modi Schalter...
  • Seite 36 Anleitung: Diode Serie (1) DJ Modus Um eine Laserausgabe zu erhalten, stellen Sie für DMX-Kanal 1 einen Wert größer als 0 ein (z.B. ein Wert zwischen 128 und 159 für den Automatikmodus). Kanal Modus Wert Funktion 1 Helligkeit Laser aus 1 - 255 Helligkeit erhöhen (volle Helligkeit = 255) 2 Musterauswahl...
  • Seite 37 Anleitung: Diode Serie Kanal Modus Wert Funktion 12 Erweiterte Farb- 0 - 127 Hinzufügen eines Farbverlaufs effekte Der Wert von Kanal 11 muss >15 sein! 128 - 192 Hinzufügen von Farbblöcken Der Wert von Kanal 11 muss >15 sein! 193 - 255 Automatische Änderung von Farbverläufen (Geschwindigkeit wird erhöht) 13 Strobo...
  • Seite 38 Anleitung: Diode Serie (2) Professional Modus 1 Helligkeit Prof. Laser aus 1 - 255 Helligkeit erhöhen (volle Helligkeit = 255) 2 Musterauswahl Prof. Blackout (000.ild darf nicht existieren) 1 - 255 Gespeicherte Muster darstellen: 1 = 001.ild 2 = 002.ild ...
  • Seite 39 Anleitung: Diode Serie 17 Strobo Prof. 0 - 15 Kein Strobo-Effekt 16 - 255 Ansteigender Strobo-Effekt 18 Scangeschwindigkeit Prof. 0 - 15 Standard 16 - 255 Ansteigende Scangeschwindigkeit (von 5 kpps bis 40 kpps) 19 Größe der Safety Prof. 0 - 63 Größe der horizontalen Safety Zone Zone Die Safety Zone befindet sich unten...
  • Seite 40 Anleitung: Diode Serie Netzwerkbetrieb Wichtig: Es dürfen sich nur ShowNET-Interfaces und der ArtNet-Controller im selben Netzwerk befin- den. Vermeiden Sie den Einsatz von anderen Geräten im selben Netzwerk. Vermeidung von Verbindungsproblemen, Troubleshooting: - Stellen Sie sicher, dass keine Firewall den Netzwerkverkehr zwischen dem Computer und dem Showlaser blockiert.
  • Seite 41 Zuweisung einer anderen IP-Adresse innerhalb desselben Subnetzes an den Windows PC, z. B. 192.168.0.100 (Subnetz = 255.255.255.0) ILDA-Streaming Das Laserworld ShowNET-Interface kann auch als Reichweitenverlängerung für ILDA- Signale dienen. Ein ankommendes ILDA-Signal wird auf der ILDA-IN-Schnittstelle in ein Standard-UDP-Netzwerksignal umgewandelt über das Netzwerk an eine Empfängerein- heit übertragen und dort wieder in ein Standard-ILDA-Signal umgewandelt (dafür wird...
  • Seite 42 Anleitung: Diode Serie DIP-Schalter-Einstellungen Schalter An (1) / 0000 -> IP sender: 192.168.2.70 sendet an 192.168.2.50 Sender: 0 Aus (0) 0001 -> IP sender: 192.168.2.71 sendet an 192.168.2.51 Empfänger: 1 0010 -> IP sender: 192.168.2.72 sendet an 192.168.2.52 0011 -> IP sender: 192.168.2.73 sendet an 192.168.2.53 0100 ->...
  • Seite 43 Not-Aus System mit dem Gerät verbunden ist. Falls Probleme auftreten oder weitere Informationen benötigt werden, konsultieren Sie bitte die Bedienungsanleitung der FB4 - diese kann hier heruntergeladen werden: https://www.laserworld.com/fb4-manual Vollfarb OLED Display SD Karte / bis zu 64GB...
  • Seite 44: Abschließende Erklärung

    Sollten Änderungen an dieser Bedienungsanleitung vorgenommen werden, können wir Sie darüber nicht in Kenntnis setzen. Bitte kontaktieren Sie für Fragen Ihren Händler. Für Servicefragen wenden Sie sich bitte an Ihren Händler oder aber an Laserworld. Verwenden Sie auschließlich Laserworld-Ersatzteile. Änderungen vorbehalten. Aufgrund der Datenmenge kann keine Gewähr für die Richtigkeit der Angaben gegeben werden.
  • Seite 45 Manuel: Série Diode Table des matières: Contenu et informations Avertissements d’usage et précautions avant d’utiliser cet appareil Démarches pour la mise en service, mesures de précaution Instructions de sécurité pour le travail avec l’appareil Soin et entretien Description de l’appareil et mesures de sécurité Comment brancher l’appareil Fonctionnement général Modes d’opérations...
  • Seite 46: Contenu Et Informations

    7. Protéger le laser de l’humidité et des projections d’eau. Aucune bouteille contenant un liquide ne doit être posée sur l’appareil ou à proximité. En cas de rupture du sigle de garantie, Laserworld décline toute responsabilité et votre appareil ne sera dès lors plus sous garantie! 3.
  • Seite 47: Instructions De Sécurité Pour Le Travail Avec L'appareil

    à l’abri de secousses. environ 30 minutes si la tempéra- Laserworld propose différentes solutions ture de l’appareil est acceptable ou de protection du matériel (flightcase) s’il vaudrait mieux trouver une place •...
  • Seite 48: Description De L'appareil Et Mesures De Sécurité

    être exemptes de poussières vice ne seront pas pris en charge par la pour éviter tout risque de surchauffe de garantie Laserworld. 6. Description de l’appareil et mesures de sécurité Merci de lire le mode d’emploi avant l‘usage de l‘appareil laser!
  • Seite 49 Manuel: Série Diode DS-1000RGB Miroitement X / Y Microphone Réglage de la sen- Interrupteur DIP switch sibilité du micro général Scan Safety Interrupteur à clé Interlock LAN / ShowNET Sortie Interlock Entrée DMX Alimentation électrique Sortie DMX Entrée ILDA Point d‘accroche Sortie ILDA pour élingue de sécurité...
  • Seite 50: Fonctionnement Général

    Sur la face arrière du projecteur se situe un fusible. Si le fusible venait à se déclencher, veuillez le remplacer par un nouveau fusible. Si le problème persiste, veuillez contacter votre revendeur ou le service après-vente de Laserworld. Fonction de sécurité par défaut L‘appareil laser possède une „Scan Safety“...
  • Seite 51 ILDA sur la carte SD interne, veuillez télécharger le logiciel d’administration « Admin tool » ici : https://www.laserworld.com/shownet_mainboard Lancez le fichier « ShowNET-Admin_Tool.exe » chaque fois que ce mode d’emploi fait référence au logiciel d’administration / Admin Tool.
  • Seite 52 Manuel: Série Diode Utilisez un câble Ethernet standard (norme RJ45) pour connecter le port LAN du pro- jecteur laser à votre ordinateur. Les switchs / HUB réseaux peuvent être utilisés pour con- necter plusieurs projecteurs à la fois à votre ordinateur de contrôle. Le logiciel peut être téléchargé...
  • Seite 53 SD! Si vous souhaitez changer la carte microSD à l‘intérieur du boîtier, veuillez contacter le service après-vente de Laserworld. En raison du grand nombre de cartes micro SD disponibles sur le marché, il n’est pas garanti que toutes les cartes soient compatibles avec la carte mère du système laser.
  • Seite 54 Manuel: Série Diode Mode autonome / Mode automatique / Mode de lecture Réglage DIP Switch switch On (1) / Off (0) En mode autonome, les fichiers ILDA sur la carte SD intégrée sont déclenchés automati- quement. Ce mode de fonctionnement est particulièrement adapté à la démonstration ou aux installations laser fixes.
  • Seite 55 Manuel: Série Diode Maitre-esclave en mode musical Réglage de l’appareil Maitre : switch On (1) / Off (0) Réglage des appareils esclaves : switch On (1) / Off (0) Pour que les mêmes effets apparaissent sur toutes les unités connectées, il est nécessaire d’avoir les mêmes motifs définis sur toutes les cartes SD à...
  • Seite 56 Manuel: Série Diode Cliquez sur «Store Data» pour enregistrer les modifications. Cliquez deux fois sur «OK» et attendez qu’une autre fenêtre demandant de redémarrer l’interface ShowNet s’ouvre. Pour ce faire, éteignez puis rallumez le système laser. Voir les détails sur le mode DMX ci-dessous pour plus d‘informations : Modes DMX switch Binary DMX...
  • Seite 57 Manuel: Série Diode (1) Mode DJ Pour obtenir une sortie laser, le canal DMX 1 doit avoir une valeur supérieure à 0 (recom- mandé : 64 à 192). Canal Mode Valeur Fonction / descriptif 1 Intensité Laser éteint 1 - 255 Intensité...
  • Seite 58 Manuel: Série Diode Canal Mode Valeur Fonction / descriptif 12 Effets de couleur 0 - 127 Effet de fondu de couleur lisse jusqu’à effet de étendus recoloriage. La valeur du canal 1 doit être >15 ! 128 - 192 Blocage de l‘effet de couleur à l‘effet de re- coloriage.
  • Seite 59 Manuel: Série Diode (2) Mode Professionnel Canal Mode Valeur Fonction / descriptif 1 Intensité Prof. Laser éteint 1 - 255 Intensité croissante (pleine puissance = 255) 2 Sélection des motifs Prof. Blackout (fichier 000.ild ne doit pas exister) 1 - 255 Affichage des animations ILDA de la carte SD : 1 = 001.ild 2 = 002.ild;...
  • Seite 60 Manuel: Série Diode Canal Mode Valeur Fonction / descriptif 17 Strobe Prof. 0 - 15 Aucun effet de strobe 16 - 255 Effet strob (vitesse croissante) 18 Vitesse de scan Prof. 0 - 15 Valeur par défaut 16 - 255 Vitesse de scan croissante (de 5kpps à...
  • Seite 61 Manuel: Série Diode Contrôle via réseau Important : Seules les interfaces ShowNET et potentiellement un contrôleur ArtNet doivent être utilisées sur le même réseau. Évitez d’utiliser d’autres périphériques réseau sur le même réseau. Eviter les problèmes de connectivité, Troubleshooting : - Assurez-vous qu‘aucun pare-feu ne bloque le trafic réseau entre l‘ordinateur et l’interface ShowNet / le projecteur équipé...
  • Seite 62 192.168.0.100 (sous-réseau = 255.255.255.0) Streaming ILDA L’interface Laserworld ShowNET peut servir d’extension de portée pour les signaux ILDA en transformant un signal ILDA entrant sur l’interface ILDA IN (ShowNet en mode émet- teur) en un signal réseau UDP standard et en reconvertissant ce signal en signal ILDA standard via une interface ShowNet (en mode récepteur).
  • Seite 63 Manuel: Série Diode Configuration émetteur-récepteur pour Streaming ILDA via réseau local, utilisati- on en mode « range extender » L’émetteur (ShowNet en mode émetteur) utilise une plage d‘adresses IP comprise ent- re 192.168.2.70 et 192.168.2.85 et transmet le signal à un récepteur (ShowNet en mode récepteur) dont les adresses sont comprises entre 192.168.2.50 et 192.168.2.65.
  • Seite 64 10. Version FB4 - avec Pangolin FB4 Les instructions d’opérations suivantes ne s’appliquent uniquement si votre pro- jecteur laser Diode Series a été acheté avec une interface de gestion Pangolin FB4 intégrée d’office dans le projecteur. Avec cette carte de gestion interne Pangolin FB4, le projecteur laser Diode Series peut être contrôlé...
  • Seite 65 Veuillez-vous renseigner sur notre site internet ou auprès de votre marchand. Pour les questions liées au service, demandez à votre marchand ou adressez-vous à Laser- world. Utilisez uniquement des pièces de rechange Laserworld. Nous nous réservons le droit d’effectuer des modifications, améliorations à ce mode d’emploi. Laserworld décline toute res- ponsabilité...
  • Seite 66 Manual: Diode Series Technical data / Technische Daten / caractéristiques techniques Laser sources: Diodes only Laserquellen: Ausschließlich Dioden Sources laser: Diodes uniquement Laser class: Laserklasse: Classe laser: Scanner: 30 kpps@8° Scan angle: Strahlauslenkung: 45° max. Angle de balayage: ILDA, DMX, Stand-alone, Sound-to-Light, Master-Slave...
  • Seite 67 Manual: Diode Series...

Inhaltsverzeichnis