Qualsiasi altro utilizzo non punto “15”. espressamente indicato potrebbe pregiudicare l’integrità del prodotto 17) FAAC declina ogni responsabilità ai fini della sicurezza e del buon fun- e/o rappresentare fonte di pericolo. zionamento dell’automazione, in caso vengano utilizzati componenti 6) FAAC declina qualsiasi responsabilità...
APPARECCHIATURA ELETTRONICA 578D 1 AVVERTENZE 3 LAYOUT E COMPONENTI Attenzione: Prima di effettuare qualsiasi tipo di intervento sull'apparecchiatura elettronica (collegamenti, manutenzione) togliere sempre l'alimentazione elettrica. - Prevedere a monte dell'impianto un interruttore magnetotermico differenziale con adeguata soglia di intervento. - Collegare il cavo di terra all'apposito morsetto previsto sul connettore J7 dell'apparecchiatura (vedi fig.2).
NOTA: L'apparecchiatura 578D può comandare operatori elet- Collegamento di nessun dispositivo di sicurezza tromeccanici per cancelli scorrevoli e porte sezionali industriali. Nella presente istruzione tutto ciò che viene riferito a cancelli è da ritenersi valido anche per le porte. Eventuali differenziazioni sono riportate nei paragrafi specifici.
Seite 7
Collegamento di una coppia di fotocellule in apertura, Collegamento di una coppia di fotocellule in chiusura, di una di una in chiusura e di una costa in apertura e di una in apertura/chiusura Fig. 10 Collegamento di due coppie di fotocellule in chiusura e di due coste Fig.
STOP - Contatto di STOP (morsetto 5): si intende qualsiasi 4.2 Morsettiera J7 - Alimentazione (fig. 2) dispositivo (es.: pulsante) che aprendo un contatto ALIMENTAZIONE (morsetti PE-N-L): arresta il moto del cancello. PE : Collegamento di terra Per installare più dispositivi di STOP collegare i contatti N : Alimentazione ( Neutro ) N.C.
19. Un eventuale pulsante di STOP deve essere posto in serie al collegamento tra l’ingresso STOP della 578D e SAFETY Fig. 16 della 541 INTERFACE. Fare riferimento al paragrafo 6.3.
5 PROGRAMMAZIONE 5.2 PROGRAMMAZIONE AVANZATA Per programmare il funzionamento dell'automazione è Per accedere alla PROGRAMMAZIONE AVANZATA premere il necessario accedere alla modalità "PROGRAMMAZIONE". pulsante F e, mantenendolo premuto, premere il pulsante +: La programmazione si divide in due parti: BASE e AVANZATA. •...
Seite 12
Display Funzione Default Display Funzione Default LAMPADA SPIA: ENCODER: Con la selezione l'uscita funziona come Se è previsto l'utilizzo dell'encoder , è possibile lampada spia standard (accesa in apertura selezionarne la presenza. e pausa, lampeggiante in chiusura, spenta a Nel caso sia presente ed attivo, "rallentamenti" cancello chiuso).
= Attiva = Esclusa 6.2 Installazione con operatori per scorrevoli Una volta eseguiti i collegamenti tra l'apparecchiatura 578D e la scheda di interfaccia a bordo dell'operatore ed aver PROGRAMMAZIONE CICLI: montato sulla cremagliera i lamierini di finecorsa (vedi...
6.3 Installazione con operatore 541 Una volta eseguiti i collegamenti tra l'apparecchiatura 578D e la scheda di interfaccia a bordo dell'operatore ed aver effettuato la regolazione dei finecorsa (vedi istruzioni dell'operatore), occorre verificare la direzione di apertura agendo come segue: •...
Seite 17
INDEX CE DECLARATION OF CONFORMITY .......................... 2 WARNINGS FOR THE INSTALLER ..........................2 1 WARNINGS ................................3 2 TECHNICAL SPECIFICATIONS ..........................3 3 LAYOUT AND COMPONENTS ..........................3 4 ELECTRIC CONNECTIONS ............................3 ..................4 CONNECTION OF PHOTOCELLS AND SAFETY DEVICES 4.2 TERMINAL BOARD - POWER SUPPLY (FIG.
20) The installer shall supply all information concerning manual operation 6) FAAC declines all liability caused by improper use or use other than of the system in case of an emergency, and shall hand over to the user that for which the automated system was intended.
CONTROL BOARD 578D 1 WARNINGS 3 LAYOUT AND COMPONENTS Important: Before attempting any work on the control board (connections, maintenance), always turn off power. - Install, upstream of the system, a differential thermal breaker with adequate tripping threshold. - Connect the earth cable to the appropriate terminal on the J7 connector of the equipment (see fig.2).
NOTE: The 578D equipment is able to command electro-mechanical Connection of no safety device operators for sliding gates and industrial sectional doors. Anything referring to gates in these instructions also applies to doors. Any differences are shown in the specific paragraphs.
Seite 21
Connection of a pair of opening photocells, a pair of closing Connection of a pair of closing photocells, a pair of opening photocell and an edge safety device photocells and a pair of opening/closing photocells Fig. 10 Connection of two pairs of closing photocells and two edge safety devices Fig.
STOP - STOP contact (terminal 5): any device (e.g. a 4.2 Terminal board - Power supply (fig. 2) push-button) which, by opening a contact, stops gate POWER SUPPLY (terminals PE-N-L): movement. PE : Earth connection To install several STOP devices, connect the N.C. N : Power supply ( Neutral ) contacts in series (fig.
A stop push-button, if any, must be located in series with respect to the connection between the STOP input of 578D and the SAFETY of the 541 INTERFACE. Refer to paragraph Fig. 16 6.3 for instructions on putting into operation.
5 PROGRAMMING 5.2 ADVANCED PROGRAMMING To program operation of the automated system, you have To access ADVANCED PROGRAMMING, press key F and, as to access the "PROGRAMMING" mode. you hold it down, press key Programming is split into two parts: BASIC and ADVANCED. •if you release key + , the display indicates the name of the first function.
Seite 26
Display Function Default Display Function Default INDICATOR-LIGHT: ENCODER: is selected, the output functions as a If the encoder is used, you may select its presence. standard indicator-light (lighted at opening If the encoder is present and enabled, and pause, flashing at closing, and off when "decelerations"...
= Disabled 6.2 Installation using sliding gate operators When you have made the connections between the 578D equipment and the on-board operator interface CYCLE PROGRAMMING: board, and have fitted the travel-limit plates on the rack For setting countdown of system operation (see operator instructions), check opening direction and cycles.
(see Par.5.1). After you have changed it, return to viewing automated system status, and then power down and power up the equipment. NOTE - For perfect installation of the 578D equipment, using sectional doors operator 541, take care over the following aspects:...
Seite 31
INDEX DÉCLARATION CE DE CONFORMITÉ ........................... 2 PRÉCAUTIONS POUR L'INSTALLATEUR ......................... 2 1 AVERTISSEMENTS ..............................3 2 CARACTÉRISTIQUES TECHNIQUES........................... 3 3 SCHÉMA ET COMPOSANTS ............................ 3 4 CONNEXIONS ÉLECTRIQUES ..........................3 4.1 CONNEXION DES PHOTOCELLULES ET DES DISPOSITIFS DE SÉCURITÉ ..............4 4.2 BORNIER J7 - ALIMENTATION (FIG.
Toute autre utilisation non expressément indiquée pourrait compromettre l'intégrité du produit et/ou représenter 17) FAAC décline toute responsabilité quant à la sécurité et au bon une source de danger. fonctionnement de l'automatisme si les composants utilisés dans l'installation n'appartiennent pas à...
PLATINE ÉLECTRONIQUE 578D 1 AVERTISSEMENTS 3 SCHÉMA ET COMPOSANTS Attention: Avant tout type d'intervention sur la platine électronique (connexions, entretien), toujours couper le courant. - Prévoir en amont de l'installation un disjoncteur magnétothermique différentiel ayant un seuil d'intervention adéquat. - Connecter la terre à la borne spécifique prévue sur le connecteur J7 de l'aromoire (voir fig.2).
REMARQUE: L'armoire 578D peut commander des opérateurs Connexion d'aucun dispositif de sécurité électromécaniques pour portails coulissants et des portes sectionnales industrielles. Dans ces instructions tout ce qui se rapporte aux portails est également valable pour les portes. On signale les différences éventuelles aux paragraphes spécifiques.
Seite 35
Connexion d'une paire de photocellules en fermeture, d'une Connexion d'une paire de photocellules en ouverture, d'une paire de photocellules en fermeture et d'un bord paire de photocellules en ouverture et d'une paire de photocellules en ouverture/fermeture Fig. 10 Connexion de deux paires de photocellules en fermeture et de deux bords Fig.
STOP - Contact de STOP (borne 5): c'est à dire tout dispositif (ex.: 4.2 Bornier J7 - Alimentation (fig. 2) poussoir) qui, en ouvrant un contact, arrête le mouvement ALIMENTATION (bornes PE-N-L): du portail. PE : Connexion de terre Pour installer plusieurs dispositifs de STOP , connecter les contacts N : Alimentation ( Neutre ) N.F.
Placer un poussoir éventuel de STOP en série à la connexion Fig. 16 entre l'entrée STOP de la 578D et SAFETY de la 541 INTERFACE. Se reporter au paragraphe 6.3. pour la mise en fonction. 4.8 Connexion de opérateurs sans interface Pour réaliser les connexions entre l'armoire 578D et les...
5 PROGRAMMATION 5.2 PROGRAMMATION AVANCÉE Pour programmer le fonctionnement de l'automatisme, il est Pour accéder à la PROGRAMMATION AVANCÉE, appuyer sur nécessaire d'accéder à la modalité "PROGRAMMATION". le poussoir F et, en le maintenant enfoncé, appuyer sur le La programmation est subdivisée en deux parties: BASE et poussoir +: AVANCÉE.
Seite 40
Afficheur Fonction Par défaut Afficheur Fonction Par défaut LAMPE-TEMOIN:: ENCODEUR: Avec la sélection la sortie fonctionne Si on a prévu l'utilisation de l'encodeur on peut comme une lampe-témoin standard (allumée en sélectionner la présence. en ouverture et pause, clignotante en fermeture, S'il est présent et actif, "ralentissements"...
) à chaque impulsion d'Open (demande d'in- de fermé, le fin de course engagé sera donc FC1 (Led éteinte) tervention). Elle peut être utile pour programmer Après avoir réalisé les connexions entre l'armoire 578D et des interventions d'entretien programmé. = Active 6.2 Installation avec des opérateurs pour portails coulissants...
6.3 Installation avec l'opérateur 541 Après avoir réalisé les connexions entre l'armoire 578D et la carte d'interface sur l'opérateur et après avoir effectué le réglage des fins de course (voir instructions de l'opérateur), vérifier la direction d'ouverture en agissant comme suit:...
Seite 45
INHALT CE - KONFORMITÄTSERKLÄRUNG ..........................2 HINWEISE FÜR DIE INSTALLATION ..........................2 1 HINWEISE ................................3 2 TECHNISCHE EIGENSCHAFTEN ..........................3 3 ANORDNUNG UND KOMPONENTEN ........................3 4 ELEKTRISCHE ANSCHLÜSSE ............................ 3 4.1 ANSCHLUSS DER PHOTOZELLEN UND DER SICHERHEITSVORRICHTUNGEN ............4 4.2 KLEMMENBRETT J7 - VERSORGUNG (ABB.
Punkt “15” erwähnten Vorrichtungen einzusetzen. beeinträchtigen und/oder eine Gefahrenquelle darstellen. 17) Die Firma FAAC lehnt jede Haftung hinsichtlich der Sicherheit und des 6) Die Firma FAAC lehnt jede Haftung für Schäden, die durch unsachgemäßen störungsfreien Betriebs der Automatik ab, soweit Komponenten auf der Anlage oder nicht bestimmungsgemäßen Gebrauch der Automatik verursacht...
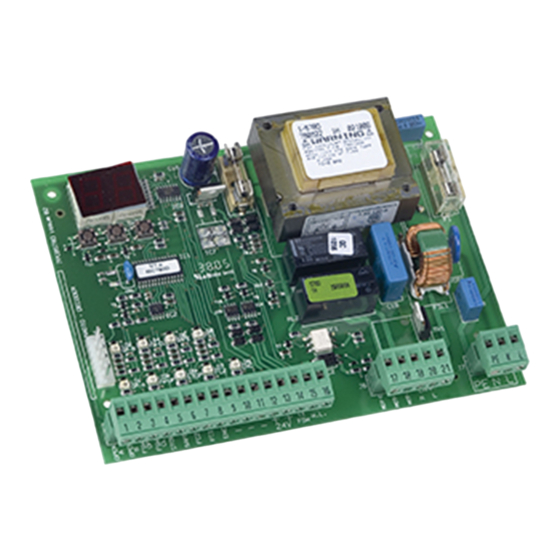
ELEKTRONISCHES GERÄT 578D 1 HINWEISE 3 ANORDNUNG UND KOMPONENTEN Achtung: vor der Ausführung jeglicher Art von Eingriffen auf dem elektronischen Gerät (Anschlüsse, Instandhaltung) ist stets die Stromzufuhr abzuschalten. - Vor der Anlage sollte ein Differential-Wärmeschutzschalter mit entsprechender Auslöseschwelle zwischengeschaltet werden.
ANMERKUNG: Das Gerät 578D kann elektromechanische Antriebe Kein Anschluß einer Sicherheitsvorrichtung für Schiebetore und industrielle Sektionaltore steuern. Die auf Tore bezogenen in der vorliegenden Betriebsanleitung enthaltenen Angaben gelten ebenfalls für Türen. Eventuelle Unterschiede sind in den jeweiligen spezifischen Kapiteln aufgeführt.
Seite 49
Anschluß eines Photozellenpaars beim Schließvorgang, eines Anschluß eines Photozellenpaares im Öffnungsvorgang und eines Photozellenpaares im Schließvorgang sowie einer Leiste Paars beim Öffnungsvorgang sowie eines Paars beim Öffnungs-/Schließvorgang Abb. 10 Anschluß von zwei Photozellenpaaren im Schließvorgang und zwei Leisten Abb. 12 Anschluß...
Arbeitskontakte in Reihenschaltung angeschlossen (Abb. 4). 4.2 Klemmenbrett J7 - Versorgung (Abb. 2) Anmerkung: werden keine Sicherheitsvorrichtungen beim VERSORGUNG (Klemmen PE-N-L): Schließvorgang angeschlossen, so sind die Klemmen FSW CL PE : Erdungsanschluß und -TX FSW mit Überbrückungsklemmen zu versehen (Abb. 5). N : Versorgung ( Nulleiter ) STOP - STOP-Kontakt (Klemme 5): darunter wird jegliche Vorrichtung L : Versorgung ( Leitung )
Kapitel 6.2 verwiesen. DECODER 4.7 Anschluß des Antriebs 541 Die Anschlüsse zwischen dem Gerät 578D und der auf dem Antrieb integrierten Anschlußkarte unter Bezugnahme auf den Plan aus Abb. 19 vornehmen. Eine eventuelle STOP-Taste muß in Reihe an den Anschluß...
5 PROGRAMMIERUNG 5.2 DETAILLIERTE PROGRAMMIERUNG Für die Programmierung des Antriebs wird auf die Betriebsart Um Zugang zur DETAILLIERTEN PROGRAMMIERUNG zu "PROGRAMMIERUNG" zugegriffen. erlangen, ist die Taste F gedrückt zu halten und zusätzlich Die Programmierung ist in zwei Bereiche unterteilt: BASIS und die Taste + zu drücken: DETAILLIERT.
Seite 54
Display Funktion Default Display Funktion Default ENCODER: KONTROLLAMPE: Ist der Einsatz eines Encoders vorgesehen, so kann Wird angewählt, funktioniert der Ausgang dessen Anwesenheit angewählt werden. wie eine Standardkontrollampe (eingeschaltet Sollte der Encoder vorhanden und aktiv sein, so beim Öffnungsvorgang und während der Pause, werden die "Abbremsungen"...
Instandhaltung hilfreich sein. 6.2 Installation mit Antrieben für Schiebetore = Aktiv = Aus Wenn die Anschlüsse zwischen dem Gerät 578D und der im Antrieb integrierten Schnittstellenkarte vorgenommen und ZYKLUSPROGRAMMIERUNG: die Endschalterbleche (siehe Anleitungen des Antriebs) auf Hiermit kann eine Rückzählung der Betriebszyklen der Zahnstange montiert sind, müssen die Öffnungsrichtung...
Entriegeln und Verriegeln des Antriebs erklären. Endschalter vermindert und/oder der Bremswert erhöht werden. 6.3 Installation mit Antrieb 541 Wenn die Anschlüsse zwischen dem Gerät 578D und der im Antrieb integrierten Schnittstellenkarte vorgenommen sind und die Endschalter eingestellt wurden (siehe Anleitungen des Antriebs), ist die Öffnungsrichtung wie folgt zu prüfen:...
Seite 59
ÍNDICE DECLARACIÓN CE DE CONFORMIDAD ........................2 ADVERTENCIAS PARA EL INSTALADOR ........................2 1 ADVERTENCIAS ..............................3 2 CARACTERÍSTICAS TÉCNICAS ..........................3 3 LAYOUT Y COMPONENTES ............................. 3 4 CONEXIONES ELÉCTRICAS ............................ 3 4.1 CONEXIÓN FOTOCÉLULAS Y DISPOSITIVOS DE SEGURIDAD ................4 4.2 REGLETA DE BORNES J7 - ALIMENTACIÓN (FIG.
Cualquier uso diverso del previsto podría perjudicar el funcionamiento del producto y/o 17) FAAC declina toda responsabilidad relativa a la seguridad y al buen representar fuente de peligro. funcionamiento de la automación si se utilizan componentes de la instalación que no sean de producción FAAC.
EQUIPO ELECTRÓNICO 578D 1 ADVERTENCIAS 3 LAYOUT Y COMPONENTES Atención: Antes de efectuar cualquier tipo de intervención en el equipo electrónico (conexiones, mantenimiento), quiten siempre la alimentación eléctrica. - Coloquen línea arriba de la instalación un interruptor magnetotérmico diferencial con un adecuado umbral de intervención.
NOTA: El equipo 578D puede mandar operadores electromecánicos Conexión de ningún dispositivo de seguridad para cancelas correderas y puertas seccionales industriales. En las presentes instrucciones todo lo que se refiere a cancelas también es válido para las puertas. Las posibles diferenciaciones se indican en los específicos párrafos.
Seite 63
Conexión de una pareja de fotocélulas en apertura, Conexión de una pareja de fotocélulas en cierre, de una en cierre y de un borde de una en apertura y de una en apertura/cierre Fig. 10 Conexión de dos parejas de fotocélulas en cierre y de dos bordes Fig.
STOP - Contacto de STOP (borne 5): se entiende cualquier 4.2 Regleta de bornes J7 - Alimentación (fig. 2) dispositivo (p. ej.: pulsador) que, al abrir un contacto, ALIMENTACIÓN (bornes PE-N-L): detiene el movimiento de la cancela. PE : Conexión de tierra Para instalar varios dispositivos de STOP conecte los N : Alimentación ( Neutro ) contactos N.C.
19. Un eventual pulsador de STOP debe colocarse en serie a la conexión entre la entrada STOP de la 578D y SAFETY de Fig. 16 la 541 INTERFAZ. Remítanse al párrafo 6.3. para la puesta en funcionamiento 4.8 Conexión de operadores sin interfaz incorporada...
5 PROGRAMACIÓN 5.2 PROGRAMACIÓN AVANZADA Para programar el funcionamiento de la automación hay que Para acceder a la PROGRAMACIÓN AVANZADA presionen el acceder al modo "PROGRAMACIÓN". pulsador F, y manteniéndolo presionado, presionen el pulsador +: La programación se divide en dos partes: BASE y AVANZADA. •al soltar el pulsador + la pantalla muestra el nombre de la 5.1 PROGRAMACIÓN BASE primera función.
Seite 68
Pantalla Función Por defecto Pantalla Función Por defecto LUZ TESTIGO: ENCODER: Con la selección la salida funciona como Si estuviera previsto el uso del encoder se puede luz testigo estándar (encendida en apertura y seleccionar la presencia. pausa, destellante en cierre, apagada con la Si estuviera presente y activo, "deceleraciones"...
FC1 (Diodo apagado). = Activa 6.2 Instalación con operadores para correderas = Excluida Una vez realizadas las conexiones entre el equipo 578D y la tarjeta de interfaz incorporada en el operador y, PROGRAMACIÓN CICLOS: Permite programar una cuenta atrás de los tras haber montado las chapas de fin de carrera en la ciclos de funcionamiento de la instalación.
6.3 Instalación con el operador 541 Una vez realizadas las conexiones entre el equipo 578D y la tarjeta de interfaz incorporada en el operador y tras haber regulado los fines de carrera (véanse las instrucciones del operador), hay que comprobar la dirección de apertura...
Seite 73
INHOUDSOPGAVE CE-VERKLARING VAN OVEREENSTEMMING ........................ 2 WAARSCHUWINGEN VOOR DE INSTALLATEUR ......................2 1 WAARSCHUWINGEN .............................. 3 2 TECHNISCHE EIGENSCHAPPEN ..........................3 3 LAYOUT E COMPONENTI ............................3 4 ELEKTRISCHE AANSLUITINGEN ..........................3 4.1 AANSLUITING FOTOCELLEN EN VEILIGHEIDSVOORZIENINGEN ................4 4.2 KLEMMENBORD J7 - VOEDING (FIG. 2) ......................6 4.3 KLEMMENBORD J6 - MOTOREN EN WAARSCHUWINGSLAMP (FIG.
22) Houd radio-afstandsbedieningen of alle andere impulsgevers buiten het bereik 9) FAAC is niet aansprakelijk als de regels der goede techniek niet in acht van kinderen, om te voorkomen dat het automatische systeem onopzettelijk genomen zijn bij de bouw van het sluitwerk dat gemotoriseerd moet worden, kan worden aangedreven.
ELEKTRONISCHE APPARATUUR 578D 1 WAARSCHUWINGEN 3 LAY-OUT EN COMPONENTEN Let op: alvorens werkzaamheden op de apparatuur te verrichten (verbindingen, onderhoud) moet altijd eerst de elektrische voeding worden weggenomen. - Breng bovenstrooms van de installatie een magnetothermische differentieelschakelaar met een geschikte inschakellimiet aan.
OPMERKING: de apparatuur 578D kan elektromechanische Aansluiting zonder veiligheidsvoorzieningen aandrijvingen voor schuifpoorten en sectionaaldeuren in de industriële sector bedienen. Alles in deze instructie dat betrekking heeft op de poorten, dient ook geldig te worden geacht voor de deuren. Eventuele verschillen worden in specifieke paragrafen uiteengezet.
Seite 77
Aansluiting van een paar fotocellen bij opening, Aansluiting van een paar fotocellen bij sluiting, een paar bij sluiting en een veiligheidslijst een paar bij opening en een paar bij opening/sluiting Fig. 10 Aansluiting van twee paar fotocellen bij sluiting en twee veiligheidslijsten Fig.
STOP - STOP-contact (klem 5): hiermee wordt een willekeurige 4.2 Klemmenbord J7 - Voeding (fig. 2) voorziening (b.v. sleutelschakelaar) bedoeld die de VOEDING (klemmen PE-N-L): beweging van de poort laat stoppen bij opening van PE : Aardaansluiting een contact. N : Voeding (nulleiding) Om meerdere STOP-voorzieningen te installeren, moeten L : Voeding (lijn) de rustcontacten in serie worden aangesloten (fig.
19. Een eventuele STOP-knop moet in serie geschakeld worden Fig. 16 met de verbinding tussen de ingang STOP van de 578D en SAFETY van de 541 INTERFACE. Zie paragraaf 6.3. voor de inbedrijfstelling. 4.8 Aansluiting van aandrijvingen zonder ingebouwde interface...
5 PROGRAMMERING 5.2 GEAVANCEERDE PROGRAMMERING Om de werking van het automatische systeem te programmeren Om toegang te krijgen tot de GEAVANCEERDE PROGRAMMERING moet de mode "PROGRAMMERING" worden opgeroepen. moet op de knop F worden gedrukt, en terwijl deze ingedrukt De programmering bestaat uit twee delen: BASISPROGRAMMERING gehouden wordt, op de knop +: en GEAVANCEERDE PROGRAMMERING •als de knop + wordt losgelaten, verschijnt de naam van de eerste...
Seite 82
Display Functie Default Display Functie Default CONTROLELAMPJE: ENCODER: door selectie van functioneert de uitgang indien het gebruik van de encoder voorzien als standaard controlelampje (dat brandt bij is, kan de aanwezigheid ervan worden gese- opening en pauze, knippert bij sluiting, uit is als lecteerd.
= Actief 6.2 Installatie met aandrijvingen voor schuifpoorten = Uitgeschakeld Nadat de aansluitingen tussen de apparatuur 578D PROGRAMMERING CYCLI: en de interfacekaart in de aandrijving zijn gemaakt hiermee kan het aftellen van het aantal door en de eindschakelaarplaatjes op de tandheugel...
OPMERKING- Voor de optimale installatie van de apparatuur 578D met de aandrijving voor sectionaaldeuren 541 moet op de volgende aspecten worden gelet: BEDRIJFSLOGICA ( LO ) : Als u, om de aandrijving 541 te bedienen, een knop voor het stijgen en een voor het dalen wilt gebruiken, moeten de logica’s B, C, B/...
Seite 88
Les descriptions et les illustrations du présent manuel sont fournies à titre indicatif. FAAC se réserve le droit d’apporter à tout moment les modifications qu’elle jugera utiles sur ce produit tout en conservant les caractéristiques essentielles, sans devoir pour autant mettre à...