Herunterladen Inhalt Inhalt Diese Seite drucken

Werbung

Verfügbare Sprachen

Verfügbare Sprachen


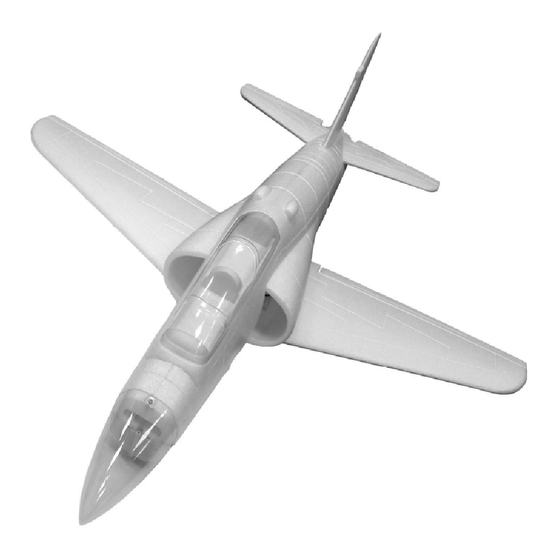
T45 Goshawk


Manual | Anleitung | Manuel | Manual
www.Air-Ace.net
 
www.ACME-online.de

Werbung

Inhaltsverzeichnis
loading

Inhaltszusammenfassung für ACME T45 Goshawk

  • Seite 1     T45 Goshawk             Manual | Anleitung | Manuel | Manual www.Air-Ace.net   www.ACME-online.de...
  • Seite 2: Sicherheitshinweise

    Funkfrequenz noch frei ist. Sprechen Sie sich auf dem Flugplatz ab. Anmerkung: „ACME the game company“ kann keine angemessene Verwendung bzw. Handhabung dieser Anleitung garantieren. Aus diesem Grund ist „ACME the game company“ verpflichtet, etwaige Garantieansprüche zu abzulehnen.
  • Seite 3: Technische Daten

    1. Montage des Servogestänges Befestigen Sie die Ruderhörner(6) mit der Gegenplatte am Höhenleitwerk(7). Fixieren Sie dieses mit dem Klebstoff. Schrauben Sie  den Anlenkungsstellring (8) an dem unterstem Loch des Ruderhorns fest.  2. Höhenleitwerk/Seitenruder befestigen Befestigen Sie nun das Höhenleitwerk mit dem BlueGlue Kleber auf dem Rumpf - danach das Seitenruder. www.ACME-online.de...
  • Seite 4: Servogestänge Und Fahrwerkeinbau

    Stecken Sie das Fahrwerk (9) in die dafür vorgesehene Auskerbung in den Tragflächen. Achten Sie darauf, dass das Gestänge nach innen zeigt. Fixieren Sie das Fahrwerk mit den Schrauben (10).     Schieben Sie den Stellring (14) auf das Gestänge des Bugrads (11) und  fixieren Sie diesen mit der Madenschraube. Schieben Sie das montierte  Bugrad  durch die Aufnahme. Schieben Sie den zweiten Stellring (12) auf  das Gestänge und schrauben Sie diesen fest. Stecken Sie das Ruderhorn  (13) auf die Verzahnung und fixieren Sie dieses mit dem dritten   Stellring (14).    www.ACME-online.de...
  • Seite 5: Servokabel Und Flächenmontage

    Stecken Sie den Kabinenrahmen (5) auf den Rumpf. Fixieren Sie die Kabinenabdeckung (18) mit BlueGlue Kleber auf den Kabinenrahmen. 5. Servokabel und Flächenmontage Verbinden Sie die Verlängerungskabel mit den Servos. Beachten Sie bitte die richtige Polung. Schieben Sie die Tragflächen die Aussparung im Rumpf. www.ACME-online.de...
  • Seite 6     Befestigen Sie die Tragfläche mit der Schraube und Unterlegscheibe (19 und 20). Setzen Sie die Haube auf den Rumpf. Symmetrie Überprüfen Sie die Symmetrie der Flächen. Fertig. Das Flugmodell ist vollständig montiert ! www.ACME-online.de...
  • Seite 7: Security Advices

    Pay attention that you will not interfere with other models using the same frequency. Don´t start the model if you are not sure that the chosen frequency is free. Note: ACME the game company is unable to ensure correct use according to these instructions. For this reason ACME the game company will not accept any claim under guarantee.
  • Seite 8: Technical Data

    Please make sure that you are using the right screws (consider the length). See the instructions on the first page. For the setup you need- next to the included screw driver- a pair of pliers. 1. Attach the servo horn (6) from the top side of the Elevator and fix it with the counterpart plate (7).  2. Install the adjuster onto the servo horn and fix it with the nut (recommend to take the 4th hole  3. Attach the elevator unit with BlueGlue onto the fuselage   4. Attach the fin onto the fuselage using BlueGlue.  www.ACME-online.de...
  • Seite 9       5. Guide the steel wire for the elevator through the fixing hole adjust the elevator and fix the grub screws.  6. Install the main undercarriage(9) into the fixing slots underneath each wing. Fix it with the screws (10).  7. Put the 5mm stopper(14) onto the shaft of the Nose‐Wheel (11) Landing Gear and fix the grub screw  8. Insert the shaft of the nose‐wheel landing gear through the fixing part. Put the next 5mm stopper followed by the  servo arm(13) and the final 5mm stopper (12)  9. Connect the steel wire into the servo arms hole of the front  landing       gear.  10. Figure of correctly installed nose‐wheel landing gear    www.ACME-online.de...
  • Seite 10     11. Put the nose(16)  onto the fuselage  12. Fix the nose with 3 screws (17)  13. Apply the canopy(18) onto the cockpit frame(5) using BlueGlue  14. Attach the extension cable matching the right colors with the aileron Servo cable.   15.  Insert the main wing into the connectors   www.ACME-online.de...
  • Seite 11     16.  ...and fix it with the screw(20)  17.  Add the canopy  18.  Check the symmetrical installation of the Tail  Ready. The airplane is fully assembled www.ACME-online.de...
  • Seite 12 1999/5/EC. En kopi af den originale erklaering med de angivne regler kan rekvireres pa folgende adresse: ACME the game company GmbH Industriestr. 10A 33397 Rietberg – Germany T: +49 700 70 77 77 00 (12ct/Min.) F: +49 5244 97 40 48 service@acme-online.de www.ACME-Online.de WEEE-Reg.-Nr.: DE64989527 © copyright 2011 ACME the game company GmbH www.ACME-online.de...

Inhaltsverzeichnis