Werbung
Verfügbare Sprachen
Verfügbare Sprachen
Quicklinks
Montageanleitung
Fernscheinwerfer
Mounting instructions
Driving lamps
Instructions de montage
Projecteurs longue portée
Monteringsanvisning
Fjärrstrålkastare
Montagehandleiding
Vèrstralers
Instrucciones de montaje
Faros de largo alcance
Istruzioni di montaggio
Proiettori di profondità
Asennusohje
Lisäkaukovalot
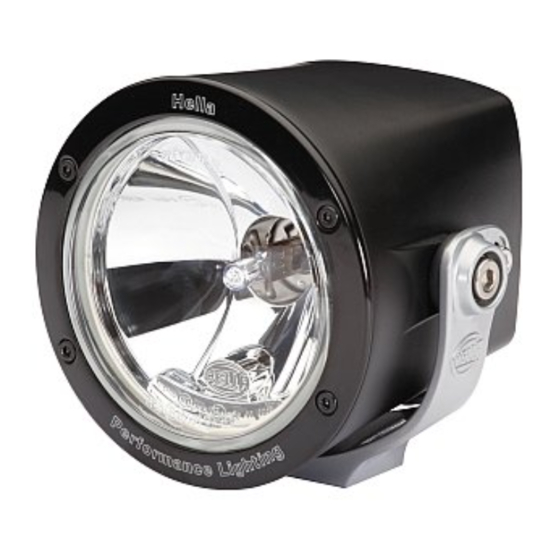
LUMINATOR X XENON
RALLYE 4000Xi XENON
Werbung

Verwandte Anleitungen für Hella LUMINATOR X XENON


Inhaltszusammenfassung für Hella LUMINATOR X XENON
- Seite 1 Montageanleitung Fernscheinwerfer Mounting instructions Driving lamps Instructions de montage Projecteurs longue portée Monteringsanvisning Fjärrstrålkastare Montagehandleiding Vèrstralers Instrucciones de montaje Faros de largo alcance Istruzioni di montaggio Proiettori di profondità Asennusohje Lisäkaukovalot LUMINATOR X XENON RALLYE 4000Xi XENON...
- Seite 2 Lieferumfang Leveransomfattning Dotazione di fornitura Kit includes Inhoud set Osaluettelo Fourniture Volumen del suministro 1F0 010 186 - 001/011...
- Seite 3 Lieferumfang 2 Leveransomfattning 2 Dotazione di fornitura 2 Kit 2 includes Inhoud set 2 Osaluettelo 2 Fourniture 2 Volumen del suministro 2 1F0 010 186 - 901...
- Seite 4 Zubehör Tillbehör Accessori Accessories Toebehoren Lisätarvikkeet Accessories Accessorios EC C E Chrom Chrome rouge Chrome röd Krom rood Chroom rajo Cromo rosso Cromo punainen Kromi 9AG 172 638 - 011 9AG 172 638-001 8XS 172 921 -001 6EH 007 946 - 031 8HG 116 741 - 801 8GS 009 028 - 001...
- Seite 5 Benötigte Montagewerkzeuge Nödvändiga monteringsverktyg Attrezzi necessari per il montaggio Installation tools required Benodigde montagewerktuigen Tarvittavat asennustyökalut Outillage de montage requis Herramientas de montaje necesarias Torx 10 SW 17 Ø 3/5/11 mm 3/5/6 mm...
- Seite 6 Montage Montering Montaggio Mounting Montage Asennus Montage Montaje...
- Seite 7 Ø 3/11mm SW 17...
- Seite 8 Montage Zubehör Montering Tillbehör Montaggio Accessori Mounting Accessories Montage Toebehoren Asennus Lisätarvikkeet Montage Accessories Montaje Accessorios 8HG 116 741 - 801 min. 2mm Ø 5mm...
- Seite 9 Elektrischer Anschluss Elektrisk anslutning Collegamento elettrico Electrical connection Elektrische aansluiting Osaluettelo Branchement électrique Conexión eléctrica rood rajo rouge rosso röd punainen braun bruin brown marrón marron marrone brun ruskea gelb geel yellow amarillo jaune giallo keltainen blau blauw blue azul bleu blå...
- Seite 10 Elektrischer Anschluss Elektrisk anslutning Collegamento elettrico Electrical connection Elektrische aansluiting Osaluettelo Branchement électrique Conexión eléctrica rood rajo rouge rosso röd punainen braun bruin brown marrón marron marrone brun ruskea gelb geel yellow amarillo jaune giallo keltainen blau blauw blue azul bleu blå...
- Seite 11 Elektrischer Anschluss Elektrisk anslutning Collegamento elettrico Electrical connection Elektrische aansluiting Osaluettelo Branchement électrique Conexión eléctrica rood grün groen rajo green verde rouge rosso vert verde röd punainen grön vihreä blau blauw blue azul bleu blå sininen gelb geel yellow amarillo jaune giallo keltainen...
- Seite 12 Lampentausch Lampbyte Sostituzione lampadina Bulb replacement Verwisselen gloeilamp Poittimon vaihto Replacement de la lampe Cambio de lámparas Torx 10 3 mm...
- Seite 13 DEUTSCH 14 -15 Technische Änderungen vorbehalten ENGLISH 16-17 Subject to alteration without notice FRANÇAIS 18-19 Sous réserve de modifi cations techniques SVENSKA 20-21 Vi reserverar oss för tekniska ändringar NEDERLANDS 22-23 Technische wijzigingen voorbehouden ESPAÑOL 24-25 Reservadas modifi caciones técnicas ITALIANO 26-27 Con riserva di modifi...
- Seite 14 anzeichnen. Mit 3 mm Bohrer Nur richtig eingestellte Schein- Montage: vorbohren und 11 mm aufbohren. werfer sorgen für optimales Seite 6, 7, 8, 14 Gebohrte Metallteile mit Rost- Licht. schutz versiegeln. Elektrischer Anschluss: Für die Scheinwerfer gibt es betr. der Anbauhöhe sowie der Bei der Montage der Schein- Seite 9, 10, 11 Anbaubreite, keine besonderen...
- Seite 15 (Werkstatt) sollte der Raum für 20 Stecker abziehen und Haltebügel Minuten verlassen und gelüftet abschrauben. Bei Fragen oder Einbauproblemen, werden, um eine Gesundheitsge- rufen Sie bitte den HELLA fährdung durch giftige Gase zu Glühlampe nicht mit bloßen Fin- Kundendienst, Großhändler an vermeiden. gern anfassen! Papiertaschen- oder wenden Sie sich an Ihre tuch oder ähnliches verwenden.
- Seite 16 Drill using a 3 mm drill bit, and drill Mounting steps: Electrical connection: out to 11 mm. Seal drilled metal Page 6, 7, 8, 16 From page 9, 10, 11 parts with rust protection. When fi tting the lights, With regard to the mounting height, Fit the relay with the connection there are no special regulations for Ensure that the „TOP“...
- Seite 17 fi ngers! Use a paper tissue or If you have questions or installation closed headlight. similar. problems, please call the HELLA Service, wholesaler, or turn to your If a xenon bulb breaks in a closed Screw the holding bracket on and room (garage), then you should lea- reinstall the plug.
- Seite 18 points de fi xation. Effectuer un pré- Faites régler vos projecteurs Montage: longue portée dans un garage perçage au foret de 3 mm et percer Page 6, 7, 8, 18 spécialisé. au foret de 11 mm. Appliquer une protection antirouille sur les pièces Seuls des projecteurs correcte- métalliques percées.
- Seite 19 être éliminés de manière appro- cher le connecteur. contacter le service après-vente priée. HELLA, votre distributeur ou votre Eliminer les lampes au xénon Si la lampe est défectueuse mais garage. usagées de la même façon qu’un...
- Seite 20 3 mm borr och borra upp med Montering: Elektrisk anslutning: 11 mm borr. Försegla borrade me- Sidan 6, 7, 8, 20 Sidan 9, 10, 11 talldelar med rostskyddsmedel. Det fi nns inga särskilda föreskrifter Se till att markeringen „TOP“ på Montera reläet med anslutnings- för monteringshöjd eller monte- refl...
- Seite 21 Låt lampan kallna. Använd skydds- Endast rätt inställda strålkastare Byte av xenon-lampa glasögon och skyddshandskar vid ger optimalt ljus. Bild sidan 12 byte av lampa. Fler tips: Xenon-lampans glaskropp är fylld Använd skyddsglasögon och med olika gaser och metallån- skyddshandskar vid byte av Håll alltid strålkastarglasen rena.
- Seite 22 in de tekening aangegeven maten Alleen goed afgestelde schijn- Montage: in acht. Bepaal de montagepositie werpers geven optimaal licht. Pagina 6, 7, 8, 22 en merk de bevestigingspunten. Elektrische aansluiting: Met 3 mm voorboren en met 11 Voor de schijnwerpers gelden mm opboren.
- Seite 23 Gebruik een papie- roblemen verzoeken wij u contact om gevaar voor de gezondheid ren zakdoekje of een soortgelijk met de HELLA-klantenservice, de door giftige gassen te voorkomen. doekje. groothandel of uw dealer op te nemen.
- Seite 24 Realizar una perforación previa con Los faros de luz de carretera de- Conexión eléctrica: la broca de 3 mm y, a continuaci- berán ser ajustados por un taller Página 6, 7, 8, 24 ón, perforar con la de 11 mm. Es especializado.
- Seite 25 No tocar la lámpara directa- la salud debido a la inhalación de de montaje, por favor, llame al mente con las manos. Utilizar un gases tóxicos. Servicio postventa de Hella o al pañuelo de papel o similar. mayorista, o bien diríjase a su taller.
- Seite 26 di fi ssaggio. Praticare un foro con Far regolare i proiettori abbagli- Montaggio: la punta da 3 mm e allargarlo con anti presso un‘offi cina specializ- Pagine 6, 7, 8, 26 quella da 11 mm. zata. Spalmare sulle parti in metallo Per quanto riguarda l‘altezza e la forate la protezione antiruggine.
- Seite 27 Le lampadine allo xeno sono il servizio assistenza o il proprio considerate rifi uti speciali e Serrare a fondo la staffa di grossista HELLA oppure di rivolg- devono essere smaltite in modo supporto, inserire nuovamente il ersi alla propria officina.
- Seite 28 11 mm poranterällä. Ruostesuojaa Sähköinen liitäntä: Asennus: poratut metalliosat. Sivu 9, 10, 11 Sivu 6, 7, 8, 28 Huomioi lisävaloja asentaessa- Asenna releet liitospuristimilla Lisävalojen asennuskorkeudesta si, että heijastimen päällä oleva alapuolelle siten, että ne ovat ja – leveydestä ei ole erityisiä ”TOP”-merkintä...
- Seite 29 Irrota lasinpidikekehys ja poista Jos sinulla on kysymyksiä tai alkoholia käyttäen. Käytä lamppua valonheitinsisäke. Vedä pistoke irti asennusongelmia, soita HELLA- vain umpinaisten valonheittimien ja ruuvaa pitosanka irti. asiakaspalvelulle tai sisällä. tukkuliikkeelle tai käänny korjaa- Älä...
- Seite 30 Hella KGaA © Hueck & Co., D-59552 Lippstadt 460 818 -22 12 . 10 Printed in Germany...