Herunterladen Inhalt Inhalt Diese Seite drucken

Werbung

Verfügbare Sprachen
  • DE

Verfügbare Sprachen

  • DEUTSCH, seite 1
Luftentfeuchter
10028493
10028494

Werbung

Inhaltsverzeichnis
loading

Inhaltszusammenfassung für Klarstein 10028493

  • Seite 1 Luftentfeuchter 10028493 10028494...
  • Seite 2: Inhaltsverzeichnis

    Sehr geehrter Kunde, wir gratulieren Ihnen zum Erwerb Ihres Klarstein Gerätes. Lesen Sie die folgenden Anschluss- und Anwen- dungshinweise sorgfältig durch und befolgen Sie diese, um möglichen technischen Schäden vorzubeugen. Für Schäden, die durch Missachtung der Sicherheitshinweise und unsachgemäßen Gebrauch entstehen, übernehmen wir keine Haftung.
  • Seite 3: Sicherheitshinweise

    Sicherheitshinweise Stromanschluss • Knicken Sie das Netzkabel nicht. • Der Netzstecker muss vollständig und fest in der Steckdose stecken. • Verwenden Sie keine Mehrfachsteckdosen. • Der Netzstecker muss sauber sein. • Ziehen Sie nach der Benutzung des Gerätes den Netzstecker. •...
  • Seite 4: Installation

    Installation Installation des Ableitungsschlauchs Rückseite des Gerätes Bereiten Sie den Ableitungsschlauch zur Ableitung von Wasser vor. Ableitungsschlauch (Die Schläuche werden in Märkten mit einem Innendurchmesser von 13 Verschlusskappe mm verkauft.) Schrauben Sie die Verschlusskappe der Ableitungsöffnung ab. Nehmen Sie den Stopfen heraus. Bewahren Sie ihn zusammen mit dem Schraubverschluss in einem Stopfen...
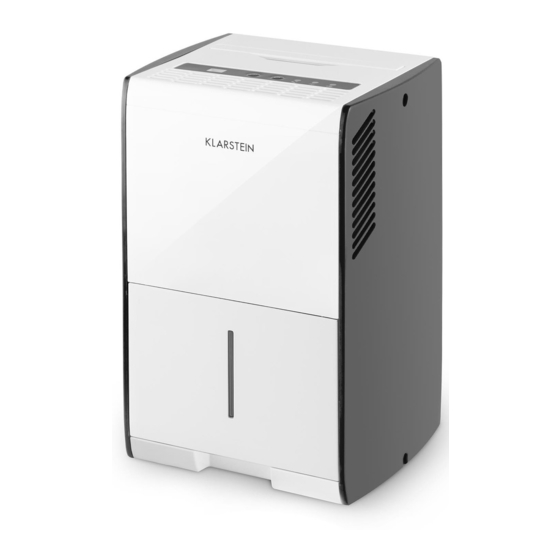
  • Seite 5: Übersicht Über Das Gerät

    Übersicht über das Gerät Luftauslass Griff getrocknete Luft Bedienfeld Durchgehender Wasserablass Lufteinlass feuchte Luft Wasserbehälter Funktionstasten 1. CO (Continue)= Weiter 2. Einstellung für den Feuchtigkeitsgrad: Drücken Sie diese Taste, um den Feuchtigkeitsgrad einzustellen, die Reihenfolge ist 60 % > 50 % > 40 % > CO > 60 % . 3.
  • Seite 6: Bedienung

    Bedienung Betriebsstart 1. Verbinden Sie den Netzstecker mit der Steckdose. 2. Der Wassertank muss in einer geeigneten Position sein. (Wenn Sie das Gerät das erste Mal mit dem Stromnetz verbinden und die Lampe für „Wasser tank voll“ aufleuchtet, ziehen Sie einfach den Wasser- tank heraus und schieben ihn in die richtige Stellung zurück.) 3.
  • Seite 7: Hinweise Zur Entsorgung

    Hinweis: Fassen Sie den Wassertank mit beiden Händen an. Abtaubetrieb Die Lampe für den Abtaubetrieb leuchtet auf. Wenn das Gerät auf niedrigen Temperaturen läuft (weniger als 12 °C), wird die Oberfläche des Verdunsters vereisen und den Wirkungsgrad des Luftentfeuchters beeinträchtigen. Wenn dies geschieht, wird das Ge- rät automatisch in einen wiederkehrenden Abtaubetrieb gehen.
  • Seite 8: Technical Data

    Dear Customer, Congratulations on purchasing this Klarstein equipment. Please read this manual carefully and take care of the following hints on installation and use to avoid technical damages. Any failure caused by ignoring the mentioned items and cautions mentioned in the operation and installation instructions are not covered by our warranty and any liability.
  • Seite 9: Securitiy Instructions

    Security Instructions Electrical connection • Do not fold the power cord. • Make sure the plug is placed fully & firm into the socket • Do not use multiple sockets. • Make sure the plug is clean. • After turning the unit off, please take plug out of the socket. •...
  • Seite 10: Installation

    Installation Installation of the drainage hose Prepare PVC hose to drain out water Back of the unit (The hose sold in market with inner Drainage hose dia. 13mm) Closing cap Remove the closing cap from the drainage outlet . Take out the , put it and tube stopple into the bucket for storage.
  • Seite 11: Product Overview

    Product Overview Dehumified Handle air vent Control panel Continuous drainage outlet Moist air intake Drain bucket Function keys 1. CO (Continue) 2. To set the humidity, press the key to select desired setting. the The sequence is:60% -> 50% -> 40% -> CO ->...
  • Seite 12: Operation

    Operation Start operation 1. Ensure that the unit is connected to the power socket. 2. Make sure the water tank is placed in proper position. (After plug on the machine for the first time, if the full tank lamp light up, just pull out the water tank then push it back to the proper position.) 3.
  • Seite 13: Disposal Coniderations

    Defrost mode When operating in low temperatures (less than 12 °C) the surface of the evaporator will accumulate frost and effect the efficiency of the dehumidifier. When this happens the machine will go into periodic defrost mode automatically. This is quite normal. Defrost lamp will come on. The unit will operate in temperatures down to 5 °C.
  • Seite 14: Dati Tecnici

    Installazione 16 Descrizione del prodotto 17 Utilizzo 18 Pulizia e manutenzione 18 Avvertenze per lo smaltimento 19 Dichiarazione di conformità 19 Dati tecnici Numero dell’articolo 10028493 10028494 Alimentazione 220-240 V 50 Hz Potenza 205 W Dimensioni (LxAxP) 25 x 38 x 23 cm...
  • Seite 15: Avvertenze Di Sicurezza

    Avvertenze di sicurezza Collegamento alla corrente • Non piegare il cavo • La spina deve essere inserita correttamente nella presa. • Non utilizzare prese multiple. • La spina deve essere pulita. • Dopo l’utilizzo del dispositivo, staccare la spina. • Non staccare la spina tirando il cavo di rete, per evitare che questo si rompa. •...
  • Seite 16 Installazione Installazione del tubo di scarico Parte posteriore del dispositivo Preparare il tubo per lo scarico dell’ a cqua. (I tubi sono disponibili sul tubo di scarico dell’ a cqua mercato e hanno un diametro di 13 mm). Svitare il tappo di protezione tappo di prote- dall’uscita dello scarico dell’...
  • Seite 17: Descrizione Del Prodotto

    Descrizione del prodotto Uscita aria Impugnatura deumidificata Pannello di controllo Uscita per il dre- naggio continuo Entrata aria umida Serbatoio dell‘acqua Tasti funzione 1. CO (Continue) = Continuare 2. Impostare il livello di umidità: premere questo tasto, per impostare il livello di umidità secondo la sequen- za 60% >...
  • Seite 18: Pulizia E Manutenzione

    Utilizzo Messa in funzione 1. Inserire la spina nella presa di corrente. 2. Il serbatoio deve essere inserito correttamente. (Se al primo il primo utilizzo la spia “serbatoio pieno” si accende, rimuovere il serbatoio e reinserirlo nella posizione corretta). 3. Per accendere il dispositivo, premere il tasto di accensione/spegnimento. Premere, per impostare il livello di umidità...
  • Seite 19: Smaltimento

    rizzatore si congela e questo influisce negativamente sulle prestazioni del dispositivo. Se si verifica ciò, il dispositivo passa automaticamente alla modalità di sbrinamento. Non si tratta di un malfunzionamento. La spia della modalità di sbrinamento si accende. Il dispositivo funziona ad una temperatura ambiente superiore ai 5 gradi.
  • Seite 20: Données Techniques

    Chère cliente, cher client, Toutes nos félicitations pour l’ a cquisition de ce nouvel appareil Klarstein. Veuillez lire attentivement les in- structions de branchement et d’utilisation afin d’ é viter d’ é ventuels dommages techniques. Le fabricant ne saurait être tenu pour responsable des dommages dus au non-respect des consignes de sécurité et à la mauvaise utilisation de l’...
  • Seite 21: Consignes De Sécurité

    Consignes de sécurité Cordon d’alimentation et fiche • Ne pas plier le cordon d’ a limentation. • La fiche doit être doit être bien branchée. • Ne pas utiliser de multiprise. • La fiche doit être propre. • Débrancher l’ a ppareil après utilisation. •...
  • Seite 22: Installation

    Installation Installation du tuyau d’évacuation Partie arrière de l’ a ppareil Préparer le tuyau d’ é vacuation d’ e au Tuyau d’ é vacuation (acheter un tuyau d’un diamètre de d’ e au 13 mm, disponible dans le commer- ce). Bouchon Dévisser le bouchon de la valve d’...
  • Seite 23: Aperçu De L'appareil

    Aperçu de l’appareil Poignée Panneau Sortie d’ a ir sec de contrôle Évacuation d’ e au fixe Entrée d’ a ir humide Réservoir d‘eau Touches de fonction 1. CO (Continue) : poursuivre. 2. Réglage du degré d’humidité : appuyer sur la touche pour ajuster le degré d’humidité. La séquence est la suivante : 60 % >...
  • Seite 24: Utilisation

    Utilisation Mise en marche 1. Brancher l’ a ppareil. 2. Le réservoir d’ e au doit être placé de manière adéquat. Si l’ a ppareil est branché pour la première fois et le témoin lumineux indiquant que le réservoir d’ e au est plein s’ a llume, retirer simplement le réservoir d’ e au et le replacer de manière adéquat.
  • Seite 25: Informations Sur Le Recyclage

    Informations sur le recyclage Le témoin lumineux correspondant s’ a llume. Lorsque l’ a ppareil fonctionne à des températures basses (inférieures à 12 °C), la surface ex- terne de l’ é vaporateur peut geler et nuire au rendement de l’ a ppareil. Lorsque cela arrive, l’...
  • Seite 26: Datos Técnicos

    Estimado cliente: Le felicitamos por la adquisición de este producto Klarstein. Lea atentamente el siguiente manual y siga cuidadosamente las instrucciones de uso con el fin de evitar posibles daños técnicos. La empresa no se responsabiliza de los daños ocasionados por un uso indebido del producto o por haber desatendido las indicaciones de seguridad.
  • Seite 27: Indicaciones De Seguridad

    Indicaciones de seguridad Conexión eléctrica • No tire del cable de alimentación. • El enchufe debe encajarse completamente en la toma de corriente. • No utilice bases múltiples. • El enchufe deberá conservarse limpio. • Desenchufe el aparato cuando no lo utilice. •...
  • Seite 28 Instalación Instalación del tubo de desagüe Parte trasera del aparato Prepare el tubo de desagüe para ca- nalizar el agua. (El tubo deberá tener Tubo de desagüe un diámetro interior de 13 mm y po- drá adquirirlo en cualquier tienda). Cierre Desenrosque el cierre del desagüe.
  • Seite 29: Vista General Del Aparato

    Vista general del aparato Salida de aire seco Panel de control Desagüe permanente Entrada de aire húmedo Depósito de agua Botones de función 1. CO (Continuar) 2. Ajustes para determinar el grado de humedad: pulse este botón para ajustar el grado de humedad. La secuencia es la siguiente: 60 % >...
  • Seite 30: Limpieza Y Mantenimiento

    Manejo Puesta en funcionamiento 1. Conecte el aparato a la toma de red. 2. El depósito de agua debe estar colocado en la posición correcta. Si conecta el aparato a la red eléctrica por primera vez y se enciende el indicador luminoso del depósito lleno, extraiga el depósito y colóquelo en su posición correcta.
  • Seite 31: Indicaciones Para La Retirada Del Aparato

    Función de descongelación El indicador de funcionamiento se ilumina. Si el aparato funciona a temperaturas demasiado bajas (por debajo de los 12 °C), la superficie del evaporador acumulará escarcha, lo que afectará el rendimiento del deshumidificador. Cuando esto ocurre, el aparato entra automáticamente en el modo descongelación.

Diese Anleitung auch für:

10028494

Inhaltsverzeichnis