
Verwandte Anleitungen für BNF Blade 120


Inhaltszusammenfassung für BNF Blade 120
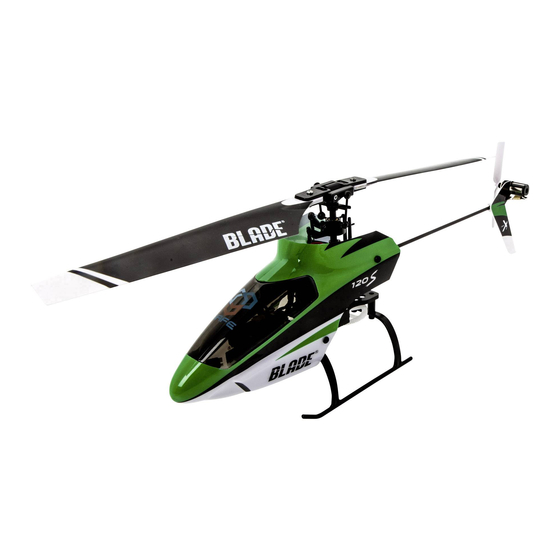
- Seite 1 Instruction Manual Bedienungsanleitung Manuel d’utilisation Manuale di Istruzioni READY-TO-FLY...
-
Seite 2: Meaning Of Special Language
NOTICE All instructions, warranties and other collateral documents are subject to change at the sole discretion of Horizon Hobby, LLC. For up-to-date product literature, visit horizonhobby.com and click on the support tab for this product. Meaning of Special Language The following terms are used throughout the product literature to indicate various levels of potential harm when operating this product: NOTICE: Procedures, which if not properly followed, create a possibility of physical property damage AND a little or no possibility of injury. -
Seite 3: Inhaltsverzeichnis
Battery Charging ..............4 Troubleshooting Guide ............12 Installing the Transmitter Batteries (RTF) ......5 Exploded View..............14 Transmitter Setup (BNF) ............5 Parts List ................. 14 Installing the Flight Battery ..........8 Limited Warranty .............. 15 Transmitter and Receiver Binding ........8 Warranty and Service Contact Information ...... -
Seite 4: First Flight Preparation
• Install the batteries in the transmitter (RTF only) ❏ Allow the receiver and ESC to initialize and arm properly • Program your computer transmitter (BNF only) ❏ Fly the model • Install the fl ight battery in the helicopter ❏... -
Seite 5: Installing The Transmitter Batteries (Rtf)
Blade 120 S DXe model setup available at www.spektrumrc.com. To use the DXe transmitter with the Blade 120 S, channel 6 must be reversed. To reverse channel 6: 1. While powering on the DXe, hold the left and right sticks in the top-inside corners as shown. - Seite 6 DX6i SETUP LIST ADJUST LIST Model Type Acro TRAVEL ADJ D/R & Expo Channel Travel Chan Sw Pos Expo* REVERSE THRO 100/100 Channel Direction AILE AILE 100/100 THRO ELEV 100/100 AILE ELEV RUDD 100/100 ELEV GEAR 100/100 RUDD RUDD PITC 100/100 GEAR FLAPS...
- Seite 7 SYSTEM SETUP FUNCTION LIST Model Type ACRO Servo Setup Chan Travel Reverse Chan Travel Reverse SW Select 100/100 Normal 100/100 Normal Trainer Aux 1 100/100 Normal 100/100 Reverse F Mode Gear 100/100 Normal 100/100 Normal All Others 100/100 Normal D/R & Expo D/R &...
-
Seite 8: Installing The Flight Battery
Installing the Flight Battery 1. Lower the throttle stick to the lowest position (A) and 6. Place the helicopter on a fl at center all trims. surface and leave it still until the red LED changes to blue and glows solid, indicating nd glows solid indicating 2. -
Seite 9: Rtf Transmitter Controls
To bind or re-bind your helicopter to your chosen transmitter, follow the directions below. General Binding Procedure (BNF) 1. Disconnect the fl ight battery from the helicopter. 2. Refer the Transmitter Setup Table to correctly setup your transmitter. 3. Lower the throttle stick to the lowest position and center all trims on your transmitter. -
Seite 10: Control Tests
Control Tests Test the controls prior to the fi rst fl ight to ensure the servos, linkages and parts operate correctly. Ensure the throttle is in the low position when doing the control tests. Elevator Left Side View Left Side View Elevator down Elevator up Aileron... -
Seite 11: Safe Technology
® Technology ® Revolutionary SAFE (Sensor Assisted Flight Envelope) SAFE technology delivers: technology uses an innovative combination of multi-axis • Flight envelope protection you can enable at the fl ip sensors and software that allows model aircraft to know of a switch. its position relative to the horizon. -
Seite 12: Drift Calibration
7-channel mode Spektrum DXe but will not The transmitter is in 9-channel mode or download the Blade 120 S model setup fi le to your respond to control input transmitter from www.spektrumrc.com Disconnect the fl ight battery, place the throttle stick in the Throttle too high and/or throttle trim lowest position and lower the throttle trim a few clicks. - Seite 13 Problem Possible Cause Solution Flight battery charge is low Completely recharge the fl ight battery Helicopter has reduced fl ight Replace the fl ight battery and follow the fl ight battery Flight battery is damaged time or is underpowered instructions Flight conditions might be too cold Make sure the battery is warm (room temperature) before use Power off the transmitter.
-
Seite 14: Exploded View
Description Part # Description BLH4100 120 S RTF 15 BLH3115 Rotor Head Linkage BLH4180 120 S BNF 16 BLH3106 Main gear 1 SPMSH2029L Linear Long, 35mm lead 17 BLH3709 Landing gear Set 2 SPMSH2030L Linear Long, 60mm lead 18 BLH3114... -
Seite 15: Limited Warranty
Limited Warranty What this Warranty Covers may need any assistance. For questions or assistance, please visit our website at www.horizonhobby.com, submit a Product Horizon Hobby, LLC, (Horizon) warrants to the original purchas- Support Inquiry, or call the toll free telephone number refer- er that the product purchased (the “Product”) will be free from enced in the Warranty and Service Contact Information section defects in materials and workmanship at the date of purchase. -
Seite 16: Warranty And Service Contact Information
Warranty and Service Contact Information Country of Purchase Horizon Hobby Contact Information Address Horizon Service Center servicecenter.horizonhobby.com/ (Repairs and Repair Requests) RequestForm/ Horizon Product Support productsupport@horizonhobby.com United States of 4105 Fieldstone Rd America (Product Technical Assistance) 888-959-2304 Champaign, Illinois, 61822 USA sales@horizonhobby.com Sales 888-959-2304... -
Seite 17: Ic Information
Compliance Information for the European Union EU Compliance Statement: RTF: BNF: Horizon Hobby, LLC hereby declares that this Horizon Hobby, LLC hereby declares that this product is product is in compliance with the essential requirements in compliance with the essential requirements and other and other relevant provisions of the R&TTE, EMC, and LVD... -
Seite 18: Spezielle Bedeutungen
HINWEIS Alle Anweisungen, Garantien und anderen zugehörigen Dokumente können im eigenen Ermessen von Horizon Hobby, LLC jederzeit geändert werden. Die aktuelle Produktliteratur fi nden Sie auf horizonhobby.com unter der Registerkarte „Support“ für das betreffende Produkt. Spezielle Bedeutungen Die folgenden Begriffe werden in der gesamten Produktliteratur verwendet, um auf unterschiedlich hohe Gefahren- risiken beim Betrieb dieses Produkts hinzuweisen: HINWEIS: Wenn diese Verfahren nicht korrekt befolgt werden, können sich möglicherweise Sachschäden UND geringe oder keine Gefahr von Verletzungen ergeben. -
Seite 19: Lieferumfang
Sie können Ihr Produkt online unter Hauptrotordurchmesser www.bladehelis.com registrieren. Lieferumfang • Blade 120 S • LP6DSM SAFE Sender (nur in RTF version) • 500mAh 1S 3,7V 25C Li-Po Akku • 4 AA Batterien (nur in RTF version) • 1S USB Lipo Lader... -
Seite 20: Vorbereitung Für Den Erstfl Ug
❏ Lassen Sie der ESC Kontrolleinheit Zeit zum initialisieren • Setzen Sie die Batterien in den Sender ein (nur RTF Version) und armieren • Programmieren Sie Ihren Sender (nur BNF Version) ❏ Fliegen Sie das Modell • Setzen Sie den Akku ein wenn er vollständig geladen ist ❏... -
Seite 21: Einsetzen Der Senderbatterien (Rtf)
Einsetzen der Senderbatterien (RTF) Ersetzen Sie die Sender Batterien wenn die der Sender piept. Sendereinstellungen (BNF) Sie müssen Ihren Sender zuerst programmieren, bevor Sie den Bei der Programmierung der DXe über den PC oder mit der Helikopter binden oder fl iegen können. Die Werte, die Sie zum App achten Sie bitte darauf, dass die Anzahl der Senderkanäle... - Seite 22 DX6i SETUP LIST ADJUST LIST Model Type Acro TRAVEL ADJ D/R & Expo Channel Travel Chan Sw Pos Expo* REVERSE THRO 100/100 Channel Direction AILE AILE 100/100 THRO ELEV 100/100 AILE ELEV RUDD 100/100 ELEV GEAR 100/100 RUDD RUDD PITC 100/100 GEAR FLAPS...
-
Seite 23: Systemeinstellung
Systemeinstellung Funktionsliste Modelltyp ACRO Servoeinstellung Kanal Servoweg Laufrichtung Kanal Servoweg Laufrichtung SW Select 100/100 Normal 100/100 Normal Trainer Aux 1 100/100 Normal 100/100 Reverse F Mode 100/100 Normal 100/100 Normal andere 100/100 Normal D/R & Expo D/R & Expo Kanal Shalter Pos (AIL D/R) Expo* Kanal Shalter Pos (AIL D/R) Expo*... -
Seite 24: Einsetzen Des Flugakkus
Einsetzen des Flugakkus 1. Bringen Sie den Gashebel auf die unterste 6. Stellen Sie den Hubschrauber Position (A) und zentrieren alle Trimmungen. auf eine ebene Oberfl äche und lassen ihn vollkommen still stehen bis die rote LED l stehen bis die rote LED 2. -
Seite 25: Der Bindevorgang (Bnf)
Um ihren Hubschrauber an den gewählten Sender zu binden oder neu zu binden folgen Sie bitte den untenstehenden Anweisungen. Der Bindevorgang (BNF) 1. Trennen Sie den Flugakku vom Hubschrauber. 2. Entnehmen Sie aus der Sendereinstelltabelle die korrekte Einstellung für ihren Sender. -
Seite 26: Kontrolltests
Kontrolltests Testen Sie vor dem Erstfl ug die Kontrollen um sicher zustellen, dass die Servos, Anlenkungen und weitere Teile richtig arbeiten. Versichern Sie sich, dass das Gas in der niedrigsten Position bei dem Durchführen dieser Tests ist. Höhenruder Seitenansicht Seitenansicht Gasgeber nach Gasgeber nach oben... -
Seite 27: Safe Technologie
® Technologie Die revolutionäre SAFE Technologie von Horizon Hobby SAFE Technologie im Überblick: (Sensor Assited Flight Envelope) verwendet eine innovative • Flugstabilisierung über einen Schalter zuschaltbar. Kombination aus Multi-Achs Sensoren und Software, die es • Mehrere Modi zur Anpassung von SAFE and die Fähigkeiten erlauben, die relative Position des Fluggerätes im Raum je- des Piloten. -
Seite 28: Driftkalibrierung
Stabilitätsmode mit großen Neigewinkel (FM1): Die Agilitätsmode (FM2): Die Empfänger LED leuchtet rot. Der Empfänger LED leuchtet blau. In diesen Flugmode sind größere mögliche Neigewinkel ist nicht begrenzt. Wird die zyklische Neigewinkel und höhere Fluggeschwindigkeiten möglich. Wird (Taumelscheiben) Steuerung losgelassen richtet sich das die zyklische (Taumelscheiben) Steuerung losgelassen richtet Modell nicht von selbst wieder auf. - Seite 29 Problem Mögliche Ursache Lösung Trennen Sie den Flugakku, bringen Sie den Gashebel in die nied- rigste Postion und stellen die Gastrimmung ein paar Klicks nach Gas oder Gastrimmung ist zu hoch unten. Schließen Sie den Flugakku an und lassen sich das Modell Hubschrauber reagiert nicht initialisieren auf Gas...
-
Seite 30: Explosionszeichnung
6 BLH4104 Blade Rahmen 22 BLH3113 Blade Spindel mit Lagern und O-Ringen 7 BLH4105 Blade Rotorwelle 23 BLH3129 Blade 120 SR Heckmotor 8 BLH4106 Blade Taumelscheibe 24 EFLB5001S25 1S, 500 mAh, 25C LiPo Akku, JST 9 BLH4107 Blade Kabinenhaube 25 BLH3121 Blade Gummitüllen für die Kabinenhaube... -
Seite 31: Garantie Und Service Informationen
Garantie und Service Informationen Warnung Einschränkungen und Vorbehalte. Wenn Sie als Käufer nicht bereit sind, diese Bestimmungen im Ein ferngesteuertes Modell ist kein Spielzeug. Es kann, wenn Zusammenhang mit der Benutzung des Produktes zu akzeptieren, es falsch eingesetzt wird, zu erheblichen Verletzungen bei werden Sie gebeten, dass Produkt in unbenutztem Zustand in der Lebewesen und Beschädigungen an Sachgütern führen. -
Seite 32: Garantie Und Service Kontaktinformationen
+49 (0) 4121 2655 100 Rechtliche Informationen für die Europäische Union EU Konformitätserklärung RTF: BNF: Horizon LLC erklärt hiermit, dass dieses Horizon LLC erklärt hiermit, dass dieses Produkt konform Produkt konform zu den essentiellen Anforderungen der zu den essentiellen Anforderungen der R&TTE und EMC R&TTE, EMC Direktive, und LVD ist. - Seite 34 REMARQUE La totalité des instructions, garanties et autres documents est sujette à modifi cation à la seule discrétion d’Horizon Hobby, LLC. Pour obtenir la documentation à jour, rendez-vous sur le site horizonhobby.com et cliquez sur l’onglet de support de ce produit. Signifi...
-
Seite 35: Contenu De La Boîte
à inspecter après le vol ............44 Installation des piles de l’émetteur (RTF) ......37 Guide de résolution des problèmes ........44 Réglage de l’émetteur (BNF) ..........37 Vue éclatée..............46 Installation de la batterie ..........40 Liste des pièces détachées ..........46 Affectation de l’émetteur et du récepteur ...... -
Seite 36: Préparation Au Premier Vol
❏ Branchez la batterie à la prise du contrôleur • Installez les piles dans l'émetteur (RTF seulement) ❏ Patientez durant l’initialisation du contrôleur • Programmez votre émetteur (Version BNF) ❏ Effectuez votre vol • Installez la batterie totalement chargée dans ❏... -
Seite 37: Installation Des Piles De L'émetteur (Rtf)
Blade 120 S avec la DXe sur www.spektrumrc.com. Pour utiliser l'émetteur DXe avec le Blade 120 S, la voie 6 doit être inversée. Pour inverser la voie 6: 1. Lorsque vous mettez votre DXe sous tension, maintenez les manches gauche et droit dans les coins inférieurs comme sur l'illustration. - Seite 38 DX6i LISTE DES PARAMETRES VALEURS Type de Course de servo Double-débattements et Expo Acro modèle Voie Travel Voie Pos. Inter. Expo* 100/100 Inversion Ailerons Ailerons 100/100 Voie Direction Profondeur 100/100 Profondeur Dérive 100/100 Ailerons Gyro 100/100 Profondeur Dérive 100/100 Dérive VOLET Mixing Gyro...
- Seite 39 PARAMETRES SYSTEME LISTE DES FONCTIONS Type de Course des servos ACRO modèle Voie Course Inversion Voie Course Inversion 100/100 Normal 100/100 Normal Gear Sélection interr. 100/100 Normal 100/100 Inversion Ailerons Écolage Aux 1 100/100 Normal 100/100 Normal Profondeur Mode de Vol Gear 100/100 Normal...
-
Seite 40: Installation De La Batterie
Installation de la batterie 1. Baissez le manche des gaz à fond (A) et centrez tous 6. Placez l'hélicoptère sur une les trims. surface plane et gardez-le immobile jusqu'à ce que la DEL rouge passe au bleu fi xe L rouge passe au bleu fixe 2. -
Seite 41: Commandes De L'émetteur (Rtf)
Pour affecter ou ré-affecter votre hélicoptère à l'émetteur de votre choix, veuillez suivre les instructions suivantes. Processus général d'aff ectation (BNF) 1. Déconnectez la batterie de l'hélicoptère. 2. Référez-vous au tableau des paramètres de l'émetteur pour confi gurer votre émetteur. -
Seite 42: Compréhension Des Commandes De Vol De Base
Test des commandes Testez les commandes avant d'effectuer le premier vol pour contrôler les mouvements des servos, des tringleries et autres éléments. Assurez-vous que le manche des gaz est en position basse quand vous effectuez ce test. Gouverne de profondeur Vue latérale Vue latérale Gouverne de... -
Seite 43: Safe Technologie
® Technologie La technologie révolutionnaire SAFE (Système d'entraî- La technologie SAFE apporte: nement assisté par capteurs) utilise la combinaison de • Une protection du domaine de vol qui s'active avec un capteurs sur différents axes et un logiciel permettant au simple basculement d'un interrupteur. -
Seite 44: Correction Des Déviations
L'émetteur est en mode 9 voies votre émetteur en mode 7 voies ou téléchargez le guide mais ne répond pas aux de réglage du Blade 120 S pour votre émetteur sur www. commandes spektrumrc.com La manette des gaz et/ou le trim des gaz Réinitialisez les commandes en plaçant la manette des gaz... -
Seite 45: Cause Possible
Problème Cause possible Solution La charge de la batterie de vol est faible Rechargez complètement la batterie de vol L’hélicoptère ne vole pas Remplacez la batterie de vol et suivez les instructions La batterie de vol est endommagée très longtemps ou manque correspondantes de puissance Assurez-vous que la batterie est chaude (température... -
Seite 46: Vue Éclatée
Réf. pièce Description Réf. pièce Description BLH4100 120 S RTF 15 BLH3115 Biellette de tête BLH4180 120 S BNF 16 BLH3106 Couronne principale 1 SPMSH2029L Servo Linéaire, câble 35mm 17 BLH3709 Train d'atterrissage 2 SPMSH2030L Servo Linéaire, câble 60mm 18 BLH3114... -
Seite 47: Garantie Et Réparations
Garantie et réparations Durée de la garantie Indications relatives à la sécurité Garantie exclusive - Horizon Hobby, LLC (Horizon) garantit Ceci est un produit de loisirs perfectionné et non un jouet. que le Produit acheté (le « Produit ») sera exempt de défauts Il doit être utilisé... -
Seite 48: Coordonnées De Garantie Et Réparations
Informations de conformité pour l’Union européenne Déclaration de conformité de l’Union européenne : RTF: BNF: Horizon Hobby, LLC déclare par la présente Horizon Hobby, LLC déclare par la présente que ce produit que ce produit est en conformité avec les exigences es- est en conformité... - Seite 50 AVVISO Tutte le istruzioni, le garanzie e gli altri documenti pertinenti sono soggetti a cambiamenti a totale discrezione di Horizon Hobby, LLC. Per una documentazione aggiornata sul prodotto, visitare il sito horizonhobby.com e fare clic sulla sezione Support del prodotto. Convenzioni terminologiche Nella documentazione relativa al prodotto vengono utilizzati i seguenti termini per indicare i vari livelli di pericolo potenziale durante l’uso del prodotto:...
-
Seite 51: Contenuto Del Kit
Controlli e manutenzione dopo il volo......... 60 Installazione delle pile nella trasmittente (RTF) ....53 Risoluzione dei Problemi ........... 60 Controllo trasmettitore (BNF) ..........53 Vista esplosa ..............62 Installazione batteria di bordo ........... 56 Elenco delle parti ............. 62 Connessione (binding) fra trasmettitore e ricevitore .... -
Seite 52: Preparazione Al Primo Volo
❏ Far atterrare il modello (dopo averla ben caricata) ❏ Scollegare la batteria di bordo dall’unità ESC • Connettere (bind) il vostro tramettitore (solo BNF) ❏ Spegnere sempre il trasmettitore per ultimo • Familiarizzare con i comandi • Trovare un’area adatta al volo... -
Seite 53: Installazione Delle Pile Nella Trasmittente (Rtf)
DXe. spektrumrc.com. Per poter usare la trasmittente DXe con il Blade 120 S, bisogna invertire il canale 6. Per invertire il canale 6: 1. Durante l’accensione della DXe, tenere lo stick sinistro e destro nell’angolo interno in alto, come illustrato. - Seite 54 DX6i SETUP LIST ADJUST LIST Tipo di modello Acro TRAVEL ADJ D/R & Expo Canale Corsa Canale Sw Pos Expo* REVERSE THRO 100/100 Channel Direzione AILE AILE 100/100 THRO ELEV 100/100 AILE ELEV RUDD 100/100 ELEV GEAR 100/100 RUDD RUDD PITC 100/100 GEAR...
- Seite 55 SYSTEM SETUP FUNCTION LIST Tipo di modello ACRO Servo Setup Canale Corsa Reverse Canale Corsa Reverse SW Select 100/100 Normal 100/100 Normal Trainer Aux 1 100/100 Normal 100/100 Inverso F Mode Gear 100/100 Normal 100/100 Normal Altrui 100/100 Normal D/R & Expo D/R &...
-
Seite 56: Installazione Batteria Di Bordo
Installazione batteria di bordo 1. Abbassare lo stick motore completamente (A) e centrare 6. Posizionare l’elicottero su di tutti i trim. una superfi cie piana e non toccarlo fi no a quando il LED rosso sarà cambiato a blu osso sarà cambiato a blu 2. -
Seite 57: Controlli Della Trasmittente Rtf
Per connettere o riconnettere l’elicottero al trasmettitore scelto, si prega di osservare le indicazioni seguenti: Procedura generale di connessione (BNF) 1. Scollegare la batteria di bordo dall’elicottero. 2. Fare riferimento alla tabella per impostare correttamente il trasmettitore. 3. Abbassare completamente lo stick del motore e centrare tutti i trim della vostra trasmittente. -
Seite 58: Informazioni Sui Comandi Di Volo Principali
Test di controllo Prima di far volare il modello, verifi care la direzione dei comandi per accertarsi che servi, rinvii e tutte le parti operino correttamente. Quando si fanno queste verifi che, accertarsi che lo stick del motore sia posizionato in basso. Elevatore Vista laterale Vista laterale... -
Seite 59: Safe Tecnologia
® Tecnologia La rivoluzionaria tecnologia SAFE usa una combinazione La tecnologia SAFE fornisce: innovativa di sensori ad assi multipli e un software che • Protezione dell'inviluppo di volo attivabile con un interruttore. permette al modello di conoscere la sua posizione relativa •... -
Seite 60: Procedura Di Calibrazione
7 canali o per scaricare il fi le per il settaggio della risponde ai comandi vostra trasmittente per il Blade 120 S su www.spektrumrc.com Scollegare la batteria di bordo, abbassare completamente Il comando motore o il suo trim sono lo stick motore e il suo trim. - Seite 61 Problema Possibile Causa Soluzione La batteria di bordo è quasi scarica Ricaricare completamente la batteria L’elicottero ha ridotto il tempo La batteria di bordo è danneggiata Sostituire la batteria seguendo le istruzioni di volo o è sotto potenziato La temperatura ambientale potrebbe Prima dell’uso accertarsi che la batteria sia tiepida essere troppo bassa Spegnere il trasmettitore e allontanarlo dall’elicottero.
-
Seite 62: Vista Esplosa
Descrizione Codice Descrizione BLH4100 120 S RTF 15 BLH3115 Collegamenti testa rotore BLH4180 120 S BNF 16 BLH3106 Ingranaggio principale 1 SPMSH2029L Lineare, lungo, 35mm cavo 17 BLH3709 Set carrello d'atterraggio 2 SPMSH2030L Lineare, lungo, 60mm cavo 18 BLH3114 Manine porta pala principale con hardware... -
Seite 63: Garanzia
Garanzia Periodo di garanzia Indicazioni di sicurezza Garanzia esclusiva - Horizon Hobby, LLC (Horizon) garantisce Questo è un prodotto sofisticato di hobbistica e non è un giocat- che il prodotto acquistato (il “Prodotto”) sarà privo di difetti tolo. Esso deve essere manipolato con cautela, con giudizio e relativi ai materiali e di eventuali errori di montaggio alla data richiede delle conoscenze basilari di meccanica e delle facoltà... -
Seite 64: Garanzia E Assistenza - Informazioni Per I Contatti
+49 (0) 4121 2655 100 Informazioni sulla conformità per l’Unione Europea Dichiarazione di Conformità EU: RTF: BNF: Horizon Hobby, LLC con la presente dichiara Horizon Hobby, LLC con la presente dichiara che il prodotto è che il prodotto è conforme ai requisiti essenziali e ad altre conforme ai requisiti essenziali e ad altre disposizioni rilevanti disposizioni rilevanti del R&TTE, direttiva EMC, e LVD. - Seite 68 ©2016 Horizon Hobby, LLC Blade, E-Flite, the BNF logo, DSM, DSM2, DSMX, SAFE, the SAFE logo, AirWare and ModelMatch are trademarks or registered trademarks of Horizon Hobby, LLC. The Spektrum trademark is used with permission of Bachmann Industries, Inc. All other trademarks, service marks and logos are property of their respective owners.