
Verwandte Anleitungen für Medion LIFE P63008


Inhaltszusammenfassung für Medion LIFE P63008
- Seite 1 Teléfono DECT DECT Phone DECT Telefon ® ® MEDION LIFE P63008 (MD 83640) Manual de instrucciones e instrucciones Instruction Manual Bedienungsanleitung...
-
Seite 2: Inhaltsverzeichnis
Sobre las presentes instrucciones ....4 Avisos y señales de advertencia usados en es- tas instrucciones ...........5 Funcionalidad con otras estaciones base .7 Estaciones base de Medion ......7 Estaciones base de otros fabricantes ....7 Uso conforme a lo previsto .......8 Instrucciones de seguridad ....10 Usuarios no autorizados ......10... - Seite 3 Índice Puesta en funcionamiento ....25 Conectar la estación base al teléfono y a la co- rriente ............25 Introducir las baterías ........26 Cargar las baterías del terminal móvil en la es- tación base ..........27 Pantalla y control del menú ....29 Indicaciones en la pantalla ......29 Control del menú...
- Seite 4 Índice terminal móvil..........54 Contestador automático ......56 Activar y desactivar ........57 Escuchar y editar los mensajes recibidos..58 Recordatorios ..........61 Mensajes salientes ........62 Ajustes del contestador automático ....66 Otros ajustes en el menú del teléfono ..73 Menú de configuración .......73 Ajustes del terminal móvil ......81 Ajustes de la estación base ......84 Restaurar ..........90 Limpieza ..........91...
-
Seite 5: Sobre Las Presentes Instrucciones
Sobre las presentes instrucciones Sobre las presentes instrucciones ¡Antes de la primera puesta en funciona- miento, lea atentamente este manual de instrucciones y respete ante todo las ins- trucciones de seguridad! Todas las acciones en este aparato o con el mismo solo se pueden realizar en la medida en que estén descritas en las presentes instrucciones de uso. -
Seite 6: Avisos Y Señales De Advertencia Usados En Estas Instrucciones
Sobre las presentes instrucciones Avisos y señales de advertencia usados en estas instrucciones ¡PELIGRO! ¡Advertencia de riesgo de muerte in- minente! ¡ADVERTENCIA! ¡Advertencia de un posible peligro de muerte y/o graves lesiones irreversi- bles! ¡CUIDADO! ¡Observe las indicaciones para evitar lesiones y daños materiales! ¡ATENCIÓN! ¡Observe las indicaciones para evitar... -
Seite 7: Paquete De Suministro
Sobre las presentes instrucciones Paquete de suministro ¡PELIGRO! No deje jugar a niños pequeños con plásticos. ¡Existe peligro de asfixia! Retire todo el material de embalaje, también las láminas plásticas de las pantallas de la estación base y del terminal móvil. Cuando desembale el aparato, asegúrese de que estén incluidos los siguientes componentes: −... -
Seite 8: Funcionalidad Con Otras Estaciones Base
Funcionalidad con otras estaciones base Funcionalidad con otras estaciones base Estaciones base de Medion El terminal móvil suministrado funciona con las estaciones base DECT aptas para GAP que actual- mente se pueden encontrar en el mercado: MD 83321. Estaciones base de otros... -
Seite 9: Uso Conforme A Lo Previsto
Uso conforme a lo previsto Uso conforme a lo previsto El aparato está previsto para hablar por teléfono dentro de la red de teléfono establecida y para el funcionamiento con conexión telefónica analógi- ca en Alemania. El aparato está previsto únicamente para uso pri- vado y no para uso industrial o comercial (es de- cir, no se permite el uso en tiendas, oficinas y otras zonas comerciales, en propiedades agríco-... - Seite 10 Uso conforme a lo previsto nida en este manual de instrucciones, espe- cialmente las indicaciones de seguridad. Cual- quier otro uso se considerará contrario al uso previsto y puede provocar daños materiales y personales. • No utilice el aparato en condiciones ambien- tales extremas.
-
Seite 11: Instrucciones De Seguridad
Instrucciones de seguridad Instrucciones de seguridad Usuarios no autorizados • Este aparato no está diseñado para ser usado por personas (menores incluidos) con unas capacidades físicas, sensoriales o mentales limitadas, o que no tengan la su- ficiente experiencia o conocimientos, a no ser que sean supervisadas por una perso- na responsable de su seguridad o reciban de ella las correspondientes instrucciones... -
Seite 12: Información Médica
Instrucciones de seguridad Información médica Diríjase al fabricante de sus aparatos médi- cos como, por ejemplo, un audífono, para saber si está suficientemente blindado contra fuentes externas de energía de alta frecuen- cia. • El producto funciona en una banda de fre- cuencia de 1,88 GHz hasta 1,90 GHz. -
Seite 13: Adaptador De Red
Instrucciones de seguridad Adaptador de red • Utilice exclusivamente el adaptador de red suministrado S004LV0600045. • Usar el adaptador de red solamente en es- pacios secos. Instalación segura del aparato Si traslada el aparato de un lugar frío a otro caliente, espere un tiempo antes de conec- tar el adaptador de red. - Seite 14 Instrucciones de seguridad lor (p. ej., radiadores). • Los aparatos no deben exponerse a la luz solar directa. • Se debe evitar el contacto con humedad, agua o salpicaduras de agua. • Los aparatos no están diseñados para fun- cionar en espacios con un alto nivel de humedad (p.
-
Seite 15: Mantenga La Toma De Corriente Accesible
Instrucciones de seguridad Mantenga la toma de corriente accesible ¡ADVERTENCIA! Componentes conductores de corrien- te. Existe peligro de descarga eléctrica. Observe las siguientes indicaciones: • Conecte el adaptador de red siempre a to- mas de corriente con puesta a tierra de (100-240 V ~ 50/60 Hz) debidamente ins- taladas, fácilmente accesibles y cercanas al lugar de emplazamiento. -
Seite 16: Tormenta/No Utilizar
Instrucciones de seguridad inmediatamente. • No coloque nunca el terminal móvil sin la tapa del compartimento de pilas en la es- tación base. • Para evitar que alguien tropiece, no utilice cables de prolongación. Tormenta/No utilizar • En caso de ausencia prolongada o de tor- menta, desconecte el adaptador de red de la toma eléctrica y el cable del teléfono de la estación base. -
Seite 17: Manejo Seguro De Las Baterías
Instrucciones de seguridad Manejo seguro de las baterías Para el terminal móvil se necesita la batería NiMH suministrada. ADVERTENCIA Las pilas pueden contener sustan- cias inflamables. En caso de un ma- nejo inadecuado, las pilas pueden derramar líquidos tóxicos, calentar- se demasiado, inflamarse o hasta explotar, lo que puede causar daños en su aparato y su salud. - Seite 18 Instrucciones de seguridad • ¡Retire del aparato, sin falta, las baterías defectuosas! ¡Existe un alto peligro de de- rrame! • Nunca exponga las baterías a un calor ex- cesivo, como radiación solar directa, fue- go o similares. Existe un alto peligro de derrame.
-
Seite 19: No Haga Nunca Reparaciones Por Su Cuenta
• No intente en ningún caso abrir y/o arre- glar usted mismo los aparatos. • En caso de mal funcionamiento del apa- rato, diríjase al Medion Service Center o a otro taller especializado. • El cable de conexión del adaptador de red no puede sustituirse. -
Seite 20: Esquema Del Aparato
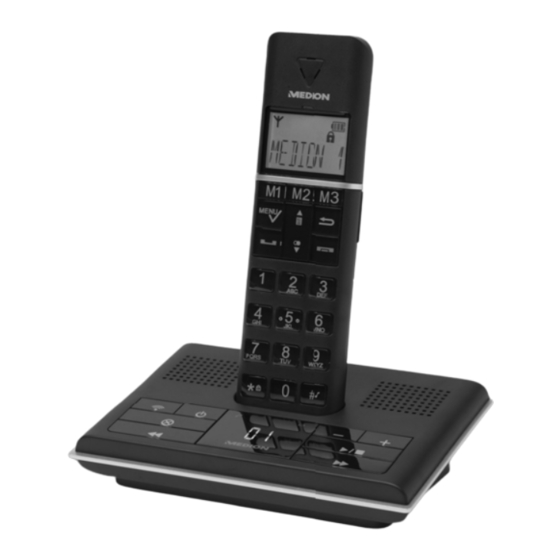
Esquema del aparato Esquema del aparato Estación base Teclas de control: ver tabla en „Teclas de con- trol de la estación base“ en la página 20 Altavoz Bandeja para el auricular con contactos de carga Teclas de control: ver tabla en „Teclas de con- trol de la estación base“... - Seite 21 Esquema del aparato Teclas de control de la estación base Estación Función base Activar o desactivar el contesta- dor automático Subir el volumen de los altavo- ces de la base Bajar el volumen de los altavo- ces de la base Contestador automático: Repro- ducción / stop Contestador automático: Avan-...
-
Seite 22: Conexiones En La Parte Posterior
Esquema del aparato ¡NOTA! Se ilumina el LED en cuanto se realiza una llamada. Se ilumina el LED en cuanto se está cargando la batería. Conexiones en la parte posterior Toma para el cable de teléfono (clavija mo- dular RJ11) Toma para el cable del adaptador de red Portacables para el cable del adaptador de 21/104... -
Seite 23: Terminal Móvil
Esquema del aparato Terminal móvil Altavoz Amplificador/ LED llamada Pantalla Teclas de selección rápida Teclas de control: ver tabla en „Teclas de control del terminal móvil“ en la página 22/104... - Seite 24 Esquema del aparato Micrófono Regulador del volumen Altavoz Compartimento de la pila Contactos de carga Tecla de amplificador Teclas de control del terminal móvil Terminal Función móvil Tecla Atrás: Saltar hacia atrás en el menú Abrir menú; confirmar los puntos del menú...
- Seite 25 Esquema del aparato Terminal Función móvil Finalizar llamada; apagar terminal móvil Tecla de almohadilla: introducir # ; pulsar prolongadamente: activar/ desactivar tono de llamada Tecla de asterisco: Introducir *; ac- tivar/desactivar boqueo de teclas 24/104...
-
Seite 26: Puesta En Funcionamiento
Puesta en funcionamiento Puesta en funcionamiento Retire todos los plásticos de la pantalla y del alta- voz del terminal móvil. Conectar la estación base al teléfono y a la corriente Conecte la clavija jack del adaptador de red S004LV0600045 suministrado en la clavija posterior. -
Seite 27: Introducir Las Baterías
Puesta en funcionamiento Introducir las baterías Para el terminal móvil se suministran dos baterías de níquel-hidruro metálico "AAA" de 600 mAh. ¡NOTA! En los terminales móviles utilice exclu- sivamente baterías de níquel-hidruro metálico del tipo suministrado (NiMH; 1,2 V; 600 mAh). La garantía del aparato pierde su validez si se in- troducen otras baterías. -
Seite 28: Cargar Las Baterías Del Terminal Móvil En La Estación Base
Puesta en funcionamiento (+/–), (el polo negativo debe estar en contac- to con el muelle respectivamente). Vuelva a colocar la tapa del compartimento de las pilas. Cargar las baterías del terminal móvil en la estación base Coloque el terminal móvil en el cargador de la estación base. - Seite 29 Puesta en funcionamiento ¡NOTA! Puede dejar el terminal móvil permanen- temente en el cargador. Así se puede es- tar seguro de mantener el nivel de carga máximo. La autonomía de las baterías es de 10 horas en conversación o 100 horas en es- pera.
-
Seite 30: Pantalla Y Control Del Menú
Pantalla y control del menú Pantalla y control del menú Indicaciones en la pantalla Posibles indicaciones en la pantalla: Contestador automático activado. Parpadea si en el contestador automático hay mensajes sin escuchar Tono de llamada desactivado Bloqueo de teclas activado. Está... - Seite 31 Pantalla y control del menú El terminal móvil se encuentra dentro del alcance de la estación base Parpadea cuando la capacidad de alcan- ce se va reduciendo Si ya no se indica es que el terminal mó- vil está fuera del alcance de emisión El nombre o número mostrado tiene más ◄...
-
Seite 32: Control Del Menú
Control del menú Control del menú Navegar por el menú Abra el menú pulsando la tecla M E N U . Con las siguientes teclas puede moverse por el menú del terminal móvil: navegar hacia arriba; navegar hacia abajo; M E N U ... -
Seite 33: Ajustar La Hora Y La Fecha
Control del menú lla. Pasados aprox. 30 segundos el menú se cie- rra automáticamente y aparece la pantalla de inicio. A justar la hora y la fecha Después de conectar el teléfono la hora y la fe- cha están aún sin ajustar. Así... - Seite 34 Control del menú Seleccione el formato de 12 o 24 horas. En el formato de hora "12 H" aparece al lado de la hora "AM" para las horas comprendi- das entre 00 y 11:59 h, y "PM" para las horas comprendidas entre las 12:00 y las 23:59 h.
-
Seite 35: Registrar Terminales Móviles
Registrar terminales móviles Registrar terminales móviles ¡NOTA! El terminal móvil suministrado de fábrica ya está registrado con el nombre de "Me- dion 1". Registre en la estación base un terminal móvil DECT apto para GAP. Pulse la tecla M E N U . ... -
Seite 36: Seleccionar Base
Registrar terminales móviles También existe la posibilidad de registrar otros teléfonos DECT-GAP en la estación base. Con- sulte el manual de instrucciones del fabricante correspondiente. ¡NOTA! Mientras registra otro terminal móvil, el proceso de registro para ESTA estación base será el mismo. Si registra distintos terminales móviles de distintos fabricantes en una estación base no se puede garantizar, aún siendo... -
Seite 37: Funciones Básicas
Funciones básicas Busque la base en la que quiere registrar el terminal. Detrás de las estaciones base en las que el ter- minal móvil ya está registrado aparece el sím- bolo *. En cuanto el terminal móvil esté conectado con la nueva base, aparece BASE SEL en la pantalla. -
Seite 38: Bloqueo De Teclas
Funciones básicas También se puede encender el terminal móvil colocándolo en la estación base. Bloqueo de teclas Para evitar marcar las teclas por error puede ac- tivar el bloqueo de teclas. Esto no es posible du- rante una conversación. ... -
Seite 39: Llamar
Funciones básicas Llamar Marcar Levante el auricular o presione la tecla de lla- mada Introduzca con el teclado numérico el núme- ro de teléfono. El número de teléfono puede tener hasta 20 dígitos. Para activar la función de manos libres proceda como sigue: ... - Seite 40 Funciones básicas Pulse la tecla para seleccionar el último nú- mero marcado desde el terminal móvil. Navegue con el por los últimos números marcados y pulse la tecla de llamada para llamar al numero elegido. Marcar desde la lista de llamadas Se pueden memorizar hasta 10 llamadas entran- tes en la lista de llamadas (ver también „Lista de llamadas“...
- Seite 41 Funciones básicas Navegue con hasta el participante que desea llamar. Pulse la tecla de llamada para llamar a la entrada seleccionada. Seleccionar número de marcación rá- pida A los contactos que están registrados en la agen- da puede asignarles un número de marcación rá- pida en los números del 2 hasta el 9 (ver tam- bién „Marcación rápida“...
- Seite 42 Funciones básicas Colgar Pulse la tecla del auricular (roja) para fi- nalizar la llamada. En la pantalla aparece durante unos segundos el tiempo de duración de la llamada. ¡NOTA! Si telefonea con la batería casi descarga- da, oirá durante la llamada una señal do- ble de aviso cada minuto.
-
Seite 43: Indicación Del Número De Teléfono
Funciones básicas tecla de llamada (verde). Indicación del número de teléfono Se puede ver en la pantalla el número de teléfo- no del abonado que llama, si ha solicitado a su compañía telefónica la función CLIP y si el abo- nado que llama también dispone de una cone- xión telefónica con la función CLIP y no ha blo- queado la identificación de su número. -
Seite 44: Función De Ahorro De Energía
Funciones básicas Función de ahorro de energía El teléfono dispone de tres funciones de ahorro de energía con las que puede reducir el consu- mo de energía y la potencia de emisión: Modo ECO, Full ECO y modo ECO Manual (ver „Ajustes de la estación base“... - Seite 45 Funciones básicas Amplificador El aparato es compatible con audífonos, por lo que puede utilizar la "Función de amplificador" (para amplificar el volumen ajustado). Si a pesar del audífono no puede oír bien al in- terlocutor, proceda de la siguiente manera: ...
-
Seite 46: Opciones
Funciones básicas Silenciar el terminal Durante la llamada pulse la tecla para si- lenciar el teléfono. El micrófono está apagado y el interlocutor no puede escucharle. Pulse la misma tecla para volver a activar el micrófono. Opciones Durante la llamada puede abrir con la tecla M E N U ... -
Seite 47: Lista De Llamadas
Funciones básicas mos 5 números que haya marcado. ¡NOTA! Por favor, tenga en cuenta que en la lista de rellamada solo se muestras los 20 pri- meros dígitos de los últimos 5 números marcados. Si el número de teléfono tu- viese más de 20 dígitos (se permiten has- ta 20 dígitos), la marcación, no obstante, sería correcta. -
Seite 48: Interno
Funciones básicas cione el número y pulse la tecla del auricular del terminal móvil. Si el abonado está registrado en el teléfono con su nombre éste aparecerá en vez del número de teléfono. Interno Puede transmitir llamadas a otro terminal interno o realizar una llamada a tres con un interlocutor externo y dos internos. - Seite 49 Funciones básicas Conmutación Puede transmitir una llamada al segundo termi- nal móvil registrado en la estación base. Durante la conversación pulse la tecla M E N U . Seleccione con el menú INTERCOM y confirme con la tecla M E N U . ...
-
Seite 50: La Agenda
Funciones básicas Seleccione con el menú INTERCOM y confirme con la tecla M E N U . Con las teclas puede seleccionar el termi- nal móvil, si resultara necesario. Suena el segundo terminal móvil. Acepte la llamada con el segundo terminal móvil y presione durante un segundo la tecla del primer terminal móvil. - Seite 51 Funciones básicas DIRECT. con la tecla M E N U para acceder a la agenda. En la agenda, pulse la tecla M E N U para ac- ceder al submenú. Confirme AGREGAR con M E N U para aña- dir una nueva entrada a la agenda.
- Seite 52 Funciones básicas Seleccione una entrada de la agenda. Seleccione EDITAR y confirme con M E N U . Ahora puede introducir datos como al memori- zar entradas por primera vez; para ello véase el apartado anterior "Añadir una entrada". Revise las entradas en la agenda.
- Seite 53 Funciones básicas Borrar todas Borre todas las entradas de la agenda. Abra la agenda. Pulse la tecla M E N U . Con seleccione ELI.TODO y confirme con M E N U . Aparece la pregunta de seguridad "¿CON- FIR?"...
-
Seite 54: Marcación Rápida
Funciones básicas moria). Marcación rápida Aquí puede asignar un número de la agenda a una de las ocho teclas de cifras que van de la 2 a la 9. Abra la agenda como se describió anterior- mente y confirme con M E N U . ... -
Seite 55: Teclas De Selección Rápida M1 Hasta M3 En El
Funciones básicas Se muestra el nombre del registro nuevo. Confirme con M E N U . Sonará una señal acústica y el indicador de la te- cla de marcación rápida, p.ej. M TA. 7“ Teclas de selección rápida M1 hasta M3 en el terminal móvil En el terminal móvil tiene la posibilidad de me- morizar tres números de teléfono en las teclas de... - Seite 56 Funciones básicas cambiarlo). Confirme con M E N U . Marcar desde la agenda con una te- cla de selección rápida o tecla de marcación rápida • Agenda: Seleccione la entrada y levante el au- ricular o pulse la tecla de llamada. •...
-
Seite 57: Contestador Automático
Contestador automático Contestador automático Con el contestador puede grabar las llamadas entrantes o grabar un recordatorio. En total se pueden grabar mensajes de hasta 15 minutos. El contestador automático añade automática- mente a todos los mensajes la fecha y la hora. Por tanto, deberá... -
Seite 58: Activar Y Desactivar
Contestador automático Activar y desactivar Con la tecla • Para activar o desactivar el contestador auto- mático en la estación base ha de pulsar la te- cla activar/desactivar en la estación base. A través del menú Para activar o desactivar el contestador automá- tico con el terminal móvil, proceda del modo si- guiente: ... -
Seite 59: Escuchar Y Editar Los Mensajes Recibidos
Contestador automático Escuchar y editar los mensajes recibidos Modo de encendido (retardo) según configuración de fábrica El modo de encendido del contestador automáti- co según la configuración de fábrica está ajusta- do de la siguiente manera: • con la primera llamada el contestador auto- mático se conecta después del cuarto timbre;... - Seite 60 Contestador automático Durante la reproducción, pulse la tecla para que se muestre la hora de la llamada en la pan- talla. • Los mensajes que aún no se van escuchado se denominan "mensajes nuevos". • Los mensajes que ya se han escuchado se de- nominan "mensajes antiguos".
- Seite 61 Contestador automático Borrar mensajes sueltos Pulsando brevemente la tecla puede borrar un mensaje que se está reproduciendo. Para borrar un mensaje desde el terminal mó- vil, seleccione la entrada MENSAJE y confir- me con M E N U . ...
-
Seite 62: Borrar Todos Los Mensajes
Contestador automático Borrar todos los mensajes ¡NOTA! Solo puede borrar los mensajes que haya escuchado (“Mensajes antiguos”). A través del menú puede borrar mensajes en conjunto sin que se tengan que reproducir. Abra el menú CONT.AUT. Seleccione ELI.TODO y confirme con M E N U . -
Seite 63: Mensajes Salientes
Contestador automático Sonará una señal acústica y comienza la gra- bación. Hable con un volumen de voz normal al auri- cular del terminal móvil. Tras grabar el recordatorio pulse la tecla M E N U para guardarlo. A continuación, se reproduce el recordatorio. - Seite 64 Contestador automático dor automático esté activado (CON. REG: la persona que llama puede de- jar un mensaje en el contestador); • un mensaje saliente para cuando el contesta- dor automático esté desactivado (CON. SOL: se le ruega al que llama que vuelva a intentar- lo).
- Seite 65 Contestador automático M E N U . Seleccione la opción REPROD. o GRABAR y confirme con M E N U . Ahora se escuchará el mensaje saliente actual o, si quiere, puede dejar un mensaje saliente perso- nalizado en el CA. Cuando grabe el mensaje sa- liente, por favor, proceda del mismo modo que para grabar un recordatorio, según „Grabar re- cordatorio“...
- Seite 66 Contestador automático confirme con M E N U . Ahora se escuchará el mensaje saliente actual o, si quiere, puede dejar un mensaje saliente perso- nalizado en el CA. Cuando grabe el mensaje sa- liente, por favor, proceda del mismo modo que para grabar un recordatorio, según „Grabar re- cordatorio“...
-
Seite 67: Ajustes Del Contestador Automático
Contestador automático Ajustes del contestador automático En el menú CFG CONT puede realizar los ajus- tes básicos. Abra el menú CONT.AUT. Seleccione CFG CONT y confirme con M E N U . Modo del contestador automático Seleccione aquí el texto saliente que escuchará el que llama: el mensaje saliente con grabación o el mensaje saliente sin grabación. - Seite 68 Contestador automático Elija NB. TOQUE. Seleccione 2, 4, 6, 8 TIMB. o ECO.TPO (modo de ahorro de costes) y confirme con M E N U . Modo de ahorro de costes Si está en modo de ahorro puede evitar costes de conexión para escuchar los mensajes del contes- tador automático desde el exterior (para la con- sulta a distancia ver „Consulta a distancia“...
-
Seite 69: Tiempo De Grabación
Contestador automático nifica que no se han grabado nuevos men- sajes. En tal caso, vuelva a colgar inme- diatamente. El contestador automático se conectaría tras la cuarta señal de llamada. Tiempo de grabación Se puede ajustar la duración del mensaje que se puede grabar en el contestador automático. - Seite 70 Contestador automático con M E N U . Consulta a distancia Mediante la consulta a distancia puede escuchar mensajes desde un teléfono externo. La consulta a distancia está activada, según la configuración de fábrica, con el PIN "0000". Desactivar función de consulta a dis- tancia ...
- Seite 71 Contestador automático Cambiar el PIN de consulta a distan- El PIN es una clave que sirve para evitar que per- sonas ajenas tengan acceso a la consulta a dis- tancia de los mensajes de su contestador. Si acti- vada la consulta a distancia tiene que introducir el PIN y puede cambiarlo a continuación.
- Seite 72 Contestador automático Escuchar los mensajes desde otra lí- nea telefónica Marque su número y durante el mensaje pul- se la tecla de asterisco * del teléfono. Ahora introduzca su PIN de consulta a distan- cia con las teclas numéricas. Las teclas numéricas de un teléfono también pueden servir como teclas de control del contes- tador automático.
- Seite 73 Contestador automático Función mientras Tecla Función que se está scuchando Borrar el mensaje Sin función actual. Repetir el mensa- Sin función je; ir a mensaje an- terior. Reproducir men- Parar la reproduc- sajes. ción Saltar al siguiente Sin función mensaje Conectar contes- Sin función tador automático...
-
Seite 74: Otros Ajustes En El Menú Del Teléfono
Otros ajustes en el menú del teléfono Otros ajustes en el menú del teléfono Abra el menú pulsando la tecla M E N U . „Navegar por el menú“ en la pági- na 31 puede ver cómo controlar el menú. Menú... - Seite 75 Otros ajustes en el menú del teléfono Estructura del menú "Ajustes" en el terminal móvil Menú menú / menú / menú / principal opción opción opción Agenda Añadir una Detalles entrada (DIRECT.) Ver entra- Modificar entrada Borrar una entrada Borrar to- Mostrar Memoria estado de...
- Seite 76 Otros ajustes en el menú del teléfono Menú menú / menú / menú / principal opción opción opción Lista de llamadas Detalles (LISTA LL.) Ajus- Ajustar Melodía tar tono base de llama- (CFG (MEL. 1 … da (TOQ. BASE) BASE) Volumen tono de SUBIR...
- Seite 77 Otros ajustes en el menú del teléfono Menú menú / menú / menú / principal opción opción opción Tipo de marcación Por tonos/ por pulsos (NUMERI- Tiempo de LARGO / flash (T. MEDIO / FLASH) CORTO Cambiar PIN (MOD. Cambiar PIN) Modo ECO (MODO...
- Seite 78 Otros ajustes en el menú del teléfono Menú menú / menú / menú / principal opción opción opción Modo ECO comple- Elegir to (ECO COMP) Ajustar terminal MEL. 1 … móvil Interno (CONF. AUR) Tono de llamada MEL. 1 … Externo (CFG TIMB)
- Seite 79 Otros ajustes en el menú del teléfono Menú menú / menú / menú / principal opción opción opción Tono de teclado ACEND. / (TONO APAGA. TECL.) Aviso ba- tería ACEND. / Tonos (BAT. APAGA. (TONOS) BAJA) Adverten- cia cober- ACEND. / tura APAGA.
- Seite 80 Otros ajustes en el menú del teléfono Menú menú / menú / menú / principal opción opción opción Elegir esta- ción base Elegir (EL BASE) Elegir: Ajuste de (Deutsch/ idioma Español/ (IDIOMA) English) Nombre terminal Ajuste móvil (REN.AUR.) Indicación en panta- NOM.AURI HORA (PANT...
- Seite 81 Otros ajustes en el menú del teléfono Menú menú / menú / menú / principal opción opción opción Respuesta ACEND. / automáti- ca (CONT APAGA. AUT) Asignar te- clas de se- M1 / M2 / lección rá- pida (MEM DIR) 80/104...
-
Seite 82: Ajustes Del Terminal Móvil
Otros ajustes en el menú del teléfono Ajustes del terminal móvil Tono de llamada Ajuste aquí el tono de llamada que desea para su terminal móvil. Confirme CFG TIMB con M E N U . INTERNA: Seleccione el tono de llamada para conversaciones internas. - Seite 83 Otros ajustes en el menú del teléfono Sonido Seleccione aquí otra impresión acústica para adaptarla a su audífono, si resultara necesario. Confirme ACÚST. con M E N U . FLAT: Elija esta opción para un sonido natu- ral. ...
-
Seite 84: Respuesta Automática
Otros ajustes en el menú del teléfono turco o inglés. Nombre terminal móvil Ajuste aquí el nombre del terminal móvil. Confirme REN.AUR. con M E N U . Con las teclas numéricas introduzca el nom- bre y pulse nuevamente M E N U . ¡NOTA! El terminal móvil suministrado de fábrica ya está... -
Seite 85: Ajustes De La Estación Base
Otros ajustes en el menú del teléfono Confirme CONT AUT con M E N U . Active o desactive aceptar la llamada automá- ticamente. Teclas de selección rápida Aquí puede programar las teclas de selección rá- pidaM1, M2 y M3. ... - Seite 86 Otros ajustes en el menú del teléfono Volumen del tono de llamada Puede ajustar el volumen de las melodías en la estación base. Confirme VOLUMEN con M E N U . Ajuste aquí el volumen deseado. Dar de baja terminal móvil Puede dar de baja todos los terminales móviles excepto el último que haya utilizado.
-
Seite 87: Tipo De Marcación
Otros ajustes en el menú del teléfono Tipo de marcación Aquí puede adaptar su teléfono al tipo de mar- cación de su operador de red. Puede elegir entre marcación por tonos o por pulsos. La configura- ción de fábrica es “Marcación por tonos”. Éste es hoy en día el tipo de marcación más emplea- En caso de algunos equipos telefónicos más anti- guos se necesitará... -
Seite 88: Pin Del Sistema
Otros ajustes en el menú del teléfono Confirme T. FLASH con M E N U . Elija el tiempo flash y confirme con M E N U . Los equipos telefónicos más antiguos típicamente suelen necesitar MEDIO. PIN del sistema Determinados ajustes solo se pueden modificar después de haber introducido el PIN (número de identificación personal). - Seite 89 Otros ajustes en el menú del teléfono Confirme PIN ANT.? con M E N U . Introduzca el PIN antiguo y confirme con M E N U . Confirme NUE. PIN? con M E N U . ...
- Seite 90 Otros ajustes en el menú del teléfono Full-ECO La función Full-ECO anula totalmente la capaci- dad de emisión en modo standby. La función Fu- ll-ECO solo es posible cuando el terminal móvil está en la estación base. Así puede activar/desactivar la función: ...
-
Seite 91: Restaurar
Restaurar var la función. Confirme con M E N U . Restaurar Puede volver al ajuste de fábrica de la estación base. Elija FALTO. en el menú principal y confirme con M E N U . Introduzca el PIN de cuatro cifras y confirme pulsando en M E N U . -
Seite 92: Limpieza
Limpieza Limpieza Antes de limpiar el aparato, desenchufe el adap- tador de red del aparato. Para limpiarlo, utilice un paño seco y suave. Evite emplear detergentes químicos y productos de limpieza, puesto que podrían dañar la super- ficie y/o las inscripciones de los aparatos. 91/104... -
Seite 93: En Caso De Averías
En caso de averías En caso de averías Si se produce una avería en el aparato, comprue- be primero si puede solucionarla con ayuda del siguiente resumen. En ningún caso trate de arreglar el aparato. Si fuera necesario reparar el aparato, diríjase a nuestro centro de posventa o a cualquier otro ta- ller especializado. - Seite 94 En caso de averías Fallo Solución Ante cualquier • Compruebe si los cables de problema red y del teléfono están bien conectados. • Compruebe primero el te- léfono en otra toma telefó- nica. • Compruebe en el indicador de batería si la batería está cargada.
- Seite 95 En caso de averías Fallo Solución No hay señal • Compruebe si la estación de tono base está conectada correc- tamente. • Compruebe si el terminal móvil está encendido, car- gado, correctamente regis- trado y dentro de la zona de cobertura de la estación base.
- Seite 96 En caso de averías Fallo Solución En la pantal- • Compruebe si la estación la del terminal base está conectada correc- móvil aparece tamente. “sin señal!” • Compruebe si el terminal móvil está dentro del alcan- ce de la zona de cobertura de la estación base.
- Seite 97 En caso de averías Fallo Solución No hay tono de • Compruebe si la estación llamada en el base está conectada correc- terminal móvil tamente. o en la estaci- • Compruebe que el volumen ón base del tono de llamada no esté desactivado.
- Seite 98 En caso de averías Fallo Solución No pueden lla- • Compruebe si hay señal de marle línea y si en la pantalla apa- rece el símbolo del auricular después de pulsar la tecla de auricular verde. • Compruebe si otro teléfono funciona en esa toma telefó- nica o si su teléfono funcio- na en otra toma telefónica.
-
Seite 99: Eliminación
Eliminación Eliminación Embalaje Su aparato está embalado para prote- gerlo contra eventuales daños durante el transporte. Los embalajes son materias primas y por ello son reutilizables o ap- tos para ser devueltos al ciclo de recicla- je de materias primas. Aparato No tire bajo ningún concepto el aparato al final de su vida útil a la basura domés-... -
Seite 100: Especificaciones Técnicas
Especificaciones técnicas Especificaciones técnicas Terminal móvil Estándar DECT/GAP Cobertura aprox. 300 m Batería terminal móvil 2 x 1,2 V / 600 mAh; Tipo NiMH, HR03, AAA Tiempo de carga batería terminal móvil aprox. 16 horas en caso de descarga completa Standby: aprox. - Seite 101 Declaración de conformidad Dimensiones (ancho x profundidad x altura) Estación base sin terminal móvil aprox. 162 x 110 x 46 mm ¡Reservado el derecho a realizar modifica- ciones técnicas! 100/104...
-
Seite 102: Declaración De Conformidad
Al teléfono DECT no se le aplica la Directiva so- bre Diseño Ecológico 2009/125/CE (Decreto 1275/2008). Para un uso conforme a lo previsto han de recibirse o enviarse datos de modo conti- nuado. Encontrará la versión completa de las declaracio- nes de conformidad en www.medion.com/con- formity. 101/104... -
Seite 103: Index
Index Colgar ....41 Index Conectar y desconec- Contestador auto- Adaptador de red . 12, mático ....57 14, 15, 18, 91, 99, Terminal móvil ... 36 Conexión ....25 Agenda ....39, Conmutación ..48 40, 42, 45, 49, 50, Consulta a distancia .. - Seite 104 Index Especificaciones técni- cas...... 99 Idioma ..... 82, 83 Estación base ..... Indicación del número 6, 7, 12, 13, 15, 18, de teléfono ..42 19, 20, 25, 30, 34, Indicaciones de seguri- 35, 36, 37, 41, 48, dad .....10 56, 57, 58, 59, 62, Iniciar la sesión 81, 85, 89, 90, 93,...
- Seite 105 Index Estación base ..20 Terminal móvil ... 23 Paging ....37 Teclas de selección rá- Pantalla ..19, 22, 27, pida 22, 40, 54, 80, 29, 30, 36, 37, 40, 41, 42, 43, 44, 46, Textos de mensaje sa- 49, 53, 57, 59, 62, liente ..62, 63, 64 66, 79, 83, 93, 95, Tiempo de flash 86, 87...
- Seite 106 About these instructions ......5 Warning symbols and key words used in these instructions ...........6 Compatibility with other base stations ..8 Medion base stations ........8 Base stations from other manufacturers ..8 Proper use ..........9 Safety instructions ......... 11 People not permitted to use this device ..11 Medical information ........12...
- Seite 107 Table of Contents Initial operation ........26 Connect the base station to the telephone network and power sockets......26 Inserting batteries ........27 Charging the handset batteries in the base station ............28 Display and menu operation ....30 Symbols on the display ......30 Operating the menu ......32 Navigating in the menu ......32 etting the date and time ......33...
- Seite 108 Table of Contents Answering machine .......56 Switching on and off ........57 Listening to and editing received messages .58 Memos ............61 Outgoing messages ........62 Answering machine settings .......65 Further settings in the telephone menu 72 Settings menu ..........72 Handset settings .........80 Settings on the base station .......84 Reset ............89 Cleaning ..........90...
- Seite 109 Table of Contents 4/101...
-
Seite 110: About These Instructions
About these instructions About these instructions Before using the device for the first time, you should read these operating instructions thoroughly and follow, in particular, the safety advice. This device may only be used as de- scribed in the operating instructions. Always keep these operating instruc- tions to hand but store them safely so that you can pass them on to a new... -
Seite 111: Warning Symbols And Key Words Used In These Instructions
About these instructions Warning symbols and key words used in these instructions DANGER! Warning: immediate mortal danger! WARNING! Warning: possible mortal danger and/or serious irreversible injuries! CAUTION! Please follow the guidelines to avoid injuries and/or property damage! ATTENTION! Please follow the guidelines to avoid property damage! WARNING! Warning: danger of electric shock... -
Seite 112: Package Contents
About these instructions Package contents DANGER! Do not let children play with the plastic film. There is a risk of suffocation! Remove all packaging materials including the film on the displays of the base station and the handset. When unpacking the device, ensure that the fol- lowing parts are included: −... -
Seite 113: Compatibility With Other Base Stations
Compatibility with other base stations Compatibility with other base stations Medion base stations The supplied handset will function with the fol- lowing GAP-capable DECT base station currently available: MD 83321. Base stations from other manufacturers The functions described in these instructions... -
Seite 114: Proper Use
Proper use Proper use The device is intended for use within the local phone network and suitable for operation on an analogue telephone connection in Spain. The device is only intended for private use and not for industrial or commercial use (i.e. it is not permitted to use the device in shops, offices and other commercial areas, on agricultural estates, by customers in hotels, motels or other residen-... - Seite 115 Proper use • Do not use the device in extreme environmen- tal conditions. 10/101...
-
Seite 116: Safety Instructions
Safety instructions Safety instructions People not permitted to use this device • This device is not intended for use by peo- ple (including children) with reduced physical, sensory or mental abilities or for those without experience and/or knowl- edge, unless they are supervised by a per- son responsible for their safety or they have been instructed in its use. -
Seite 117: Medical Information
Safety instructions Medical information Please refer to the manufacturer of your per- sonal medical devices, for example, a hear- ing aid, to find out if these are adequate- ly screened against external radio frequency energy. • The device operates within a frequency range of 1.88 GHz to 1.90 GHz. -
Seite 118: Mains Adapter
Safety instructions Mains adapter • Use only the mains adapter supplied (model S004LV0600045). • The mains adapter may only be used in dry rooms. Setting up the device safely If the device has been moved from a cold to a warm room, wait before connecting it to the mains adapter. - Seite 119 Safety instructions • Do not expose the devices to direct sun- light. • Contact with moisture, water and splash- es must be avoided. • The devices are not suitable for use in rooms that are very humid (e.g. bath- room). •...
-
Seite 120: Ensure Accessibility Of Mains Power Socket
Safety instructions Ensure accessibility of mains power socket WARNING! Live components. There is a risk of electrical shock. Please observe the following instruc- tions: • Only connect the mains adapt- er to an easily accessible and correct- ly installed earthed power socket (100– 240 V ~ 50/60 Hz) that is close to the place where you have set up the device. -
Seite 121: Thunder Storms/Non-Use
Safety instructions enter the device, remove the plug imme- diately from the socket. • Never put the handset back in the base station without the battery cover. • To avoid the risk of tripping, please avoid using extension cables. Thunder storms/non-use •... -
Seite 122: Handling The Rechargeable Batteries Safely
Safety instructions Handling the rechargeable batteries safely You will need to use the supplied NiMH re- chargeable battery for the handset. WARNING Batteries may contain combustible materials. If not handled correctly, batteries can leak, become very hot, ignite or even explode, which could damage your device and/or your health. - Seite 123 Safety instructions • Remove defective batteries from the de- vice immediately! There is an increased risk of leakage! • Never expose the batteries to excessive heat such as direct sunlight, fire or similar. There is an increased risk of leakage. •...
-
Seite 124: Never Carry Out Repairs Yourself
• Never try to open and/or repair the devic- es yourself. • In the event of a fault, please contact the Medion Service Centre or an approved re- pair specialist. • The mains cable of the mains adapter can- not be replaced. If the cable is damaged,... -
Seite 125: Overview Of The Device
Overview of the device Overview of the device Base station Operating keys: see table on “Operating keys on the base station” on page <?> Speaker Handset cradle with charging contacts Operating keys: see table on “Operating keys on the base station” on page <?> Answering machine display 20/101... - Seite 126 Overview of the device Operating keys on the base station Base station Function Enabling and disabling the an- swering machine Increase base station speaker volume Decrease base station speaker volume Answering Machine: Start/stop playback Answering Machine: Fast for- ward/jump to next message Answering Machine: Rewind/ jump to previous message Paging key: triggers ringing on...
- Seite 127 Overview of the device PLEASE NOTE! The LED lights up as soon as a phone call is made. The LED lights up when the battery is being charged. Connections on rear Connection for telephone cable (Western jack RJ11) Connection for mains adapter lead Cable holder for mains adapter lead 22/101...
-
Seite 128: Handset
Overview of the device Handset Speaker Amplifier/Call LED Display Speed dial keys Operating keys: see table on “Operating keys on the handset” on page <?> Microphone 23/101... - Seite 129 Overview of the device Volume control Speaker Battery compartment Charging contacts Amplifier key Operating keys on the handset Hand- Function Back button: Jump back to menu Open menu; confirm menu option Navigate up; Open call list Navigate down; Redial 0 - 9 To enter numbers and letters Accept call End call;...
- Seite 130 Overview of the device Asterisk key: Enter *; activate/deacti- vate key lock 25/101...
-
Seite 131: Initial Operation
Initial operation Initial operation Remove the protective films from the displays and from the speaker on the handset. Connect the base station to the telephone network and power sockets . Insert the plug of the supplied mains adapt- er (model S004LV0600045) into the socket on the rear. -
Seite 132: Inserting Batteries
Initial operation phone cable into the telephone wall socket. Inserting batteries The handset is supplied with two AAA-size 600 mAh nickel-metal hydride batteries. PLEASE NOTE! Only use batteries of the supplied type (NiMH; 1.2 V; 600 mAh) in the hand- sets. -
Seite 133: Charging The Handset Batteries In The Base Station
Initial operation partment, paying attention to the polarity +/– (the negative end is always against the spring). Replace the cover on the battery compart- ment. Charging the handset batteries in the base station Place the handset into the charging cradle on the base station. - Seite 134 Initial operation PLEASE NOTE! The handset can be left permanently in the charging station. This ensures max- imum charging. A fully charged battery will last for 10 hours of calls, or 100 hours of standby operation. The battery will then have to be recharged after that time.
-
Seite 135: Display And Menu Operation
Display and menu operation Display and menu operation Symbols on the display Possible symbols on the display: Answering machine switched on. Flashes when there are unheard messag- es on the answering machine. Ring tone muted Key lock activated. You are making a call. Hands-free mode. - Seite 136 Display and menu operation Handset is within range of the base sta- tion Flashes when the signal starts getting weaker. Is no longer displayed when the handset is outside the range of the base station. The displayed name or number has more ◄...
-
Seite 137: Operating The Menu
Operating the menu Operating the menu Navigating in the menu You open the menu by pressing the MENU button. Use the following keys to navigate within the handset menu: scroll up; scroll down; MENU Confirm selection Move back through the menu ... -
Seite 138: Etting The Date And Time
Operating the menu 30 seconds, the menu closes automatically and the standard display is shown. Setting the date and time After setting up the telephone, the time and date still need to be set. Here is how you set the time and date: ... - Seite 139 Operating the menu Select either a 12 or 24 hour format. For the time format “12 HRS.” the display “AM” appears for the hours from 00 to 11:59 hrs, “PM” for the hours from 12:00 to 23:59 hrs. Confirm the time format with MENU. ...
-
Seite 140: Registering Handsets
Registering handsets Registering handsets PLEASE NOTE! The supplied handset is pre-registered with the default name “Medion 1”. Registering a GAP-capable DECT handset with the base station. Press the MENU key. Confirm the menu option REGISTER with MENU. Select Base 1 if you want to register the hand- set as a second handset on an already active base station and confirm with MENU. -
Seite 141: Select Base
Registering handsets It is also possible to register other DECT GAP telephones with the base station. Refer to the respective manufacturer’s instructions. PLEASE NOTE! When registering another handset, the registering process for THIS base sta- tion remains the same. If you register handsets from differ- ent manufacturers on a single base sta- tion, it is possible that, despite the GAP... -
Seite 142: Basic Functions
Basic functions handset is to be registered. The * symbol appears behind the base sta- tions on which the handset has already been registered. As soon as the handset is connected to the new base, the message BS SEL. appears on the display. -
Seite 143: Handset Paging
Basic functions Key lock To prevent accidental dialling you can activate the key lock. This is not possible during a call. Press and hold down the asterisk key * until appears on the handset display. To deactivate the key lock, press and hold down the asterisk key * again until the symbol disap- pears from the handset display. - Seite 144 Basic functions Enter the telephone number using the key- pad. The telephone number can comprise up to 20 digits. To use the hands-free function, proceed as fol- lows: Press the talk key twice in quick succes- sion. Enter the telephone number using the key- pad.
-
Seite 145: Dialling From The Phone Book
Basic functions Scroll through the last dialled numbers using and press the talk key to call the required number. Dialling using the caller list Up to ten received calls can be saved in the call list (see also “Call list“ on page 46). ... -
Seite 146: One-Touch Dialling
Basic functions Press the talk key to call the selected en- try. One-touch dialling Phone book entries can also be assigned a one- touch dialling number for the number keys 2 to 9 (see also “One-touch dialling“ on page 41). ... -
Seite 147: Answering The Telephone
Basic functions PLEASE NOTE! If the battery is almost empty when you make a call, you will hear a dou- ble warning beep every minute during the call. Finish the call, return the handset to the base station and allow the battery to recharge. -
Seite 148: Switching Off The Ring Tone
Basic functions a telephone connection with CLIP function (and has not suppressed his/her telephone number), you will see the telephone number of the caller on the display. If the caller is stored in the phone book the name will appear on the display instead. Switching off the ring tone ... -
Seite 149: Functions Available During Calls
Basic functions Functions available during calls Changing the earpiece volume To change the volume during a call, proceed as follows: During the call, press the - or + keys or the buttons to reduce or increase the ear- piece volume. -
Seite 150: Hands-Free Mode
Basic functions The amplifier LED lights up whenever the ampli- fier is activated. Hands-free mode Press the talk key (green) during the call. The speaker will be switched on and the symbol appears on the display. You can now put the receiver or handset down and you will still be able to hear your caller. - Seite 151 Basic functions • the phone book: “The phone book“ on page • the redial list: “Redialling“ on page 46, • the call list: “Call list“ on page 46, • Internal calls: “Internal calls“ on page 47. Redialling The last 5 telephone numbers that you dialled are stored in the redial list.
-
Seite 152: Internal Calls
Basic functions can be seen on the display). Open the caller list Press the key to open the caller list. Use to scroll through the entries. To call back a number, select the number and press the call key on the handset. -
Seite 153: Conference Call Facility
Basic functions and confirm with MENU. Toggling You can transfer a call to the second handset that is registered with the base station. During the call press MENU. Use to select the INTERN menu and con- firm with MENU. ... -
Seite 154: The Phone Book
Basic functions firm with MENU. If necessary, use the keys to select the re- quired handset. The second handset will ring. Accept the call on the second handset and hold down the key on the first handset for 1 second. -
Seite 155: Editing An Entry
Basic functions BOOK with the MENU key to open the phone book. Once in the phone book, press MENU to ac- cess the sub-menu. Confirm ADD with MENU to add a new en- try. The telephone is now in text mode. ... -
Seite 156: Delete All
Basic functions previous section “Adding entries”. View Check entries in the phone book. Select a phone book entry. Use to select VIEW and confirm with MENU. You can view the name and telephone number and listen to the ring tone without making any changes. - Seite 157 Basic functions Use to select DEL.ALL and confirm with MENU. The security prompt “OK?” appears. Confirm this with MENU. You can use the back button to abort the delete process. All entries in the phone book will be deleted. Status Show the status of the phone book.
- Seite 158 Basic functions One-touch dialling Here you can assign a number out of the phone book to one of the eight number keys from 2 to Open the phone book as previously described and confirm with MENU. Select OT DIAL and confirm with MENU. ...
-
Seite 159: Speed Dial Keys M1 To M3 On The Handset
Basic functions Confirm with MENU. There will be a beep and then the selected one- touch dialling key, e.g. “M KEY 7” will be dis- played. Speed dial keys M1 to M3 on the handset You have the option to assign three telephone numbers to the speed dial keys M1 to M3 on the handset. - Seite 160 Basic functions Now use the number keys to enter the tele- phone number for the selected speed dial key. (If a number has already been entered, this number will now appear and you can change it). Confirm with MENU. Dialling from the phone book, with the speed dial keys and with the one-touch dialling keys...
-
Seite 161: Answering Machine
Answering machine Answering machine The answering machine can record incoming calls and can also be used to record voice mem- os. Messages can have a maximum length of 15 minutes. The answering machine will automatically add the date and time to every message. Therefore, to use the full functionality of the answering ma- chine, you must set the date and time (see also “Setting the date and time“... -
Seite 162: Switching On And Off
Answering machine Switching on and off Using the button • To switch the answering machine on or off on the base station, press the On/Off button on the base station. Via the menu To switch the answering machine on or off with the handset, proceed as follows: ... -
Seite 163: Listening To And Editing Received Messages
Answering machine Listening to and editing received messages Answer mode (delay) in the factory setting In the factory setting, the answer mode for the answering machine is set as follows: • for the first call, the answering machine switches on after four rings; •... -
Seite 164: Deleting Individual Messages
Answering machine time of the call on the display. • Messages that have not yet been listened to are described as “New messages”. • Messages that have already been listened to are described as “Old messages”. Listening to and editing messages at the base station ... - Seite 165 Answering machine To delete a message using the handset, select the entry LISTEN and confirm with MENU. During playback of the message press the number key 2. The current message will be deleted and the next message will be played. Listening and editing messages via the menu ...
-
Seite 166: Delete All Messages
Answering machine Delete all messages PLEASE NOTE! You can only delete messages that you have already listened to (“Old messag- es”). You can delete all messages via the menu with- out the need to be in playback mode. Open the AM menu. ... -
Seite 167: Outgoing Messages
Answering machine Speak at a normal volume into the mouth- piece of the handset. After dictating your memo, press the MENU button to save the memo. Your memo will now be played back. Editing memos After recording a memo, the symbol flashes on the handset display (the same as when a mes- sage is received on the answering machine) and... - Seite 168 Answering machine on the answering machine); • one outgoing message for the deactivated an- swering machine (WITHOUT REC.: the caller is requested to call back later). • The procedure for selecting the outgoing message is described in “Outgoing messages“ on page 62. Outgoing message with recording You can listen to or change the standard outgo- ing message for the answering machine with re-...
- Seite 169 Answering machine ing a message, please proceed in the same man- ner as for recording a memo that is described in “Recording memos“ on page 61. Outgoing message without recording You can listen to the existing outgoing message. Open the AM. menu and confirm with MENU.
-
Seite 170: Answering Machine Settings
Answering machine PLEASE NOTE! When an outgoing message has been recorded, this message (and not the factory default) will be played when there is a call. Answering machine settings You can make basic settings in the AM SETT. menu. Open the AM menu. ... -
Seite 171: Economy Mode
Answering machine Delay You can set the number of rings after which the answering machine is activated. The options are 2, 4, 6 or 8 rings. Select DELAY. Select 2, 4, 6, 8 RINGS or ECONOMY (the call charge saving function) and confirm with MENU. -
Seite 172: Recording Time
Answering machine • If new messages have been recorded, the an- swering machine will switch on after the first ring. • If you hear a second ring, then this means that no new messages have been recorded for you. In this case, hang up immediately. Oth- erwise, the answering machine will switch on after the fourth ring. -
Seite 173: Remote Enquiry
Answering machine a message requires. Select COMPRES. Select HIGH, MEDIUM or LOW and confirm with MENU. Remote enquiry You can use the remote enquiry function to lis- ten to your messages from an external line. The remote enquiry function is activated with the fac- tory default PIN “0000”. -
Seite 174: Changing The Remote Enquiry Pin
Answering machine Changing the remote enquiry PIN The PIN is a password and is used to prevent strangers from accessing your answering ma- chine using the remote enquiry function. When you activate remote enquiry, you will be re- quired to enter the PIN and will have the oppor- tunity to change it. -
Seite 175: Playing Back Messages From An External Telephone Line
Answering machine Playing back messages from an ex- ternal telephone line Dial your telephone number and while the message is playing press the asterisk key * on the telephone. Now enter your remote enquiry PIN with the number keys. The number keys of a telephone can also be used as control keys for your answering machine. - Seite 176 Answering machine Function during Function playback Delete current mes- No function sage Repeat message; No function jump to previous message Play back Stop playback message(s) Jump to the next No function message Switch on answer- No function ing machine Switch off answer- No function ing machine Enter 4-digit PIN...
-
Seite 177: Further Settings In The Telephone Menu
Further settings in the telephone menu Further settings in the telephone menu Open the menu by pressing the MENU button. Read more about how to use the menu in the section “Navigating in the menu“ on page 32. Settings menu The structure of the SETTINGS menu differs be- tween the base station (BS) and handset (HS). - Seite 178 Further settings in the telephone menu Structure of the “Settings” menu on the handset Sub- Sub- Sub- Main menu/ menu/ menu/ menu Options Options Options Contacts Empty View Edit Delete Delete all Capacity Fastdial Call log Empty Store Delete Del all Details Category Ring tone...
- Seite 179 Further settings in the telephone menu Sub- Sub- Sub- Main menu/ menu/ menu/ menu Options Options Options Ring tone volume VOLUME 5 - 1 / OFF (RING VOL) Deregis- tering the PIN? handset (DEL HS) Dialling Tone dial- mode ling/pulse (DIAL dialling MODE)
- Seite 180 Further settings in the telephone menu Sub- Sub- Sub- Main menu/ menu/ menu/ menu Options Options Options ECO mode (ECO ON / OFF MODE) Manual ECO mode SML RM / (M’UL BIG RM ECO) Full ECO mode ON / OFF (FULL ECO) 75/101...
- Seite 181 Further settings in the telephone menu Sub- Sub- Sub- Main menu/ menu/ menu/ menu Options Options Options Handset Internal RING 1 … settings calls (INT RING) (HS SET) Exter- RING 1 … Ring tone nal (EXT RING) (RINGER) Ring tone volume VOLUME 1–5 / OFF...
- Seite 182 Further settings in the telephone menu Sub- Sub- Sub- Main menu/ menu/ menu/ menu Options Options Options Key tone ON / (KEY TONE) Battery warning ON / Tones (LOW (TONE) BATT) Range warning ON / (OUT- RANGE) Select Sound (FATURAL pattern / BASS / (EQLIZER)
- Seite 183 Further settings in the telephone menu Sub- Sub- Sub- Main menu/ menu/ menu/ menu Options Options Options Language Select settings (SPANISH / GERMAN / (LAN- ENGLISH) GUANG) Handset name Setting (HS NAME) Show dis- HS NAME / play TIME (DISPLAY) Automat- ON / ic answer...
- Seite 184 Further settings in the telephone menu Sub- Sub- Sub- Main menu/ menu/ menu/ menu Options Options Options Program speed dial M1 / M2 / keys (MEM KEY) 79/101...
-
Seite 185: Handset Settings
Further settings in the telephone menu Handset settings Ring tone Here you can set the desired ring tone for the handset. Confirm RING TONE with MENU. INTERNAL: Select the ring tone for internal calls. EXTERNAL: Select the ring tone for external calls. - Seite 186 Further settings in the telephone menu Sound Here you can select a different sound pattern to adjust the sound to suit your hearing aid if re- quired. Confirm SOUND with MENU. FLAT: Choose this setting for a natural sound. ...
-
Seite 187: Handset Name
Now use the number keys to enter the desired name and confirm with MENU. PLEASE NOTE! The supplied handset is pre-registered under the name “Medion 1”. Display Set here whether the name or the time should be displayed. Confirm HS DISPL with MENU. -
Seite 188: Automatic Answer
Further settings in the telephone menu Automatic answer Here you can activate the automatic answer function. Confirm ANSW. A with MENU. Switch the automatic answering mode on or off. Speed dial keys Here you can program the speed dial keys M1, M2 and M3. -
Seite 189: Settings On The Base Station
Further settings in the telephone menu Settings on the base station Ring tone Here you can set the ring tone for the base sta- tion. Confirm RING TONE with MENU. Select a ring tone. Ring tone volume You can set the ring tone volume on the base station. -
Seite 190: Dialling Mode
Further settings in the telephone menu Dialling mode Here you can set your telephone to the dialling mode of your network operator. You can choose between tone dialling and pulse dialling. The factory setting is “tone dialling”. That is the most commonly used dialling mode nowadays. -
Seite 191: System-Pin
Further settings in the telephone menu Older telephone systems generally require MEDI- System PIN Certain settings can only be changed after you have entered the PIN (personal password). The fac- tory default PIN is preset to “0000”. PLEASE NOTE! Here you can specify a four-digit PIN of your own choosing. - Seite 192 Further settings in the telephone menu Re-enter the new PIN and confirm with MENU. The new PIN is now saved. ECO mode The ECO mode function enables low-radiation operation during a call. The reduction in radia- tion will depend on the distance of the handset from the base.
- Seite 193 Further settings in the telephone menu Activate/deactivate the function as follows: In the HS SETT menu, select the FULL ECO entry and confirm with MENU. Use the or keys to switch the function on or off. ...
-
Seite 194: Reset
Reset Reset You can reset the base station to the factory set- tings. Select RESET in the main menu and confirm with MENU. Enter the 4-digit PIN and confirm with MENU. Confirm the OK? security query by pressing MENU. -
Seite 195: Cleaning
Cleaning Cleaning Before cleaning the device, disconnect the mains adapter from the mains. Use a dry, soft cloth for cleaning. Avoid the use of chemical solutions and cleaning products because these may damage the surface and/or markings of the devices. 90/101... -
Seite 196: Troubleshooting
Troubleshooting Troubleshooting If the device malfunctions, please check first if you can eliminate the error yourself with the help of the following overview. Never try to repair the devices yourself. Contact our service centre or other qualified personnel if a repair is necessary. Fault Solution For all prob-... - Seite 197 Troubleshooting Fault Solution The display on • Check whether the handset the handset is is switched on. blank. • Check whether the battery is charged and inserted with the correct polarity. No dialling • Check whether the base sta- tone tion is correctly connected.
- Seite 198 Troubleshooting Fault Solution The display • Check whether the base sta- on the hand- tion is correctly connected. set shows • Check whether the hand- “ Range!” set is within the range of the base station. • Check whether the handset is registered with the desired base station.
- Seite 199 Troubleshooting Fault Solution No ring tone • Check whether the base sta- on handset or tion is correctly connected. base station • Check whether the volume of the ring tone has been switched off. • Check whether the hand- set is within the range of the base station.
- Seite 200 Troubleshooting Fault Solution You cannot be • Press the green call key and called check for a dialling tone and whether the receiver symbol appears on the display. • Check whether another tel- ephone works on the tele- phone socket or if your tele- phone works on a different telephone socket.
-
Seite 201: Disposal
Disposal Disposal Packaging Your device has been packaged to pro- tect it against transportation damage. Packaging materials are raw materials and can therefore be reused or recy- cled. Device At the end of its life, the device should not be disposed of in the normal household rubbish. -
Seite 202: Technical Data
Technical data Technical data Handset Standard DECT/GAP Range approx. 300 m Handset battery 2 x 1.2 V / 600 mAh; type: NiMH, HR03, AAA Charging time handset battery approx. 16 hours if completely discharged Standby operation approx. 100 hours Talk time approx. -
Seite 203: Declaration Of Conformity
Declaration of conformity Declaration of conformity 0168 MEDION AG hereby de- clares that the DECT tel- ephone conforms to the fundamental require- ments and other regulations of the relevant di- rective R&TTE 1999/5/EC. The mains adapter supplied satisfies the require-... -
Seite 204: Index
Index Call list 24, 40, 46, 47, Index Cleaning ....90 Conference call facility Answering machine ... 56, 94 Connecting ... 26 Base station ....Declaration of confor- 7, 8, 13, 14, 16, 19, mity ....98 20, 21, 26, 31, 35, Dialling mode .. - Seite 205 Index Factory settings 85, 89 Mains adapter 13, 15, 16, 19, 90, 97, 98 Faults ..... 91 Memos ..61, 62, 64 Flash time ....85 Messages Delete ....59 Hands-free mode ... 45 Listen ....58 Hanging up ....41 Mute ..... 45 Initial operation ..
- Seite 206 Index Proper use ....9 System PIN ..69, 86 Range . 91, 92, 93, 94 Technical data ..97 Recording time ..67 Toggling ....48 Redial ..24, 39, 46 Remote enquiry ..58, 66, 68, 69, 70 Ring tone .. 43, 74, 76, 80, 84, 94 Safety instructions ..11 Setting...
- Seite 207 Inhaltsverzeichnis Zu dieser Anleitung .........4 In dieser Anleitung verwendete Warnsymbole und Signalwörter ..........5 Funktionalität mit anderen Basisstationen ..........7 Basisstationen von Medion ......7 Basisstationen anderer Hersteller ....7 Bestimmungsgemäßer Gebrauch ....8 Sicherheitshinweise .......10 Nicht zugelassener Personenkreis ....10 Medizinische Informationen ......11 Explosionsgefährdete Bereiche ....11 Netzadapter ..........12...
- Seite 208 Inhaltsverzeichnis Mobilteil .............22 Inbetriebnahme ........25 Basisstation an das Telefon und Stromnetz an- schließen ............25 Akkus einlegen ..........26 Akkus des Mobilteiles in der Basistation laden . Display und Menübedienung ....29 Anzeigen im Display ........29 Menü bedienen ........31 Im Menü navigieren ........31 Zeit und Datum einstellen ......32 Mobilteile anmelden ......34 Basis wählen ..........35...
- Seite 209 Inhaltsverzeichnis Schnellwahltasten M1 bis M3 am Mobilteil .54 Anrufbeantworter .........57 Aus- und Einschalten ........58 Eingegangene Nachrichten hören und bear- beiten ............59 Memos ............63 Ansagen ............64 Einstellungen des Anrufbeantworters..67 Weitere Einstellungen im Telefonmenü .74 Menü Einstellungen ........74 Einstellungen des Mobilteils ......81 Einstellungen der Basisstation ....85 Zurücksetzen .........90 Reinigen ..........91...
-
Seite 210: Zu Dieser Anleitung
Zu dieser Anleitung Zu dieser Anleitung Lesen Sie vor der ersten Inbetriebnahme diese Bedienungsanleitung gründlich durch und befolgen Sie vor allen Dingen die Sicherheitshinweise! Alle Tätigkeiten an und mit diesem Gerät dürfen nur soweit ausgeführt werden, wie sie in der Bedienungsanleitung be- schrieben sind. -
Seite 211: In Dieser Anleitung Verwendete Warnsymbole Und Signalwörter
Zu dieser Anleitung In dieser Anleitung verwendete Warnsymbole und Signalwörter GEFAHR! Warnung vor unmittelbarer Lebensge- fahr! WARNUNG! Warnung vor möglicher Lebensgefahr und/oder schweren irreversiblen Ver- letzungen! VORSICHT! Hinweise beachten, um Verletzungen und Sachschäden zu vermeiden! ACHTUNG! Hinweise beachten, um Sachschäden zu vermeiden! WARNUNG! Warnung vor Gefahr durch elektri-... -
Seite 212: Lieferumfang
Zu dieser Anleitung Lieferumfang GEFAHR! Lassen Sie kleine Kinder nicht mit Foli- en spielen. Es besteht Erstickungsgefahr! Entfernen Sie sämtliches Verpackungsmaterial, auch die Folien auf den Displays der Basisstation und des Mobilteils. Vergewissern Sie sich beim Auspacken, dass fol- gende Teile mitgeliefert wurden: −... -
Seite 213: Funktionalität Mit Anderen Basisstationen
Funktionalität mit anderen Basisstationen Funktionalität mit anderen Basisstationen Basisstationen von Medion Das mitgelieferte Mobilteil funktioniert mit fol- genden zur Zeit im Handel erhältlichen GAP-fähi- gen DECT-Basisstationen: MD 83321. Basisstationen anderer Hersteller Die in dieser Anleitung beschriebenen Funktio- nen sind bei der Verwendung einer nicht bau- gleichen GAP-fähigen DECT- Basisstation oder... -
Seite 214: Bestimmungsgemäßer Gebrauch
Bestimmungsgemäßer Gebrauch Bestimmungsgemäßer Gebrauch Das Gerät ist zum Telefonieren innerhalb des an- sässigen Telefonnetzes bestimmt und ist für den Betrieb am analogen Telefonanschluss in Spani- en geeignet. Das Gerät ist nur für den privaten und nicht für den industriellen/kommerziellen Gebrauch be- stimmt (d. - Seite 215 Bestimmungsgemäßer Gebrauch dienungsanleitung, insbesondere die Sicher- heitshinweise. Jede andere Bedienung gilt als nicht bestimmungsgemäß und kann zu Perso- nen- oder Sachschäden führen. • Nutzen Sie das Gerät nicht unter extremen Umgebungsbedingungen. 9/102...
-
Seite 216: Sicherheitshinweise
Sicherheitshinweise Sicherheitshinweise Nicht zugelassener Personenkreis • Dieses Gerät ist nicht dafür bestimmt, durch Personen (einschließlich Kinder) mit eingeschränkten physischen, sensorischen oder geistigen Fähigkeiten oder mangels Erfahrung und/oder mangels Wissen be- nutzt zu werden, es sei denn, sie werden durch eine für ihre Sicherheit zuständige Person beaufsichtigt oder erhielten von ih- nen Anweisungen, wie das Gerät zu be- nutzen ist. -
Seite 217: Medizinische Informationen
Sicherheitshinweise Medizinische Informationen Wenden Sie sich an den Hersteller Ihrer per- sönlichen medizinischen Geräte, wie zum Beispiel einem Hörgerät, um zu erfahren, ob diese ausreichend gegen externe Hochfre- quenzenergie abgeschirmt sind. • Das Produkt arbeitet in einem Frequenz- bereich von 1,88 GHz bis 1,90 GHz. •... -
Seite 218: Netzadapter
Sicherheitshinweise Netzadapter • Verwenden Sie nur den mitgelieferten Netzadapter S004LV0600045. • Der Netzadapter darf nur in trockenen Räumen verwendet werden. Das Gerät sicher aufstellen Warten Sie mit dem Anschluss des Netzadap- ters, wenn das Gerät von einem kalten in ei- nen warmen Raum gebracht wird. - Seite 219 Sicherheitshinweise oder Mobilteil wirken. • Es darf kein direktes Sonnenlicht auf die Geräte treffen. • Der Kontakt mit Feuchtigkeit, Wasser oder Spritzwasser muss vermieden werden. • Die Geräte sind nicht für die Benutzung in Räumen mit hoher Luftfeuchtigkeit geeig- net (z. B. Badezimmer). •...
-
Seite 220: Netzanschluss Zugänglich Lassen
Sicherheitshinweise Netzanschluss zugänglich lassen WARNUNG! Stromführende Teile. Es besteht die Ge- fahr eines elektrischen Schlags. Befolgen Sie daher folgende Hinweise: • Schließen Sie den Netzadapter nur an gut erreichbare, ordnungsgemäß ins- tallierte Schutzkontaktsteckdosen (100- 240 V ~ 50/60 Hz) an, die sich in der Nähe des Aufstellortes befinden. -
Seite 221: Gewitter/Nichtgebrauch
Sicherheitshinweise sofort den Stecker aus der Steckdose. • Stellen Sie das Mobilteil nie ohne Batterie- fachdeckel in die Basisstation. • Um Stolperfallen zu vermeiden, verwen- den Sie keine Verlängerungskabel. Gewitter/Nichtgebrauch • Bei längerer Abwesenheit oder bei Gewit- ter ziehen Sie den Netzadapter aus der Steckdose und das Telefonkabel von der Basisstation ab. -
Seite 222: Sicher Mit Akkus Umgehen
Sicherheitshinweise Sicher mit Akkus umgehen Für das Mobilteil benötigen Sie die mitgelie- ferten NiMH-Akkus. WARNUNG Batterien können brennbare Stoffe enthalten. Bei unsachgemäßer Be- handlung können Batterien auslau- fen, sich stark erhitzen, entzünden oder gar explodieren, was Schäden für Ihr Gerät und ihre Gesundheit zur Folge haben kann. - Seite 223 Sicherheitshinweise • Entfernen Sie defekte Akkus umgehend aus dem Gerät! Es besteht erhöhte Aus- laufgefahr! • Setzen Sie die Akkus niemals übermäßiger Wärme, wie direkter Sonneneinstrahlung, Feuer oder dergleichen aus. Es besteht er- höhte Auslaufgefahr. • Nehmen Sie ausgelaufene Akkus sofort aus dem Gerät.
-
Seite 224: Niemals Selbst Reparieren
• Versuchen Sie auf keinen Fall, die Geräte selber zu öffnen und/oder zu reparieren. • Wenden Sie sich im Störungsfall an das Medion Service Center oder eine andere geeignete Fachwerkstatt. • Die Anschlussleitung des Netzadapters kann nicht ersetzt werden. Bei Beschädigung der... -
Seite 225: Geräteübersicht
Geräteübersicht Geräteübersicht Basisstation Bedientasten: siehe Tabelle auf „Bedientas- ten der Basisstation“ auf Seite 20 Lautsprecher Hörerschale mit Ladekontakten Bedientasten: siehe Tabelle auf „Bedientas- ten der Basisstation“ auf Seite 20 Display des Anrufbeantworters 19/102... - Seite 226 Geräteübersicht Bedientasten der Basisstation Basisstation Funktion Anrufbeantworter ein- und aus- schalten Lautstärke des Basislautspre- chers erhöhen Lautstärke des Basislautspre- chers senken Anrufbeantworter: Wiedergabe /stoppen Anrufbeantworter: Schnel- ler Vorlauf / Überspringen zur nächsten Nachricht Anrufbeantworter: Schneller Rücklauf / Überspringen zur vorherigen Nachricht Ruftaste („Pagingtaste“): löst Rufsignal am Mobilteil aus Löschtaste: Nachrichten löschen...
-
Seite 227: Anschlüsse Auf Der Rückseite
Geräteübersicht HINWEIS! Die LED leuchtet auf, sobald ein Tele- fonat geführt wird. Die LED leuchtet auf, sobald der Akku geladen wird. Anschlüsse auf der Rückseite Anschluss für das Telefonkabel (Westernste- cker RJ11) Anschluss für das Netzadapterkabel Kabelhalter für Netzadapterkabel 21/102... -
Seite 228: Mobilteil
Geräteübersicht Mobilteil Lautsprecher Verstärker/Anruf LED Display Schnellwahltasten Bedientasten: siehe Tabelle auf „Bedientas- ten des Mobilteiles“ auf Seite 23 Mikrofon 22/102... - Seite 229 Geräteübersicht Lautstärkeregler Lautsprecher Batteriefach Ladekontakte Verstärkertaste Bedientasten des Mobilteiles Mobil- Funktion teil Zurück-Taste: Im Menü zurück sprin- Menü öffnen; Menüpunkte bestäti- Navigation nach oben; Anrufliste öff- Navigation nach unten; Wahlwieder- holung Zur Eingabe von Ziffern und Buchsta- 0 - 9 Gespräch entgegen nehmen Gespräch beenden;...
- Seite 230 Geräteübersicht Mobil- Funktion teil Raute-Taste: #-Zeichen eingeben ; länger drücken: Tonruf ein/aus Stern-Taste: *-Zeichen eingeben; Tas- tensperre ein/aus 24/102...
-
Seite 231: Inbetriebnahme
Inbetriebnahme Inbetriebnahme Ziehen Sie alle Folien von den Displays und vom Lautsprecher des Mobilteiles ab. Basisstation an das Telefon und Stromnetz anschließen Stecken Sie den Klinkenstecker des mitgelie- ferten Netzadapters S004LV0600045 in die Buchse an der Rückseite. Die Buchse ist mit einem Steckersymbol kennzeichnet. -
Seite 232: Akkus Einlegen
Inbetriebnahme kabels in die Telefonsteckdose in der Wand. Akkus einlegen Für die Mobilteile werden zwei Nickel-Metallhyd- rid-Akkus „AAA“ 600 mAh mitgeliefert. HINWEIS! Benutzen Sie in den Mobilteilen nur Ni- ckel-Metallhybrid-Akkus des mitgeliefer- ten Typs (NiMh; 1,2 V; 600 mAh). Die Garantie des Geräts erlischt, wenn Sie ande- re Akkus einlegen. -
Seite 233: Akkus Des Mobilteiles In Der Basistation Laden
Inbetriebnahme nus-Pol liegt jeweils an der Feder an). Schieben Sie den Batteriefachdeckel wieder auf das Batteriefach. Akkus des Mobilteiles in der Basistation laden Setzen Sie das Mobilteil in die Ladeschale der Basistation. Ein Piepton signalisiert, dass das Mobilteil richtig in der Schale sitzt. Das ani- mierte Batterieladesymbol zeigt den Ladevor- gang im Display des Mobilteiles an. - Seite 234 Inbetriebnahme HINWEIS! Sie können das Mobilteil ständig in der Ladestation belassen. So sichern Sie den maximalen Ladezustand. Die Leistung des Akkus reicht für 10 Stunden Gespräch oder 100 Stunden Bereitschaftsbetrieb aus. Anschließend muss der Akku neu aufgeladen werden. Bei niedrigem Akkuzustand erscheint die Batterieanzeige leer und es erfolgt ein akustisches Warnsignal.
-
Seite 235: Display Und Menübedienung
Display und Menübedienung Display und Menübedienung Anzeigen im Display Mögliche Anzeigen im Display: Anrufbeantworter eingeschaltet. Blinkt bei ungehörten Nachrichten auf dem Anrufbeantworter Tonruf ausgeschaltet Tastensperre ein. Sie befinden sich im Gespräch. Freisprechmodus Neue Nachricht(en) auf dem Anrufbeant- worter während des Abhörens der neuen Nachricht. - Seite 236 Display und Menübedienung Mobilteil befindet sich innerhalb der Sen- dereichweite der Basisstation Blinkt, wenn die Sendeleistung schwä- cher wird Wird nicht mehr angezeigt, wenn das Mobilteil außerhalb der Sendereichwei- te ist Der angezeigte Name bzw. die angezeig- ◄ ► te Nummer hat mehr Zeichen, als das Display anzeigen kann Batteriestatus 30/102...
-
Seite 237: Menü Bedienen
Menü bedienen Menü bedienen Im Menü navigieren Sie öffnen das Menü, indem Sie die Taste M E N U drücken. Mit folgenden Tasten bewegen Sie sich im Menü des Mobilteiles: nach oben blättern; nach unten blättern; M E N U Auswahl bestätigen Schritt zurück durch das Menü... -
Seite 238: Automatische Displayausschaltung
Menü bedienen Automatische Displayausschaltung Wenn für ca. 10 Sekunden keine Taste gedrückt wird, geht die Displaybeleuchtung aus. Nach ca. 30 Sekunden schließt sich das Menü automatisch und es erscheint das Grunddisplay. Zeit und Datum einstellen Nach dem Anschließen des Telefons sind Zeit und Datum noch nicht eingestellt. - Seite 239 Menü bedienen Bestätigen Sie das Datum mit M E N U . Blättern Sie mit zum Eintrag ZEITFORM. und bestätigen Sie mit M E N U . Wählen Sie das Zeitformat 12 oder 24 Stun- den. Beim Zeitformat „12 STD.“...
-
Seite 240: Mobilteile Anmelden
Mobilteile anmelden Mobilteile anmelden HINWEIS! Das ab Werk mitgelieferten Mobilteil ist bereits unter den Namen „Medion 1“ angemeldet. Melden Sie ein GAP fähiges DECT Mobilteil an der Basisstation an. Drücken Sie die Taste M E N U . Bestätigen Sie das Menü ANMELDEN mit M E N U . -
Seite 241: Basis Wählen
Mobilteile anmelden zu hören sind. Sie haben auch die Möglichkeit, andere DECT- GAP Telefone an der Basis anzumelden. Rich- ten Sie sich nach der jeweiligen Herstelleran- leitung. HINWEIS! Während einer Anmeldung eines ande- ren Mobilteiles, bleibt das Anmeldever- fahren für DIESE Basisstation gleich. Wenn Sie verschiedene Mobilteile von verschiedenen Herstellern an eine Basis- station anmelden, kann trotz GAP Stan-... -
Seite 242: Grundfunktionen
Grundfunktionen M E N U . Bestätigen Sie das Menü BS WAHL mit M E N U . Suchen Sie nun die Basis aus, an der sich das Handgerät anmelden soll. Das Symbol * erscheint hinter den Basisstati- onen, an den das Mobilteil bereits angemel- det war. -
Seite 243: Tastensperre
Grundfunktionen Sie können das Mobilteil auch einschalten, in- dem Sie es zurück in die Basisstation stellen. Tastensperre Um ein versehentliches Wählen zu verhindern, können Sie die Tastensperre einschalten. Dies ist nicht während eines Gesprächs möglich. Halten Sie die Stern-Taste * gedrückt, bis Im Display des Mobilteils erscheint. -
Seite 244: Anrufen
Grundfunktionen Anrufen Wählen Nehmen Sie den Hörer ab, oder drücken Sie die Gesprächstaste Geben Sie mit den Zifferntasten die Telefon- nummer ein. Die Telefonnummer kann bis zu 20 Ziffern umfassen. Um die Freisprechfunktion nutzen zu können, gehen Sie wie folgt vor: ... -
Seite 245: Aus Der Anrufliste Wählen
Grundfunktionen speichert (siehe auch „Wahlwiederholung“ auf Seite 46). Um die zuletzt gewählte Nummer von dem Mobilteil aus aufzurufen, drücken Sie die Tas- te . Blättern Sie mit durch die zuletzt ge- wählten Nummern und drücken Sie die Ge- sprächstaste um die gewünschte Num- mer anzurufen. - Seite 246 Grundfunktionen Drücken Sie die Taste M E N U . Wählen Sie mit TEL. BUCH und bestäti- gen Sie mit der Taste M E N U . Das Telefonbuch wird geöffnet und die erste Nummer wird angezeigt. ...
-
Seite 247: Anruf Entgegennehmen
Grundfunktionen den (siehe auch „Schnellwahltasten M1 bis M3 am Mobilteil“ auf Seite 54). Um diese Nummer zu wählen, drücken Sie einfach die Schnellwahltaste. Auflegen Drücken Sie die Hörertaste (rot), um das Gespräch zu beenden. Im Display erscheint für ein paar Sekunden die Zeit des Gesprächs. -
Seite 248: Rufton Ausschalten
Grundfunktionen Nehmen Sie den Hörer ab, um den Anruf an- zunehmen. Hierfür muss im Menü MT EINST / ANTW. A. des Mobilteiles die Funktion ANTW. A. aktiviert sein. Wenn das Mobilteil nicht in der Basis steht oder die Funktion ANTW. A. deaktiviert ist, drücken Sie die Gesprächstaste (grün). -
Seite 249: Energiesparfunktion
Grundfunktionen er wird nur im Display angezeigt. Um den Tonruf wieder einzuschalten, halten Sie die Raute-Taste gedrückt, bis im Dis- play das Symbol verschwindet. Energiesparfunktion Das Telefon verfügt über drei Energiesparfunkti- onen, mit denen Sie den Energieverbrauch und die Funkleistung reduzieren können: ECO Mode, Full ECO und Manueller ECO Mode (siehe „Ein- stellungen der Basisstation“... -
Seite 250: Freisprechen
Grundfunktionen Nach Beenden des Gesprächs wird die eingestell- te Stufe übernommen. Verstärker Da das Gerät mit Hörgeräten verträglich ist, ha- ben Sie die Möglichkeit die „Verstärker Funktion“ (zum Verstärken der eingestellten Lautstärke) zu nutzen. Wenn Sie einen Gesprächspartner, trotz Hörgerät nicht gut verstehen, gehen Sie wie folgt vor: ... -
Seite 251: Stummschalten
Grundfunktionen trotzdem hören. Drücken Sie dieselbe Taste, um die Lautspre- cher wieder auszuschalten. Stumm schalten Drücken Sie während des Gesprächs die Taste , um das Telefon stumm zu schalten. Das Mikrofon ist aus und der Teilnehmer kann Sie nicht hören. ... -
Seite 252: Anrufliste
Grundfunktionen Wahlwiederholung In der Wahlwiederholungs-Liste sind die letzten 5 Rufnummern gespeichert, die Sie gewählt ha- ben. HINWEIS! Bitte beachten Sie, dass in der Wahlwie- derholungsliste nur die ersten 20 Ziffern der 5 letzten, gewählten Telefonnum- mern angezeigt werden. Sollte die Tele- fonnummer mehr als 20 Ziffern umfas- sen (bis zu 20 Ziffern sind möglich), wird diese aber trotzdem richtig gewählt. -
Seite 253: Anrufliste Aufrufen
Grundfunktionen Anrufliste aufrufen Drücken Sie die Taste , um die Anrufliste auf- zurufen. Blättern Sie mit durch die Anrufe. Um eine Nummer zurückzurufen, wählen Sie die Nummer aus und drücken Sie die Hörer- taste an dem Mobilteil. Falls der Anrufer mit Namen im Telefon gespei- chert ist, erscheint statt der Telefonnummer der Name. - Seite 254 Grundfunktionen klingelt das zweite Mobilteil automatisch. Wenn Sie mehrere Mobilteile angemeldet ha- ben, wählen Sie mit den Tasten das ge- wünschte Mobilteil und bestätigen mit Druck auf die Taste M E N U . Makeln Sie können ein Gespräch an das zweite an der Basisstation angemeldete Mobilteil weiterleiten.
-
Seite 255: Konferenzschaltung
Grundfunktionen Konferenzschaltung Sie können eine Konferenzschaltung mit allen momentanen Gesprächspartnern führen. Drücken Sie während des Gespräches die Tas- te MENÜ. Wählen Sie mit das Menü INTERN und bestätigen mit der Taste M E N U . Wählen Sie bei Bedarf mit den Tasten das gewünschte Mobilteil. -
Seite 256: Eintrag Hinzufügen
Grundfunktionen stätigen erneut durch Druck auf die Taste M E N U . Das Telefonbuch wird geöffnet und der erste Ein- trag wird angezeigt. Eintrag hinzufügen Fügen Sie hier einen weiteren Eintrag dem Tele- fonbuch hinzu. Drücken Sie die Taste MENÜ, und bestäti- gen Sie den Eintrag TEL. -
Seite 257: Eintrag Ändern
Grundfunktionen ger-Nummer ein. Drücken Sie nach der Eingabe der Nummer die Taste M E N U . Wählen Sie mit an dem Handgerät eine Anrufmelodie. Drücken Sie die Taste M E N U , um den Tele- fonbucheintrag abzuspeichern. -
Seite 258: Alle Löschen
Grundfunktionen rufmelodie ansehen bzw. anhören, ohne sie zu ändern. Löschen Löschen Sie einen Telefonbucheintrag. Wählen Sie einen Telefonbucheintrag. Drücken Sie die Taste M E N U . Wählen Sie mit LOESCHEN und bestäti- gen Sie mit M E N U . Der ausgewählte Eintrag wird gelöscht. - Seite 259 Grundfunktionen Status Lassen Sie sich den Speicherstatus des Telefon- buchs anzeigen. Öffnen Sie das Telefonbuch. Drücken Sie die Taste M E N U . Wählen Sie mit das Untermenü TB STAT/. Bestätigen Sie mit M E N U . Sie sehen, wie viele Speicherplätze im Telefon- buch belegt sind ( Anzeige 12/20 bedeutet 12 von 20 Speicherplätzen sind belegt).
-
Seite 260: Schnellwahltasten M1 Bis M3 Am Mobilteil
Grundfunktionen Ist unter der Taste noch kein Eintrag gespei- chert, erscheint im Display kurz der Hinweis „LEER!“ und anschließend das Telefonbuch. Bestätigen Sie mit M E N U . Es ertönt ein Signalton und die Anzeige der Ziel- wahltaste, z.B. -
Seite 261: Aus Dem Telefonbuch, Mit Schnellwahltaste Und Zielwahltaste Wählen
Grundfunktionen wahltasten: Öffnen Sie das Menü mit der Taste M E N U . Wählen Sie mit das Menü MT EINST und bestätigen Sie mit M E N U . Wählen Sie den Eintrag M SPEI und bestäti- gen Sie mit M E N U . - Seite 262 Grundfunktionen • Schnellwahltaste: Halten Sie die Taste (M1 bis M3) länger gedrückt. Diese Funktionen werden auch unter „Wählen“, ab „Wählen“ auf Seite 38, beschrieben. 56/102...
-
Seite 263: Anrufbeantworter
Anrufbeantworter Anrufbeantworter Mit dem Anrufbeantworter können Sie einge- hende Anrufe aufzeichnen oder ein Memo auf- nehmen. Insgesamt können Nachrichten bis zu 15 Minuten Länge aufgenommen werden. Der Anrufbeantworter fügt jeder Nachricht au- tomatisch das Datum und die Uhrzeit hinzu. Da- her müssen Sie Datum und Uhrzeit einstellen, um den Anrufbeantworter richtig nutzen zu kön- nen (siehe „Zeit und Datum einstellen“... -
Seite 264: Aus- Und Einschalten
Anrufbeantworter Aus- und Einschalten Mit der Taste • Um den Anrufbeantworter an der Basisstation ein- oder auszuschalten, drücken Sie die Ein-/ Aus-Taste an der Basisstation. Über das Menü Um den Anrufbeantworter mit dem Mobilteil ein- oder auszuschalten, gehen Sie wie folgt vor: ... -
Seite 265: Eingegangene Nachrichten Hören Und Bearbeiten
Anrufbeantworter Eingegangene Nachrichten hören und bearbeiten Einschaltmodus (Verzögerung) im Auslieferungszustand Im Auslieferungszustand ist der Einschaltmodus des Anrufbeantworters folgendermaßen einge- stellt: • beim ersten Anruf schaltet sich der Anrufbe- antworter nach dem vierten Klingeln ein; • bei den folgenden Anrufen schaltet sich der Anrufbeantworter nach dem ersten Klingeln ein. - Seite 266 Anrufbeantworter ken auf der Basisstation. Drücken Sie die Taste während der Wiederga- be, um die Uhrzeit des Anrufes im Display anzei- gen zu lassen. • Nachrichten, die noch nicht abgehört wur- den, heißen „neue Nachrichten“. • Nachrichten, die bereits abgehört wurden, heißen „alte Nachrichten“.
-
Seite 267: Einzelne Nachrichten Löschen
Anrufbeantworter Wenn alle Nachrichten abgehört sind, hört das Symbol auf zu blinken. Einzelne Nachrichten löschen Eine Nachricht, die gerade wiedergegeben wird, können Sie durch kurzes Drücken der Taste löschen. Um eine Nachricht über das Mobilteil zu lö- schen, wählen Sie den Eintrag ABHOEREN und bestätigen mit M E N U . -
Seite 268: Alle Nachrichten Löschen
Anrufbeantworter Drücken Sie die Taste 4 / 6, um zur vorheri- gen Nachricht / nächsten Nachricht zu sprin- gen. Drücken Sie die Taste 2, um die aktuelle Nach- richt zu löschen. Drücken Sie die Taste 5, um die Wiedergabe zu stoppen. -
Seite 269: Memos
Anrufbeantworter Memos Am Handgerät können Sie selbst ein Memo auf- sprechen, z. B., um sich an etwas zu erinnern. Memos aufnehmen Öffnen Sie das Menü AB. Wählen Sie MEMO. und bestätigen Sie mit M E N U . ... -
Seite 270: Ansagen
Anrufbeantworter tion. Sie können das Memo wiedergeben, indem Sie die Taste / drücken. Während der Wiedergabe können Sie das Memo löschen, indem Sie die Taste (Lö- schen) betätigen. Ansagen Im Auslieferungszustand sind zwei Ansagetexte aktiviert: • ein Ansagetext für den eingeschalteten Anruf- beantworter (MIT A.: Der Anrufer kann eine Nachricht auf dem Anrufbeantworter hinterlassen);... -
Seite 271: Ansagetexte Ohne Aufnahme
Anrufbeantworter die Anrufbeantworterfunktion mit Aufnahme an- hören oder verändern. Öffnen Sie das Menü AB. und bestätigen Sie M E N U . Wählen Sie AB EINST. und bestätigen Sie mit M E N U . Wählen Sie ANSAGEN und bestätigen Sie mit M E N U . - Seite 272 Anrufbeantworter Öffnen Sie das Menü AB. und bestätigen Sie M E N U . Wählen Sie AB EINST. und bestätigen Sie mit M E N U . Wählen Sie ANSAGEN und bestätigen Sie mit M E N U . ...
-
Seite 273: Einstellungen Des Anrufbeantworters
Anrufbeantworter Einstellungen des Anrufbeantworters Im Menü AB EINST. können Sie Grundeinstel- lungen vornehmen. Öffnen Sie das Menü AB. Wählen Sie AB EINST. und bestätigen Sie mit M E N U . AB-Modus Wählen Sie hier, welche Ansage der Anrufer hö- ren soll: die Ansage mit Aufzeichnung oder die Ansage ohne Aufzeichnung. -
Seite 274: Gebühren Sparmodus
Anrufbeantworter Wählen Sie VERZOEG. Wählen Sie 2, 4, 6, 8 RUFE oder GEB. SP (Gebühren Sparfunktion) und bestätigen Sie mit M E N U . Gebühren Sparmodus Im Sparmodus können Sie beim Abhören des Anrufbeantworters von außen Verbindungskos- ten vermeiden (zur Fernabfrage siehe „Fernab- frage“... -
Seite 275: Aufnahmezeit
Anrufbeantworter Fall sofort auf. Der Anrufbeantworter würde nach dem vierten Rufsignal einschalten. Aufnahmezeit Sie können einstellen, wie lang die Nachricht auf dem Anrufbeantworter sein darf. Voreingestellt sind 60 Sekunden. Wählen Sie A. ZEIT. Wählen Sie 60S, 120S, 180S oder UNBE- GR und bestätigen Sie mit M E N U . -
Seite 276: Fernabfragefunktion Ausschalten
Anrufbeantworter Fernabfrage Per Fernabfrage können Sie Nachrichten von ei- nem externen Telefon aus abhören. Die Fernab- frage ist im Auslieferungszustand mit der werk- seitigen PIN-Nummer „0000“ aktiviert. Fernabfragefunktion ausschalten Wählen Sie FERNABF und bestätigen Sie mit M E N U . ... -
Seite 277: Fernabfrage-Pin Ändern
Anrufbeantworter Fernabfrage-PIN ändern Die PIN ist ein Kennwort und dient dazu, die Fernabfrage Ihres Anrufbeantworters durch frem- de Personen zu verhindern. Wenn Sie die Fernab- frage einschalten, müssen Sie die PIN eingeben und können Sie ändern. HINWEIS! Diese PIN ist nicht mit der System-PIN (siehe „System-PIN“... -
Seite 278: Anrufbeantworter Nachrichten Von Einem Anderen Telefonanschluss Aus Abhören
Anrufbeantworter Nachrichten von einem anderen Te- lefonanschluss aus abhören Wählen Sie Ihre Rufnummer und drücken Sie während der Ansage die Stern-Taste * am Te- lefon. Geben Sie jetzt Ihre Fernabfrage-PIN mit den Zifferntasten ein. Die Zifferntasten eines Telefones, können auch als Steuertasten des Anrufbeantworters dienen. - Seite 279 Anrufbeantworter Funktion wäh- Taste Funktion rend des Abspielens Aktuelle Nachricht Keine Funktion löschen. Nachricht wiederho- Keine Funktion len; zur vorherigen Nachricht. Nachrichten wie- Wiedergabe Stop- dergeben. Zur nächsten Nach- Keine Funktion richt Anrufbeantworter Keine Funktion einschalten Anrufbeantworter Keine Funktion ausschalten 4 –...
-
Seite 280: Weitere Einstellungen Im Telefonmenü
Weitere Einstellungen im Telefonmenü Weitere Einstellungen im Telefonmenü Sie öffnen das Menü durch Drücken der Taste M E N U . Wie Sie das Menü bedienen, lesen Sie „Im Menü navigieren“ auf Seite 31 . Menü Einstellungen Das Menü EINSTELLUNGEN unterscheidet sich zwischen Basis (BS) und Mobilteil (MT) in der Struktur. - Seite 281 Weitere Einstellungen im Telefonmenü Struktur des Menüs „Einstellungen“ am Mobilteil Unter- Unter- Unter- Haupt- menü/ menü/ menü / menü Option Option Option Telefon- Eintrag buch Details hinzufü- (TEL. BUCH) Eintrag an- sehen Eintrag än- dern Eintrag lö- schen Alle lö- schen Telefon- Anzeige...
- Seite 282 Weitere Einstellungen im Telefonmenü Unter- Unter- Unter- Haupt- menü/ menü/ menü / menü Option Option Option Anrufliste Details (A. LISTE) Melodie Basis Rufton einstellen einstellen (MEL. 1 … (RUFTON) (BS EINST) Rufton- LAUTER lautstärke 1-5 / AUS (RT. LAUT) Mobilteil abmelden Abmelden (MT ABM.)
- Seite 283 Weitere Einstellungen im Telefonmenü Unter- Unter- Unter- Haupt- menü/ menü/ menü / menü Option Option Option PIN än- dern (PIN Ändern AEND) ECO-Mo- Auswäh- (ECO MODE) Manueller ECO-Mo- Auswäh- dus (MAN. ECO) Voller ECO-Mo- Auswäh- dus (FULL ECO) 77/102...
- Seite 284 Weitere Einstellungen im Telefonmenü Unter- Unter- Unter- Haupt- menü/ menü/ menü / menü Option Option Option Mobilteil einstellen MEL. 1 … Intern EINST) Rufton MEL. 1 … Extern (RUFTON) Rufton- LAUTER lautstärke 1-5 / (RT. LAUT) RUFT. AUS Tastenton EIN / (TAST.
- Seite 285 Weitere Einstellungen im Telefonmenü Unter- Unter- Unter- Haupt- menü/ menü/ menü / menü Option Option Option Auswäh- Klangbild len (FLAT /BAESSE / (KLANG) HOEHEN) Auswahl Auswäh- Basistation (BS WAHL) Aus- Sprachein- wählen: stellung (Deutsch/ Español/ (SPRACHE) English) Mobilteil Name Einstellen NAME) 79/102...
- Seite 286 Weitere Einstellungen im Telefonmenü Unter- Unter- Unter- Haupt- menü/ menü/ menü / menü Option Option Option Anzeige MT NAME Display (MT DIS- ZEIT Automat. Gesprächs- EIN / annahme (ANTW. Schnell- wahltasten M1 / M2 / belegen (M SPEI.) 80/102...
-
Seite 287: Einstellungen Des Mobilteils
Weitere Einstellungen im Telefonmenü Einstellungen des Mobilteils Rufton Stellen Sie hier den gewünschten Rufton für das Mobilteil ein. Bestätigen Sie RUFTON mit M E N U . INTERN: Wählen Sie den Rufton für interne Gespräche. EXTERN: Wählen Sie den Rufton für externe Gespräche. - Seite 288 Weitere Einstellungen im Telefonmenü Klang Stellen Sie hier ein anderes Klangbild ein, um das Klangbild bei Bedarf an Ihr Hörgerät anzupassen. Bestätigen Sie KLANG mit M E N U . FLAT: Wählen Sie diese Einstellung für einen natürlichen Klang. ...
-
Seite 289: Mobilteil Name
Geben Sie nun mit den Zifferntasten, den ge- wünschten Namen ein und drücken erneut M E N U . HINWEIS! Das ab Werk mitgelieferte Mobilteil ist bereits unter dem Namen „Medion 1“ angemeldet. Display Stellen Sie hier ein, ob der Name oder die Zeit angezeigt werden soll. -
Seite 290: Automatische Antwort
Weitere Einstellungen im Telefonmenü Automatische Antwort Sie können hier die automatische Antwort akti- vieren. Bestätigen Sie ANTW. A mit M E N U . Schalten Sie die Automatische Gesprächsan- nahme ein oder aus. Schnellwahltasten Sie können hier die Schnellwahltasten M1, M2 und M3 programmieren. -
Seite 291: Einstellungen Der Basisstation
Weitere Einstellungen im Telefonmenü Einstellungen der Basisstation Rufton Sie können hier den Klingelton der Basisstation einstellen. Bestätigen Sie RUFTON mit M E N U . Wählen Sie einen Rufton. Rufton Lautstärke Sie können die Lautstärke der Klingeltöne an der Basisstation einstellen. - Seite 292 Weitere Einstellungen im Telefonmenü Wahlverfahren Hier können Sie Ihr Telefon an das Wahlverfah- ren Ihres Netzbetreibers anpassen. Sie können zwischen Tonwahl und Impulswahl auswählen. Die Werkseinstellung ist „Tonwahl“. Dies ist das heutzutage gebräuchliche Wahlverfahren. Die Impulswahl kann bei einigen älteren Telefon- anlagen notwendig sein.
- Seite 293 Weitere Einstellungen im Telefonmenü Wählen Sie eine Flash-Zeit und bestätigen Sie M E N U . Ältere Telefonanlagen benötigen typischerweise MITTEL. System-PIN Bestimmte Einstellungen können nur verändert werden, nachdem Sie die PIN (persönliches Kenn- wort) eingegeben haben. Werkseitig ist die PIN „0000“...
- Seite 294 Weitere Einstellungen im Telefonmenü Bestätigen Sie PIN ALT mit M E N U . Geben Sie die alte PIN ein und bestätigen Sie M E N U . Bestätigen Sie PIN NEU mit M E N U . ...
-
Seite 295: Manueller Eco Mode
Weitere Einstellungen im Telefonmenü Full-ECO Die Funktion Full-ECO führt zur vollständigen Abschaltung der Sendeleistung im Standby-Be- trieb. Full-ECO ist nur möglich, wenn das Mobil- teil in der Basisstation eingesetzt ist. So schalten Sie die Funktion ein/aus: Wählen Sie im Menü BS EINST den Eintrag FULL ECO und bestätigen mit M E N U . -
Seite 296: Zurücksetzen
Zurücksetzen Funktion ein oder aus. Bestätigen Sie mit M E N U . Zurücksetzen Sie können die Basisstation in die Werkseinstel- lung zurück setzen. Wählen Sie RUECK-S im Hauptmenü und be- stäitgen Sie mit M E N U . ... -
Seite 297: Reinigen
Reinigen Reinigen Vor der Reinigung des Geräts ziehen Sie den zu- gehörigen Netzadapter des Geräts aus der Steck- dose. Für die Reinigung verwenden Sie ein tro- ckenes, weiches Tuch. Vermeiden Sie den Gebrauch von chemischen Lösungs- und Reinigungsmitteln, weil diese die Oberfläche und/oder Beschriftungen der Geräte beschädigen können. -
Seite 298: Wenn Störungen Auftreten
Wenn Störungen auftreten Wenn Störungen auftreten Bei einer Störung des Geräts prüfen Sie bitte zu- nächst, ob Sie das Problem mit Hilfe der folgen- den Übersicht selbst beheben können. Versuchen Sie auf keinen Fall, die Geräte selbst zu reparieren. Wenn eine Reparatur notwendig ist, wenden Sie sich bitte an unser Service Center oder eine andere geeignete Fachwerkstatt. - Seite 299 Wenn Störungen auftreten Fehler Lösung Bei allen Prob- • Überprüfen Sie, ob Netz- lemen und Telefonkabel richtig ein- gesteckt sind. • Überprüfen Sie das Telefon zunächst an einer anderen Telefonsteckdose. • Überprüfen Sie mit der Bat- terieanzeige, ob der Akku geladen ist.
- Seite 300 Wenn Störungen auftreten Fehler Lösung Kein Freizei- • Überprüfen Sie, ob die Ba- chen sisstation richtig angeschlos- sen ist. • Überprüfen Sie, ob das Mo- bilteil eingeschaltet, gela- den, richtig registriert und in Reichweite der Basisstati- on ist. Im Display des •...
- Seite 301 Wenn Störungen auftreten Fehler Lösung Kein Rufton an • Überprüfen Sie, ob die Ba- Mobilteil oder sisstation richtig angeschlos- Basisstation sen ist. • Überprüfen Sie, ob die Laut- stärke des Ruftons nicht ab- geschaltet ist. • Überprüfen Sie, ob sich das Mobilteil in Reichweite der Basisstation befindet.
- Seite 302 Wenn Störungen auftreten Fehler Lösung Sie können • Überprüfen Sie, ob ein Frei- nicht angeru- zeichen und im Display fen werden das Hörersymbol erscheint, nachdem Sie die grüne Hörertaste gedrückt haben. • Überprüfen Sie, ob ein an- deres Telefon an der Telefon- steckdose funktioniert oder ob Ihr Telefon in einer ande- ren Telefonsteckdose funkti-...
-
Seite 303: Entsorgung
Entsorgung Entsorgung Verpackung Ihr Gerät befindet sich zum Schutz vor Transportschäden in einer Verpackung. Verpackungen sind Rohstoffe und so- mit wiederverwendungsfähig oder kön- nen dem Rohstoffkreislauf zurückgeführt werden. Gerät Werfen Sie Ihr Gerät am Ende ihrer Le- benszeit keinesfalls in den normalen Hausmüll. -
Seite 304: Technische Daten
Technische Daten Technische Daten Mobilteil Standard DECT/GAP Reichweite ca. 300 m Akku Mobilteil 2 x 1,2 V / 600 mAh; Typ NiMH, HR03, AAA Ladezeit Akku Mobilteil ca. 16 Stunden bei voll- ständiger Entladung Bereitschaftsbetrieb ca. 100 Std. Gesprächsdauer ca. 10 Std. Netzadapter Hersteller: TenPao... -
Seite 305: Konformitätsinformation
Richtlinie 2009/125/EG (Verordnung 278/2009) ein. Für das DECT Telefon findet die Ökodesign Richt- linie 2009/125/EG (Verordnung 1275/2008) kei- ne Anwendung. Für den bestimmungsgemäßen Gebrauch müssen dauerhaft Daten empfangen bzw. gesendet werden. Vollständige Konformitätserklärungen sind er- hältlich unter www.medion.com/conformity. 99/102... -
Seite 306: Index
Index 57, 58, 60, 63, 81, Index 85, 89, 90, 93, 94, 95, 96, 98 Batteriestatus ..30 Akku .. 21, 28, 41, 93, Bedientasten Basisstation ..20 Anmelden Mobilteil ....23 Mobilteil ....34 Bestimmungsgemäßer Anrufbeantworter . 57, Gebrauch ..... 8 Anrufen .... - Seite 307 Index Konformitätsinformati- ändern ....51 on ...... 99 ansehen ....51 löschen ....52 Ein- und ausschalten Lieferumfang ... 6 Anrufbeantworter 58 Mobilteil ....36 Energiesparfunktion 43 Makeln ....48 Entsorgung ....97 Memos ..63, 65, 66 Fernabfrage ..59, 68, Nachrichten 70, 71, 72 hören ....
- Seite 308 Index Rufnummernanzeige . Wahlverfahren . 76, 86 Rufton 42, 76, 78, 81, Wahlwiederholung 23, 85, 95 38, 46 Werkseinstellung .. 86, Schnellwahltaste .. 40, 41, 55, 56, 84 Schnellwahltasten 22, 40, 54, 80, 84 Sicherheitshinweise 10 Sprache ....82 Störungen ..... 92 Stummschalten ..
- Seite 309 Medion Service Center Visonic S.A. c/ Miguel Faraday, 6 Parque Empresarial "La Carpetania", N-IV Km. 13 28906 Getafe, Madrid España Hotline: 902196437 Fax: 914604772 E-Mail: service-spain@medion.com www.medion.es...