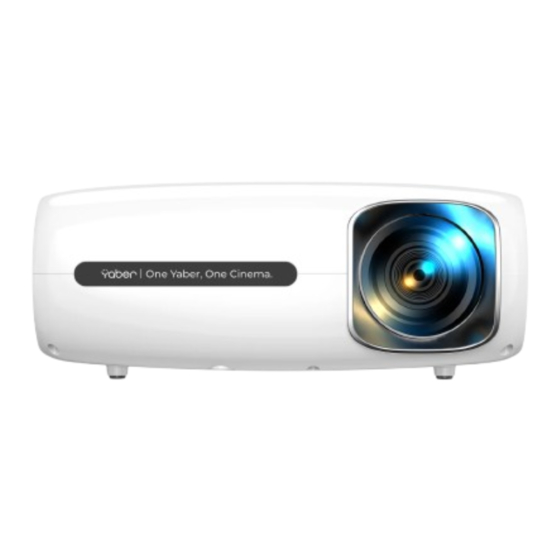
YABER Pro V7 Bedienungsanleitung
Inhaltsverzeichnis
Quicklinks
Kapitel
Inhaltsverzeichnis
Fehlerbehebung

Verwandte Anleitungen für YABER Pro V7


Inhaltszusammenfassung für YABER Pro V7
- Seite 1 9Qben Entertainment Projector Pro V7 Projector...
- Seite 3 LANGUAGE English Franqais Italian — Espanol • 78 Deutsche —...
-
Seite 4: Inhaltsverzeichnis
Support@yabertech.com CONTENTS YABER Lifetime Professional Support TIPS PACKAGE LIST PROJECTOR SPECIFICATIONS PROJECTOR OVERVIEW REMOTE CONTROL INSTALLATION 1 . Installation Method 2. Projection Distance and Size 3 Install on the Ceiling, STARTING PROJECTOR IMAGEADJUSTMENT 1. Focus 2. Digita 6D Keystone Correction... -
Seite 5: Yaber Lifetime Professional Support
YABER Lifetime Professional Support Dear customer, Thank you very much for supporting YABER! Please read this manual thoroughly before using the projector. If you have any issues, email your order number and the problem to Support@yabertech.com We will provide a fast solution in 24 hours... -
Seite 6: Package List
Support@yabertech.com PACKAGE LIST YABER V7 Projector*l Remote Control* Power Cord* HDMI Cable*l 3 in-I AV Cable Lens Cover* 1 Cleaning Kit* 1 Cleaning Cloth* 1 User Manual* PROJECTOR SPECIFICATIONS Model Native Keystone 6D Keystone Correction & 1920*1080P Resolution Correction Manual... -
Seite 7: Projector Overview
Support@yabertech.com PROJECTOR OVERVIEW... - Seite 8 Support@yabertech.com Height Adjustment Screw Adjust the height of the projector 1/18 Infrared signal receiver IR Window Projector lens Optica coated glass lens Power Cord Port Power Cord Port Headphone Jack 3 5mm Headphone Output 7/10 HDMI Ports HDMI 1 input / HDMI 2 input USB port above Ports USB port below: USB T port...
-
Seite 9: Remote Control
Support@yabertech.com REMOTE CONTROL Power Source Arrow keys 4. Menu 5 6D Function 6 Volume 7. Volume 8 Mute Homepape 10. Confirmation key (Play and Pause) Return 12. Previous 13. Next Tum on/off the power Select the input signal source Used to adjust the parameter of the projector in the menu mode Press... -
Seite 10: Installation Method
Support@yabertech.com Note: l).lnstall 2 pieces of AAA batteries into the remote before using it. Do not combine new batteries with old ones in remote controller, which can cause operation failure due to insufficient power supply. 2) When using the remote controller, please make sure that the signal transmitter of the remote controller aims at infrared... - Seite 11 Support@yabertech.com Aspect Ratio: 16:9 Distance (ft ) Screen Size 5 50 7 80 70" 100" 120" 200" 21 8 The recommended projection distance is about Ilft,the shortest projection distance is 5.5ft The image size depends on the distance between projector and screen, there may be 3% deviation among above...
-
Seite 12: Starting Projector
Support@yabertech.com STARTING PROJECTOR 1 )Press the power key on the remote or projector, the indicator light will turn blue; 2)Adjust the focus ring on the left side of the projector to get the best image performance; (If it is still blurry, please try to adjust the projection distance.) 3)Use the 6D keystone function of the projector to get a rectangle projection screen;... - Seite 13 Support@yabertech.com Rotate the focus ring slowly. At the same time, check the focus point carefully. The best focus point for the lens would be where the image most clear. Note: If it is still blurry, please try to adjust the projection distance 2.Auto 6D keystone Correction...
-
Seite 14: Setting Up The Projector
Support@yabertech.com Note: I.In mode 1 and mode 2, the auto 6D keystone correctionfunction will work automatically. 2.1f you are not satisfied with the projection effect after correction, please disable the auto 6D keystone correction function, short press the 6D button on remote control to reopen mode 1 and repeat the above operation. -
Seite 15: Usb Disk Input Mode
Support@yabertech.com 2.USB Disk Input Mode 2.1 Play Movie/Music/Photo/TXT in the USB Disk Input Mode 1).lnput the USB Disk, select [ USB ] on the homepage and enter; 2).Select the option [ Movie/Music/Photo/TXT] 3).Select the desired file (or folder to enter the subfolder) in the USB disk, then press the [ 0K ] button to play it. -
Seite 16: Wifi Setting
(2) Make sure your mobile device is close to the projector when using wireless connection. A distance within I meter is recommended. O Some mobile devices may not support screen mirroring due to the compati- bility. Any questions, please feel free to email YABER via Support@yabertech.com. -
Seite 17: 1 Ios Cast(For Ios Devices)
Support@yabertech.com 3.1 .iOS Cast (for iOS Devices) I .GO to home page — Select the [ Screen Mirroring ] menu — Select the [ Settings ] — Select the [ Network Setting ]menu - Open the WiFi function Select your home WiFi from the list —Connect the V7 projector to your home WiFi. - Seite 18 Support@yabertech.com 3.2.Miracast (for Android Devices) I Go to [ Screen Mirroring ] menu — Select the [ Miracast ] menu Press the 0K button to enter the [ Miracast Setting ] Menu Miracast 2.Select the [ Settings ] menu on your Android device - Select the [ Screen mirroring ] function —Select your Miracast receiver named [ V7-AnCast-XXXX ] —your Android device screen will be displayed on the projection screen after 3 seconds...
-
Seite 19: Wired Screen Mirroring( For Ios Device)
Support@yabertech.com 3.3 Wired Screen Mirroring( for iOS Device) I Go to [ Screen Mirroring ] menu — Select the [ iOS Cable Cast] menu - Press the 0K button to enter the [ Wired Screen Mirroring Setting ] Menu iOS Cable Cast 2. -
Seite 20: Bluetooth Setting
Bluetooth connection HOME Note: 1 The V7 projector is compatible with the Bluetooth headsets, Bluetooth speakers and Airpods, but not the Bluetooth keyboards or Bluetooth phones 2. If you have any question, please feel free to email YABER via: support@yabertech.com... -
Seite 21: Projector Setting Menu
Support@yabertech.com 5.Projector Setting Menu I .Select [Setting] menu on the projector's home page. HOME key, the menu will move to 3.Select the adjust interface,use"A/V" key to choose the wanted item. 4.Press"OK" or "4/>' to adjust the item parameter. MENU PICTURE MENU MODE FUNCTION... - Seite 22 Support@yabertech.com 5.1.1 Reduce Display Size Step 1: Press the button to select the [Reduce Display Size] menu, then press the [0K] bottom to enter the submenu. Step 2: By pressing the button on the remote or projector, you can reduce the height and width of projection size up to 50% 5.1.2 Projection Direction...
- Seite 23 Support@yabertech.com 5.1.3 FourPoint Correction Setting When the projection screen is not rectangular, it can be adjusted by 4-point keystone correction Step 1: Press the button to select the [ FourPoint Correction Setting ] menu, then press the [ 0K ] bottom to enter the submenu. Step 2: Keep pressing the 0K button on the remote control or projector to select the point Step 3: Press the arrow keys on the remote or projector to adjust the...
- Seite 24 Support@yabertech.com 5.1.4 Keystone Correction Setting Step I: Press the V button to select the [Keystone Correction Setting ] menu, then press the [0K] bottom to enter the submenu. Step 2: If the projection image shows as (1), press the button on the remote or projector to increase the vertical parameter (-50—0), until to achieve the projection image (2) Step 3: If the projection image shows as (3), then press the...
-
Seite 25: 2 Sound Menu
Support@yabertech.com 5.1.5 Infinity Zoom Setting Step 1: Press the button to select the [Infinity Zoom Setting] menu, then press the [0K] bottom to enter the submenu Step 2: By pressing the button on the remote or projector, you can reduce the height or width of projection size up to 70% SOUND MENU... -
Seite 26: 4 Option Menu
Support@yabertech.com OPTION MENU MODE FUNCTION OPTION MENU OSD Language English, France, Italian, Spanish,etc Set up the language displayed in the o ration interface BT Setting On/Off Connect Bluetooth Devices Restore Factory Default Reset the projector Color Range Auto Update the projector's software Software Updates (USB) Update software verslon... -
Seite 27: Signal Lines Connection
Restore Factory Default Please press 0K andscreen mirroringsystemsetting SIGNAL LINES CONNECTION YABER V7 projector has 6 interfaces, HDMI ports*2/USB ports*2/3.5mm headphone output/AV output. Please select the correct connecting port to connect your device (PC, Phone, DVD Player, Sound bar, USB, PS4 etc.) 1 .Connect... -
Seite 28: Connect To The Dvd Player
Support@yabertech.com 3.Connect to the DVD Player Use the 3-in -I AV cable in the package I) Turn on your DVD player and the projector; 2) Connect the colorful female connectors to your DVD player's RCA cable with the 3-in-l AV cable in the package; 3) Connect the black connector to the AV port of the projector, enter the home page to select [AV ] as the signal source O Video... -
Seite 29: Troubleshooting
Support@yabertech.com TROUBLESHOOTING Problems listed below might occur during the operation of your projector. Please refer to the possible factors which might cause the issue to do troubleshooting 1. When turning on the power switch, the indicator light does not work. 1) The power might not be connected well 2) Check the over-heat protection system... - Seite 30 Support@yabertech.com CONTE-NU Assistance professionnelle YABER å vie CONSEILS LISTE PAQUETS SPECIFICATIONS DU PROJECTEUR APERGI-J DU PROJECTEUR TÉLÉCOMMANDE INSTALLATION 1 . Méthode d'installation 2 Distance et taille de projection 3. Installer sur le plafond PROJECTEUR DE DÉMARRAGE RÉGLAGE DE L'IMAGE 1. Réglage de la mise au point 2.
-
Seite 31: Conseils
Support@yabertech.com Assistance professionnelle YABER Cher client, Merci beaucoup de soutenir YABER! Veuillez lire attentivement ce manuel avant d'utiliser le projecteur. Si vous rencontrez des problémes, envoyez votre numéro de commande et le probléme Support@yabertech.com Nous fournirons une solution rapide en 24 heures En fait, de nombreux problémes... -
Seite 32: Liste Des Paquets
La lentille sale doit étre essuyée avec un chiffon en coton doux pour Ia surface de la lentille en verre. Aucun chiffon dur ou abrasif ne doit étre utilisé. LISTE PAQUETS Yaber V7 Projecteur *1 Télécommande*l Cordon d'alimentation*l Couvercle de jectif*l Cåble HDMI*I 3-in-l Cåble... - Seite 33 Support@yabertech.com APERCU DU PROJECTEUR...
- Seite 34 Support@yabertech.com 1/18 VIS de réglage de Ia hauteur Ajustez la hauteur du projecteur Fenétre Récepteur de signal infrarouge Objectif du projecteur Port du cordon Port du cordon d'alimentation d'alimentation Prise casque Sortie casque 3,5 mm 7/10 Ports HDMI Entrée HDMI 1 / Entrée HDMI Port USB 1 / port USB 2...
-
Seite 35: Télécommande
Support@yabertech.com TÉLÉCOMMANDE D'alimentation Bouton Source de signal Touches directionnelles Menu Page d'accueil Volume Volume Muet Retour au menu principal 10. Touche de confirmation (lecture et pause) 11. Revenir Précédent Prochaint Allumer / éteindre l'alimentation Sélectionnez la source du signal d'entrée Utilisé... -
Seite 36: Installation
Support@yabertech.com Remarque: I). Installez 2 piles AAA dans la télécommande avant de 'utiliser. Ne combinez pas de nouvelles piles avec d'anciennes dans la télécommande, car cela pourrait entrainer une panne de fonctionnement en raison d'une alimentation électrique insuffisante 2). Lorsque vous utilisez la télécommande, assurez-vous que l'émetteur de signal de la télécommande vise Ie récepteur de signal infrarouge du project- eur. -
Seite 37: Distance Et Taille De Projection
Support@yabertech.com Maintenez le projecteur å une hauteur oü sa lentille est en symétrie axiale par rapport l'écran. Si cela n'est pas possible, utilisez la fonction de correc tion trapézoidale pour régler l'image de projection. Si vous souhaitez obtenir un écran de projection gratuit, veuillez... -
Seite 38: Projecteur De Démarrage
Support@yabertech.com PROJECTEUR DE DÉMARRAGE I) Appuyez sur la touche d'alimentation de la télécommande ou du projecteur, le voyant deviendra bleu; 2) Ajustez Ia bague de mise au point sur Ie cöté gauche du projecteur pour obtenir la meilleure image performance; (S'il est toujours flou, essayez d'ajuster la distance de projection.) 3) Utilisez Ia fonction trapézoidale 6D du projecteur pour obtenir une projection rectangle... - Seite 39 Support@yabertech.com Tournez lentement Ia bague de mise au point. En méme temps, vérifiez soigneusement e point AE Le meilleur point de mise au point pour l'objectif serait I'endroit oü I'image est Ia plus claire. Remarque: s'il est toujours flou, essayez d'ajuster Ia distance de projection 2.Fonction de correction...
- Seite 40 Support@yabertech.com Mode 1. Appuyez longuement sur le bouton 6D de la télécommande (ou appuyez sur le bouton 0K du projecteur et maintenez-le enfoncé) pour accéder au mode de correction trapézoidale 6D 2 2. Ajustez la direction de projection, l'écran de projection se rétablira automa- tiquement dans un rectangle 3.
-
Seite 41: Installation
Support@yabertech.com INSTALLATION PROJECTEUR La page d'accueil du projecteur est la suivante HOME Setting HDMI Miroir del Récran Cinema Musi PHOTO Texte 1 .Sélectionnez la source du signal d'entrée Sélectionnez la source de signal d'entrée souhaitée (HDMI 1 / HDM12 / AV) sur la page d'accueil 2.Mode d'entrée du disque... - Seite 42 Support@yabertech.com Interface lecture Menu Fonction Sélectionnez Ie mode de lecture (lecture de répertoire / cycle unique / boucle de répertoire) Passer la vidéo précédente Retour rapide, rembobine rapidement Ia vidéo pendant la lecture. le la vitesse de rembobinage varie de 2X å 32X Lire ou mettre en pause a vidéo actuelle La vitesse d'avancement...
-
Seite 43: Connexion Sans Fil
Support@yabertech.com Tv Setting Picture Mode Sound Mode Contenu Menu Mode Fonction Luminosité Modifiez Contraste Utilisateur / Standard Mode image paramétres d'image Vif / Doux Saturation dans la plage 0-100 Acuité 120Hz 500Hz Modifiez Utilisateur / Standard Mode son paramétres sonores Actualités / Musique / Sport 1 5KHz dans la plage 0 100... -
Seite 44: Ios Cast (Pour Les Appareils Ios)
Support@yabertech.com Pour toute question, n'hésitez pas å envoyer un e-mail å YABER via Support@yabertech.com. 3.1 .iOS Cast (pour Ies appareils iOS) I .Accédez la page d'accueil - Sélectionnez le menu [Miroir del Récran] Sélectionnez le [Paramétres] - Sélectionnez le menu [Parametres réseau]... -
Seite 45: Miracast (Pour Les Appareils Android)
Support@yabertech.com 4.0uvrez le [Centre de contröle] sur votre appareil iOS - Sélectionnez [Écran Fonction de mise en miroir] - Sélectionnez et connectez le récepteur iOS Cast nor-nmé [V7-iOSCast-xxxx] l'écran de votre appareil iOS sera affiché sur le écran de projection apres 3 secondes 3.2.Miracast (pour les appareils Android) 1 Accédez au menu [Screen Mirroring] - Sélectionnez le menu [Miracast]... -
Seite 46: Miroir D'écran Filaire (Pour Les Appareils Android)
Support@yabertech.com 3.3 Miroir d'écran filaire (pour appareil iOS) 1 Allez dans le menu [Miroir del Récran] - Sélectionnez Ie menu [iOS Cable Cast] - Appuyez sur le bouton 0K pour accéder au menu [Wired Screen Mirroring Setting] iOS cable cast €2 2. -
Seite 47: Réglage Bluetooth
HOME Noter: 1.Le projecteur V7 est compatible avec les casques Bluetooth, les haut-parleurs Bluetooth et les Airpods, mais pas les claviers Bluetooth ou les téléphones Bluetooth. 2 Si vous avez des questions, n'hésitez pas envoyer un e-mail YABER via: support@yabertech.com... -
Seite 48: Réglage De "Image Du
Support@yabertech.com 5.Réglage de l'image du projecteur I .Appuyez sur Ia touche de Ia télécom- mande, puis l'image du menu s'affichera å HOME l'écran. Sélectionnez le menu Setting sur le projecteur page d'accueil 2. Appuyez sur la touche ((4/>», le menu se déplacera vers 3 Sélectionnez l'interface de réglage,utilisez la touche «A/V»... - Seite 49 Support@yabertech.com 5.1.1 Réduire la taille l'écran Étape I: Appuyezsur le bouton pour sélectionner le menu [Réduire Iataille d'affichage], puis appuyez sur le bouton [0K] pour accéder au sous-menu Étape 2: En appuyant sur le bouton de la télécommande ou du projecteur, vous pouvez réduire la hauteur et la argeur de la taille de projection jusqu'å...
- Seite 50 Support@yabertech.com 5.1.3 Réglage de la correction en quatre points Lorsque l'écran de projection n'est pas rectangulaire, il peut étre ajusté par correction trapézoidale 4 points Étape 1:Appuyez sur le bouton pour sélectionnerle menu [Réglagede correction en quatre points], puis appuyez sur [0K] pour accéder au sous-menu Étape2: Continuez appuyer sur le bouton0K de la télécommandeou du projecteur pour sélectionner le point...
- Seite 51 Support@yabertech.com 5.1.4 Réglage de la correction trapézoidale Étape1:Appuyezsur leboutonpoursélectionner l e menu[Réglage de la correction trapézoidale], puis appuyez sur le bouton [0K] pour accéder au sous-menu Étape 2: Si l'image de projection s'affiche sous Ia forme (1), appuyez sur bouton télécommande ou projecteur pour augmenter...
-
Seite 52: Menu Son
Support@yabertech.com 5.1.5 Réglage du zoom infini Étape 1:Appuyez sur le bouton pour sélectionnerle menu [Réglage du zoom infini], puis appuyez sur Ie bouton [0K] pour accéder au sous-menu. Étape2: Enappuyant s urle boutonde latélécommande oudu projecteur, vous pouvez réduire la hauteur ou la largeur de la taille de projection jusqu'å A-mm-Ä... - Seite 53 Support@yabertech.com MENU OPTIONS OPTIONS MENU MODE FUNCTION Configurer Ia langue affichée Language OSD English, France, Italian, Spanish,etc dans I'interface de commande Réglage BT On/Arret Connectez les appareils Bluetooth Réinitialisez le projecteur Restaurer Gamme de couleurs Auto Mettre å jour Ia version du Mise a jour ogicieI(USB) Mettre å...
-
Seite 54: Connexion
CONNEXION I-IGNES SIGNAL YABER V 7 projector has 6 interfaces, HDMI ports*2/USB ports*2/3.5mm headphone output/AV output. Please select the correct connecting port to connect your device (PC, Phone, DVD Player, Sound bar, USB, PS4 etc.) 1 .Connectez Ie disque 1) Insérez e disque U dans l'un des deux ports d'entrée USB;... -
Seite 55: Connectez-Vous
Support@yabertech.com 3. Connectez-vous lecteur Utilisez le cåble AV 3 en -1 dans l'emballage 1) A1umez votre lecteur DVD et le projecteur; 2) Connectez Ies connecteurs femelles colorés au cåble RCA de votre lecteur DVD avec le cåble AV 3 en 1 dans l'emballage; 3) Connectez le connecteur noir au port AV du projecteur, accédez å... -
Seite 56: Dépannage
Support@yabertech.com de 3 ans pour le projecteurV7 Si vous avez des questions, n'hésitez pas nous contacter via Support@yabertech.com. DÉPANNAGE Les problémes répertoriés ci-dessous peuvent survenir pendant fonctionnement de votre projecteur. Veuillez vous référer aux facteurs possibles qui pourraient causer le probléme pour effectuer e dépannage I.Lors de la mise sous tension... - Seite 57 Support@yabertech.com 8. Impossible de trouver des périphériques 'ors de la connexion avec un disque dur ou un lecteur flash. Vérifiez si l'appareil est cassé 9. Auto-off apres avoir travaillé pendant un certain temps. 1) La ventilation du projecteur est bloquée 2) La tension n'est pas stable 3) Le systéme de protection...
- Seite 58 Support@yabertech.com SOMMARIO Supporto professionale a vita YABER • SUGGERIMENTI Elenco di imballaggio del prodotto SPECIFICHE DEL PROIETTORE PANORAMICA DEL PROETTORE • Telecomando INSTALLAZIONE .. 58 1 . Metodo • 59 2. Distanza e dimensioni del proiettore . 59 3. Installare sul soffitto •...
-
Seite 59: Supporto Professionale A Vita Yaber
Support@yabertech.com Supporto professionale a vita YABER Caro cliente, Woohoo! II tuo proiettore giå nelle tue mani! Iniziamo! Hai domande come funziona? Leggere attentamente questo manuale prima di utilizzare proiettore. Sei soddisfatto del tuo proiettore? In caso di problemi, inviare per... -
Seite 60: Elenco Di Imballaggio Del Prodotto
La lente sporca deve essere pulita con un panno di cotone morbido per la lente di vetro superficie. Non utilizzare panni duri o abrasivi. Elenco di imballaggio del prodotto YABER Proiettore Power Cavo Telecomando Manuale di istruzioni CavoAV... - Seite 61 Support@yabertech.com PANORAMICA PROIETTORE...
- Seite 62 Support@yabertech.com 1/18 Regola l'altezza del proiettore Vite di regolazione dell'altezza Finestra Ricevitore di segnali a infrarossi Obiettivo del proiettore Lente in vetro rivestimento ottico Porta del cavo di alimentazione Porta del cavo di alimentazione Jack per cuffie Uscita per cuffie da 3,5 mm 7/10 Porte HDMI...
-
Seite 63: Telecomando
Support@yabertech.com Telecomando Potenza Fonte 3 Tasti freccia Menu Funzione 6 Volume 7 Volume Muto Menu principale Tasto di conferma(Riproduci metti in pausa) Ritorno Precedente Avanti Accendi / spegni l'alimentazione Seleziona a sorgente del segnale di ingresso Utilizzato per regolare il parametro del proiettore in Apri il menu Premere volta:... -
Seite 64: Installazione
Support@yabertech.com Nota: 1) .Installare 2 batterie AAA nel telecomando prima di utilizzarlo. Non combin- are le nuove batterie con quelle vecchie nel telecomando, che possono causare problemi di funzionamento a causa di un'alimentazione insufficiente 2) .Quando si utilizza il telecomando, assicurarsi che il segnale il trasmettitore del telecomando punta al ricevitore del segnale a infrarossi del proiettore... -
Seite 65: Distanza E Dimensioni Del Proiettore
Support@yabertech.com 2.Distanza e dimensioni del proiettore Proporzioni: 16:9 Distance (m.) Dimensione dello schermo 3 35 100" 120" 150" 200" La distanza di proiezione consigliata di circa 100 pollici, la distanza proiezione piü breve é di 3 35m La dimensione dell'immagine dipende dalla distanza tra il proiettore... -
Seite 66: Avviamento Del Proiettore
Support@yabertech.com AVVIAMENTO PROIETTORE 1) Premere il tasto di accensione sul telecomando o sul proiettore, l'indicatore uminoso diventerå blu; 2) Regolare l'anello di messa a fuoco sul lato sinistro del proiettore per ottenere e migliori prestazioni di immagine; (Se é ancora sfocato, prova a regolare la distanza di proiezione.) 3) Utilizzare la funzione trapezoidale 6D del proiettore per ottenere uno schermo di proiezione rettangolare;... -
Seite 67: Funzione Di Correzione Trapezoidale Automatica 6D
Support@yabertech.com Ruotare lentamente l'anello di messa a fuoco. Allo stesso tempo, controlla il punto AF accuratamente. II miglior punto di messa a fuoco per l'obiettivo sarebbe quello in cui l'immagine é piü nitida Nota: se ancora sfocato, provare a regolare la distanza di proiezione 2.Funzione di correzione trapezoidale... -
Seite 68: Configurazione
Support@yabertech.com I. In modalitå I e modalitå 2, Ia funzione di correzione trapezoidale Nota: automatica 6D funzionerå automaticamente 2. Se non si é soddisfatti dell'effetto di proiezione dopo la correzione, disabilitare la funzione di correzione trapezoidale 6D automatica, premere brevemente il pulsante 6D sul telecomando per riaprire la modalitå... -
Seite 69: 2 Interfaccia Di Gioco
Support@yabertech.com 2.ModaIitå di input disco USB 2.1 Riproduzione di film I musica I foto I TXT in modalitå di input 1). Immettere il disco USB, selezionare [USB] nella home page e accedere; 2). Seleziona l'opzione [Film / Musica / Foto / TXT] 3). - Seite 70 Si consiglia una distanza entro 1 metro. Alcuni dispositivi mobili potrebbero non supportare il mirroring dello schermo a causa di Compatibilitå Per qualsiasi domanda, non esitare a inviare un'e-mail a YABER tramite Support@yabertech.com...
-
Seite 71: Cast Ios (Per Dispositivi Ios)
Support@yabertech.com 3.1 Cast iOS (per dispositivi iOS) 1 Vai alla home page - Seleziona il menu [Clonazione schermo] Seleziona le [Impostazioni] - Seleziona il menu [Impostazioni di rete] - Apri la funzione WiFi - Seleziona il tuo WiFi domestico dall'elenco - Collega il Proiettore V7 al WiFi di casa... -
Seite 72: Miracast (Per Dispositivi Android)
Support@yabertech.com 3.2.Miracast (for Android Devices) 1 Accedere al menu [Clonazione schermo] - Selezionare il menu [Miracast] Premere il pulsante 0K per accedere al menu [Impostazioni Miracast] Miracast 2 2.Selezionare il menu [Impostazioni] sul dispositivo Android - Selezionare funzione [Mirroring schermo] - Selezionare il ricevitore Miracast denominato... - Seite 73 Support@yabertech.com 3.3 Mirroring schermo cablato (solo per dispositivo iOS) 1 Andare al menu [Clonazione schermo] - Selezionare il menu [iOS Cable Cast] - Premere il pulsante 0K per accedere al menu [Impostazione mirroring del o schermo cablato]. iOS cable cast 2 Col ega il cavo originale della tua apparecchiatura IOS alla porta USB-T 3.
-
Seite 74: Impostazioni Bluetooth
Bluetooth. HOME Nota: 1 II proiettore V7 é compatibile con auricolari Bluetooth, altoparlanti Bluetooth e Airpod, ma non con tastiere Bluetooth o telefoni Bluetooth. 2.1n caso di domande, non esitare a inviare un'e-mail a YABER tramite: support@yabertech.com... -
Seite 75: Menu Immagine
Support@yabertech.com 5. Metodo di impostazione del menu 1 .Premere " " sul telecomando, quindi l'immagine del menu verrå visualizzata sullo HOME schermo. Oppure necessario selezionare il tasto " O " sul proiettore per accedere ai 4 menu senza telecomando 2..Premere il tasto "4/>", il menu si sposterä... - Seite 76 Support@yabertech.com 5.1.1 Riduci le dimensioni dello schermo Passaggio I: premere il pulsante per selezionare il menu [Riduci dimensioni display], quindi premere la parte inferiore [0K] per accedere al sottomenu Passaggio 2: premendo il pulsante sul telecomando o sul proiettore, é possibile ridurre l'altezza e la arghezza delle dimensioni di proiezione fino al 5.1.2 Direzione di proiezione...
- Seite 77 Support@yabertech.com 5.1.3 Impostazione correzione fourpoint Quando 10schermo di proiezione non é rettangolare, pub essere regolato mediante una correzione trapezoidale a 4 punti. Passaggio I: premere il pulsante per selezionare il menu [Impostazione correzione fourpoint], quindi premere la parte inferiore [0K] per accedere al sottomenu.
- Seite 78 Support@yabertech.com 5.1.4 Impostazione correzione trapezoidale Passaggio 1: premere il pulsante per selezionare il menu [Impostazione correzione trapezoidale], quindi premere la parte inferiore [0K] per accedere al sottomenu. Passaggio 2: se l'immagine di proiezione mostra come (1), premere il pulsante sul telecomando o sul proiettore per aumentare il parametro verticale (-50 —O), fino a ottenere l'immagine di proiezione (2).
- Seite 79 Support@yabertech.com 5.1.5 Impostazione zoom infinito Passaggio I: premere ilü pulsante per selezionare il menu [Impostazione zoom infinito], quindi premere Ia parte inferiore [0K] per accedere al sottomenu. Passaggio 2: premendo pulsante sul telecomando o sul proiettore, possibile ridurre l'altezza o la larghezza delle dimensioni di proiezione fino al Zoo m 5.1.6 Aggiornamento...
-
Seite 80: Menu Tempo
Support@yabertech.com MENU SUONO MODALITÅ FUNZIONE MENU SUONO Modalita sonora Musica, film, sport, utente, standard mposta Ia modalitå audio -50-+50 Regolazione del bilanciamento Bilanciamento Suono surround / Surround Set up the surround mode MENU TEMPO MENU ORARIO MODALITÅ FUNZIONE Clock Off/10min/20min/ Timer spegn 30min/60min/90min MENU OPZIONI... -
Seite 81: Collegamento
Support@yabertech.com COLLEGAMENTO LINEE Dl SEGNALE proiettore YABER V7 ha 6 interfacce, porte HDMI * 2 / porte USB * 2 / uscita cuffie da 3,5 mm / uscita AV. Seleziona la porta di connessione corret- ta per collegare il tuo dispositivo (PC, telefono, lettore DVD, soundbar, USB, PS4 ecc ) I.Collega... -
Seite 82: Arresto Sicuro
Support@yabertech.com 3.CoIlegati al lettore Utilizzare il cavo AV 3 in -1 nella confezione I) Accendi il tuo lettore DVD e il proiettore; 2) Collega i connettori femmina colorati al cavo RCA del tuo lettore DVD con il cavo AV 3 in 1 incluso nella confezione; 3) Collegare il connettore nero alla porta AV del proiettore,... -
Seite 83: Risoluzione
Support@yabertech.com RISOLUZIONE PROBLEMI problemi elencati di seguito potrebbero verificarsi durante il funzionamento del proiettore Fare riferimento ai possibili fattori che potrebbero causare il problema risoluzione dei problemi. 1. Quando si accende l'interruttore di alimentazione, la spia non funzio- 1) L'alimentazione potrebbe non essere collegata correttamente. 2) Controllare il sistema di protezione da surriscaldamento. - Seite 84 Support@yabertech.com indice Soporte y Consejos• Lista de empaque Especificaciones del proyector Resumen del proyector Resumen del Remoto Contro INSTALACIÖN 1 . Método de instalaciån• 2. Distancia de proyecciön y tamaöo• 3. Instalar en eI techo Encender eI proyector•• Ajuste de imagen 1.
- Seite 85 Profesional de Por Vida YABER Estimado cliente, iMuchas gracias por apoyar a YABER! Lea este manual detenidamente antes de utilizar el proyector. Si tiene algün problema, envie un correo electrånico con su nümero de pedido y el proble- support@yabertech.com. Brindaremos una soluciön...
-
Seite 86: Lista De Empaque
Lista de empaque Proyector YABER V7*1 Control remoto*l Cable de alimentaciön*l Cable HDMI*I 3-en-l Cable Cubierta de la lente*l... -
Seite 87: Resumen Del Proyector
Support@yabertech.com Resumen del proyector... - Seite 88 Support@yabertech.com 1/18 Tornillo de ajuste de altura Ajuste la altura de Ia pantalla de proyecciön Ventana Recibiendo Ia serial infrarroja Lente del proyector Lente de vidrio con revestimiento Optico Puerto de alimentaciön Conecte el cable de alimentaciön Enchufe para auriculares Salida de auriculares de 3,5mm...
-
Seite 89: Resumen Del Remoto Contro
Support@yabertech.com Resumen Remoto Control Poder 2 Fuente 3. Tecla direccional 4 Menü 5 6D Funciön 6. Volumen Volumen 8. Silencio Pågina de inicio 10 Confirmar/Reproducir pausar el video 11 Regreso Un abrazo 13 El siguiente. Encender/a a ar el ro ector Seleccione la fuente de entrada (HDMI 1, HDMI 2,AV) Se utilizan para ajustar la configuraciön... - Seite 90 Support@yabertech.com Nota: I.lnstale 2 baterias en eI control remoto antes usar. combine baterias nuevas y Viejas en el control remoto, ya que esto puede causar un funcionamiento debido a una fuente de alimentaciön insuficiente. 2.Cuando use eI control remoto, asegürese de que el transmisor de sefial del control remoto apunte al receptor...
-
Seite 91: Distancia De Proyecciön Y Tamaöo
Support@yabertech.com La lente del proyector debe instalarse en los ejes de simetria izquierdo derecho de a pantalla para evitar la distorsiön trapezoidal de las imågenes izquierda y derecha 2.La distancia entre el proyector y Ia pantall Si desea obtener un tela de proyecciön gratuita, contåctenos a través de... -
Seite 92: Encender Ei Proyector
Support@yabertech.com A. Compre un soporte universal con tornillo M5*II para instalar el proyector en el techo. B. Instale el proyector en el soporte a través de los orificios para tornillos en a parte inferior del proyector. Encender eI proyector A. Presione eI botön en el control remoto o proyector, el indicador LED se pondrå... -
Seite 93: Ajuste De Enfoque
Support@yabertech.com 1.Ajuste de enfoque Anillo de Enfoque Lentamente gire el anillo de enfoque. A1mismo tiempo, verifique cuidadosa- mente el punto de enfoque, el mejor punto de enfoque para la lente seria donde la imagen sea mås clara Nota: Si todavia estå borroso, intente ajustar la distancia de proyecciön 2.Funciön de correcciön trapezoidal... - Seite 94 Support@yabertech.com Modo I. Mantenga presionado el boton 6D en el control remoto (o presione mantenga presionado el botön 0K en el proyector) para ingresar al modo 2 de correcciön trapezoidal 2.Ajuste la direcciön de proyecciön, la pantalla de proyecciön se restaurarå automåticamente a un rectångulo 3.
-
Seite 95: Configuraciön Del Proyector
Support@yabertech.com CONFIGURACIÖN DEL PROYECTOR La pagina de inicio del proyector es la siguiente: HOME HDMI HDMI Setting Duplicar pantalla MÜSICA CINE TEXTO 1 .SeIeccione Ia fuente Ia seöal de entrada Seleccione la fuente de sefial de entrada deseada (HDMI 1 / HDM12 / AV) en la pågina de inicio. - Seite 96 Support@yabertech.com Menü Funciön Seleccione el modo de reproducciön (reproducciön de directorio / ciclo ünico / bucle de directorio) Cambiar al video anterior Fast Backward, rebobina eI video råpidamente mientras lo reproduce Ia velocidad de rebobinado varia de 2X a 32X Reproducir o pausar el video actual Avance råpido, empuja el video para avanzar råpidamente mientras 10 reproduce...
-
Seite 97: Conexiön Inalåmbrica
Cualquier pregunta, no dude en ponerse en contacto con YABER a través de Support@yabertech 3.1 .iOS de Cast (por Dispositivos iOS) 1 Vaya a la pågina de inicio - Seleccione el menü [Duplicar pantalla] - Selecci- one el menü... - Seite 98 Support@yabertech.com 2. Regresar au menü [Duplicar pantalla] - Seleccione el menü [iOS Cast] - Presione eI boton 0K para ingresar al menü [iOS Cast]. Releja tu iPhone' i Pado iPodtouch 'CrS 3. Seleccione eI menü [Configuraciön] en su dispositivo iOS - Encienda Ia funciön [Wi-Fi] - Conecte su dispositivo iOS a la misma red doméstica con eI proyector.
- Seite 99 Support@yabertech.com Wireless Projection Wireless Projection Available devices gwailable devices V7-AnCast-6688 CANCEL DISCONNECT HELp CANCEL 3.En su dispositivo Android, toque [Configuraciön] [WLAN] - Encienda [Wi-Fi], conecte el WiFi de su hogar. Nota: I. Las diferentes marcas de teléfonos Android tienen diferentes operaciones para seleccionar Pantalla duplicada...
-
Seite 100: 4 Duplicaciön De Pantalla Con Cable (Para Dispositivos Android)
Support@yabertech.com 3.4 Duplicaciön de pantalla con cable (para dispositivos Android) 1 Vaya al menü [Duplicar pantalla] - Seleccione el menü [Miracast] Presione el botön 0K para ingresar al menü Duplicaciön de pantalla con cable de Android. Miracast 2. Conecte el cable original de su equipo Android al puerto USB-T 3. -
Seite 101: Menü De Configuraciön
Bluetooth y los Airpods, pero no los teclados Bluetooth ni Ios teléfonos Bluetooth. 2.Si tiene alguna pregunta, no dude en enviar un correo electrönico a YABER a través de support@yabertech.com 5.Menü de configuraciön 1. Seleccione el menü [Setting] en la pågina de inicio del proyector. -
Seite 102: 1 Menu Imagen
Support@yabertech.com 5.1.MENÜ IMAGEN MENU IMAGEN FUNCIÖN MODO Mechl_m, Suave,Usuano,Intenso Cambiar entre el color Modo imagen Usuario,Frio, Medium,Calido Cambiarentre el modode imagen Temp del Co or Proporciön de aspecto Configurar a relaciån de aspecto de la imagen Reducciön de ruido Off/Baj0/Medioe/AIt0 Ajuste de ruido Reducir eI tamano de a panta Ia Redßrel tamahode lapantaladel IT/o al... - Seite 103 Support@yabertech.com 5.1.2 Projection Direction Pantalla Proyector Proyector Pantalla I .Proyecdön frontal suspendida deltecho 2.Proyecciön trasera suspendida del techo Pantalla Proyector Proyector antalla 3 Proyecciön frontal en el escritorio 4. Proyecciön posterior en el escritorio 5.1.3 Configuraciön de Correcciön de 4 puntos Cuando la pantalla de proyecciön no es rectangular, se puede ajustar mediante la correcciön trapezoidal...
- Seite 104 Support@yabertech.com OKLSeIect : Continüe presionando el botön 0K en el control remoto o proyector, hasta que aparezca el icono de posicionamiento en el punto deseado, luego suelte el botön inmediatamente. 'Ajustar Presione las teclas de flecha del control remoto o del proyector para ajustar los paråmetros horizontales o verticales...
- Seite 105 Support@yabertech.com Siga presionando el botön del control remoto o del proyector para elegir Hor. / Ver. Correcciön o Rotar, luego suelte el botön inmediata mente. — : Presione elbotön delcontrol r emoto o delproyector para ajustar los paråmetros horizontales o verticales. Reinidar : Pulse las teclas del mando a distancia para restaurar los...
-
Seite 106: 2 Menu Sonido
Support@yabertech.com 5.2 MENU SONIDO MENÜ SONIDO FUNCIÖN MODO Configurar eI modo de sonido Modo de sonido Eståndar Ajustando eI equilibrio -50-+50 Equilibrio Sonido envolvente Apagado / Rodear Configurar el modo envo vente 5.3 MENÜ HORA MENÜ HORA FUNCIÖN MODO Reloj Tempdormir ApagadQ'I 30min.'60min,'90min... -
Seite 107: Actuaiizaciön
Support@yabertech.com 6.ActuaIizaciön del Sistema Duplicar pantalla HOME CONFIGURACIÖN FUNCIÖN MODO SISTEMA Configurar el idioma que se Inglés,francés, dioma muestra en eI sistema italiano,espanol, etc duplicaciön de pantalla Actualizaciån oca para la configuraciån Actualizaciön local Please press 0K del sistema de duplicaciån de panta la Configuraciön del sisterna de duplicaciÖn Actualizaciön linea... -
Seite 108: Conectarse Con Otros Dispositivos
Otros Dispositivos EI YABER V7 proyector tiene 6 interfaces, puertos HDMI * 2 / puertos USB * 2 / salida de auriculares de 3,5 mm / Salida AV. Seleccione eI puerto de conexiån correcto para conectar su dispositivo (PC, Teléfono, Reproductor de DVD, Barra de Sonido, USB, PS4, etc.) - Seite 109 Support@yabertech.com 2.Conecte Ios Dispositivos a través de los puertos HDMI I) Conecte su TV stick o computadora portåtil a cualquier puerto HDMI del proyector; 2) Ingrese a Ia pagina de inicio para seleccionar eI HDMI I o HDM12 correspondiente como fuente de seöal. 3.Conecte al reproductor de DVD...
-
Seite 110: Apagado Seguro
Support@yabertech.com APAGADO SEGURO I. Presione el botön C) del proyector o del control remoto. 2. Desenchufe el cable de alimentaciön del proyector. 3. Cubra la lente y guarde el proyector en un lugar fresco y seco GARANTIE iMuchas gracias por su compra y apoyo! Ofrecemos una garantia de 3 afios para el proyector V7. - Seite 111 Support@yabertech.com 4. Pantalla azul, sin imagen, sin sonido. conectado correctamente el cable de entrada? 5. Imagen correcta, sin sonido. 1) &Estå conectado correctamente el cable de entrada? 2) Determine si eI volumen estå al minimo o en silencio. 3) El sistema de decodificaciön no coincide 6.
- Seite 112 Support@yabertech.com KATALOG LEBENSLANGE PROFESSIONELLE UNTERSTÜTZUNG VON YABRET ••105 .105 TRINKGELD LISTE PAKETE BEAMER SPEZIFIKATIONEN ÜBERSICHT DER BEAMEREN ..107 FERNBEDIENUNG ..110 INSTALLATION ..110 1 . Die Installationsmethode•• 2. Projektionsabstand und -größe • 111 3. Montage an der Decke .112 STARTEN BEAMER -112 IMAGE ADJUSTMENT...
-
Seite 113: Lebenslange Professionelle Unterstützung
Sie uns bitte, damit das Problem behoben werden kann. Und geben Sie uns die Chance, uns zu verbessern. Wir garantieren Ihnen eine zufriedenstellende Lösung Vielen Dank für Ihr Verständnis! Yaber Service Team Trinkgeld: 1. Stellen Sie den Beamer nicht in einem... -
Seite 114: Liste Der Pakete
Bildqualität beeinträchtigen. Schmutzige Linsen Wischen Sie die Oberfläche der Glaslinse mit einem weichen Baumwolltuch ab. Verwenden Sie keine harten Tücher Oder Schleifmittel Liste Pakete Fernbedienung * 1 YABER V7 Beamer* Netzkabel HDMI Cablte*l Drei-in-Eins-AV-Kabel Objektivdeckel Reinigungstuch Bedienungsanleitung Reinigungskit Beamer Spezifikationen Modell Aboriginal Korrektur 6D Keystone Correction &... -
Seite 115: Übersicht Der Beameren
Support@yabertech.com Übersicht der Beameren... - Seite 116 Support@yabertech.com 1/18 Höhenverstellschraube Stellen die Höhe Beamers Infrarot-Signalempfänger Infrarot-Fenster Beamer Objektiv Optische beschichtete Glaslinse Anschlüsse für Stromkabel Anschlüsse für Stromkabel Kopfhörerbuchse 3,5 mm Kopfhörerausgang 7/10 HDMI Port HDMI 1 Eingang, HDM12 Eingang USB-Anschluss Interface USB-Anschluss unten: USB-T-AnschIuss Hafen Audio Lautsprecher Stereo 5w Sprecher Lüftungsschlitze...
-
Seite 117: Fernbedienung
Support@yabertech.com Fernbedienung Netzschalter 2. Quelle Schlüssel Pfeil 4. Speisekarte Lautstärke erhöhen Lautstärke runter 8 Stumm Zurück Home-Menü 10. Bestätigungsschlüssel (Wiedergabe und Pause) 11. Rückkehr 12. Bisherige 13. Nächster Ein-/Ausschalten Stromversor Wählen Sie eine Eingangssignalquelle Parameter zur Einstellung des Beamers im Menümodus Ziehen Menü... -
Seite 118: Installation
Support@yabertech.com Anmerkungen: 1). Vor Gebrauch 2 AAA-Batterien an die Fernbedienung anbringen. Kombinieren keine neue Batterie mit einer alten Batterie an der Fembedi- enung, da eine unzureichende Stromversorgung zu einem Betriebsausfall führen kann 2). Achten Sie bei Verwendung der Fernbedienung darauf, dass der Signalge- ber der Fernbedienung auf den Infrarot-Signalempfänger des Beamers zielt. -
Seite 119: Projektionsabstand Und -Größe
Support@yabertech.com Halten Sie den Beamer in einer Höhe, in der seine Linse axialsymmetrisch zur Leinwand ist. Wenn dies nicht möglich ist, verwenden Sie die Keystone-Kor- rekturfunktion, um das projizierte Bild anzupassen. 2.Projektionsabstand und -größe Wenn Sie eine kostenlose Projektionswand wünschen, kontaktieren Sie uns bitte unter Support@yabertech.com. -
Seite 120: Starten Sie Den Beamer
Support@yabertech.com A.Bitte kaufen Sie einen UniversalBeamer für die Deckenmontage; B. Entfernen Sie die vier Gummimatten an der Unterseite des Beamers Sie werden die Schraubenlöcher sehen, montieren Sie die Decke M5*11 mm Schrauben und montieren Sie Sie. Starten Beamer 1)Drücken Sie die Power-Taste auf der Fernbedienung Oder dem Beamer und die Anzeigeleuchte Wird blau. -
Seite 121: Automatische 6D-Trapezkorrekturfunktion
Support@yabertech.com Drehen Sie den Fokusring langsam. ÜberprüfenSie gleichzeitigden Fokuspunkt sorgfältig. Der beste Fokuspunkt für das Objektiv wäre dort, wo Bild klarsten ist. Hinweis: Wenn es immer noch verschwommen ist, versuchen Sie bitte, den Projektionsabstand anzupassen 2.Automatische 6D-Trapezkorrekturfunktion Schalten Sie den Projektor ein. Stellen Sie sicher, dass das Objektiv (A) zum Bildschirm / zur Wand (B) zeigt Modus 1 Drücken Sie einmal die 6D-Taste auf der Fernbedienung, um den automa... -
Seite 122: Projektor Einrichten
Support@yabertech.com 2. Passen Sie die Projektionsrichtung an. Der Projektionsbildschirm Wird automatisch in einem Rechteck wiederhergestellt. 3. Drücken Sie lange die 6D-Taste auf der Fernbedienung, um den 6D-Trapez korrekturmodus zu verlassen Hinweis: I. In Modus I und Modus 2 funktioniert die automatische 6D-Trapez- korrektur automatisch. -
Seite 123: Usb Disk Input Mode
support 01@yaberauto.com Support@yabertech.com 2. USB Disk Input Mode 2.1. Abspielen von Filmen/Musik/Fotos/TXT im USB.Stick.lnp ut-Modus 1). Geben Sie die USB-Festplatte ein, wählen Sie [USB] auf der Startseite und geben Sie ein; 2). Wählen Sie die option [Film/MusiWFoto/TXT] 3). Wählen Sie die gewünschte Datei im USB-Stick (Oder Ordner in Unterord ner) und drücken Sie die Schaltfläche [0K], um Sie abzuspielen. -
Seite 124: Wi-Fi Einstellungen
Verbindung in der Nähe des Beamers befindet. Es Wird eine Entfernung von weniger als 1 m empfohlen. ($)Aufgrund der Kompatibilität unterstützen einige mobile Geräte die Bildschirmspiegelung möglicherweise nicht. @Bei Fragenwenden Sie sich bitte an Yaber per E-Mail an support@yabertech com... -
Seite 125: 1 Ios Cast (Fur Ios Gerate)
Support@yabertech.com 3.1 IOS Cast (für iOS Geräte) I .Gehen Sie zu Home-Wählen Sie das Menü [ Bildschirmspiegelung -Wählen Sie das Menü [ die Einstellungen ] - Wählen Sie das Menü [ Netzw erkeinstellung] - Öffnen Sie die WiFi Funktion-Wählen Sie Ihr Heim-WiFiaus Liste -Verbinden V7-Beamer... -
Seite 126: 2 Miracast
Support@yabertech.com 3.2.Miracast (für Android-Geräte) I .wählen Sie die Funktion [ Bildschirmspiegelung ]-wählen Sie das Menü [ Miracast ]-drücken Sie die Schaltfläche 0K, um das Menü [ Miracast Setting ] zu öffnen Miracast 2 Wählen Sie das Menü [ Settings ] auf Ihrem Android-Gerät-wählen Sie die Funktion [ Screen mirroring ]-wählen Sie Ihren Miracast-Empfänger mit dem Namen [ V7-AnCast-XXXX]-lhr Android-Gerät Bildschirm Wird auf der Projek- tionswand nach 3 Sekunden angezeigt. - Seite 127 Support@yabertech.com 3.3 Kabelgebundene Bildschirmspiegelung (für iOS-Geräte) I Gehen Sie zum Menü [Bildschirmspiegelung] - Wählen Sie das Menü [iOS Cable Cast] - Drücken Sie die 0K Taste, um das Menü [Wired Screen Mirroring Setting] aufzurufen. iOS Cable Cast 2. Stecken Sie das Originalkabel Ihres IOS-Geräts in den USB-T-Anschluss. 3 Zeigen Sie mit "Vertrauen Sie diesem Gerät?"...
-
Seite 128: Bluetooth Einstellungen
Warten Sie einige Sekunden, bis eine erfolgreiche Bluetooth-Verbindung hergestellt ist. HOME Anmerkungen: 1 Der V7-Beamer ist kompatibel mit Bluetooth-Headsets, Bluetooth-Laut- sprechern und Airpods, aber nicht mit Bluetooth -Tastaturen Oder Bluetooth -Telefonen 2. Wenn Sie Fragen haben, wenden Sie sich bitte an Yaber per E-Mail an: support@yabertech.com... -
Seite 129: Projektor-Einsteiiungs
Support@yabertech.com 5.Projektor-EinsteIIungs menü I .Select [Setting] menu on the projector's home page HOME 2.Drücken Sie die Taste "4/> '. Das Menü wechselt "SONDER- FUNKTIONEN" 3 Wählen Sie die Einstelloberfläche und wählen Sie mit den Tasten "A / V" das gewünschte Element 4/>' to adjust the item... -
Seite 130: Anzeigegröße Reduzieren
Support@yabertech.com 5.1.1 Anzeigegröße reduzieren Schritt 1: Drücken Sie die V Taste, um das Menü [Anzeigegröße reduzie- ren ] auszuwählen, und drücken Sie dann die untere Taste [ 0K l, um das Untermenu aufzurufen. Schritt 2: Durch Drücken der V Taste auf der Fembedienung Oder dem Projektor können Sie die Höhe und Breite der Projektionsgröße um bis zu reduzieren... -
Seite 131: Fourpoint-Korrektureinstellung
Support@yabertech.com 5.1.3 FourPoint-Korrektureinstellung Wenn die Projektion bildschirm nicht rechteckig ist, kann sie durch 4-Punkt-Trapezkorrektur angepasst werden Schritt 1: Drücken Sie die Taste, um das Menü [FourPoint-Korrekturein- stellung] auszuwählen, und drücken Sie dann unten auf [0K], um das Untermenü aufzurufen Schritt 2: Halten Sie die 0K Taste auf der Fembedienung Oder dem Projektor gedrückt, um den Punkt auszuwählen Schritt 3: Drücken Sie die Pfeiltasten auf der Fernbedienung... - Seite 132 Support@yabertech.com 5.1.4 Keystone Correction Setting Schritt 1: Drücken Sie die Taste, um das Menü [Einstellung der Trapezkor- rektur] auszuwählen, und drücken Sie dann auf [0K], um das Untermenü aufzurufen. Schritt 2. Wenn das projizierte Bild als (1) angezeigt wird, drücken Sie die Taste auf der Fernbedienung Oder dem Beamer, um den Vertikalparameter (-50 —O) zu erhöhen, bis das projizierte Bild (2) realisiert ist...
- Seite 133 Support@yabertech.com 5.1.5 Infinity Zoom Setting Schritt 1. Drücken Sie die V Taste, um das Menü [Infinity Zoom Setting] auszuwählen, und drücken Sie dann die [0K] -Taste, um das Untermenü aufzurufen. Schritt 2: Durch Drücken der V Taste auf der Fernbedienung Oder dem Projektor können Sie die Höhe Oder Breite der Projektionsgröße um bis zu 70% reduzieren.
-
Seite 134: 4 Optionsmenü
Support@yabertech.com 5.4 OPTIONSMENÜ OPTIONSMENÜ MODUS FUNKTION France, Italian, Spanish,etc Richten Sie die in der Bedienober OSD Sprache English, fläche angezeigte Sprache ein BT-EinstelIung On/Off Verbinden Sie die Bluetooth-Geräte Wiederherstel Setzen Sie den Projektor zurück Farbspektrum Auto Aktua isieren Sie die Softwareversion Software Updates (USB) Update software des Projektors... -
Seite 135: Systemeinstellungen
Please press 0K sanvændung und die Einste lung des wiederherstellen Bildsdnfinspiegelungssysterns Wieder her Signalleitungsanschluss Der Yaber V7-Beamer verfügt über 6 Schnittstellen, HDMI-Port * 2/USB-Port * 2/3,5mm Kopfhörerausgang/AV-Ausgang. Bitte wählen Sie den richtigen Anschluss, um Ihr Gerät (PC, Telefon, DVD-Player, Soundbar, USB, PS4 usw.) anzuschließen. -
Seite 136: Anschluss An Dvd Player
Support@yabertech.com 3.AnschIuss an DVD-Player Vemenden Sie das im Lieferumfang enthaltene 3-in-1AV-Kabel I)Schalten Sie Ihren DVD-Player und Beamer ein; 2)Verbinden Sie den farbigen weiblichen Stecker mit dem Cinch-Kabel des DVD-Players mit dem 3-in-IAV-KabeI im Paket; Schließen Sie den schwarzen Stecker an den AV-Port des Beamers an, gehen Sie zur Startseite und wählen Sie "AV"... -
Seite 137: Troubleshooting
Support@yabertech.com Troubleshooting Die unten aufgeführten Probleme können während des Betriebs Ihres Beam- ers auftreten. Bitte beziehen Sie sich auf mögliche Faktoren, die zu Proble- men bei der Fehlerbehebung führen können. 1. Die Anzeige funktioniert nicht, wenn der Netzschalter eingeschaltet ist. 1) Die Stromversorgung kann schlecht angeschlossen sein. - Seite 138 support 01@yaberauto.com Support@yabertech.com 2.7>5 3.1 iOS F(iOSiJ 3.2 Miracast (Androidi/ XdRØ%å) 4. Bluetooth • 1. uSB&ØEfö 2. HDMI*—...
- Seite 139 support 01@yaberauto.com IJ 10 -1-6 08 +6...
- Seite 140 g:lä {fifi IJ ffJ Ill* å4J...
- Seite 141 Support@yabertech.com 1920*1080P —2>75' YRi-L 16 7M Full 50-2004 1 7—6M ACIOO-240V 2 18Kg JPG/JPEG/BMP Headphone jacWAV /PNG e-it7rdJV 3GP/AVI/FLV/MP4/MPG/VOB/TS/M2TS/DAT/MKV MP3/APE/AAC/FLAC/OGG/WAV/WMA/MlD/DTS/M4A Amazon Fire TV,...
- Seite 142 Support@yabertech.com —gg130)ähBÉ...
- Seite 143 Support@yabertech.com 1/18 a'-x55—LDX 3.5mm Output HDMI 1 input / HDMI 2 input 7/10 Fire TV Stickt&CDi/ Audio input xe—fi— e—fi— ßfi%—,' 3. 01<7fi5Y _E/F/É/É...
- Seite 144 Support@yabertech.com aY155 fifi .1¯...
- Seite 145 Support@yabertech.com chü: I .}QYfiit Support @ yabertech.com...
- Seite 146 Support@yabertech.com 16:9 50" 70" 100" 120" 150" 200" 5*llmm...
- Seite 147 1- 4 IQ OH 1 42...
- Seite 148 Support@yabertech.com æ—F1: äj6Dåh;...
- Seite 149 Support@yabertech.com en-ee c-c<fdtoo...
- Seite 150 Support@yabertech.com :A1/ HDMII HDM12 2.USBÄiJæ— 2.1.USBX7tæ—...
- Seite 151 Support@yabertech.com TvSetting fifjØL+JlÄllctJJblg>c TVSetting (T VH...
- Seite 152 Support@yabertech.com -t L/5Ya7 120Hz 500Hz 1.5KHz 5KHz 1 OKHz 3.WlFlöE YÄiL&EC -xn—lc- @CÄEWIFID2.4 Support@yabertech.com...
- Seite 153 Support@yabertech.com lucmos Cast'* iPhone. iPad. iPod 3 3. iOS7J...
- Seite 154 Support@yabertech.com 3.2.Miracast (Android* JVI OK7fi5 ¯ Miracast STEP V7-AnCast-XXXX Wireless projection Wireless projection Available devioes Available devices V7-AnCast-6688 V7 Ancast-6688 Cmnected CANCEL DISCONNECT HELP CANCEL —E STEP2GÜCfc« AndroidiJ rWi-FiJ I) — > J/rWLANidÄj174 J/rx...
- Seite 155 Support@yabertech.com (iOS-i/ VfÄO)b) — < 9) 51) — iOS cable cast 2.10siJ Miracast (3) [USBF/...
- Seite 156 Support@yabertech.com 4.BIuetooth 51)y5...
- Seite 157 Support@yabertech.com (j)BIuetoothAvy BluetoothÄ I.IÆZ>C" 4" 3."A/V...
- Seite 158 Support@yabertech.com 5.1.dAfi 100% -30-+30...
- Seite 159 Support@yabertech.com Äiy72: 500/0 /J -C REX—L 5.1.2...
- Seite 160 Support@yabertech.com 5.1.3 Fy-II F— iÆ$R: I) 5—...
- Seite 161 Support@yabertech.com 5.1.4 Fy-II 4 —Äl_WitiE step step chü: 1.7y...
- Seite 162 Support@yabertech.com 5.1.5 ¯ _50—+50...
- Seite 163 Support@yabertech.com Bluetooth Bluetooth 7/ Y7SJ...
- Seite 164 Support@yabertech.com 6.Ä51) OK&FT OK&FT OKä-#j...
- Seite 165 Support@yabertech.com in/Audio (PCs PS4tE) Fire TV 1080P...
- Seite 166 Support@yabertech.com @Video OLeft AV port Right e—fi Audio AUX port e5*U)
- Seite 167 Support@yabertech.com Support@yabertech.com eFi- (Aft Y—A) e-Ftø Ft 73...
- Seite 168 Support@yabertech.com e-Ftø F&PCME-— (HDCPtB...