xantron PRO-SS400 Installationsanleitung

Verwandte Anleitungen für xantron PRO-SS400


Inhaltszusammenfassung für xantron PRO-SS400
- Seite 1 INSTALLATION MANUAL Ultra-slim Fixed Wall Mount CAUTION: DO NOT EXCEED RATED LISTED WEIGHT. SERIOUS INJURY PROPERTY DAMAGE MAY OCCUR! 200000 55" 300x300 PRO.SS400 55kg 400x200 400x400 RATED PRO-SS800 70" 400x200/400x400 65kg (14$Ibs) MA x 600x400/800x400 RATED...
- Seite 2 NOTE: Read the entire instruction manual before you start installation and assembly. A WARNING • Do not begin the installation until you have read and understood all the instructions and warnings contained in this installation sheet. If you have any questions regarding any of the instructions or warnings,...
-
Seite 3: Checklist
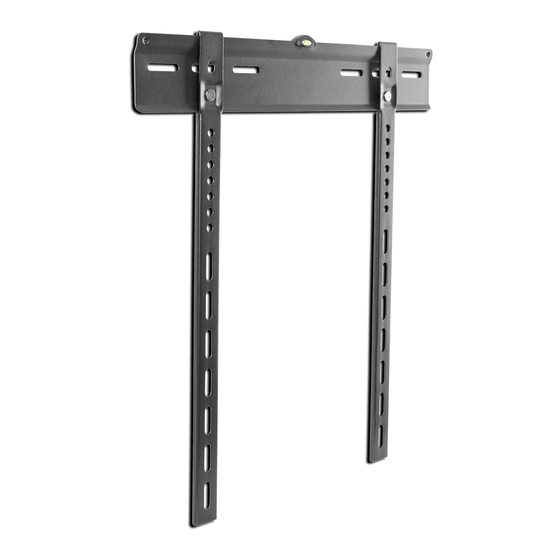
Component Checklist IMPORTANT: Ensure that you have received all parts according to the component checklist prior to installation f any parts are missing or faulty, telephone your local distributor for a replacement wall plate (xl) adapter bracket (x2) Package Oznn M5x14 (x4) M6x14 (x4) M8x20... - Seite 4 la. For Wood Stud Wall Mounting 55mm ø 4.5mm (ø 3/16") Find mark exact location of mounting holes Drill pilot holes Screw the wall plate onto wall WARNING • Make sure that mounting screws are anchored into the center of the studs. The use of a stud finder is highly recommended •...
- Seite 5 1b. For Solid Brick and Concrete Mounting 60mm I Omm Mark exact location mounting holes Drill pilot holes Screw the wall plate onto wall A WARNING Installers must verify that the supporting surface will safely support the combined weight of the equipment and all attached hardware and components...
- Seite 6 2. Installing the Adapter Brackets Top of the TV 2-1 For Flat Back Screens M-A/M-B/M-C Position the adapter brackets as close as possible to the middle of the screen. • Screw the adapter brackets onto the TV. Tighten all screws but do not over tighten.
- Seite 7 2-2 For Bump-out or Recessed Back Screens Note: Choose the appropriate screws, washers and spacers (if necessary) according to the type of screen. • Position the adapter brackets as close as possible to the center of the TV. • Screw the adapter brackets onto the TV.
- Seite 8 3. Hanging the TV onto the Wall Plate wall Do not release the TV until the adapter bracket have securely hooked onto the wall plate Maintenance • Check that the bracket is secure and safe to use at regular intervals(at least every three months) •...
- Seite 9 0-3 xvu (sqlÉVL) ootxoowoovxoog ootxoowoozxoov 008SS-OUd ootxoo€/00ZX00Z ootxoot (sqliZL) oozxoot OOVSS-OUd ootxoo€ oozxooz 30UVHO AliOVdVO 8-3SSVd30 swwar AN 'NOUNALLV lelde.:un A1 uoddns @UOJ2Uex N011V11VISNl.a SNOILO(ÄULSNI...
- Seite 10 A ATTENTION Ne pas commencer l'installation avant d'avoir lu et compris la notice d'installation. En cas de question, veuillez vous adresser å votre commerqant. Ce produit n'est prévu que pour l'usage décrit dans la présente notice d'utilisation. Une installation inadaptée peut causer des blessures et des dommages.
- Seite 11 Checklist des composants IMPORTANT: Veuillezvousassurerd'avoir requtous les produits.Si ce n'est pasle cas,veuillez contacter votre commergant. (x2) Package M5x14 (x4) M6x14 (x4) M8x20 (x4) M6x30 (x4) M8x30 (x4) washer (x4) Package ST6.3x55 (x4) D6 (x4)
- Seite 12 la. Pour le montage sur des murs en bois 55mm (2.2') ø 45mm (ø 3/16")
- Seite 13 1b.Pour le montage sur des murs en briques ou en béton 60mm I Omm ATTENTION Assurez-vous que la surface de soutien supporte en sécurité le poids combiné de l"équipement et de tous les matériaux et composantes associés.
- Seite 14 2. Installer le support 2-1 Pour les moniteurs avec le dos plat M-A/M-B/M-C...
- Seite 15 2-2 Pour les moniteurs sans un dos plat...
- Seite 16 3. Installer le moniteur...
- Seite 17 INSTALLATIONSANLEITUNG TV Wandhalterung ultraflach ACHTUNG: DIE TRAG- KRAFT HALTERUNG NIEMALS ÜBERSCHREITEN 200000 55" 300x300 PRO-SS400 55kg 400x200 400x400 RATED PRO-SS800 70" 400x200/400x400 65kg (14$lbs) MA x 600x400/800x400 RATED...
- Seite 18 A WARNUNG Beginnen Sie die Installation nicht, bevor Sie die Installationsanleitung gelesen und verstanden haben. Bei Fragen wenden Sie sich an Ihren Händler. Dieses Produkt ist nur für den in dieser Anleitung beschriebenen Zwecke geeignet. Unsachgemäße Installation kann Schäden und Verletzungen verursachen.
- Seite 19 Komponenten-Checkliste Stellen Sie sicher, dass Sie alle Produkte erhalten haben. Ansonsten kontaktieren Wichtig: Sie bitte Ihren Händler. (x2) Package Oznn M5x14 (x4) M6x14 (x4) M8x20 (x4) M6x30 (x4) M8x30 (x4) washer (x4) (x8) Package ST6.3x55 (x4) D6 (x4)
- Seite 20 la. Für die Montage an Holzwänden 55mm (2.2') ø 4.5mm (ø 3/16")
- Seite 21 1b. Für die Montage an Backstein oder Betonwänden 60mm I Omm A WARNUNG Bitte stellen Sie sicher, dass die tragende Oberfldche das Gewicht dieses Produktes inklusive angebrachte Gerdte trägt.
-
Seite 22: Halterung Montieren
2. Halterung montieren 2-1 Für Monitore mit flacher Rückseite M-A/M-B/M-C... - Seite 23 Für Monitore ohne flache Rückseite...
- Seite 24 3. Monitor an die Wandplatte hängen...
- Seite 25 ISTRUZIONI D'INSTALLAZIONE Supporto TV ultra piatto ATTENZIONE: SUPERARE CAPACITA CARICO 200000 55" 300x300 PRO-SS400 55kg 400x200 400x400 RATED PRO-SS800 70" 400x200/400x400 65kg (14$lbs) MA x 600x400/800x400 RATED...
- Seite 26 A ATTENZIONE Non iniziare l'installazione prima di aver letto e compreso la guida all'installazione. In caso di domande si prega di rivolgersi al commerciante. Questo prodotto é adatto esclusivamente agli scopi descritti nel presente manuale. Un'installazione impropria potrebbe causare danni o ferite.
- Seite 27 Lista di controllo die componenti IMPORT ANTE: Assicurarsidi averricevutotutti i prodotti.In casocontrariosi pregadi contattare il commerciante. (x2) Pacchetto Oznn M5x14 (x4) M6x14 (x4) M8x20 (x4) M6x30 (x4) M8x30 (x4) washer (x4) (x8) Pacchetto ST6.3x55 (x4) D6 (x4)
- Seite 28 la. Per l'installazione su pareti in legno 55mm (2.2') ø 4.5mm (ø 3/16")
- Seite 29 1b.Pour montaggio su pareti di mattoni o calcestruzzo 60mm I Omm ATTENZIONE Assicurarsi di aver ricevuto tutti i prodotti. In caso contrario si prega contattare il commerciante.
- Seite 30 2. Installare Ia staffa 2-1 per i monitor con schiena piatta M-A/M-B/M-C...
- Seite 31 2-2 Per i monitor senza schiena piatta...
- Seite 32 3. Installare Monitor...