Werbung
Verfügbare Sprachen
Verfügbare Sprachen
Werbung
Inhaltsverzeichnis

Inhaltszusammenfassung für Bose ControlSpace EP40-D
- Seite 1 ControlSpace EP40-D ® 4-input Dante Endpoint ™ Installation Guide...
-
Seite 2: Important Safety Instructions
Important Safety Instructions pro.Bose.com The symbols below are internationally accepted symbols that warn of potential hazards with electrical products. This symbol, wherever it appears, alerts you to the presence of un-insulated dangerous voltage inside the enclosure – voltage that may be sufficient to constitute a risk of shock. - Seite 3 X: Indicates that this toxic or hazardous substance contained in at least one of the homogeneous materials used for this part is above the limit requirement in SJ/T 11363-2006. ©2015 Bose Corporation. All rights reserved. All trademarks are the property of their respective owners. English...
-
Seite 4: Instrucciones De Seguridad Importantes
Instrucciones de seguridad importantes pro.Bose.com Los siguientes son símbolos reconocidos internacionalmente que avisan de los riesgos potenciales de los productos eléctricos. Siempre que aparezca este símbolo, alerta sobre la presencia dentro del cuerpo del producto de fuentes de voltaje peligroso no aisladas, suficientes para provocar un riesgo de descarga. - Seite 5 Instrucciones de seguridad importantes pro.Bose.com 13. Cuando utilice un carrito, tenga cuidado al mover el carrito con el dispositivo para evitar que caiga y produzca daños. 14. Desenchufe el aparato si se produce una tormenta eléctrica o si no lo va a utilizar durante periodos prolongados de tiempo.
- Seite 6 X: Indica que esta sustancia tóxica o peligrosa contenida en al menos uno de los materiales homogéneos usados para esta pieza está por encima del requisito límite en SJ/T 11363-2006. ©2015 Bose Corporation. Todos los derechos reservados. Las restantes marcas comerciales pertenecen a sus propietarios correspondientes.
-
Seite 7: Instructions Importantes Relatives À La Sécurité
Instructions importantes relatives à la sécurité pro.Bose.com Les symboles internationaux ci-dessous vous avertissent des dangers potentiels inhérents aux appareils électriques. La présence de ce symbole vous met en garde contre une tension dangereuse non isolée à l’intérieur du boîtier. Celle-ci est suffisamment élevée pour présenter un risque d’électrocution. - Seite 8 X : indique que la quantité de cette substance toxique ou dangereuse contenue dans au moins un des composants homogènes de cette pièce est supérieure à la limite définie dans la norme SJ/T 11363-2006. ©2015 Bose Corporation. Tous droits réservés. Les autres marques commerciales appartiennent à leurs proprié- taires respectifs.
-
Seite 9: Wichtige Sicherheitshinweise
Wichtige Sicherheitshinweise pro.Bose.com Sie unten aufgeführten Symbole sind international anerkannt und warnen vor möglichen Gefahren durch elektro- nische Produkte. Dieses Symbol warnt Sie vor einer nicht isolierten Spannung in einem Gehäuse, die hoch genug ist, um einen Stromschlag auszulösen. Dieses Symbol weist Sie auf wichtige Betriebs- und Wartungsanweisungen in der beiliegenden Dokumentation hin. - Seite 10 Wichtige Sicherheitshinweise pro.Bose.com 12. Verwenden Sie für das Gerät nur Rollwagen, Ständer, Dreibeine, Halterungen oder Tische, die vom Hersteller zugelassen sind oder zusammen mit dem Gerät verkauft werden. 13. Falls Sie einen Rollwagen verwenden, dürfen Sie die Einheit Gerät/Rollwagen nur mit Vorsicht bewegen, damit Verletzungen beim möglichen Umkippen ausgeschlossen sind.
- Seite 11 X: Gibt an, dass dieser giftige oder gefährliche Stoff, der in mindestens einem der homogenen Materialien enthalten ist, die für dieses Teil verwendet wurden, über den Grenzwerten gemäß SJ/T 11363-2006 liegt. ©2015 Bose Corporation. Alle Rechte vorbehalten. Alle Marken sind das Eigentum der jeweiligen Inhaber. Deutsch...
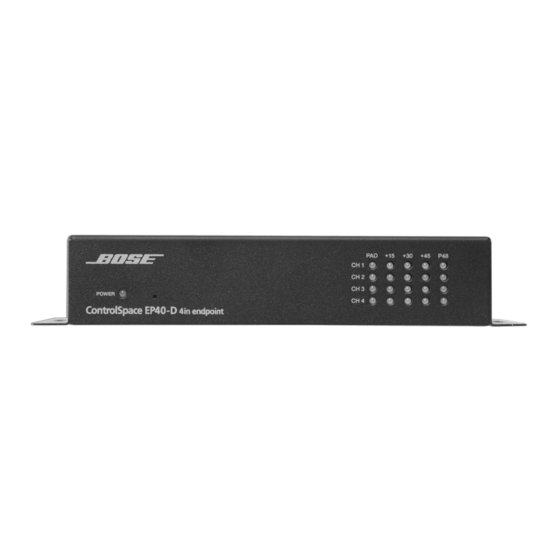
- Seite 12 Figure 1. ControlSpace EP40-D 4-input Dante endpoint front and rear views. The EP40-D features four balanced mic/line inputs using 3-pin Euroblock connectors for balanced or unbalanced connectivity. Each input supports eight different gain levels from -12dB to +45dB. Each input also...
- Seite 13 The EP40-D has two network connections allowing multiple EP40-D units to be daisy chained through a single CAT-5 home run connection to a network switch. Power can also be daisy chained. The Bose ControlSpace Designer software is used to configure ®...
- Seite 14 EP40-D Installation Guide pro.Bose.com What’s in the Box The package contains one EP40-D device. An optional 24 V DC power supply may be ordered separately. Mounting On flat mounting surface, mark screw locations through holes in the mounting flange. Secured the unit to the mounting surface using appropriately rated no.
- Seite 15 EP40-D Installation Guide pro.Bose.com Powering Using an Optional External Power Supply • Attach the “PoE + DATA” port to a spare port on the Dante network switch using a CAT-5 cable. • Attach the power supply to the power input jack and then power up the external supply.
- Seite 16 EP40-D Installation Guide pro.Bose.com ardware OnneCtiOns The EP40-D accepts either unbalanced or balanced audio devices. Refer to the following diagrams and instructions for connecting different types of audio devices. Professional grade audio cabling is recom- mended to achieve the best audio performance throughout the system.
-
Seite 17: Input From An Unbalanced Source
EP40-D Installation Guide pro.Bose.com Input from an Unbalanced Source To connect a 2-wire unbalanced source to the EP40-D, connect the positive output of the unbalanced source to the positive input of the EP40-D. Connect both the source and EP40-D input grounds together, and short the negative input of the EP40-D to ground at the input of the EP40-D. -
Seite 18: Configuration
EP40-D Installation Guide pro.Bose.com eviCe OnfiguratiOn There are two parts of the device that require software to setup. First the audio routing, and second the configurable features of the device itself. Both should be carried out using ControlSpace Designer ™... -
Seite 19: Audio Inputs
EP40-D Installation Guide pro.Bose.com eCHniCal PeCifiCatiOns Audio Inputs Input Channels Four (4) analog, balanced microphone/line level Connectors Four (4) 3.81 mm Euroblock connector, 3-pin Phantom Power +48VDC, software selectable per input Gain Settings -12 / 0 /+3 / +15 / +18 / +30 / +33 / +45 dB,... - Seite 20 Dante is a trademark of Audinate Pty Ltd. ™ © 2015 Bose Corporation The Mountain, Framingham, MA 01701-9168 USA AM744554 Rev.00...


