Inhaltsverzeichnis
Werbung
Quicklinks
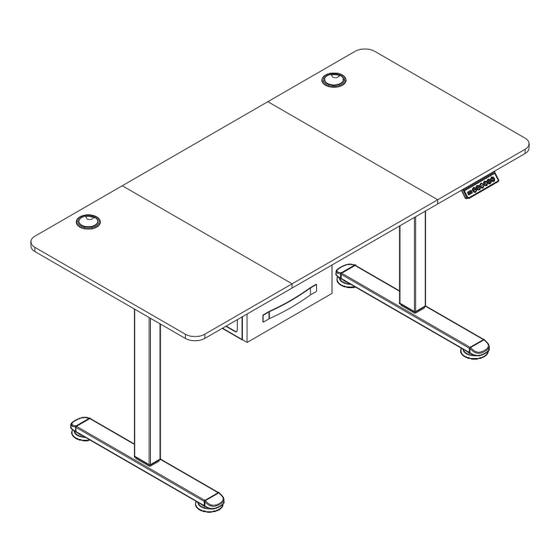
Electric Standing Desk
Elektrischer Stehschreibtisch
Bureau Debout Électrique
Escritorio Eléctrico de Pie
Scrivania Elettrica Regolabile in Altezza
Biurko elektryczne
JV10998
USA office: Fontana
AUS office: Truganina
GBR office: Ipswich
ITA office: Milano
POL office: Gdańsk
DEU office: FDS GmbH, Neuer Höltigbaum 36, 22143 Hamburg, Deutschland
FRA office: Saint Vigor d'Ymonville
THIS INSTRUCTION BOOKLET CONTAINS IMPORTANT SAFETY INFORMATION. PLEASE READ AND KEEP FOR FUTURE REFERENCE.
Werbung
Inhaltsverzeichnis

Verwandte Anleitungen für Costway JV10998


Inhaltszusammenfassung für Costway JV10998
- Seite 1 Electric Standing Desk Elektrischer Stehschreibtisch Bureau Debout Électrique Escritorio Eléctrico de Pie Scrivania Elettrica Regolabile in Altezza Biurko elektryczne JV10998 USA office: Fontana AUS office: Truganina GBR office: Ipswich ITA office: Milano POL office: Gdańsk DEU office: FDS GmbH, Neuer Höltigbaum 36, 22143 Hamburg, Deutschland FRA office: Saint Vigor d'Ymonville THIS INSTRUCTION BOOKLET CONTAINS IMPORTANT SAFETY INFORMATION.
-
Seite 2: Before You Start
Before You Start Avant de Commencer Please read all instructions carefully. Veuillez lire attentivement toutes les instructions. Retain instructions for future reference. Conservez les instructions pour vous y référer ultérieurement. Separate and count all parts and hardware. Vérifiez toutes les pièces et les accessoires. Read through each step carefully and follow the proper order. -
Seite 3: Prima Di Iniziare
Prima di Iniziare Si prega di leggere attentamente tutte le istruzioni. Conservare le istruzioni per riferimento futuro. Separare e contare tutte le parti e gli accessori. Leggere attentamente ogni passo e seguire l'ordine corretto. Si consiglia, ove possibile, di assemblare tutti gli articoli vicino alla zona in cui verranno posti in uso, per evitare di spostare inutilmente il prodotto una volta assemblato. -
Seite 4: Important Safeguards
IMPORTANT SAFEGUARDS WICHTIGE SCHUTZKLAUSELN Read these instructions carefully and retain them for future use. Lesen Sie diese Anleitung sorgfältig durch und bewahren Sie sie für den späteren Gebrauch auf. Bei der Verwendung des When using the product, basic safety precautions should always Produkts sollten immer grundlegende Sicherheitsvorkehrungen be followed to reduce the risk of injury including the following: getroffen werden, um das Verletzungsrisiko zu verringern:... -
Seite 5: Garanties Importantes
GARANTIES IMPORTANTES PRECAUCIONES DE SEGURIDAD IMPORTANTES Lisez attentivement ces instructions et conservez-les pour une Lea atentamente estas instrucciones y consérvelas para su uso utilisation future. futuro. Lors de l'utilisation du produit, des précautions de sécurité de Al utilizar el producto, deben seguirse siempre las precauciones base doivent toujours être suivies pour réduire le risque de básicas de seguridad para reducir el riesgo de lesiones, blessure, notamment :... -
Seite 6: Importanti Misure Di Sicurezza
IMPORTANTI MISURE DI SICUREZZA WSKAZÓWKI DOTYCZĄCE BEZPIECZEŃSTWA Leggere attentamente queste istruzioni e conservarle per un uso Uważnie przeczytaj całą instrukcję i zachowaj ją do futuro. późniejszego użytku. Quando si utilizza il prodotto, è necessario seguire sempre le Zawsze przestrzegaj podstawowych zasad bezpieczeństwa, w precauzioni di sicurezza di base per ridurre il rischio di lesioni, tym: tra cui le seguenti:... - Seite 7 Parts List/Teileliste/Liste des Pièces/ Motor Rod F x1 /Motorstange Lista de Piezas/Lista delle Parti/Lista części /Tige du Moteur /Varilla del motor A x1 Lift column /Asta del motore /Hubsäule /Wałek napędowy /Colonne élévatrice /Columna de elevación /Colonna di sollevamento /Regulowana noga B x1 Lift column /Hubsäule...
- Seite 8 Assembly steps/Montage-Schritte/ Étapes de Montage/Pasos de Montaje/ Passi di montaggio/Montaż 1.1 Connect the three desk tops with wooden pins as Handset + Power supply+Power cord shown in the figure; /Handgerät+Netzteil+Netzkabel 1.2 Fasten connecting blocks with M6 screws as /Combiné+Source de courant+Cordon d’alimentation shown in the figure, using the provided spanner.
- Seite 9 2.1 After the desktop are connected with wooden pins, check whether the holes are aligned as shown in the figure. 2.2 Then fix the frame fixing on the desk top with screws as shown in the figure, using the provided spanner.
- Seite 10 Assemble the frame components as shown in the figure before use; Note:1. Pay attention to the card slot direction. 2. The socket set screws at the bottom of cannot be tightened. Montieren Sie die Rahmenteile wie in der Abbildung gezeigt, bevor Sie sie verwenden;...
- Seite 11 Fix the assembled frame on both sides of the lifting column with M6 screws, using the provided spanner. Befestigen Sie den zusammengebauten Rahmen auf beiden Seiten der Hubsäule mit M6-Schrauben unter Verwendung des mitgelieferten Schraubenschlüssels. Fixez le cadre monté des deux côtés de la colonne de levage avec des vis M6, en utilisant...
- Seite 12 Then install the two side brackets with M6 screws, Fix the base on the lifting column with M6 screws as using the provided spanner. shown in the figure, using the provided spanner. Montieren Sie dann die beiden Seitenhalterungen mit Befestigen Sie die Basis mit M6-Schrauben an der M6-Schrauben unter Verwendung des mitgelieferten...
- Seite 13 Fix the table frame to the desk top with M6 screws through 8.1 Lay the table board on a flat surface and put the table shelf the holes on the frame fixing, using the provided spanner. on it. 8.2 Adjust the 2 sides of table frame to align with the screw Befestigen Sie den Tischrahmen mit M6-Schrauben durch die Löcher der Rahmenbefestigung mit dem mitgelieferten...
- Seite 14 9.1Losen the handle on the motor rod a little as shown in the figure. 9.2 As shown in Figure 2, insert the hexagonal bar into the table leg B until the buckle is not visible. 9.3 Assemble the other end of the connecting rod to the table leg A and screw on the handle.
- Seite 15 9.1 Desserrez légèrement la poignée de la barre du moteur 9.1 Allentare leggermente la maniglia sull'asta del motore comme indiqué sur la figure. come mostrato in figura. 9.2 Comme illustré à la figure 2, insérez la barre 9.2 Come mostrato nella Figura 2, inserire la barra hexagonale dans le pied de table B jusqu'à...
- Seite 16 Tighten the socket set screws at the bottom of the frame as shown in the figure. Ziehen Sie die Inbusschrauben an der Unterseite des Rahmens wie in der Abbildung gezeigt fest. Serrez les vis de fixation au bas du cadre comme indiqué sur la figure.
- Seite 17 Fix the handset on the desktop with M4 screws, using Fix the power supply on the desk top with M4 screws as the provided screwdriver. shown in the figure, using the provided screwdriver. Befestigen Sie das Handgerät mit M4-Schrauben und Befestigen Sie das Netzteil mit M4-Schrauben an der...
- Seite 18 Connect the motor and power supply circuit to the handset first, and then connect the power cord to the power supply before powering on. Schließen Sie zuerst den Motor und den Stromversorgungskreis an das Handgerät an, und schließen Sie dann das Netzkabel an die Stromversorgung an, bevor Sie es einschalten.
- Seite 19 Then splice the colth drawer with the fixing parts as Put the bottom plate into the colth drawer as shown. H 1 H 2 shown in the figure. Legen Sie die Bodenplatte wie abgebildet in die Kühlschublade. Verbinden Sie dann die Schublade mit den H 1 H 2 Befestigungsteilen wie in der Abbildung gezeigt.
- Seite 20 Fix the assembled cloth drawer assembly on the desk top with M4 screws as shown in the figure, using the provided screwdriver. Befestigen Sie die zusammengebaute Stoffschublade mit M4-Schrauben an der Tischplatte, wie in der Abbildung gezeigt, und verwenden Sie den mitgelieferten Schraubendreher.
- Seite 21 IMPORTANT SAFEGUARDS Finally, buckle the power supply holder on the desk top. Zum Schluss befestigen Sie den Netzteilhalter an der Tischplatte. Enfin, fixez le support d'alimentation à la carte. Por último, fije el soporte de la fuente de alimentación al 1.
-
Seite 22: Error Code
Error code 3. Location 1. In the picture above, hand controller can storage and memorize 3 positions. The memory method is as memory follows. When running to a specific point, press Error code Meaning Resolution operation the “S” button, the digital tube displays “S-”, and “-”... - Seite 23 Desktop tilts when Reinitialize it Motor 1 stall Reinitialize it again running Power supply Wait fot power supply temperature is too high, temperature to cool down, or The running direction of Replace the motor wire or or runs for more than 2 let the system rest for 18 motor 1 is wrong Hall wire...
- Seite 24 Anleitungen 1. In der obigen Abbildung kann der Handregler 3 Positionen abspeichern. Die Speicherplatz Speichermethode ist wie folgt. Wenn Sie zu einem bestimmten Punkt laufen, drücken Sie Speicherfunktion die "S"-Taste, die digitale Röhre zeigt "S-" an, und "-" blinkt gleichzeitig, dann drücken Sie eine beliebige Tastennummer von "1-3", um die aktuelle Position auf der entsprechenden Taste zu speichern.
- Seite 25 Der Schreibtisch kippt Reinitialisieren Fehlercode während des Betriebs Fehlercode Bedeutung Lösung Die Temperatur des Abwarten, bis die Netzteils ist zu hoch, Temperatur des Netzteils Die Netzspannung Hauptstromversorgung oder es läuft mehr als 2 abgekühlt ist, oder das überschreitet 45V prüfen Minuten in 18 Minuten System 18 Minuten lang ruhen lassen und dann...
- Seite 26 Motor 1 blockiert Reinitialisieren Sie ihn Instructions erneut Die Laufrichtung von Ersetzen Sie das Motordraht Motor 1 ist falsch oder das Hall-Kabel 1. Opération Lorsque le système est anormal ou que la télécommande affiche « RST », le bureau d'initialisation Die Last von Motor 1 ist Reduzieren Sie die Last assis-debout doit être initialisé.
-
Seite 27: Code D'erreur
Code d'erreur 1. Dans l'image ci-dessus, la télécommande peut mémoriser 3 positions. La méthode de Emplacement mémorisation est la suivante. Lorsque vous de stockage Code Signification Résolution courez vers un point spécifique, appuyez sur le d'erreur bouton « S », le tube numérique affiche « S- » et fonctionnement «... - Seite 28 Le tableau de bord Redémarrez-le Le moteur 1 s'arrête Redémarrez-le à nouveau s'incline lorsqu'il est en marche La température de Attendez que la température l'alimentation est trop de l'alimentation se Le sens de marche du Remplacez le câble moteur élevée, ou elle refroidisse ou laissez le moteur 1 est erroné...
- Seite 29 Instrucciones 1. En la imagen de arriba, el controlador manual puede memorizar 3 posiciones. El Almacenamiento método de memorización es el siguiente. Al de ubicación y correr a un punto específico, pulse el botón funcionamiento "S", el tubo digital muestra "S-", y "-" parpadea de la memoria al mismo tiempo, a continuación, pulse cualquier número de botón de "1-3"...
-
Seite 30: Código De Error
El tablero se inclina Reinícielo Código de error cuando está en funcionamiento Código de Significado Resolución La temperatura de la Espere a que se enfríe la error fuente de alimentación temperatura de la fuente de El voltaje de red supera Compruebe la alimentación es demasiado alta, o alimentación o deje que el... - Seite 31 El motor 1 se para Reinícielo de nuevo Istruzioni El sentido de marcha Sustituya el cable del motor del motor 1 es o el cable Hall incorrecto 1. Operazione Quando il sistema è anomalo o il controllore manuale visualizza "RST", è necessario La carga del motor 1 es Reduzca la carga inizializzare la scrivania.
-
Seite 32: Codice Di Errore
Codice di errore 1. Nell'immagine precedente, la pulsantiera può memorizzare 3 posizioni. Il metodo di Memorizzazione memorizzazione è il seguente. Quando si della Codice di Significato Risoluzione raggiunge un punto specifico, premere il pulsante posizione e errore "S", il tubo digitale visualizza "S-" e "-" lampeggia funzionamento contemporaneamente, quindi premere il numero La tensione di rete... - Seite 33 Il piano della scrivania si Inizializzare nuovamente il Stallo del motore 1 Reinizializzarlo di nuovo inclina durante il dispositivo funzionamento La temperatura Attendere che la dell'alimentatore è temperatura La direzione di marcia Sostituire il filo del motore o troppo alta, o funziona dell'alimentatore si raffreddi, del motore 1 è...
- Seite 34 Instrukcja obsługi 1.Jak widać na rysunku powyżej, system ma Zapamiętywanie możliwość zapamiętania 3 pozycji. Aby ustawień zapamiętać pozycję: ustaw wysokość blatu zgodnie z preferencjami, a następnie naciśnij przycisk „S”. Na wyświetlaczu pojawi się symbol „S” z migającym symbolem „-”. Naciśnij przycisk 1, 2 lub 3, aby przypisać...
-
Seite 35: Komunikaty Błędów
Blat przechyla się Zresetuj biurko. Komunikaty błędów podczas zmiany wysokości. Komunikat Znaczenie Rozwiązanie Temperatura zasilacza Odczekaj, aż zasilacz błędu jest zbyt wysoka lub ostygnie lub wyłącz biurko Napięcie zasilacza Sprawdź zasilacz. silnik działał dłużej niż 2 na 18 minut, a następnie przekracza 45 V. -
Seite 36: Rücksendung / Beschädigung Anweisungen
Silnik 1 zacina się. Zresetuj biurko. Return / Damage Claim Instructions Silnik 1 działa w Wymień przewód zasilający odwrotnym kierunku. lub przewód sterowania DO NOT discard the box / original packaging. silnika. In case a return is required, the item must be returned in original box. Without this your return will not be accepted. - Seite 37 Instructions De Retour / Réclamation De Dommages Istruzioni Per La Restituzione / Reclamo Per Danni NE PAS jeter la boîte/l'emballage d'origine. NON scartare la scatola / confezione originale. Dans le cas où un retour est requis, l'article doit être retourné dans sa boîte Nel caso in cui sia richiesto un reso, l'articolo deve essere restituito nella scatola d'origine.