
Verwandte Anleitungen für Beko GN162341PTCHN


Inhaltszusammenfassung für Beko GN162341PTCHN
- Seite 1 Refrigerator User Manual Gefrierschrank Bedienungsanleitung Réfrigérateur Manuel d’utilisation GN162341PTCHN EN/DE/FR 58 6474 0000/AA EN-DE-FR...
- Seite 2 Dear Customer, Please read this manual before using the product. Thank you for choosing this product. We would like you to achieve the optimal efficiency from this high quality product which has been manufactured with state of the art tech- nology.
-
Seite 3: Inhaltsverzeichnis
1 Safety Instructions 6 Operating the Product 6.1 Turning off the product ....19 1.1 Purpose of usage ....3 6 Operation of the Product 1.2 Safety of children, vulnerable persons and pets. -
Seite 4: Safety Instructions
Safety Instructions This section includes the safety 1.2 Safety of children, instructions necessary to prevent vulnerable persons and pets the risk of personal injury or material This product may be used by children damage. aged 8 years and older and persons Our company shall not be held with underdeveloped physical, responsible for damages that may... -
Seite 5: Handling Safety
Safety instructions maintenance, cleaning, repair, and 1.5 Installation Safety transportation operations. Contact the Authorized Service If the power the cord is damaged, for the product’s installation. To it shall be replaced by authorized prepare the product for installation, service only to avoid any risk that see the information in the user may occur. -
Seite 6: Operational Safety
Safety instructions Do not connect your refrigerator to power of refrigerant. The amount of the saving devices. These systems are harmful for refrigerant available in your product the product. is specified in the Type Label. The installation place of the product 1.6 Operational safety shall not be exposed to direct Do not use chemical solvents on the product. - Seite 7 Safety instructions chemical agents in the vicinity of Do not place objects that may fall/ the refrigerator. Risk of fire and tipped over on the product. These explosion! objects may fall while opening or Do not store explosive materials closing the door and cause injuries such as aerosol cans with flammable and/or material damages.
-
Seite 8: Maintenance And Cleaning Safety
Safety instructions 1.9 Lighting 1.7 Maintenance and (May not be applicable for all models) cleaning safety Contact an authorized service when Do not pull by the door handle if you you shall replace the LED / bulb using shall move the product for cleaning for lighting. -
Seite 9: Environmental Instructions
Environmental instructions 2.1 Compliance with the WEEE Directive and Disposing of the Waste Product: This product complies with EU WEEE Directive (2012/19/EU). This product bears a classification symbol for waste electrical and electronic equip- ment (WEEE). This symbol indicates that this product shall not be disposed with other house- hold wastes at the end of its service life. -
Seite 10: Your Refrigerator
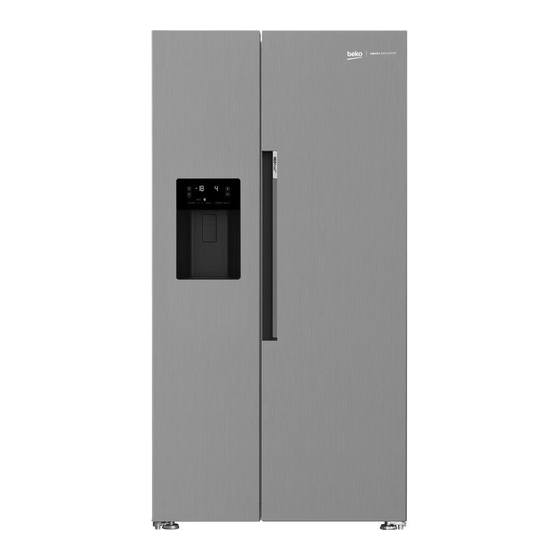
Your Refrigerator 1- Freezer compartment 9- Bottle shelf 2- Cooler compartment 10- Glass shelves 3- Cooler compartment door shelves 11- Fan 4- Egg Holder 12- Frozen food storing compartments 5- Bottle shelf 13- Freezer compartment glass shelf 6- Adjustable stands 14- Icematic 7- Crispers 15- Ice storage box... -
Seite 11: Installation
Installation 4.1 The right place for installation function efficiently. If the product will be placed Read the “Safety Instructions” section first! in an alcove, remember to leave at least 5 cm distance between the product and the ceiling and the walls. Your product requires adequate air circulation to 4.2 Attaching the plastic wedges function efficiently. -
Seite 12: Adjustment Of The Feet
Installation In order to adjust the doors vertically, 4.3 Adjustment of the feet If the product is not in balanced position, adjust the front adjustable stands by rotating right or left. position of the door In order to adjust the doors horizontally, Loosen the fixing screw at the bottom Loosen the fixing bolt on the top Screw the adjusting bolt (CW/CCW) on the side... -
Seite 13: Electrical Connection
Installation 4.4 Electrical connection 4.5 Water connection (Optional) WARNING: WARNING: Do not use extension or Unplug the product and multi sockets in power connection. the water pump (if available) during connection. The product’s water mains, filter and carboy connections must be rendered by authorizer WARNING: Damaged power cable service. -
Seite 14: Connecting Water Hose To The Product
Installation 4.6 Connecting water hose to the 4.7 Connecting to water mains product (Optional) To connect the water hose to the product, To use the product by connecting to the cold water follow the instructions below. mains, a standard 1/2” valve connector must be 1. -
Seite 15: For Products Using Water Carboy
Installation 1. Attach the connector into the faucet adaptor 2. Connect the other end of the water hose to and tighten by hand / tool. the water pump by pushing the hose into the pump’s hose inlet. 2. To avoid damaging, shifting or accidentally 3. -
Seite 16: Fixing External Filter On The Wall (Optional)
Installation 4.10 Fixing external filter on the wall (Optional) WARNING: Do not fix the filter on the product. Check to see the following parts are supplied with your product’s model: 4. Attach the water hose extending from the top of the filter to the product’s water connection adaptor, (see 4.6.) 1. -
Seite 17: Internal Filter
Installation 4.11.Internal filter 1. “Ice Off” indicator must be active while installing the filter. Switch the ON-OFF The internal filter provided with the product is not indicator using the “Ice” button on the screen. installed upon delivery; please follow the instructions below to install the filter. - Seite 18 Installation Remove the water filter by-pass cover by pulling. A few drops of water may flow out after removing the cover; this is normal. 1. Place the water filter cover into the mechanism and push to lock in place. 2. Push the “Ice” button on the screen again to cancel the “Ice Off”...
-
Seite 19: Preparation
Preparation energy while maintaining the freshness of your Read the “Safety Instructions” section first! foodstuff. In case of multiple options are present glass shelves must be placed so that the air outlets 5.1 What to do for energy saving at the backwall are not blocked, prefably air mehmet outlets are remaining below the glass shelf. -
Seite 20: Operating The Product
Operating the Product Read the “Safety Instructions” section first! Do not use any mechanical tools or any other tools than the recommendations of the manufacturer to speed up the thawing operation. Do not use parts of your refrigerator such as the door or drawers as a support or a step. This may cause the product to trip over or its components to be damaged. -
Seite 21: Operation Of The Product
Operation of the Product Read the “Safety Instructions” section first! 6.2 Indicator panel *7.1 *7.2 Indicator panels may vary depending on the model of your product. Audial and visual functions of the indicator panel will assist in using the refrigerator. 11.2 11.1 1. -
Seite 22: Using The Product
Using the product 1. Freezer compartment temperature setting Use this function when placing fresh foods into the cooler compartment or to rapidly cool the Pressing the button ( ) will enable the freezer food items. When this function is activated, the compartment temperature to be set at -18,-19,- refrigerator will be engaged for 1 hour. -
Seite 23: Deodoriser Module
Using the product 11.2 Alarm off warning 6.3 Deodoriser Module In case of power failure/high temperature alarm, (FreshGuard) after checking the food located in the freezer *May not be available in all models compartment press the alarm off button to clear the warning. -
Seite 24: Humidity Controlled Crisper (Everfresh+)
Using the product 6.4 Humidity controlled 6.5 Blue Light/HarvestFresh crisper (EverFresh+) *May not be available in all models *May not be available in all models For Blue light, Thanks to the humidity controlled crisper, Vegetables and fruit stored in crispers illuminated vegetables and fruits may be stored for a longer with blue light continue to perform photosynthesis period at an environment with ideal humidity... -
Seite 25: Using The Water Fountain
Using the product 6.6 Using the water fountain 6.7 Filling the water tank of the water fountain *May not be available in all models Open the lid of the water tank as shown in the figure. Fill in pure and clean drinking water. The first few glasses of water taken from Close the lid. - Seite 26 Using the product Do not fill the water tank with fruit juice, fizzy beverages, alcoholic beverages or any other liquids incompatible for use in the water fountain. Using such liquids will cause malfunction and irreparable damage in the water fountain. Using the fountain in this way is not within the scope of warranty.
-
Seite 27: Dairy (Cold Storage) Bin
Using the product 6.13 Icematic and ice storage box 6.9 Dairy (cold storage) bin *May not be available in all models *May not be available in all models Fill the icematic with water and put in place. The “The dairy (cold storage) bin ” provides lower ice will be ready after approximately two hours. -
Seite 28: Taking Ice / Water
Using the product 6.14 Taking ice / water The water may be cloudy during first use of the filter; do not consume the first 10 glasses (Optional) of water. To take water ( ) / ice cube ( ) / fragmented You must wait approximately 12 hours to get ice ( ), use the display to select the respective... -
Seite 29: Ice-Maker
Using the product 6.16 Ice-maker (Optional) Ice maker is located on the upper section of the freezer cover. Hold the handles on the sides of the ice stock reservoir and move up to remove. Remove the ice-maker decorative lid by moving OPERATION To remove the ice reservoir Hold the ice stock reservoir from the handles, then... - Seite 30 Using the product When ice does not come out, check for any ice stuck While taking broken Ice, cubed ice may in the canal and remove it. Regularly check the ice come first. There is a case of coming cubed ice while taking broken ice.
-
Seite 31: Freezing Fresh Food
Using the product 6.17 Freezing fresh food Mark each food pack by writing the date on the package before freezing.This will allow you to To preserve food quality, the food items placed determine the freshness of each pack every in the freezer compartment must be frozen as time the freezer is opened. -
Seite 32: Placing The Food
Using the product Boil the vegetables and filter the water to extend the frozen storage time. Place the food in air-tight packages after filtering and place in the freezer. Bananas, tomatoes, lettuce, celery, boiled eggs, potatoes and similar food items should not be frozen. -
Seite 33: Maintenance And Cleaning
Maintenance and cleaning On the products without a No-Frost feature, WARNING: Read the “Safety water droplets and icing up to a thickness of a Instructions” section first! finger may occur on the rear wall of the freezer compartment. Do not clean, and never apply oils WARNING: Unplug the refrigerator or similar materials. -
Seite 34: Cleaning Of The Products With Glass Doors
Maintenance and cleaning 7.2 Cleaning of the Products 7.3 Preventing Odours with Glass Doors The product is manufactured free of any Remove the protective foil on the glasses. odorous materials. However, keeping the food in There is a coating on the surface of the glasses. inappropriate sections and improper cleaning of This coating minimizes formation of stains and internal surfaces may lead to odours. -
Seite 35: Troubleshooting
Troubleshooting Check this list before contacting the service. Doing In case of sudden power failure or pulling so will save you time and money. This list includes the power plug off and putting back on, the frequent complaints that are not related to faulty gas pressure in the product's cooling system workmanship or materials. - Seite 36 Troubleshooting The food items kept in cooler compartment The new product may be larger than the drawers are frozen. previous one. Larger products will run for longer periods. The cooler compartment temperature is The room temperature may be high. >>> set to a very low degree.
- Seite 37 Troubleshooting There is sound of wind blowing coming from The food items may be in contact with the the product. upper section of the drawer. >>> Reorganize the The product uses a fan for the cooling food items in the drawer. process.
- Seite 38 Therefore, please be advised that repairs by professional repairers (who are not authorized by Beko) shall void the guarantee. Self-Repair...
- Seite 39 Beko, and will void the warranty of the product. Therefore, it is highly recommended that end-users refrain from the...
- Seite 40 Lieber Kunde, Bitte lesen Sie dieses Handbuch, bevor Sie das Produkt verwenden. Vielen Dank, dass Sie sich für dieses Produkt entschieden haben. Wir möchten, dass Sie mit diesem hochwertigen Produkt, das mit modernster Technologie hergestellt wurde, die optimale Effizienz erzielen. Lesen Sie dazu dieses Handbuch und alle anderen mit- gelieferten Dokumentationen sorgfältig durch, bevor Sie das Produkt verwenden, und bewahren Sie sie als Referenz auf.
- Seite 41 1-Sicherheitsanweisungen 5 Vorbereitung 1.1 Bestimmungsgemäße Verwendung 6 Betrieb des Produkts 1.2 - Sicherheit für Kinder, schutzbedürftige 6.1 Produkt ausschalten ....20 Personen und Haustiere ... . . 3 6 Bedienung des Produkts 1.3 - Elektrische Sicherheit .
-
Seite 42: 1-Sicherheitsanweisungen
1-Sicherheitsanweisungen Dieser Abschnitt enthält Sicherheitshinweise, - Bed & Breakfast Hotels, Pensionen, die zum Schutz vor Personen- oder - Catering und ähnliche Anwendungen außerhalb Sachschäden beitragen. des Einzelhandels. Unser Unternehmen haftet nicht für Dieses Produkt darf nicht im Freien mit oder Schäden, die entstehen können, wenn diese ohne Zelt wie Booten, Balkonen oder Terrassen Anweisungen nicht befolgt werden. -
Seite 43: Sicherheitshinweise
Sicherheitshinweise nicht und wenden Sie sich an den autorisierten Wenn sich an der Tür des Produkts ein Schloss Kundendienst. befindet, sollte der Schlüssel außerhalb der Reichweite von Kindern aufbewahrt werden. 1.5 - Sicherheit bei 1.3 - Elektrische Sicherheit der Installation Das Produkt muss während der Installation, Wenden Sie sich zur Installation des Wartung, Reinigung, Reparatur und des... -
Seite 44: Sicherheit Bei Der Benutzung
Sicherheitshinweise Das Produkt darf nicht an Orten installiert 1.6 - Sicherheit bei werden, die direktem Sonnenlicht ausgesetzt der Benutzung sind, und darf nicht von Wärmequellen wie Kochfeldern, Heizkörpern usw. ferngehalten Verwenden Sie niemals chemische werden. Lösungsmittel für das Produkt. Es besteht Wenn es unvermeidlich ist, das Produkt in der Explosionsgefahr! Nähe einer Wärmequelle zu installieren, muss... - Seite 45 Sicherheitshinweise Stellen oder verwenden Sie keine brennbaren Schlagen Sie nicht auf Glasoberflächen und Sprays, brennbaren Materialien, Trockeneis, üben Sie keine übermäßige Kraft auf diese aus. chemische Substanzen oder ähnliche Glasscherben können zu Verletzungen und / wärmeempfindliche Materialien in der Nähe oder Materialschäden führen.
-
Seite 46: Sicherheit Bei Der Wartung Und Pflege
Sicherheitshinweise 1.7- Sicherheit bei der 1.9- Beleuchtung Wenden Sie sich an den autorisierten Wartung und Pflege Kundendienst, wenn die für die Beleuchtung Ziehen Sie nicht am Türgriff, wenn Sie verwendete LED / Lampe ausgetauscht werden das Produkt zu Reinigungszwecken muss. bewegen müssen. -
Seite 47: Umweltbedingungen
Umweltbedingungen 2.1 Einhaltung der WEEE-Richtlinie und Entsorgung des Altgeräts: Diese Gerät entspricht der WEEE-Richtlinie (2012/19/EU). Dieses Gerät trägt Klassifizierungssymbol für Elektro- und Elektronik- Altgeräte (WEEE). Dieses Symbol gibt an, dass dieses Produkt am Ende seiner Lebensdauer nicht zusammen mit dem normalen Hausmüll entsorgt werden darf. -
Seite 48: Ihr Kühlschrank
Ihr Kühlschrank 1- Gefrierfach 11- Lüfter 2- Frischefach 12- Tiefkühlfächer 3- Türeinschübe im Frischefach 13- Glaszwischenboden für Gefrierschrankfach 4- Eierhalter 14- Eismatic - Eiswürfelbereiter 5- Flaschenablage 15- Eisbehälter 6- Stellfüße 16- Deckel des Eisbehälters 7- Gemüsefächer 17- Türablagen Gefrierbereich 8- Der Milchbehälter (Kühllagerung) 9- Flaschenablage 10- Glaseinschübe Möglicherweise nicht in allen Modellen verfügbar... -
Seite 49: Installation
Installation 4.1 Der geeignete Aufstellungsort Sonnenlicht aus und bewahren Sie es nicht in Lesen zuerst Abschnitt „Sicherheitshinweise“! feuchten Umgebungen auf. Luftzirkulation, um effizient zu funktionieren. Wenn Ihr Produkt benötigt eine ausreichende Luftzirkulation, das Produkt in eine Nische gestellt wird, denken um effizient zu funktionieren. -
Seite 50: Einstellung Der Füße
Installation Um die Türen vertikal auszurichten, 4.3 Einstellung der Füße Wenn das Gerät sind nicht in einer Unterseite. ausbalancierten Position befinden sollte, richten Sie es entsprechend auf, indem Sie die Stellfüße entweder rechts- oder linksherum drehen. Position der Tür einschrauben Endposition an Um die Türen horizontal auszurichten, Lösen Sie die Befestigungsmutter an der... -
Seite 51: Elektrischer Anschluss
Installation 4.4 Elektrischer Anschluss 4.5 Wasseranschluss (Diese Eigenschaft ist optional) WARNUNG: Verwenden Sie für HINWEIS: Während dem Anschluss sollte den Anschluss an des Stromnetz der Stecker des Geräts und falls vorhanden keine Verlängerungskabel oder der von der Wasserpumpe ausgesteckt Mehrfachsteckdosen. sein. -
Seite 52: Anschluss Des Wasserschlauchs An Das
Installation 4.6 Anschluss des Wasserschlauchs 4.7 Anschluss ans Leitungswasser an das Gerät (Diese Eigenschaft ist optional) Zum Verbinden des Geräts an den Falls Sie das Gerät, angeschlossen an die Wasserschlauch führen Sie bitte folgende Kaltwasserleitung benutzen möchten, müssen Anweisungen durch. Sie an Ihre Kaltwasserleitung im Haus, ein 1. -
Seite 53: Für Geräte Mit Dem Einsatz Von Wassergallonen
Installation 1. Befestigen Sie die Anschlussmuffe manuell/ 2. Schließen Sie das andere Ende des oder mit einem Werkzeug. Wasserschlauchs an der Wasserpumpe an, indem Sie den Schlauch in den Schlauchanschluss der Pumpe schieben. 2. Um zu vermeiden, dass der Wasserschlauch beschädigt wird, sich verschiebt oder aus 3. -
Seite 54: Die Montage Des Externen Filters An Die Wand (Diese Eigenschaft Ist Optionell)
Installation 4.10.Die Montage des externen 3. Bringen Sie den Verbindungsapparat, wie Filters an die Wand auf dem Etikett auf dem Filter angezeigt, (diese senkrecht an. (6) Eigenschaft ist optionell) HINWEIS: Montieren Sie den Filter auf das Gerät. Je nach Modell prüfen Sie bitte ob folgende Teile mit der Lieferung Ihres Produkts angekommen sind oder nicht: 4. -
Seite 55: Interne Filter
Installation 4.11 Interne Filter 1. Für die Installation des Filters “Ice Off” (Eis Aus) Anzeige aktiv sein. Der Wechsel der Da der interne Filter, bei der Lieferung nicht im Gerät Anzeige zwischen EIN - AUS kann durch montiert sein wird, müssen für die Vorbereitung Drücken der Taste “lce”(Eis) getätigt werden. - Seite 56 Installation 1. Ziehen Sie den Bypass-Deckel des Wasserfilters zu sich hin. Es ist normal, dass nach dem Entfernen des Deckels einige Wassertropfen vorhanden sind. 2. Verriegeln sie den Deckel des Wasserfilters indem Sie ihn in die Vorrichtung setzen und nach vorne schieben. 3.
-
Seite 57: Vorbereitung
Vorbereitung Achten Sie darauf, dass die Lebensmittel nicht Lesen zuerst Abschnitt mit dem unten beschriebenen Temperatursensor „Sicherheitshinweise“! des Frischefachs in Berührung kommen. Da heiße und feuchte Luft nicht direkt in Ihr 5.1 Hinweise für einen Produkt eindringt, wenn die Türen nicht geöffnet energiesparenden Betrieb werden, optimiert sich Ihr Produkt unter mehmet... -
Seite 58: Erstbetrieb
Vorbereitung 5.2 Erstbetrieb Bevor Sie den Kühlschrank das erste Mal verwenden, achten Sie darauf, alle Vorbereitungen gemäß dieser Bedienungsanleitung, insbesondere wie in den Abschnitten „Wichtige Hinweise zur Sicherheit und zum Umweltschutz“ und „Aufstellung“ beschrieben, durchzuführen. Lassen Sie das leere Gerät mindesten 12 lang laufen und öffnen Sie dabei nicht Tür, sofern es nicht absolut notwendig sein sollte. -
Seite 59: Betrieb Des Produkts
Betrieb des Produkts Lesen zuerst Abschnitt „Sicherheitshinweise“! Verwenden Sie keine mechanischen Werkzeuge oder andere Werkzeuge als die Empfehlungen des Herstellers, um den Auftauvorgang zu beschleunigen. Nutzen Sie Teile des Kühlschranks, wie z.B. die Tür oder die Schubladen nicht als Unterstützung oder als Trittbrett. Dies kann dazu führen, dass das Produkt umkippt oder seine Komponenten beschädigt werden. -
Seite 60: Bedienung Des Produkts
Bedienung des Produkts Lesen Sie zuerst den Abschnitt „Sicherheitshinweise“! *7.1 *7.2 6.2 Anzeigetafel Die Anzeigetafeln können je nach Gerätemodell variieren. Die audioellen und visuellen Funktionen der Anzeigetafel erleichtert Ihnen die Nutzung des Kühlschranks. 11.2 11.1 Tiefkühlbereichtemperatureinstellung Ökomodus Energiesparfunktion (Display aus) Stromausfall-/Hochtemperatur-/Fehler-Warnanzeige Kühlbereichtemperatureinstellung Schnellkühlen... -
Seite 61: Ferienfunktion
Nutzung des Gerätes 1. Tiefkühlbereichtemperatureinstellung Zum Deaktivieren dieser Funktion drücken Sie die Taste noch einmal. Mit der Taste ( ) kann die Temperatur des Tiefkühlbereichs auf -18, -19, -20, -21, -22, -23 Verwenden Sie diese Funktion, wenn Sie frische oder -24 eingestellt werden. Lebensmittel in den Kühlbereich geben oder 2. -
Seite 62: Nutzung Des Gerätes
Nutzung des Gerätes 6.3 Geruchvernichtungsmodul 11.1 Anzeige ein/aus Drücken Sie die Taste ( ) zum (FreshGuard) Abbrechen (XX) oder Aktivieren ( ) der (Diese Funktion ist optional) Anzeige. DasGeruchvernichtungsmodul beseitigt schlechte 11.2 Alarm-aus-Warnung Gerüche in Ihrem Kühlschrank noch bevor sie in die Lebensmittel eindringen können. -
Seite 63: Gemüsefach Mit Kontrollierter Luftfeuchtigkeit
Nutzung des Gerätes 6.4 Gemüsefach mit kontrollierter 6.5 Blaues Licht/HarvestFresh Luftfeuchtigkeit (EverFresh+) (Optional) (Optional) Dank des Gemüsefachs mit kontrollierter Für blaues Licht, Luftfeuchtigkeit können Gemüse und Gemüse und Obst, die in mit blauem Licht Obst in einer Umgebung mit idealen beleuchteten Gemüsefächern gelagert werden, Feuchtigkeitsbedingungen länger gelagert führen weiterhin eine Photosynthese durch und... -
Seite 64: Verwendung Des Wasserspenders
Nutzung des Gerätes 6.6 Verwendung des 6.7 Füllen des Wassertanks Wasserspenders des Wasserspenders Öffnen Sie den Deckel des Wassertanks wie in (Diese Funktion ist optional) der Abbildung gezeigt. Gießen Sie reines und sauberes Trinkwasser hinein. Schließen Sie den Das Wasser in ersten Gläsern aus dem Deckel. - Seite 65 Nutzung des Gerätes Füllen Sie in den Wassertank niemals mit Fruchtsaft, Sprudelgetränken, Spirituosen oder anderen, nicht für die Verwendung in einem Wasserspender geeigneten Flüssigkeiten. Die Verwendung dieser Flüssigkeiten führt zu Funktionsausfällen und nicht reparablen Schäden am Wasserspender. Eine derartige Nutzung des Wasserspenders fällt nicht unter die Garantie.
-
Seite 66: Der Milchbehälter (Kühllagerung) (Diese Funktion Ist Optional)
Nutzung des Gerätes 6.13 Eismaschine und 6.9 Der Milchbehälter (Kühllagerung) Eiswürfelbehälter (Diese Funktion ist optional) (Diese Funktion ist optional) Der Milchbehälter (Kühllagerung)“ sorgt für eine Füllen Sie die Eismaschine mit Wasser und niedrigere Temperatur im Kühlschrankfach. stellen Sie diese an ihren Platz. Das Eis sollte Verwenden Sie diesen Behälter, um Delikatessen nach ca. -
Seite 67: Eismaschine
Nutzung des Gerätes 6.14 Eismaschine Wenn Sie Schwierigkeiten beim Wiedereinsetzen des Behälters haben, drehen Sie das Drehrad (Diese Eigenschaft ist optional) um 90° und installieren Sie es erneut wie auf Die Eismaschine befindet sich im Oberteil der Tür Abbildung 3 gezeigt. des Gefrierfachs. - Seite 68 Nutzung des Gerätes Wenn der Eisspender nicht korrekt arbeitet Wenn Sie die Eiswürfel lange Zeit nicht entfernen, kommt es zur Bildung von Eisklumpen. In diesem Fall, entfernen Sie bitte den Eisvorratsbehälter gemäß der obigen Eiswürfel können auf Grund von Luft in der Röhre Anweisungen, trennen Sie die Eisklumpen, nach der Verbindung klein sein, jegliche Luft wird während normaler Benutzung entfernt.
- Seite 69 Nutzung des Gerätes Versuchen Sie, Eiswürfel zu entnehmen, falls bei Entnahme von Brucheis eine Blockade vorliegt (Eis kommt nicht aus dem Kühlschrank). Anschließend können Sie wieder Brucheis entnehmen. Bei der Entnahme von Brucheis kommen eventuell zunächst Eiswürfel heraus. Bei Entnahme von Brucheis kommen Eiswürfel heraus.
-
Seite 70: Einfrieren Frischer Lebensmittel
Nutzung des Gerätes 6.15 Einfrieren frischer Lebensmittel Gefriergerät geeignete Behältnisse, Alufolie, feuchtigkeitsbeständiges Papier, Kunststofftüten Um Lebensmittel in guter Qualität aufzubewahren, oder vergleichbares Verpackungsmaterial, nicht müssen die in das Gefrierfach gelegten jedoch das traditionelle Packpapier. Produkte so schnell wie möglich mit Hilfe der Markieren Sie jede Lebensmittelverpackung, Schnellgefrierfunktion tiefgekühlt werden indem Sie vor dem Einfrieren das Datum auf... -
Seite 71: Einlegen Von Lebensmitteln
Nutzung des Gerätes 6.20 Beleuchtungslampe Die einzufrierenden Lebensmittel dürfen nicht mit bereits tiefgekühlten Produkten in Berührung Als Innenlampen werden LED-Leuchten verwendet. kommen, um ein teilweises Auftauen zu Kontaktieren Sie bei Problemen mit dem Geräts verhindern. mit dieser Lampe den zuständigen Kundendienst. Blanchieren Sie das Gemüse und gießen Sie das Die in diesem Gerät verwendeten Lampen können Wasser ab, um die Lagerzeit bei Tiefkühlung zu... -
Seite 72: Wartung Und Säuberung
Wartung und Säuberung Verwenden Sie ein leicht angefeuchtetes WARNUNG: Lesen Sie zuerst den Mikrofasertuch, um die Außenfläche des Abschnitt „Sicherheitshinweise“! Produkts zu reinigen. Schwämme und andere Arten von Reinigungskleidung können Kratzer WARNUNG: Ziehen Sie den verursachen. das Gerät Netzstecker bevor Sie entfernbaren Komponenten Um alle reinigen. -
Seite 73: Gerüche Verhindern
Wartung und Säuberung gereinigt werden. Infolgedessen verschlechtert Tee ist einer der wirksamsten sich die Transparenz und das Aussehen des Geruchsentferner. Legen Sie die Pulpa des Glases. Harte und abrasive Reinigungsmethoden gebrühten Tees in einen offenen Behälter und -mittel verstärken diese Defekte weiter und und entnehmen Sie es spätestens nach 12 Stunden. -
Seite 74: Problemlösung
Problemlösung Bitte arbeiten Sie diese Liste durch, bevor Sie sich an den Kundendienst wenden. Das kann Ihnen Zeit und Geld sparen. Diese Liste enthält häufig aufgetretene Probleme, die nicht auf Material- oder Verarbeitungsfehler zurückzuführen sind. Nicht alle hier beschriebenen Funktionen sind bei jedem Modell verfügbar. Das Leistungsverhalten des Kühlgerätes kann sich Der Kühlschrank schaltet sich nicht ein. - Seite 75 Fehlerbehebung Die Temperatur im Tiefkühlbereich ist Bei heißen und feuchten Wetterlagen treten angemessen, während die Temperatur im verstärkt Eisbildung und Kondensation auf. Dies ist Kühlbereich sehr niedrig ist. völlig normal und keine Fehlfunktion. Türen wurden häufig geöffnet oder längere Zeit Die Kühltemperatur ist sehr niedrig eingestellt.
- Seite 76 Fehlerbehebung Wenn die Geräteoberfläche heiß ist. Die Bereiche zwischen den beiden Türen, an den Seitenflächen und hinten am Grill können im Betrieb sehr heiß werden. Dies ist völlig normal und weist nicht auf eine Fehlfunktion hin. Gebläse läuft weiter, wenn die Tür geöffnet wird.
- Seite 77 Reparatur- und Reparaturversuche von Endbenutzern für Teile, die nicht in dieser Liste enthalten sind und/oder die Anweisungen in den Benutzerhandbüchern zur Selbstreparatur nicht befolgen oder die auf support.beko.com verfügbar sind, können zu Sicherheitsproblemen führen, die nicht auf Bekozurückzuführen sind, und führt zum Erlöschen der Garantie des Produkts.
- Seite 78 Cher client, Veuillez lire ce manuel avant d'utiliser l'appareil. Nous vous remercions d'avoir choisi ce produit. Nous aimerions que vous obteniez une efficacité optimale de ce produit de haute qualité qui a été fabriqué avec une technolo- gie de pointe. À cette fin, lisez attentivement ce manuel et toute autre documentation fournie avant d'utiliser le produit et conservez-les comme référence.
- Seite 79 1. Consignes de sécurité 5 Préparation 1.1 Utilisation prévue ....3 6 Fonctionnement de l’appareil 1.2 - Sécurité des enfants, des personnes vulnérables et des animaux domestiques . 3 6.1 Éteindre le produit.
-
Seite 80: Consignes De Sécurité
Consignes de sécurité Cette section contient des consignes de - Zones utilisées par les clients dans les hôtels, sécurité qui vous aideront à vous protéger motels et autres types d'hébergement, contre les risques de dommages corporels ou - Hôtels de type lit & petit déjeuner, pensionnats, matériels. -
Seite 81: Sécurité Électrique
Consignes de sécurité 4. Enlever les portes. 5. Gardez le produit de manière à ce qu'il ne bascule 1.4 - Sécurité des transports pas. Le produit est lourd ; ne le déplacez pas seul. 6. Ne laissez pas les enfants jouer avec l'ancien Ne tenez pas sa porte lorsque vous déplacez produit. -
Seite 82: Sécurité Opérationnelle
Consignes de sécurité Plus un réfrigérateur contient de réfrigérant, n'installez pas le produit dans des endroits plus l'emplacement d'installation doit être tels que les garages ou les buanderies où grand. Si le lieu d'installation est trop petit, un l'humidité est élevée ou l'eau peut éclabousser. mélange inflammable de réfrigérant et d'air Si le réfrigérateur est mouillé... - Seite 83 Consignes de sécurité pu tomber ou éclabousser le sol. Il faut éviter de toucher les parois intérieures Changez la position des étagères / porte- ou les parties métalliques du congélateur bouteilles sur la porte de votre réfrigérateur ou les aliments qui y sont stockés lorsque uniquement lorsqu'ils sont vides.
-
Seite 84: Sécurité De Maintenance Et De Nettoyage
Consignes de sécurité Il ne faut jamais utiliser de la vapeur ou Pour les produits avec distributeur des nettoyeurs à vapeur pour nettoyer ou d'eau / machine à glaçons décongeler le produit. La vapeur entre en contact avec les pièces sous tension de votre N'utilisez que de l'eau potable. -
Seite 85: Instructions Environnementales
Instructions environnementales 2.1Conformité avec la Directive WEEE et Mise au rebut des appareils usagés : Cet appareil est conforme à la directive WEEE de l'Union européenne (2012/19/EU). Le produit pos- sède un symbole de classification attribué aux dé- chets d' é quipements électriques et électroniques (WEEE). -
Seite 86: Votre Réfrigérateur
Votre réfrigérateur 1- Compartiment congélateur 11- Ventilateur 2- Compartiment réfrigérateur 12- Compartiments de conservation des aliments 3- Balconnets de la porte du compartiment réfrigérateur congelés 13- Etagère en verre du compartiment congélateur 4- Porte-œuf 5- Étagère pour les bouteilles 14- Icématique 15- Fabrique de glaçons 6- Pieds réglables 16- Couvercle décoratif de la machine à... -
Seite 87: Installation
Installation 4.1 Le bon endroit pour l'installation lumière du soleil et ne le laissez pas dans des Lisez d'abord la section "Instructions de environnements humides. sécurité" ! nécessite la bonne circulation de l'air. Si le réfrigérateur est placé dans un encastrement Votre produit nécessite une circulation d’air adéquate mural, il doit y avoir un espace d’au moins 5 cm pour pouvoir fonctionner efficacement. -
Seite 88: Ajustement Des Pieds
Installation Afin de régler les portes verticalement, 4.3 Ajustement des pieds Si le réfrigérateur n'est pas équilibré, réglez les pieds avant en les tournant vers la gauche ou la droite. position de la porte Afin de régler les portes horizontalement, Desserrez la vis de fixation en bas Desserrez le boulon de fixation sur le dessus Vissez le boulon de réglage (CW/CCW) sur le... -
Seite 89: Raccordement Électrique
Installation 4.4. Raccordement électrique 4.5 Raccordement à l'approvisionnement d'eau (En option) AVERTISSEMENT : Ne branchez pas le réfrigérateur sur une rallonge AVERTISSEMENT: Débranchez le ou une multiprise. réfrigérateur et la pompe à eau (si disponible) pendant le raccordement. Les raccords d’approvisionnement en eau, du filtre AVERTISSEMENT : Les câbles et de la bonbonne du réfrigérateur doivent être... -
Seite 90: Raccordement Du Tuyau D'eau À L'appareil
Installation 4.6 Raccordement du tuyau 4.7 Raccordement au réseau d'eau à l'appareil d'approvisionnement d'eau Pour raccorder le tuyau d’eau au (En option) réfrigérateur, suivez les instructions Pour utiliser le réfrigérateur en le raccordant à suivantes : un réseau d’approvisionnement d’eau froide, il 1. -
Seite 91: Pour Les Réfrigérateurs Utilisant Une Bonbonne
Installation 1. Fixez le joint à l’adaptateur du robinet et 2. Raccordez l’autre extrémité du tuyau d’eau serrez à la main ou à l’aide d’un outil. à la pompe à eau en poussant le tuyau à l’intérieur de l’orifice d’entrée de la pompe. 2. -
Seite 92: Fixation Du Filtre Externe Au Mur
Installation 4.9.1.Fixation du filtre externe 3. Fixez le filtre en position verticale sur les au mur accessoires de raccordement, tel qu’illustré (en option) sur l’étiquette. (6) AVERTISSEMENT: Ne fixez pas le filtre sur le réfrigérateur. Vérifiez que les pièces suivantes sont fournies avec votre modèle de réfrigérateur : 4. -
Seite 93: Filtre Interne
Installation 4.9.2.Filtre interne 1. Le voyant « Ice Off » (Désactivation de la Le filtre interne livré avec l'appareil n'est pas installé préparation de glace) doit être actif au moment de l’installation du filtre. Passez du à la livraison. Pour l'installation du filtre, bien vouloir mode marche et au mode arrêt en appuyant lire attentivement les instructions ci-après. - Seite 94 Installation Retirez le couvercle de dérivation du filtre en le tirant. Quelques gouttes d’eau pourraient s’écoulées après le retrait du couvercle, c’est tout à fait normal. 1. Placez le couvercle du filtre dans le mécanisme et poussez-le pour verrouiller. 2. Pour annuler le mode « Ice off » (Désactivation de la préparation de glace), appuyez à...
-
Seite 95: Préparation
Préparation Veuillez-vous assurer que les aliments ne Lisez d'abord la section "Instructions de sont pas en contact direct avec le capteur de sécurité" ! température du compartiment réfrigérateur décrit ci-après. 5.1 Comment économiser l'énergie Comme l'air chaud et humide ne pénètre mehmet pas directement dans votre produit lorsque Il est dangereux de connecter l’appareil... -
Seite 96: Première Opération
Préparation 5.2 Première opération Avant d’utiliser votre réfrigérateur, assurez-vous que les installations nécessaires sont conformes aux instructions des sections « Instructions en matière de sécurité et d’environnement » et « Installation ». Laissez l’appareil fonctionner à vide pendant 12 heures, et ne l’ouvrez pas sauf en cas de nécessité... -
Seite 97: Fonctionnement De L'appareil
Fonctionnement de l’appareil Lisez d'abord la section "Instructions de sécurité" ! Il ne faut pas utiliser d'outils mécaniques ou autres que les recommandations du fabricant pour accélérer l'opération de décongélation. Évitez d'utiliser des parties de votre réfrigérateur, telles que la porte ou les tiroirs, comme support ou comme marchepied. -
Seite 98: Fonctionnement Du Produit
Fonctionnement du produit Lisez d'abord la section "Instructions de sécurité" ! *7.1 *7.2 6.2 Panneau indicateur Les panneaux indicateurs varient en fonction du modèle de votre appareil. Les fonctions sonores et visuelles dudit panneau vous aident à utiliser votre réfrigérateur. 11.2 11.1 1. -
Seite 99: Utilisation De L'appareil
Utilisation de l'appareil 1. Réglage de température du compartiment Veuillez consulter la section « solutions conseillées congélateur pour le dépannage » de votre manuel si vous Appuyer sur le bouton( observez que ce voyant est allumé. ) vous permettra de régler la température du compartiment congélateur 5. -
Seite 100: Module De Désodorisation
Utilisation de l'appareil L’indicateur de congélation rapide s’éteint et retourne Appuyez sur le bouton ( ) pendant 3 secondes au réglage normal. pour éteindre le voyant d'alerte du filtre. La fonction congélation rapide s’annule 9. Sélection d'eau, de glace pilée et de automatiquement après 24 heures, sauf si glaçons l’utilisateur le fait avant. -
Seite 101: Bac À Légumes À Humidité Contrôlée (Everfresh+)
Utilisation de l'appareil 6.4 Bac à légumes à humidité 6.5 Lumière bleue/HarvestFresh contrôlée (EverFresh+) (Facultatif) (Facultatif) Grâce au bac à légumes à humidité contrôlée, Voyant lumineux bleu, les légumes et les fruits peuvent être conservés Les légumes et les fruits conservés dans des plus longtemps dans un environnement aux bacs à... -
Seite 102: Utilisation De La Fontaine À Eau
Utilisation de l'appareil 6.6 Utilisation de la fontaine à eau 6.7 Remplir le réservoir de (Cette caractéristique est en option) la fontaine d'eau Ouvrez le couvercle du réservoir d'eau comme indiqué sur la figure. Remplissez-le d'eau pure et Les premiers verres d'eau obtenue du distributeur d'eau doivent normalement potable. - Seite 103 Utilisation de l'appareil Ne remplissez pas le réservoir d'eau de jus de fruits, de boissons gazeuses, de boissons alcoolisées ou tout autre liquide inapproprié à l'utilisation du distributeur d'eau. L'utilisation de tels liquides pourrait causer un dysfonctionnement ou des dommages irréparables dans le distributeur.
-
Seite 104: Le Compartiment Des Produits Laitiers (Entrepôt Frigorifique)
Utilisation de l'appareil 6.13 Machine à glaçons Icematic 6.9 Le compartiment des produits et bac à glaçons laitiers (entrepôt frigorifique) (Cette caractéristique est en option) (Cette caractéristique est en option) Remplissez la machine à glaçons d'eau et mettez- « Le compartiment des produits laitiers (entrepôt la en place. -
Seite 105: Récupération De Glace Ou De L'eau
Utilisation de l'appareil 6.14 Récupération de L’appareil pourrait ne pas libérer de l’eau durant la première utilisation. Ceci est dû glace ou de l'eau à l’air qui se trouve dans le système. Il doit (en option) être évacué. Pour cela, poussez le bouton Pour récupérer de l'eau ( ) / des glaçons ( du distributeur d’eau pendant 1 à... -
Seite 106: Twist Ice Maker
Utilisation de l'appareil 6.16 Twist ice maker (En option) La machine à glaçons est située dans la partie supérieure du couvercle du congélateur. Tenez les poignées situées sur les côtés du réservoir à glaçons et déplacez vers le haut pour retirer. - Seite 107 Utilisation de l'appareil S’il y a un blocage (la glace ne sort pas du distributeur) lorsque vous essayez d’obtenir de la glace pillée, essayez d’obtenir des glaçons. Ensuite, vous pourrez à nouveau essayer d’obtenir de la glace pilée. Lorsque vous appuyez sur le distributeur de glace pilée, un glaçon peut être distribué.
-
Seite 108: Congélation Des Aliments Frais
Utilisation de l'appareil 6.17 Congélation des aliments frais des récipients pour congélateur, du papier aluminium et du papier résistant à l'humidité, des Pour conserver la qualité des aliments, sacs en plastique ou du matériel d'emballage les denrées placées dans le compartiment similaire au lieu d'un papier d'emballage congélateur doivent être congelées le plus ordinaire. -
Seite 109: Disposition Des Aliments
Utilisation de l'appareil 6.22 Lampe d'éclairage Les aliments à congeler ne doivent pas être en contact avec ceux déjà congelés pour éviter un L'éclairage intérieur utilise une lampe de type DEL. dégivrage partiel. Contactez le service agréé pour tout problème lié à Faites bouillir les légumes et filtrez l'eau pour cette lampe. -
Seite 110: Entretien Et Nettoyage
Entretien et nettoyage Il ne faut pas utiliser d’outils tranchants AVERTISSEMENT : Lisez d'abord la et abrasifs, de savon, de produits d’entretien section "Instructions de sécurité" ! ménager, de détergents, de gaz, d’essence, de vernis et de substances similaires pour AVERTISSEMENT : Débranchez empêcher la déformation de la pièce en... -
Seite 111: Nettoyage Des Produit Savec Des Portes En
Entretien et nettoyage 7.2 Nettoyage des produit savec Conservez les aliments dans des récipients des portes en verre fermés. Des micro-organismes peuvent se Enlevez le film de protection des lunettes. proliférer dans des récipients non fermés et Il y a un revêtement sur la surface des verres. émettre de mauvaises odeurs. -
Seite 112: Dépannage
Dépannage Vérifiez la liste suivante avant de contacter le service après-vente. Cela devrait vous éviter de perdre du temps et de l'argent. Cette liste répertorie les plaintes fréquentes ne provenant pas de vices de fabrication ou des défauts de pièces. Certaines fonctionnalités mentionnées dans ce manuel peuvent ne pas exister sur votre modèle. - Seite 113 Dépannage Il se peut que le nouvel appareil soit plus La température du compartiment grand que l'ancien. Les appareils plus grands réfrigérateur est très basse. >>> Réglez la fonctionnent plus longtemps. température du compartiment congélateur à un La température de la pièce est peut-être degré...
- Seite 114 Dépannage Le sol n'est pas assez solide et durable. L'appareil n'est pas nettoyé régulièrement. >>> Si l'appareil balance lorsqu'il est déplacé >>> Nettoyez régulièrement l’intérieur à l’aide doucement, ajustez les supports afin de le d’une éponge, de l'eau tiède et du carbonate remettre en équilibre.
- Seite 115 ) annuleront la garantie. Auto-réparation L’utilisateur final peut lui-même réparer les pièces de rechange ci-après : poignées de porte,charnières de porte, plateaux, paniers et joints de porte (une liste mise à jour est également disponible à l'adresse support.beko.com au 1er mars 2021).
- Seite 116 à des problèmes de sécurité non imputables à Beko, et annulera la garantie du produit.
-
Seite 117: Manuale Utente
Frigorifero Manuale utente GN162341PTCHN İT 58 6474 0000/AA İT... - Seite 118 Gentile Cliente, Cortesemente leggi il presente manuale prima di iniziare ad usare il prodotto. Ti ringraziamo per aver scelto questo prodotto. Vorremmo che il prodotto, che è stato realizzato con la tecnologia più avanzata, ti possa offrire l’efficienza ottimale. Per questo, prima di utilizzare il prodotto leggi attentamente questo manuale e qualsiasi altra docu- mentazione fornita e conservali per riferimenti futuri.
- Seite 119 5 Preparazione 1 Istruzioni di sicurezza 1.1 Uso preposto ....3 6 Funzionamento del prodotto 1.2 - Sicurezza per bambini, persone 6.1 Spegnimento del prodotto ... . 20 diversamente abili e animali domestici .
-
Seite 120: Istruzioni Di Sicurezza
Istruzioni di sicurezza Questa sezione contiene istruzioni di sicurezza - Cucine per il personale in negozi, uffici e altri che aiutano a proteggersi da rischi di lesioni ambienti di lavoro, personali o danni alle cose. - Fattorie, La nostra azienda non è responsabile per danni - Aree utilizzate dai clienti in hotel, motel e altri che possono verificarsi se queste istruzioni non tipi di alloggio,... -
Seite 121: Sicurezza Elettrica
Istruzioni di sicurezza 5. Tenere il prodotto in modo che non si ribalti. non accendere il prodotto e contattare il 6. Non permettere ai bambini di giocare con il servizio di assistenza autorizzato. vecchio prodotto. 1.5 - Sicurezza nell’installazione Non gettare mai il prodotto nel fuoco per Contattare il servizio di assistenza autorizzato smaltirlo. -
Seite 122: Sicurezza Nelle Operazioni
Istruzioni di sicurezza cottura, radiatori, ecc. autorizzato. Rischio di scosse elettriche! Se si deve installare il prodotto in prossimità di una Non collocare fonti di fiamma (candele accese, fonte di calore, è necessario utilizzare un'adeguata sigarette, ecc.) sul prodotto o nelle sue piastra di isolamento e mantenere le seguenti vicinanze. -
Seite 123: Sicurezza Nella Manutenzione E Pulizia
Istruzioni di sicurezza mediche simili e prodotti soggetti alla direttiva Se il prodotto è danneggiato e si nota una sui prodotti medici. perdita di refrigerante, stare lontani dal L'uso del prodotto diversamente da quanto refrigerante. Il refrigerante può causare preposto può causare il deterioramento o la congelamento in caso di contatto con la pelle. -
Seite 124: Homewhiz
Istruzioni di sicurezza Assicurarsi che non entri acqua nei circuiti elettronici o negli elementi preposti all’illuminazione del prodotto. Utilizzare un panno pulito e asciutto per pulire i materiali estranei o la polvere sui perni della spina. Non utilizzare un panno umido o bagnato per pulire la spina. -
Seite 125: Istruzioni Relative All'ambiente
Istruzioni relative all’ambiente 2.1 Conformità con le normative WEEE e sullo smaltimento dei prodotti di scarico: Questo prodotto è conforme alla direttiva WEEE dell' U E (2012/19/EU). Questo prodotto porta un simbolo di classificazione per la strumentazione elettrica ed elettronica di scarto (WEEE). Questo simbolo indica che il presente prodotto alla fine della sua vita utile non deve essere smaltito con altri rifiuti do-... -
Seite 126: Il Frigorifero
Il frigorifero 1- Vano congelatore 12- Scomparti per la conservazione degli alimenti 2- Scomparto più fresco congelati 3- Ripiani porta vano frigo 13- Ripiano in vetro vano congelatore 4- Portauovo 14- Icematic 5- Ripiano per bottiglie 15- Contenitore per il ghiaccio 6- Supporti regolabili 16- Coperchio decorativo per fabbricatore di ghiaccio 7- Crispers... -
Seite 127: Installazione
Installazione 4.1 Luogo idoneo per l'installazione adeguata per funzionare con efficacia. Qualora Leggere prima la sezione "Istruzioni di sicurezza"! il prodotto venga posizionato in un padiglione estivo, ricordare di lasciare una distanza di almeno 5 cm fra il prodotto, il soffitto, e le pareti. -
Seite 128: Regolazione Dei Piedini
Installazione Per regolare le porte in verticale: 4.3 Regolazione dei piedini Qualora il prodotto non sia in equilibrio, regolare i parte inferiore supporti anteriori regolabili, ruotandoli verso destra o verso sinistra. alla posizione della porta Per regolare le porte in orizzontale: Allentare la vite di fissaggio che si trova sulla parte inferiore Allentare la vite di fissaggio che si trova sulla... -
Seite 129: Collegamento Elettrico
Installazione 4.4 Collegamento elettrico AVVERTENZA: Non usare prolunghe o multi prese per il collegamento elettrico. AVVERTENZA: I cavi di alimentazione danneggiati vanno sostituiti dal servizio autorizzato. 1. Connettore (1 pezzo): Usato per fissare il tubo La nostra azienda non si assume alcuna dell’acqua alla parte posteriore del prodotto. -
Seite 130: Collegamento Alla Rete Idrica (Opzionale)
Installazione 2. Premere saldamente il tubo dell’acqua verso il basso e collegare all’adattatore dell’ugello del tubo. 2. Collegare l’adattatore del rubinetto alla valvola della presa idrica. 3. Serrare il connettore manualmente per fissarlo all’adattatore dell’ugello del tubo. Sarà inoltre possibile serrare il connettore servendosi di una pinza o di una chiave. -
Seite 131: Per I Prodotti Che Si Servono Di Un Serbatoio D'acqua (Opzionale)
Installazione 5. Per evitare di danneggiare, spostare o 3. Posizionare e serrare il tubo della pompa accidentalmente scollegare il tubo, servirsi dei all’interno del serbatoio. clip in dotazione per fissare il tubo dell’acqua in modo adeguato. 4. Dopo aver eseguito il collegamento, collegare AVVERTENZA: Dopo aver aperto il e avviare la pompa dell’acqua. -
Seite 132: Filtro Interno
Installazione 1. Connettore (1 pezzo): Usato per fissare il tubo Dopo aver eseguito il collegamento, dovrebbe dell’acqua alla parte posteriore del prodotto. presentarsi come indicato nella seguente 2. Connettore rubinetto (1 pezzo): Usato per il immagine. collegamento alla presa dell’acqua fredda. 3. - Seite 133 Installazione Collegamento idrico: Linea serbatoio: 2. Rimuovere il cesto verdura (a) per accedere al filtro dell’acqua. Non usare i primi 10 bicchieri di acqua dopo aver collegato il filtro. 1. L’indicatore “Ice Off” deve essere attivo in fase di installazione del filtro. ACCENDERE- SPEGNERE l’indicatore servendosi del pulsante “Ice”...
- Seite 134 Installazione 3. Rimuovere il coperchio by-pass filtro tirando. Alcune gocce di acqua potrebbero fuoriuscire dopo aver tolto il coperchio, non si tratta di un’anomalia di funzionamento. 4. Posizionare il coperchio del filtro dell’acqua all’interno del meccanismo e premere per fissare in posizione. 5.
-
Seite 135: Preparazione
Preparazione Accertarsi che gli alimenti non siano in contatto Leggere prima la sezione "Istruzioni di con il sensore di temperatura dello scomparto sicurezza"! raffreddatore di seguito descritto. L'aria calda e umida, non penetrando 5.1 Cosa fare per direttamente nel prodotto quando le porte risparmiare energia non sono aperte, permetterà... -
Seite 136: Funzionamento Iniziale
Preparazione 5.2. Funzionamento iniziale Prima di iniziare a usare il frigorifero, accertarsi che tutti i preparativi necessari vengano eseguiti in conformità con le istruzioni contenute nelle sezioni "Istruzioni di sicurezza e relative all’ambiente" e "Installazione”. Tenere il prodotto in funzione senza alimenti al suo interno per 12 ore e non aprire la porta a meno che ciò... -
Seite 137: Funzionamento Del Prodotto
Funzionamento del prodotto Leggere prima la sezione "Istruzioni di sicurezza"! Per accelerare le operazioni di scongelamento, non utilizzare attrezzi meccanici o altri utensili diversi da quelli raccomandati dal produttore. Non utilizzare mai parti del frigorifero, come la porta o i cassetti, come supporto o come gradini. -
Seite 138: Pannello Indicatore
Funzionamento del prodotto Leggere prima la sezione "Istruzioni di sicurezza"! *7.1 *7.2 6.2 Pannello indicatore I pannelli indicatori potrebbero variare a seconda del modello del prodotto. Le funzioni audio e video dei pannelli indicatori assisteranno l’utente in fase di utilizzo del frigorifero. 11.2 11.1 1. -
Seite 139: Uso Del Prodotto
Uso del prodotto 1. Impostazione temperatura scomparto 5. Impostazione temperatura scomparto freezer Cooler La pressione del pulsante ( ) consente alla Dopo aver premuto questo pulsante ( ), la temperatura dello scomparto freezer di essere temperatura dello scomparto Cooler può essere impostata su -18,-19,-20,-21 ,-22,-23,-24,-18... -
Seite 140: Modulo Deodorizzatore
Uso del prodotto La funzione di raffreddamento rapido verrà annullata 9. Indicatore di selezione acqua, ghiaccio tritato, cubetti di ghiaccio automaticamente dopo 24 ore, a meno che non venga annullata dall’utente. Per congelare grandi Navigare tra le selezioni di acqua ( ), cubetti di ghiaccio ( ) e ghiaccio tritato (... -
Seite 141: Cassetto Frutta E Verdura A Umidità Controllata (Semprefresco+)
Uso del prodotto 6.4 Cassetto frutta e verdura 6.5 Luce blu/HarvestFresh a umidità controllata (Optional) (SempreFresco+) (Optional) Per la Luce blu, Grazie al cassetto ad umidità controllata, frutta e Le verdure e la frutta conservate nei cassetti verdura possono essere conservate più a lungo illuminati con luce blu continuano a svolgere la in un ambiente con condizioni ideali di umidità. -
Seite 142: Utilizzo Dell'erogatore Dell'acqua
Uso del prodotto 6.6 Utilizzo dell’erogatore dell’acqua 2. Dopo aver riempito il bicchiere d'acqua come si (Questa funzione è opzionale) desidera, rilasciare il braccio. 6.7 Riempimento del serbatoio dell’erogatore dell’acqua I primi bicchieri di acqua presi Aprire il coperchio del serbatoio dell'acqua come dall’erogatore saranno di norma tiepidi. - Seite 143 Uso del prodotto Non riempire il serbatoio dell'acqua con succo di frutta, bevande gassate, bevande alcoliche o altri liquidi incompatibili con l'uso dell’erogatore dell’acqua. L'uso di questi liquidi potrebbe provocare anomalie di funzionamento oltre che danni irreparabili all’erogatore dell’acqua. L'uso dell’erogatore secondo questa modalità...
-
Seite 144: Cestello Prodotti Caseari (Cella Frigorifera) Fornisce
Uso del prodotto 6.13 Macchina del ghiaccio e scatola 6.9 Cestello prodotti caseari di stoccaggio del ghiaccio (cella frigorifera) fornisce (Questa funzione è opzionale) (Questa funzione è opzionale) Riempire la macchina del ghiaccio con acqua e Il “Cestello prodotti caseari (cella frigorifera) posizionare. -
Seite 145: Prelevamento Di Ghiaccio / Acqua
Uso del prodotto 6.14 Prelevamento di ghiaccio / acqua Il prodotto potrebbe non scaricare acqua durante la prima messa in funzione. Ciò (Opzionale) avviene a causa dell’aria contenuta nel Per prendere acqua ( ) / cubetti di ghiaccio ( sistema. Sarà necessario scaricare l’aria ) / ghiaccio frammentato ( ), servirsi del display contenuta nel sistema. -
Seite 146: Dispositivo Per La Produzione Di Ghiaccio (Opzionale)
Uso del prodotto Dispositivo per la produzione 6.16 di ghiaccio (opzionale) Il dispositivo per la produzione di ghiaccio si trova sulla sezione superiore della copertura del congelatore. Tenere le maniglie sui lati della serbatoio di conservazione del ghiaccio, e spostare verso l'alto per rimuovere. - Seite 147 Uso del prodotto Lo sportello del freezer situato davanti alla macchina Smaltire il ghiaccio prodotto per circa un giorno, dato del ghiaccio può creare un sottile strato di brina e che il tubo potrebbe contenere contaminanti. una patina. Avvertenza! Questa eventualità è del tutto normale e si raccomanda di procedere alla pulizia senza aspettare Non inserire le mani o altri oggetti nel canale del troppo a lungo.
-
Seite 148: Congelamento Di Alimenti Freschi
Uso del prodotto 6.17 Congelamento di alimenti freschi Servirsi di contenitori per il congelatore, pellicola e carta anti-umidità, sacchetti di Per conservare la qualità degli alimenti, i cibi plastica o altri materiali da confezionamento posizionati nello scomparto congelatore devono simili anziché della normale carta per essere congelati quanto più... -
Seite 149: Posizionamento Degli Alimenti
Uso del prodotto 6.22 Lampada di illuminazione Per evitare uno scongelamento parziale, gli alimenti da congelare non devono entrare in La luce interna si serve di una lampadina LED. contatto con gli altri alimenti già congelati Contattare il servizio autorizzato per eventuali all'interno del congelatore. -
Seite 150: Manutenzione E Pulizia
Manutenzione e pulizia Per pulire la superficie esterna del prodotto AVVERTENZA: Leggere anzitutto la utilizzare un panno in micro-fibra leggermente sezione "Istruzioni di sicurezza” inumidito. Spugne e altri tipi di panni per la pulizia potrebbero graffiare la superficie. AVVERTENZA: Prima di procedere con componenti rimovibili Per pulire tutti i durante la pulizia della superficie interna... -
Seite 151: Prevenzione Dei Cattivi Odori
Manutenzione e pulizia Per i processi di pulizia di routine, devono essere utilizzati prodotti di pulizia non alcalini e non corrosivi a base di acqua*. Per ottenere una maggiore durata di questo rivestimento, durante la pulizia non devono essere utilizzate sostanze alcaline e corrosive. Per aumentare la resistenza di questi vetri contro gli urti e le rotture viene applicato un processo di tempra. -
Seite 152: Guida Alla Risoluzione Dei Problemi
Guida alla risoluzione dei problemi Controllare questo elenco prima di contattare il In caso di improvviso black out, o nel caso in cui servizio clienti. Questa operazione vi consentirà la spina venga tolta e poi reinserita, la pressione del di risparmiare soldi. Questo elenco contiene gas nel sistema di raffreddamento del prodotto non le lamentele più... - Seite 153 Guida alla risoluzione dei problemi Il nuovo prodotto potrebbe essere più grande di Impostare la temperatura dello scomparto quello precedente. I prodotti più grandi funzioneranno raffreddatore su un livello più alto, quindi più a lungo. eseguire un controllo. >>> Impostare la La temperatura della stanza potrebbe essere temperatura dello scomparto congelatore su un alta.
- Seite 154 Guida alla risoluzione dei problemi Il prodotto non è stato pulito regolarmente. Il pavimento non è piano o resistente. >>> >>> Pulire la superficie interna a intervalli regolari Se il prodotto vibra, quando viene spostato servendosi di spugna, acqua tiepida, e acqua gassata. lentamente, regolare i supporti per equilibrare Alcuni supporti e materiali da confezionamento il prodotto.
- Seite 155 Inoltre, per garantire la sicurezza del prodotto e per prevenire il rischio di lesioni gravi, la suddetta riparazione fai da te deve essere eseguita seguendo le istruzioni nel manuale utente per la riparazione fai da te o disponibili in support.beko.com Per la propria sicurezza, scollegare il prodotto prima di tentare qualsiasi riparazione fai da te.