Inhaltsverzeichnis
Werbung
Verfügbare Sprachen
Verfügbare Sprachen
Quicklinks
Istruzioni per installazione, uso e manutenzione
Montage und Bedienungsanleitung
Instructions pour installation, utilisation et entretien
Installation, use and maintenance instructions
Bruciatori di gasolio
I
Öl-Gebläsebrenner
D
Brûleurs fioul domestiques
F
Light oil burners
GB
Funzionamento monostadio
Einstufiger Betrieb
Fonctionnement à 1 allure
One stage operation
CODICE - CODE
3452030
20006157
MODELLO - MODELL - MODEL
MODELE
RIELLO 40 G7
RIELLO 40 G10
TIPO - TYP - TYPE
705M1
706M1
2903360 (5) - 09/2021
Werbung
Inhaltsverzeichnis

Verwandte Anleitungen für Riello 40 G7


Inhaltszusammenfassung für Riello 40 G7
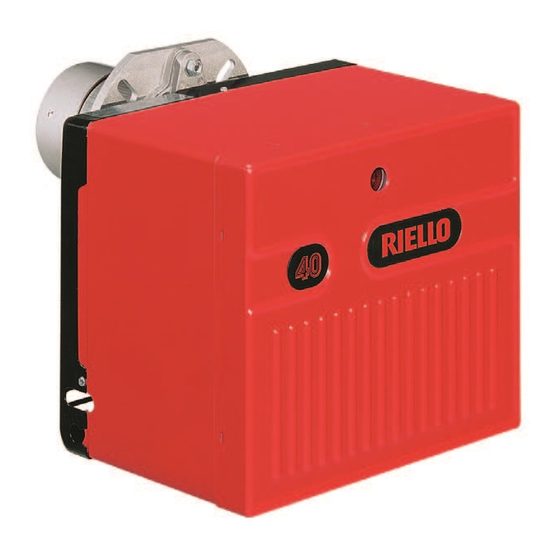
- Seite 1 Light oil burners Funzionamento monostadio Einstufiger Betrieb Fonctionnement à 1 allure One stage operation MODELLO - MODELL - MODEL CODICE - CODE TIPO - TYP - TYPE MODELE 3452030 RIELLO 40 G7 705M1 20006157 RIELLO 40 G10 706M1 2903360 (5) - 09/2021...
-
Seite 3: Dati Tecnici
DATI TECNICI TIPO 705M1 706M1 Potenza termica 29 ÷ 69 kW 54 ÷ 120 kW 4,5 ÷ 10 kg/h Portata 2,45 ÷ 5,8 kg/h Gasolio, viscosità max. a 20 °C: 4 ÷ 6 mm Combustibile Kerosene, viscosità max. a 20 °C: 1,6 ÷ 6 mm 24 V D.C ±... -
Seite 4: Materiale A Corredo
MATERIALE A CORREDO Quantità Descrizione Tubi flessibili con nipples Flangia con schermo isolante Viti e dadi per flangia Gruppo manutenzione Vite con due dadi per flangia CAMPO DI LAVORO 705M1 706M1 Portata - kg/h D8932 Potenza termica - kW DIMENSIONI Flangia Bruciatore D7818... -
Seite 5: Fissaggio Alla Caldaia
INSTALLAZIONE FISSAGGIO ALLA CALDAIA Inserire sulla flangia (1) la vite e i due dadi (vedi fig. 2). Allargare, se necessario, i fori dello schermo isolante (5), (vedi fig. 3). Fissare alla portina della caldaia (4) la flangia (1) mediante le viti (2) e (se necessario) i dadi (3) inter- ... -
Seite 6: Impianti Idraulici
IMPIANTI IDRAULICI Attenzione: Accertarsi, prima di mettere in funzionamento il bruciatore, che il tubo di ritorno non abbia occlusioni. Un eventuale impedimento provocherebbe la rottura dell’organo di tenuta della pompa. ATTENZIONE La pompa è predisposta per funzionamento bitubo. Per il funzionamento monotubo è necessario togliere la vite di by-pass (A) , (vedi figura). È... -
Seite 7: Collegamenti Elettrici
COLLEGAMENTI ELETTRICI 20191906 NON SCAMBIARE IL POSITIVO CON IL NEGATIVO: questo scambio dan- Valvola neggia il funzionamento dell’appar- Relè ecchiatura. COLLEGAMENTI ELETTRICI EFFETTUATI DALL’INSTALLATORE La tensione di alimentazione deve es- sere misurato al morsetto 1 - 2 (sulla morsettiera del bruciatore) ed a brucia- Motore tore spento. -
Seite 8: Regolazione Della Combustione
REGOLAZIONE DELLA COMBUSTIONE In conformità con la EN267, l’applicazione del bruciatore alla caldaia, la regolazione e il collaudo, devono essere eseguiti nell’osservanza del manuale d’istruzione della caldaia stessa, compreso il controllo della concentrazione di CO e CO nei fumi, della loro temperatura e di quella media dell’acqua della caldaia. -
Seite 9: Ugelli Consigliati
KEROSENE Pressione Portata Regolazione Regolazione Ugello pompa bruciatore testa serranda Angolo kg/h ± 4% Tacca Tacca 0,85 60° 1,00 60° 1,10 60° 1,25 60° 1,35 60° 1,50 60° 1,75 60° 2,00 60° 1,50 60° 4,43 1,75 60° 5,17 2,00 60° 5,91 2,25 60°... -
Seite 10: Regolazione Serranda Aria
REGOLAZIONE SERRANDA ARIA La regolazione della portata d’aria si effettua agendo sulla serranda (1), dopo aver allentato le viti (2). Le impostazioni indicate in tabella si riferiscono al bruciatore con cofano metallico montato e la camera di combustione con la depressione "zero". Queste regolazioni sono puramente indicative. -
Seite 11: Posizione Di Manutenzione
PROGRAMMA DI AVVIAMENTO BRUCIATORE Normale Blocco per mancata accensione Termostato Motore Trasf. d’accensione Valvola Fiamma Spia blocco D5229 ATTENZIONE Ogni 2000 ore di lavoro, verificare l'usura delle spazzole e collettore motore. POSIZIONE DI MANUTENZIONE Accessibilità alla testa di combustione, al gruppo eli- ca / elettrodi e all’ugello, (vedi fig. -
Seite 13: Technische Merkmale
TECHNISCHE MERKMALE 705M1 706M1 Feuerungswärmeleistung 29 ÷ 69 kW 54 ÷ 120 kW Durchsatz 2,45 ÷ 5,8 kg/h 4,5 ÷ 10 kg/h Heizöl-EL max. viskosität bei 20°C: 4 ÷ 6 mm Brennstoff Kerosen max. viskosität bei 20°C: 1,6 ÷ 6 mm ±... -
Seite 14: Mitgeliefertes Zubehör
MITGELIEFERTES ZUBEHÖR Menge Beschreibung Ölschläuche mit Nippel Flansch mit Isolierdichtung Schrauben und Mutter für Flansch Wartungsystem Schraube mit zwei Muttern für Flansch ARBEITSFELD 705M1 706M1 Heizöldurchsatz - kg/h D8932 Brennerleistung - kW ABMESSUNGEN Flansch Brenner D7818 705 M1 706 M1 2903360... - Seite 15 INSTALLATION BRENNERMONTAGE Die Schraube und die beiden Muttern am Flansch (1) montieren (siehe Abb. 2). Falls erforderlich, die Bohrungen der Isolierdichtung (5) erweitern (siehe Abb. 3). Mit den Schrauben (2) und (falls erforderlich) den Muttern (3) den Flansch (1) an der Kesseltür ...
-
Seite 16: Auffüllen Der Pumpe
ÖLVERSORGUNGSANLAGE Achtung: überprüfen, ob die Rücklaufleitung nicht verstopft ist, bevor den Brenner in Betrieb gesetzt wird. Eventuelle Verstopfungen würden die Beschädigung der Wellendichtung zur Folge haben. WICHTIGER HINWEIS Die Pumpe ist werksseitig für den Zweirohr-Betrieb eingerichtet. Für Einrohrbetrieb, ist es notwendig die By-Pass Schraube (A) zu entfernen, (Siehe Abbildung). Es ist nötig ein Filter in der Ansaugsleitung des Brennstoffes einzubauen. -
Seite 17: Elektrisches Verdrahtungsschema
ELEKTRISCHES VERDRAHTUNGSSCHEMA PLUS- UND MINUSPOL NICHT 20191906 VERWECHSELN: ein Vertauschen kann den Be- Ventil trieb des Steuergeräts stören. Relais ELEKTRISCHER ANSCHLUß BAUSEITS Die Versorgungsspannung wird an den Klemmen 1 - 2 (am Brenner) bei abgeschal- tetem Brenner gemessen. Motor Klemmleiste des 1 2 3 4 5 6 8 Steuergeräts Klemmleiste... -
Seite 18: Einstellung Der Verbrennung
EINSTELLUNG DER VERBRENNUNG In Konformität mit der EN267 müssen die Anbringung des Brenners am Heizkessel, die Einstellung und die Inbetriebnahme unter Beachtung der Betriebsanleitung des Heizkessels ausgeführt werden, einschließlich Kontrolle der Konzentration von CO und CO in den Abgasen, der Abgastemperatur und der mittleren Kesseltemperatur. -
Seite 19: Empfohlene Düsen
BRENNSTOFF KEROSEN Brenner- Brennerkopf- Luftklappen- Düse Pumpendruck Durchsatz Einstellung Einstellung Winkel kg/h ± 4% Rastepunkt Rastepunkt 0,85 60° 1,00 60° 1,10 60° 1,25 60° 1,35 60° 1,50 60° 1,75 60° 2,00 60° 1,50 60° 4,43 1,75 60° 5,17 2,00 60° 5,91 2,25 60°... -
Seite 20: Luftklappeneinstellun
LUFTKLAPPENEINSTELLUN Die Einstellung der Luftmenge erfolgt durch Registrieren der Luftklappe (1) nach Lockern der Schrauben (2). Die Schrauben (2) nach Erreichung der optimalen Einstellung wieder fest anziehen. Die in der Tabelle beschriebene Einstellung bezieht sich auf den Brenner mit aufgesetzter Haube und Null Unterdruck im Feuerraum. - Seite 21 BETRIEBSABLAUF Mit Störung wegen Normal nicht erfolgter Zündung Thermostat Motor Zündtransformator Ventil Flamme Störlampe D5229 ACHTUNG Nach jeweils 2000 Betriebsstunden müssen die Bürsten und der Kollektor des Motors überprüft werden. WARTUNGSPOSITION Zugänglichkeit zum Brennkopf, zur Stauschei- be - Elektrodengruppe und zur Düse, (siehe Abb.
-
Seite 23: Donnees Techniques
DONNEES TECHNIQUES TYPE 705M1 706M1 Puissance thermique 29 ÷ 69 kW 54 ÷ 120 kW Débit 2,45 ÷ 5,8 kg/h 4,5 ÷ 10 kg/h Fioul, viscosité max. à 20 °C: 4 ÷ 6 mm Combustible Kérosène, viscosité max. à 20 °C: 1,6 ÷ 6 mm 24 V D.C ±... -
Seite 24: Materiel Fourni
MATERIEL FOURNI Quantité Dénomination Tubes flexibles avec mamelons Bride avec joint isolant Vis et écrous pour bride Groupe entretien Vis avec deux écrous pour bride PLAGE DE TRAVAIL 705M1 706M1 Débit fioul - kg/h D8932 Puissance therm. - kW DIMENSIONS Bride Brûleur D7818... - Seite 25 INSTALLATION FIXATION A LA CHAUDIERE Insérer sur la bride (1) la vis et deux écrous, (voir fig. 2). Elargir, si nécessaire, les trous dans le joint isolant (5), (voir fig. 3). Fixer sur la plaque de la chaudière (4) la bride (1) par l’intermédiaire des vis (2) et (si nécessaire) ...
-
Seite 26: Installations Hydrauliques
INSTALLATIONS HYDRAULIQUES Attention: vérifier, avant de mettre en marche le brûleur, que le tube de retour ne soit pas obstrué. Une obturation éventuelle endommagerait l’organe d’étanchéité de la pompe. IMPORTANT La pompe est prévue pour un fonctionnement en bitube. Pour le fonctionnement en mono-tube, enlever la vis de by-pass (A), (voir figure). Il est nécessaire d’installer un filtre sur la ligne d’alimentation du combustible . - Seite 27 RACCORDEMENTS ELECTRIQUE NE PAS ÉCHANGER LE POSITIF ET LE 20191906 NÉGATIF: cet échange endommagerait le bon fonctionnement de l'appareil. Vanne Relais BRANCHEMENTS ÉLECTRIQUES EFFECTUÉS PAR L'INSTALLATEUR La tension d'alimentation doit être mesu- rée à la borne 1 - 2 (sur le bornier du brû- leur) et avec le brûleur éteint.
-
Seite 28: Réglage De La Combustion
RÉGLAGE DE LA COMBUSTION Conformément à la EN267, suivre les indications du manuel de la chaudière pour monter le brûleur, effectuer le réglage et l’essai, contrôler la concentration de CO et CO dans les fumées, leur température et celle moyenne de l’eau de la chaudière. Selon le débit voulu par la chaudière, il faut déterminer: la buse, la pression de la pompe, le réglage de la tête de combustion, le réglage du volet, selon le tableau suivant. -
Seite 29: Pression Pompe
KÉROSÈNE Réglage tête Réglage Gicleur Pression pompe Débit brûleur combustion volet d’air Angle kg/h ± 4% Repère Repère 0,85 60° 1,00 60° 1,10 60° 1,25 60° 1,35 60° 1,50 60° 1,75 60° 2,00 60° 1,50 60° 4,43 1,75 60° 5,17 2,00 60°... -
Seite 30: Réglage Volet D'air
RÉGLAGE VOLET D’AIR Le réglage du débit d'air s'effectue en agissant sur le volet (1), après avoir desserré les vis (2). Les réglages indiqués dans le tableau se réfèrent au brûleur avec un capot métallique monté et la chambre de combus- tion avec la dépression «... -
Seite 31: Position D'entretien
PROGRAMME DE DÉMARRAGE BRÛLEUR Blocage pour absence d’allumage Normal Thermostat Moteur Transf. d’allumage Vanne Flamme Lampe sécurité D5229 ATTENTION Toutes les 2000 heures de travail, vérifier l'usure des balais et du collecteur moteur. POSITION D’ENTRETIEN Accès à la tête de combustion, au groupe ac- croche flamme / électrodes et au gicleur, (voir fig. -
Seite 33: Technical Data
TECHNICAL DATA TYPE 705M1 706M1 Thermal power – output 29 - 69 kW 54 - 120 kW 2.45 - 5.8 kg/h 4.5 - 10 kg/h Output Light oil max. viscosity at 20 °C: 4 ÷ 6 mm Fuel Kerosene max. viscosity at 20 °C: 1.6 ÷ 6 mm 24 V D.C ±... -
Seite 34: Firing Rate
EQUIPMENT Quantity Description Flexible pipes with nipples Flange with insulating gasket Screws and nuts for flange Maintenance assembly Screw with two nuts for flange FIRING RATE 705M1 706M1 Fuel output - kg/h D8932 Thermal power - kW OVERALL DIMENSIONS Flange Burner D7818 TYPE... - Seite 35 INSTALLATION BOILER FIXING Put on the flange (1) the screw and two nuts, (see fig. 2). Widen, if necessary, the insulating gasket holes (5), (see fig. 3). Fix the flange (1) to the boiler door (4) using screws (2) and (if necessary) the nuts (3) interpos- ...
-
Seite 36: Hydraulic Systems
HYDRAULIC SYSTEMS Warning: before starting the burner make sure that the return pipe-line is not clogged: any obstruction would cause the pump seals to break. WARNING The pump is supplied for use with a two pipe system. For use on a one pipe system, it is necessary to remove the by-pass screw (A), (see figure). A filter must be installed on the suction fuel line. -
Seite 37: Electrical Wiring
ELECTRICAL WIRING 20191906 DO NOT EXCHANGE THE POSITIVE WITH THE NEGATIVE: this ex- change damages the working of the Valve control box. Relay ELECTRICAL CONNECTIONS CARRIED OUT BY THE INSTALLER The feeding voltage must be measu- red at the clamp 1 - 2 (on the terminal block of the burner) and the burner switched off. -
Seite 38: Combustion Adjustment
COMBUSTION ADJUSTMENT In conformity with EN267 the application of the burner on the boiler, adjustment and testing must be carried out observing the instruction manual of the boiler, including verification of the CO and CO concentration in the flue gases, their temperatures and the average temperature of the water in the boiler. To suit the required appliance output, fit the nozzle then adjust the pump pressure, the setting of the combustion head and the air damper opening in accordance with the following schedule. -
Seite 39: Combustion Head Setting
FUEL KEROSENE Comb. head Air damper Nozzle Pump pressure Burner output adjustment adjustment Angle kg/h ± 4% Set-point Set-point 0.85 60° 1.00 60° 1.10 60° 1.25 60° 1.35 60° 1.50 60° 1.75 60° 2.00 60° 1.50 60° 4.43 1.75 60° 5.17 2.00 60°... - Seite 40 AIR DAMPER ADJUSTMENT The regulation of the air-rate is made by adjusting the air damper (1), after loosing the screws (2). The settings indicated in the schedule refer to the burner with its metal cover fitted and the combustion chamber with “zero”...
-
Seite 41: Burner Start-Up Cycle
BURNER START-UP CYCLE Normal Lock-out, due to light-failure Thermostat Motor Ignition transformer Valve Flame Lock-out lamp D5229 ATTENTION Every 2000 working hours, verify the wear of the brushes and the motor manifold. MAINTENANCE POSITION Access to the combustion head, diffuser disc / elec- trodes unit and nozzle, (see fig. - Seite 44 RIELLO S.p.A. I-37045 Legnago (VR) Tel.: +39.0442.630111 http:// www.riello.it http:// www.rielloburners.com Con riserva di modifiche - Änderungen vorbehalten! - Sous réserve de modifications - Subject to modifications...