Herunterladen Diese Seite drucken
Getac K120 Serie Bedienungsanleitung
Vorschau ausblenden Andere Handbücher für K120 Serie:

Werbung

Verfügbare Sprachen
  • DE

Verfügbare Sprachen

  • DEUTSCH, seite 10
GET MORE
FROM GETAC.
REGISTER TODAY.
register.getac.com
K120 Series
Operation Guide
Manuel de fonctionnement
Инструкция по эксплуатации
Bedienungsanleitung
Guía de funcionamiento
Guida d'Uso
操作指南
Rugged Mobile Computing Solutions

Werbung

loading

Inhaltszusammenfassung für Getac K120 Serie

  • Seite 1 K120 Series Operation Guide Bedienungsanleitung   Guía de funcionamiento  Manuel de fonctionnement Guida d’Uso   操作指南 Инструкция по эксплуатации   GET MORE FROM GETAC. REGISTER TODAY. register.getac.com Rugged Mobile Computing Solutions...
  • Seite 2 English ..........2 Deutsch .......... 8 Español ......... 16 Français ........21 Italiano ......... 28 Pусский ......... 34 简体中文 ........40 繁體中文 ........45 NOTE: The information in this manual is subject to change without notice. Depending on the specific model you purchased, the look of your model may not exactly match the graphics shown in this document.
  • Seite 3 Identifying Hardware Components Barcode reader lens Camera lens Microphone Microphone Touchscreen Light sensor Micro-SIM card Stylus slot slot Combo audio connector USB-C Thunderbolt™ 4 port NFC/RFID SSD canister reader Camera/Barcode Trigger PowerShare USB 3.2 Gen 1 port See footnote Smart card reader RJ45 connector Power Kensington lock...
  • Seite 4 Getting Started CAUTION: Make sure the latch is correctly locked, not revealing the underneath red part. Unpacking Installing the Micro-SIM Card (Optional) K120 Tablet Keyboard dock (optional) Locate the micro-SIM card slot. Slide the protective cover to the unlocked position Battery pack x 2 AC adapter and open the cover.
  • Seite 5 Windows desktop. You can download the latest display. It is recommended that you use a manual and drivers by accessing the Getac screen saver or turn off the display when it is website at not in use.
  • Seite 6 • To maintain the battery pack’s operating effi- Cleaning Guidelines ciency when removed from the computer, • Never clean the computer with its power on. store it in a cool dark place and with 30% ~ 40% charge remaining. • Use a soft, lint-free cloth to wipe the exterior •...
  • Seite 7 will go back to normal after returning to Caution room temperature. • Do not use the battery where static electricity • When there is a noticeable discrepancy in (more than 100V) exists that might damage the placement of the stylus on the screen the protection circuit of the battery.
  • Seite 8 Never place your device or AC adapter on furniture or any other surface that might be Company name Getac Inc. marred by exposure to heat since the base of your device and the surface of the AC 15495 Sand Canyon Rd., Suite 350...
  • Seite 9 Please reference ENERGY STAR® related infor- https://support.getac.com/Portal/Page/809 mation from http://www.energystar.gov. The device is restricted to indoor use only when As an ENERGY STAR® Partner, Getac Technology operating in the 5150 to 5350 MHz frequency Corporation has determined that this product range.
  • Seite 10 
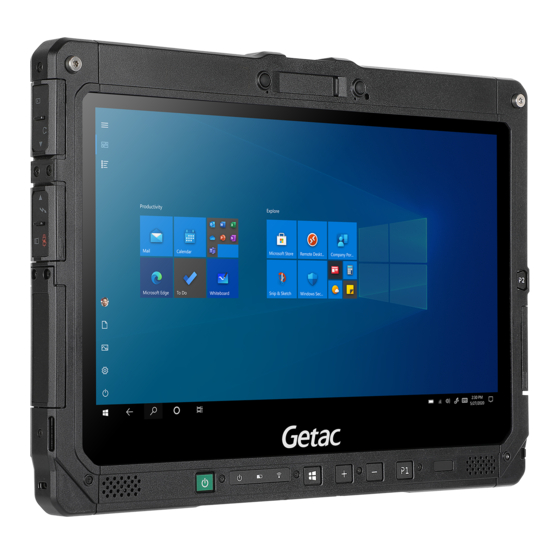
Hardwarekomponenten identifizieren Barcodeleser-Linse Kameraobjektiv Mikrofon Mikrofon Touchscreen Lightsensor Micro-SIM- Kartensteckplatz Stylus-Halter Kombi-Audioanschluss USB-C- Thunderbolt™-4-Port NFC/RFID- SSD-Modul Leser Kamera/Auslöse PowerShare-USB-3.2- Gen-1-Anschluss Siehe Fußnote Smart Card-Steckplatz RJ45-Anschluss Netzanschluss Kensington-Schloss Lautsprecher Lautsprecher Netzschalter Fingerabdruck-Scanner Geräteanzeigen OSDC Start Leiser Lauter Blitz Kameraobjektiv Akku Tri-Antennen-Durchleitung Batteriefreigaberiegel Batteriefreigaberiegel Sicherheitsverriegelung...
  • Seite 11 Erste Schritte ACHTUNG: Achten Sie darauf, dass die Verriege- lung fest geschlossen ist, so dass der untere rote Auspacken des Lieferkartons Teil nicht zu erkennen ist. Einlegen der Micro-SIM Karte K120-Tablet (Option) Tastaturdock (Option) Akku x 2 Netzteil Suchen Sie nach dem Micro-SIM-Karten-schlitz. Schieben Sie die Schutzabdeckung in die ent- Standardakku riegelte Position und öffnen Sie die Abdeckung.
  • Seite 12 Sie das Benutzerhandbuch (im PDF Format) Schließen Sie das Netzteil wie nachstehend auf Ihrem Windows Desktop. Sie können das abgebildet an. aktuelle Handbuch und Treiber durch Aufruf des Getac Weblinks unter https://support.getac.com/Portal/Page/846. Umgang mit dem Computer Richtlinien zum Aufstellungsort •...
  • Seite 13 • Eingebrannte LCD-Bilder erscheinen, wenn laden des Akkus in einem geschlossenen Fahr- ein festes Muster längere Zeit am Bildschirm zeug und bei heißem Wetter. Zudem startet angezeigt wird. Sie können das Problem ver- der Ladevorgang nicht, wenn der Akku nicht meiden, indem Sie die Menge statischer In- innerhalb des zugelassenen Temperaturbe- halte am Display reduzieren.
  • Seite 14 • tung der Touchscreen-Oberfläche beschä- Lassen Sie den Akku nicht fallen, setzen Sie digt werden. ihn keinen Erschütterungen aus. • • Schalten Sie den Computer aus, wenn Sie das Durchstechen Sie den Akku nicht mit einem Display reinigen. Reinigen Sie das Display bei Nagel, schlagen Sie nicht mit einem Hammer eingeschaltetem Computer, könnten Betriebs- darauf.
  • Seite 15 Decken Sie das Netzteil nicht mit Papier oder Informationen über Vorschriften anderen Gegenständen ab, da hierdurch der Kühleffekt gemindert wird. Verwenden Sie nicht das Netzteil, wenn es sich in einer Trage- Getac erklärt hiermit, dass Gerät tasche befindet. mit den grundlegenden Anforde- rungen und anderen relevanten •...
  • Seite 16 Umwelt für künf- tige Generationen geschützt wird. Relevante Informationen zu ENERGY STAR® finden Sie unter http://www.energystar.gov. Als Partner von ENERGY STAR® hat Getac Technology Corporation ermittelt, dass dieses Produkt die Richtlinien von ENERGY STAR® in Bezug auf Energieeffizienz erfüllt.
  • Seite 17 Identificar componentes de hardware Lente del lector de código de barras Lentes de la cámara Micrófono Micrófono LCD pantalla táctil Sensor de luz Lector de tarjetas micro-SIM Soporte para el lápiz Conector de audio combinado Puerto USB-C Thunderbolt™ 4 Lector NFC/RFID Módulo SSD Cámara/Activador Puerto USB 3.2 Gen 1...
  • Seite 18 Comenzar PRECAUCIÓN: Asegúrese de que el seguro esté Desembalaje correctamente colocado y que no se vea la parte roja que hay debajo del mismo. Tableta K120 Base de acoplamiento para teclado (opcional) Instalar la tarjeta Micro-SIM (opción) Batería x 2 Adaptador CA Localice la ranura para tarjetas Micro-SIM.
  • Seite 19 (en formato PDF) Conecte el adaptador de CA como se muestra del escritorio de Windows. Puede descargar el a continuación. manual y los controladores más recientes accediendo al vínculo Web de Getac en https://support.getac.com/Portal/Page/866. Cuidar el equipo Directrices de ubicación •...
  • Seite 20 • período de tiempo. Puede evitar el problema Se recomienda que no cargue la batería más limitando la cantidad de contenido estático de una vez al día. en la pantalla. Es recomendable utilizar un • Se recomienda que cargue la batería cuando protector de pantalla para desactivar la el equipo esté...
  • Seite 21 • • No aplique demasiada fuerza al usar la pan- Deje de utilizar la batería si se observan ano- talla. Evite poner objetos sobre la pantalla, malías, como humo, calor, deformidades o ya que esto podría hacer que se rompa el decoloración inusuales.
  • Seite 22 RoHS EU definidos por los Estándares Internacionales de Seguridad. Aun así, el contacto constante con Los productos Getac cumplen los requisitos de la las superficies calientes durante periodos largos directiva 2011/65/UE sobre la restricción del uso de tiempo puede causar malestar o daños. Para...
  • Seite 23 Identification des composants matériels Objectif du lecteur de code barres Objectif de la caméra Micro Micro Écran tactile Capteur de lumière Lecteur de cartes micro-SIM Porte-stylet Connecteur audio combo Port USB-C Thunderbolt™ 4 Lecteur NFC/RFID Module SSD Caméra/ Déclenchement Port USB 3.2 Gen 1 PowerShare Voir la note Lecteur de carte à...
  • Seite 24 Mise en route ATTENTION : Assurez-vous que le loquet est Déballage correctement verrouillé : la partie rouge ne doit pas être visible. Tablette K120 Installation de la carte micro-SIM Station d’accueil clavier (optionnel) (optionnel) Bloc batterie x 2 Adaptateur CA Standard Repérez l’emplacement de la carte micro-SIM.
  • Seite 25 PDF) sur votre bureau Windows. Vous Branchez l’adaptateur CA secteur comme indi- pouvez télécharger les dernières éditions du qué ci-dessous. manuel de l’utilisateur et des pilotes à partir du site Web de Getac au lien suivant: https://support.getac.com/Portal/Page/879. Prendre soin de l’ordinateur Consignes concernant l’emplacement •...
  • Seite 26 • La rémanence d’image sur l’écran LCD se mence pas si le bloc batterie n’est pas dans la produit si un motif reste affiché à l’écran plage de température ambiante permise. pendant une durée prolongée. Vous pouvez • Il est conseillé de ne pas charger le bloc bat- éviter ce problème en limitant l’affichage de terie plus d’une fois par jour.
  • Seite 27 • Coupez le courant de l’ordinateur pour net- Avertissement toyer l’affichage. Le nettoyage de l’affichage • Maintenez la batterie à l’écart des enfants avec l’alimentation en marche peut causer en bas âge. un mauvais fonctionnement. • Arrêtez d’utiliser la batterie si vous remarquez •...
  • Seite 28 STAR® relatives à l’efficacité énergétique. face accessible à l’utilisateur définies par les Tous les produits Getac avec le logo ENERGY normes internationales de sécurité. Néanmoins, STAR® sont conformes à la norme ENERGY un contact régulier et prolongé...
  • Seite 29 Waste Electrical and Electronic Equipment (WEEE) Ce symbole signifie que, conformément aux lois et aux réglementations locales, votre produit doit être jetés séparément des déchets ménagers. Lorsque ce produit atteint la fin de son cycle de vie, apportez-le à un point de collecte désigné par les autorités locales.
  • Seite 30 Identificazione dei componenti hardware Lente del lettore di codici a barre Obiettivo fotocamera Microfono Sensore della Microfono Touchscreen luminosità Slot scheda micro-SIM Portastilo Connettore audio combo Porta USB-C Thunderbolt™ 4 Lettore NFC/RFID Modulo SSD Fotocamera/Trigger Porta PowerShare Fare riferimento USB 3.2 Gen 1 alla nota a piè...
  • Seite 31 Per iniziare AVVERTENZA: Assicurarsi che il gancio di rilascio della batteria sia bloccato correttamente, e che non si veda la parte inferiore di colore rosso. Disimballaggio Installazione della scheda micro-SIM Tablet K120 (opzionale) Dock per tastiera (opzionale) Individuare lo slot per schede micro-SIM. Far Batteria x 2 Adattatore CA scorrere il coperchio protettivo in posizione...
  • Seite 32 Manuale utente (nel formato PDF) Collegare l’adattatore CA come mostrato di sul desktop di Window. È possibile scaricare il seguito. manuale e i driver più aggiornati accedendo al sito web Getac su https://support.getac.com/Portal/Page/892. Cura del computer Linee guida sul collocamento •...
  • Seite 33 sullo schermo è visualizzata la stessa imma- trova nella gamma di temperature consen- gina per periodi prolungati. Il problema può tita. essere evitato limitando la quantità di imma- • Si consiglia di non ricaricare la batteria più di gini statiche sullo schermo. Si raccomanda di una volta al giorno.
  • Seite 34 computer è alimentato può causare un fun- Avvertenza zionamento non corretto. • Tenere la batteria lontano dai bambini. • Non applicare forza eccessiva sul monitor. • Cessare di utilizzare la batteria se sono pre- Evitare di spostare il computer mentre viene senti anomalie evidenti quali odori anomali, tenuto fermo o viene ruotato il monitor.
  • Seite 35 RoHS EU normale utilizzo. È conforme ai limiti di tempe- ratura della superficie accessibile all’utente defi- I prodotti Getac soddisfano i requisiti della Di- niti dagli International Standards for Safety. Tut- rettiva 2011/65/UE sulla limitazione nell’utilizzo tavia, il contatto prolungato con superfici calde...
  • Seite 36 Внешний вид устройства Объектив сканера штрихкодов Объектив камеры Микрофон Микрофон Сенсорный экран Датчик освещения Гнездо micro-SIM- карты Держатель стилуса Комбинированный разъем аудио Порт USB-C Thunderbolt™ 4 Считыватель NFC/RFID Модуль SSD Камера/Trigger Порт USB 3.2 Gen 1 PowerShare См. примечание Считыватель смарт-карт...
  • Seite 37 Перед началом работы ОСТОРОЖНО: Убедитесь, что фиксатора правильно заблокирована, и ее нижняя красная часть не видна. Распаковка Установка micro-SIM-карты Планшет K120 (опция) Док-станция с клавиатурой (опция) Найдите отверстие для карты micro-SIM. Аккумулятор x 2 Адаптер переменного тока Сдвиньте защитную крышку в разблоки- Стандартный...
  • Seite 38 Подключите адаптер переменного тока, как делии обратитесь к руководству пользователя показано ниже. (в формате PDF), приведенному на рабочем столе Windows. Последние версии руководства и драйверов можно загрузить с вебсайта Getac: https://support.getac.com  Драйверы и документы. Обслуживание компьютера Указания по размещению...
  • Seite 39 • Общие указания Чтобы не допустить быстрого ухудшения ха- рактеристик аккумулятора и, таким образом, • Не помещайте на сложенный компьютер продлить срок его службы, постарайтесь ми- тяжелые предметы — это может привести к нимизировать количество процедур переза- повреждению дисплея. рядки, и не допустить слишком частого по- вышения...
  • Seite 40 • Указания по работе с сенсорным Запрещается заряжать и подключать аккуму- лятор в обратной полярности. экраном • Запрещается подключать аккумулятор к • При работе с дисплеем пользуйтесь пальцем вилке (или розетке) сети переменного тока, или стилусом для сенсорного экрана. Исполь- а...
  • Seite 41 изделие соответствует рекомендациям ENERGY непре-рывный продолжительный контакт с STAR® по энергосбережению. нагревающи-мися поверхностями может Все изделия Getac с логотипом ENERGY STAR® причинить неудоб-ство или вред здоровью. Во соответствуют требованиям стандарта ENERGY избежание возмож-ного теплового воздействия STAR®, а функция управления питанием в них...
  • Seite 42 硬件组件介绍 条形码扫描镜头 相机镜头 麦克风 麦克风 触摸屏 光传感器 Micro-SIM 卡插槽 触摸屏 笔座 复合式音频端口 USB-C Thunderbolt™ 4 端口 NFC/RFID 阅读器 SSD 固态磁盘 相机/触发 PowerShare USB 3.2 Gen 1 端口 参见注记 智能卡插槽 RJ45 端口 电源插孔 Kensington 安全锁孔 扬声器 扬声器 指纹传感器 电源钮 OSDC 指示灯 调低音量...
  • Seite 43 准备开始 注意: 请确保释放闩正确锁上, 不应露出下面的红色 部位。 装箱清单 安装 micro-SIM 卡(可选) K120 平板电脑 找到 micro-SIM 卡插槽所在, 将保护门盖推到解 键盘底座(可选) 锁位置即可打开门盖。 电池组 x 2 电源适配器 标准 Micro-SIM 卡插槽被金属片覆盖着。请拧松螺 电源线 丝拆下金属片。 - 或 - 高容量 触摸屏笔 笔绳 依正确方向将 micro-SIM 卡插入到底。 屏幕清洁布 操作指南等文件 驱动程序光盘(可选) 安装电池组 连接电源和开机 K120 有两个电池组;两个的安装方式相同。...
  • Seite 44 • 切勿在产品开机中清理产品。 需要时,您可以使用「恢复分区」(Recovery Par- • 清洁机身外部时,请以不掉绵屑的软质布擦拭。 tition) 功能将 Windows 系统恢复为出厂状态。 (请 • 参见用户手册 取得详细信息。) 触摸板表面若沾有灰尘或油渍会影响其灵敏度。 请以黏性胶带清理触摸板表面。 更多信息 • 如果产品遭水或其他液体溅湿,请在可以清理的 时候予以擦干。不要让产品在可以擦干的情况下 产品完整信息请参阅放置于电脑 Windows 桌面的 持续潮湿着。 使用手册(PDF 格式)。您可以访问 Getac 网站下 • 产品在 0 °C (32 °F) 环境下遇湿可能会导致冻伤。 载最新手册和驱动程序。 请务必将打湿的产品抹干。 https://support.getac.com  驱动及文件下载...
  • Seite 45 • 电池准则 使用软布擦去显示屏上的灰尘。触摸屏表面有特 殊保护层,可防止灰尘吸附。若不使用软布,可 • 产品接上交流适配器,并且适配器的电源线插入 能导致触摸屏表面的特殊保护层损坏。 电源插座,即对电池进行充电。此时产品上的电 • 清洁屏幕时请务必关机。开机时清洁屏幕可能导 池指示会亮褐色,表示充电进行中。建议您在产 致屏幕故障。 品关机状态下充电。 电池充满时, 指示灯亮绿色。 • 不要在显示屏上过分用力。避免在显示屏上方放 • 使用电池时,尽量将电力全部用完后再充电,并 置物品,否则可能导致破碎并损坏显示屏。 且一次就将电量充满,以免损坏电池。 • C / 41 °F; 高于 60 在低温和高温 (低于 5 C / 140 • 电池属于消耗品,下列情形会缩短其寿命: °F)条件下,触摸屏响应速度可能变慢或触摸位 – 频繁对电池充电 置偏移。达到室温条件后即可恢复正常。 –...
  • Seite 46 的节 ® • 使用适配器为设备供电或对电池充电时,确保适 能规范。 配器周围通风良好。不要用纸或其它物品盖住电 所有获得 ENERGY STAR ® 标章的 Getac 产品皆符 源适配器,以免妨碍散热。不要在手提箱内使用 合 ENERGY STAR ® 规范。电源管理功能在默认状态 电源适配器。 下是启动的。Getac 符合 ENERGY STAR ® 的产品可 • 将适配器连接到正确的电源。产品表面和/或包 见于 EPA 网站: 装上已注明电源要求。 https://www.energystar.gov/products • 适配器线缆损坏时不要使用适配器。 产品中有害物质的名称及含量 • 简 请勿自行维修设备。 设备内部没有可维修的部件。...
  • Seite 47 K120G2 平 板 電 腦 操作指南 繁 體 中 文...
  • Seite 48 硬體元件介紹 條碼掃描鏡頭 相機鏡頭 麥克風 麥克風 觸控螢幕 光線感應器 Micro-SIM 卡插槽 觸控筆座 複合式音訊接頭 USB-C Thunderbolt™ 4 埠 NFC/RFID SSD 固態硬碟 讀取器 相機/觸發 PowerShare USB 3.2 Gen 1 埠 參見註記 智慧卡插槽 RJ45 接頭 電源接頭 防盜鎖孔 喇叭 喇叭 指紋辨識器 電源鈕 指示燈 OSDC 降低音量 開始 提高音量...
  • Seite 49 開始使用 注意:請確保釋放閂正確鎖上,不應露出下面的紅色 部位。 裝箱清單 安裝 micro-SIM 卡(選配) K120G2 平板電腦 找到 micro-SIM 卡插槽所在,將保護門蓋推到解 鍵盤底座(選配) 鎖位置即可打開門蓋。 電池組 x 2 電源整流器 標準 Micro-SIM 卡插槽被金屬片覆蓋著。請鬆開螺絲 電源線 拆下金屬片。 - 或 - 高容量 觸控筆 筆繩 依正確⽅向將 micro-SIM 卡插入到底。 拭鏡布 操作指南等文件 驅動程式光碟(選配) 安裝電池組 連接電源與開機 K120 有兩個電池槽位,供兩個電池組安裝。兩個電 池組的安裝⽅法⼀樣。 首次開機時必須使用外部電源。...
  • Seite 50 更多訊息 打開鍵盤底座上電源接頭的蓋子。 要 獲 取 本 產 品 的 完 整 資 訊 , 請 參 閱 放 置 於 電 腦 如下圖所示連接電源整流器。 Windows 桌面的使用手冊(PDF 格式)。您可以造 訪 Getac 網站下載最新手冊和驅動程式。網頁位於 https://support.getac.com  驅動程式與文件下載 平時維護 地點守則 • 為確保最佳效能,請在建議的 0 °C 到 40 °C 環境...
  • Seite 51 清理守則 − 在電腦開機狀態下,充電時間會延⻑。要減短 充電時間,建議讓電腦進入睡眠或休眠模式。 • 勿在電腦開機狀態下進行清潔。 − 低溫環境會使充電的時間延⻑,也會使放電 的時間加速。 • 清潔機身外部時,請以不掉綿絮的軟質布料擦 拭。 • 在極低溫環境下使用電池電力時,可能會有操作 時間縮短以及電力顯示值不正確的情形產生。此 • 觸控板表面若沾有灰塵或油漬,將影響其靈敏 現象來⾃電池的化學特性。建議電池操作溫度應 度,請以黏性膠帶清理觸控板表面。 維持在 -10 °C ~ 50 °C 的適當範圍。 • 如果電腦遭水或其他液體濺溼,請在可以清理的 • 請勿貯放電池超過六個月而不充電。 時候予以擦乾。勿讓電腦在可以擦乾的情況下持 續潮濕著。 觸控螢幕守則 • 電腦在低於 0 °C 環境下遇濕可能會導致凍傷。請 務必將打濕的電腦抹乾。 • 請用手指或隨附的觸控筆操作螢幕。使用手指或...
  • Seite 52 • 切勿以 AC 插頭(插座)或汽車插頭連接電池。 • 使用電源整流器供電或充電時應保持四周通風 良好。切勿讓紙張或其他物品覆蓋電源整流器而 • 切勿以不明⽅式應用電池。 降低其冷卻效果。切勿將電源整流器放置在袋內 • 切勿讓電池短路。 使用。 • 切勿讓電池掉落或遭到重擊。 • 將電源整流器連接至適當的電源。您可以在產品 包裝盒和/或包裝上找到電壓規格。 • 切勿以釘子穿透或鐵鎚敲擊。 • 電源整流器的電線如有破損,請勿再行使用。 • 切勿直接焊接電池。 • 請勿試圖⾃行維修產品。產品內部無可維修部 • 切勿拆解電池。 件。如果產品損壞或暴露於溼氣水份中,則應更 • 電池需遠離大氣壓力極低的環境,因為該環境可 換產品。 能導致電池爆炸或者易燃液體或氣體外洩。 關於發燙與溫度 警告 在正常使用下,您的裝置可能發燙。本裝置符合 In- • 電池需遠離嬰幼兒。 ternational Standards for Safety 所定義的⼈體接 •...
  • Seite 53 費者,以期達到省錢⽅便與未來世 代環境保護的宗旨。ENERGY STAR ® 相關訊息請至以下官網查看。 網址:http://www.energystar.gov 做為 ENERGY STAR 的合作夥伴,Getac Technology ® Corporation 確保本產品符合 ENERGY STAR 的節 ® 能規範。 獲得此標章的 Getac 產品皆符合 ENERGY STAR 規 ® 範。電源管理功能在預設狀態下是啟動的。Getac 符 合 ENERGY STAR 的產品可見於 EPA 網站: ® https://www.energystar.gov/products 繁 體 中 文...
  • Seite 54 繁 體 中 文...
  • Seite 56 5 6 1 5 1 4 4 6 0 0 0 5 R 0 2...