Herunterladen Diese Seite drucken

Werbung

Verfügbare Sprachen
  • DE

Verfügbare Sprachen

  • DEUTSCH, seite 36
04/2010
Mod: E99/6PQFM3-XL
Production code: BE6FM

Werbung

loading

Inhaltszusammenfassung für Diamond MASTER 900 E99/2PQA1

  • Seite 1 04/2010 Mod: E99/6PQFM3-XL Production code: BE6FM...
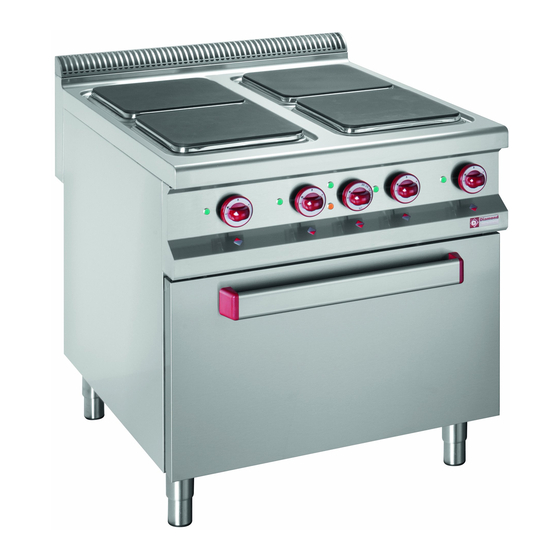
  • Seite 2 MASTER 900...
  • Seite 3 ITALIANO ....................pagina 2 - 12 ENGLISH ....................page 13 - 23 FRANÇAIS ....................page 24 - 34 DEUTSCH ....................Seite 35 - 45 ESPAÑOL ....................página 46 - 56 INDICE CAPITOLO DESCRIZIONE PAGINA Avvertenze generali ..........................Dati tecnici ............................Tabella I: Dati tecnici cucine elettriche monoblocco ................
  • Seite 4 AVVERTENZE GENERALI - Leggere attentamente le avvertenze contenute nel presente libretto in quanto forniscono importanti indicazioni riguardanti la sicurezza di installazione, d’uso e di manutenzione. - Conservare con cura questo libretto per ogni ulteriore consultazione dei vari operatori. - Dopo aver tolto l’imballaggio, assicurarsi dell’integrità dell’apparecchiatura e in caso di dubbio, non utilizzare l’apparecchiatura e rivolgersi a personale professionalmente qualificato.
  • Seite 5 DATI TECNICI TABELLA I: DATI TECNICI CUCINE ELETTRICHE MONOBLOCCO DIMENSIONI POTENZA ASSORBITA * in mm PESO MOD. ESTERNO FORNO GB 2/1 NETTO Forno Totale 3500W 3000W 4000W R1 (kW) R2 (kW) Lx Px A Lx Px A 450x900x850 E99/2PQA1 900x900x850 E99/4PQA2 E6FM 1350x900x850...
  • Seite 6 ISTRUZIONI PER L’INSTALLAZIONE L’installazione deve essere eseguita da persone qualificate secondo la normativa in vigore. AVVERTENZE: Nel caso in cui l’apparecchiatura venga installata contro una parete quest’ultima deve resistere ai valori di temperatura di 100°C e deve essere incombustibile. Prima di procedere all’installazione, togliere dal rivestimento la pellicola di protezione in plastica, eliminando gli eventuali residui adesivi con prodotto adatto alla pulizia per l’acciaio inossidabile.
  • Seite 7 COLLEGAMENTO ELETTRICO L’allacciamento elettrico dev’essere eseguito nel rispetto delle norme CEI, solo da personale autorizzato e competente. In primo luogo esaminare i dati riportati nella tabella dati tecnici del presente libretto, nella targhetta e nello schema elettrico. L’allacciamento previsto è del tipo fisso. IMPORTANTE: A monte di ogni apparecchiatura è...
  • Seite 8 COLLEGAMENTI ALLE DIVERSE RETI ELETTRICHE DI DISTRIBUZIONE PE (Terra) giallo-verde N (NP) azzurro 3N AC 380...415 V 50/60 Hz. nero nero marrone PE (Terra) giallo-verde N (NP) azzurro 2N AC 380...415 V 50/60 Hz. nero marrone PE (Terra) giallo-verde nero 3 AC 220...240 V 50/60 Hz.
  • Seite 9 E99/4PQA2 E99/6PQFM3 E6FM MODELLO E6FA E99/4PQF2 E99/6PQFA3 E99/2PQA1 Mass. N° cavi Mass. Mass. N° cavi Mass. N° cavi N° cavi Mass. N° cavi Mass. N° cavi TIPO DI TENSIONE 5 x 2,5 18,3 5 x 2,5 24,6 20,84 5 x 2,5 12,5 5x1,5 29,2...
  • Seite 10 F) Sostituzione delle lampade forno - Nel caso si renda necessaria la sostituzione di una delle lampade interne del forno , bisogna innanzitutto interrompere l’allacciamento elettrico dell’apparecchio. Si deve poi svitare la calottina di protezione di vetro (A),sostituire la lampada e rimontare la calottina protettiva.
  • Seite 11 PIASTRA RAPIDA Ø 220 e 220 mm Ø 145 mm POS. IMPIEGO 2600 1500 COTTURA 1750 1300 MANTENIMENTO SPENTO Tab. 4 Per spegnere la piastra è sufficiente ruotare la manopola in qualsiasi direzione portando lo “0” in corrispondenza dell’indice. USO DEL FORNO ELETTRICO IMPORTATE: La prima volta che si usa il forno, farlo funzionare a vuoto e al massimo per circa 1 ora, lasciando possibil- mente le finestre della cucina aperte.
  • Seite 12 PRE-RISCALDAMENTO DEL FORNO In alcuni tipi di preparazioni alla cottura è necessario che il forno venga pre-riscaldato sia perchè si rende necessario una cottura il più possibile uniforme sia per evitare spruzzi di grasso, formazione di fumo e incrostazioni del forno. TEMPI DI PRE-RISCALDAMENTO I tempi di pre-riscadamento sono legati alla temperatura scelta per la cottura per cui si imposta la temperatura prescelta, il forno entra in funzione e quando la luce spia che indica l’azione del termostato si spegne si è...
  • Seite 13 FORNO ATTENZIONE: Non lavare l’apparecchiatura all’esterno con getti d’acqua diretti o ad alta pressione, poiché eventuali infiltrazioni nei componenti elettrici potrebbero pregiudicare il regolare funzionamento dell’apparecchiatura e dei sistemi di sicurezza. Prima di effettuare le operazioni di pulizia, disinserire l’alimentazione elettrica, è necessario pulire giornalmente l’apparecchio per ragioni di igiene e per evitare guasti di funzionamento.
  • Seite 14 INDEX CHAPTER DESCRIPTION PAGE General notices ............................ 14 Technical data ............................. 15 Free standing electric ranges ......................15 Technical characteristics ........................15 Oven gn2/1 ............................15 Electrical heating ..........................15 Installation instructions ........................16 Information about free standing electric ranges ................. 16 Laws, regulations and technical directives ..................
  • Seite 15 GENERAL NOTICES - Carefully read the instructions contained in the present booklet as they supply important information relating to safe installation, use and maintenance. - Keep this booklet with care, for any further consultation by the various operators. - Having removed the packing, make sure the unit is in good order and in case of doubt, do not use the unit, but call on skilled personnel.
  • Seite 16 TECHNICAL DATA FREE STANDING ELECTRIC RANGES DIMENSIONS POWER INPUT * in mm MOD. EXTERNAL OVEN GN 2/1 WEIGHT Oven Total 3500W 3000W 4000W Wx Dx H Wx Dx H R1 (kW) R2 (kW) 450x900x850 E99/2PQA1 E99/4PQA2 900x900x850 2x2,5 2x2,5 21+10 E6FM 1350x900x850 1000x700x310...
  • Seite 17 INSTALLATION INSTRUCTIONS Installation must be performed by qualified technicians according to the law in force. WARNINGS: Should the unit be installed against a wall, the latter must be heat-resistant to temperatures of 100°C and must be fireproof. Before proceeding with the installation, remove the protective plastic film from the relevant parts, eliminating any adhesive residues with an appropriate cleaning product suitable for stainless steel.
  • Seite 18 ELECTRICAL CONNECTION Electrical connection should be performed in compliance with the IEC regulations, only by authorised and competent personnel. In the first instance, examine the data shown on the technical data table of this manual, on the label and on the electrical diagram.
  • Seite 19 CONNECTIONS TO VARIOUS MAIN POWER SUPPLIES PE (Terra) giallo-verde N (NP) azzurro 3N AC 380...415 V 50/60 Hz. nero nero marrone PE (Terra) giallo-verde N (NP) azzurro 2N AC 380...415 V 50/60 Hz. nero marrone PE (Terra) giallo-verde nero 3 AC 220...240 V 50/60 Hz. nero marrone PE (Terra)
  • Seite 20 E99/4PQA2 E99/6PQFM3 E6FM MODEL E6FA E99/4PQF2 E99/6PQFA3 E99/2PQA1 n°cables Mass. n°cables Mass. Mass. Mass. n°cables n°cables n°cables Mass. n°cables Mass. SUPPLY VOLTAGE TYPE 5 x 2,5 18,3 5 x 2,5 24,6 20,84 5 x 2,5 3N AC 380...415 V 50/60 Hz. 12,5 5x1,5 29,2...
  • Seite 21 F) Changing the oven lamps - If it is necessary to change one of the lamps inside the oven, you first need to disconnect the unit from the power supply. - You then need to unscrew the glass safety cover (A), change the lamp and fit the protective cover back on.
  • Seite 22 RAPID PLATE Ø 305 - 3500W Ø 300 - 3000W Ø 300 - 4000W POS. 3500 3000 4000 COOKING 2500 2250 2500 1700 1500 1500 1000 HOLDING Tab. 4 USING THE OVEN IMPORTANT: The first time you use the oven, operate it empty and on full power for approximately 1 hour, preferably leaving the kitchen windows open.
  • Seite 23 WARMING UP THE OVEN To cook some kinds of food the oven needs to be warmed up both because the cooking needs to be as even as possible and to avoid fat splashing, fumes forming and encrustation on the oven. TIME FOR WARMING UP The time for warming up is linked to the temperature selected for cooking so the chosen temperature is set, the oven starts working and when the thermostat indicator light goes out the preheating temperature has been reached.
  • Seite 24 OVEN N.B.: Do not wash the equipment externally by means of direct water or high pressure jets. If water comes into contact with the electric parts, this might damage the oven and the security systems. Unplug the oven before cleaning it. For hygienic reasons and to guarantee the proper functioning of the equipment, it is advisable to clean the oven daily.
  • Seite 25 SOMMAIRE CHAPITRES DESCRIPTION PAGE Regles generales ..........................25 Donnees techniques ..........................26 Fourneau électrique monobloc ......................26 Caracteristiques techniques ........................ 26 Four GN2/1 ............................26 Fonctionnement electrique ......................... 26 Instructiones pour l’installation ......................27 Plaquette d’identification des fourneau électrique monobloc ............27 Legislation a respecter ........................
  • Seite 26 REGLES GENERALES - Lisez attentivement les instructions contenues dans cette notice car elles fournissent d’importantes indications concernant la sécurité d’installation, d’emploi et d’entretien. - Rangez soigneusement cette notice dans un endroit accessible et adapté à de futures consultations. - Après avoir déballé l’appareil, contrôlez-en l’intégrité. En cas de doute ne l’utilisez pas et adressez-vous à un personnel qualifié.
  • Seite 27 DONNEES TECHNIQUES FOURNEAU ÉLECTRIQUE MONOBLOC DIMENSION PUISSANCE ABSORBEE * en mm POIDS MOD. ESTERNE FOUR GN 2/1 Four Total 3500W 3000W 4000W R1 (kW) R2 (kW) Lx Px A Lx Px A 450x900x850 E99/2PQA1 900x900x850 E99/4PQA2 1350x900x850 1000x700x310 2x2,5 2x2,5 21+10 E99/6PQFM3 E6FM...
  • Seite 28 INSTRUCTIONES POUR L’INSTALLATION L’installation doit être exécutée par un installateur qualifié en conformité avec la législation en vigueur. ATTENTION ! Si l’appareil est installé contre un mur, il faut que ce dernier puisse résister à une température de 100° et qu’il soit en matériau incombustible.
  • Seite 29 BRANCHEMENT ELECTRIQUE Le branchement électrique doit être exécuté dans le respect des normes CEI, par un personnel autorisé et compétent. Avant tout, vérifiez la correspondance des données reportées dans le tableau des données techniques de ce manuel, sur la plaquette d’identification et sur le schéma électrique.
  • Seite 30 BRANCHEMENTS AUX DIFFERENTS RESEAUX ELECTRIQUES DE DISTRIBUTION PE (Terre) jaune - vert (NP) bleu 3N AC 380...415 V 50/60 Hz L 3 (T) noir Elementi 230 V L 2 (S) noir L 1 (R) marron PE (Terre) jaune - vert (NP) bleu 2N AC 380...415 V 50/60 Hz Elementi 230 V...
  • Seite 31 E99/4PQA2 E99/6PQFM3 E6FA E6FM E99/4PQF2 E99/6PQFA3 E99/2PQA1 MODÈLE N°câble Max. Max. N°câble Max. N°câble N°câble N°câble Max. Max. N°câble Max. TYPE DE TENSION 18,3 5 x 2,5 24,6 5 x 2,5 20,84 5 x 2,5 3N AC 380...415 V 50/60 Hz. 12,5 5x1,5 29,2...
  • Seite 32 F) Changement de l’ampoule du four - Avant tout débranchez la cuisinière, puis dévissez la calotte de protection en verre (A), remplacez l’ampoule par une neuve pui remontez la calotte de protection en verre. - L’ampoule a les caractéristiques suivantes : Tension : 220/230 V - 50 Hz Puissance : 15 W Douille : E14...
  • Seite 33 PLAQUE RAPIDE Ø 305 - 3500W Ø 300 - 3000W Ø 300 - 4000W POS. UTILISATION 3500 3000 4000 CUISSON 2500 2250 2500 1700 1500 1500 1000 MAINTIEN ARRET Tab. 4 UTILISATION DU FOUR ELECTRIQUE ATTENTION : Avant d’utiliser le four pour la première fois, il est conseillé d’allumer le four à vide pendant 1 heure environ en laissant, si possible, les fenêtres de la cuisine de façon à...
  • Seite 34 PRECHAUFFAGE DU FOUR Il est recommandé de préchauffer le four afin d’uniformiser la cuisson et prévenir les projections de graisse, la formation de la fumée et les incrustations du four. TEMPS DE PRECHAUFFAGE Les temps de préchauffage sont liés à la température de cuisson choisie. Placez la manette sur la température choisie, le four s’allume.
  • Seite 35 FOUR ATTENTION ! Avant toute opération de nettoyage, débrancher le four. Pour des raisons d’hygiène et de bon fonctionnement, il est recommandé de nettoyer le four tous les jours. Ne pas diriger des jets d’eau directs ou à haute pression sur la machine car l’eau qui pénètrerait dans les composants électriques nuirait au fonctionnement du four et à...
  • Seite 36 INHALTSVERZEICHNIS KAPITEL BESCHREIBUNG SEITE Allgemeine Hinweise .......................... 36 Technische Daten ..........................37 Elektro Block-herd ..........................37 Technische Eigenschaften ........................37 Backofen GN2/1 ..........................37 Elektroheizung ............................ 37 Installationsanleitungen ........................38 Informationen Zu Den Elektro Block-herd ..................38 Gesetze, Normen Und Technische Richtlinien ................... 38 Installationsort ............................
  • Seite 37 ALLGEMEINE HINWEISE - Dieses Handbuch enthält wichtige Anleitungen für eine sichere Installation, Verwendung und Wartung und muß daher aufmerksam durchgelesen werden. - Dieses Handbuch muß für ein späteres Nachschlagen der verschiedenen Bediener sorgfältig aufbewahrt werden. - Nach dem Entfernen der Verpackung muß das Gerät nach seinem einwandfreien Zustand überprüft werden; verwenden Sie im Zweifelsfall das Gerät nicht, sondern wenden Sie sich an eine qualifizierte Fachkraft.
  • Seite 38 TECHNISCHE DATEN ELEKTRO BLOCK-HERD ABMESSUNGEN NENNAUFNAHME * in mm NETTO MOD. GEWICHT Horno Gesamt AUSSENMASSE BACKOFEN GN 2/1 3500W 3000W 4000W R1 (kW) R2 (kW) Lx Px A Lx Px A 450x900x850 E99/2PQA1 E99/4PQA2 900x900x850 1350x900x850 1000x700x310 E6FM 2x2,5 2x2,5 E99/6PQFM3 21+10 1350x900x329...
  • Seite 39 INSTALLATIONSANLEITUNGEN Die Installation muß in Übereinstimmung mit den geltenden Vorschriften von qualifizierten Fachkräften durchgeführt werden. HINWEISE: Wenn das Gerät gegen eine Wand installiert wird, so muß die Wand einer Temperatur von 100°C standhalten und feuerfest sein. Vor der Installation ist der Plastikschutzfilm vom Gerät zu lösen und die eventuellen Klebereste mit einem für Inoxstahl geeigneten Putzmittel zu entfernen.
  • Seite 40 ELEKTROANSCHLUSS Der Stromanschluß darf nur durch befugtes und sachverständiges Personal und in Übereinstimmung mit den IEC-Normen durchgeführt werden. Vor Beginn der Anschlußarbeit müssen die in diesem Handbuch in der Tabelle der technischen Daten und auf dem Typenschild und im Schaltplan enthaltenen Angaben durchgesehen werden. Es muß...
  • Seite 41 ANSCHLUSS AN DIE VERSCHIEDENEN STROMVERTEILUNGSNETZE PE (Erde) gelb-grün (NP) hellblau 3N AC 380...415 V 50/60 Hz Elementi 230 V L 3 (T) schwarz L 2 (S) schwarz L 1 (R) braun PE (Erde) gelb-grün (NP) hellblau 2N AC 380...415 V 50/60 Hz Elementi 230 V L 2 (S) schwarz L 1 (R) braun...
  • Seite 42 E6FM MODELL E6FA E99/6PQFM3 E99/4PQA2 E99/4PQF2 E99/6PQFA3 E99/2PQA1 kabel a nz kabel a nz spitzenstrom kabel a nz spitzenstrom kabel a nz spitzenstrom kabel a nz spitzenstrom spitzenstrom kabel a nz spitzenstrom BETRIEBSPANNUNG 18,3 5 x 2,5 5 x 2,5 24,6 20,84 5 x 2,5...
  • Seite 43 F) Austauschen der Backofenlampe Falls eine Auswechslung einer der Lampen im Backofeninnern notwendig sein sollte, ist zu allererst der elektrische Anschluss des Gerätes zu unterbrechen. Daraufhin ist die gläserne Schutzhaube (A) loszuschrauben, die Lampe auszuwechseln und die Schutzhaube wieder zu montieren. Die Lampe muss folgende Eigenschaften besitzen: Spannung: 220/230 V - 50 Hz Leistung: 15 W...
  • Seite 44 BLITZKOCHPLATTE Ø 305 - 3500W Ø 300 - 3000W Ø 300 - 4000W POS. VERWENDUNG 3500 3000 4000 KOCHEN 2500 2250 2500 1700 1500 1500 1000 WARMHALTEN Tab. 4 GEBRAUCH DES BACKOFENS WICHTIG: Wenn der Backofen zum ersten Mal benutzt wird, muss er vorher höchstens etwa 1 Stunde lang ohne Speiseneingabe eingeschaltet werden, wobei die Küchenfenster möglichst geöffnet sein sollten.
  • Seite 45 VORHEIZEN DES BACKOFENS Bei einigen Zubereitungsmethoden muss der Backofen vorgeheizt werden, sowohl damit die Speisen so gleichmäßig wie möglich gegart werden, als auch um das Spritzen von Fett, Rauchbildungen und Backofenverkrustungen zu vermeiden. VORHEIZZEITEN Die Vorheizzeiten sind von der gewählten Kochtemperatur abhängig, d.h. die gewählte Temperatur wird eingestellt, der Backofen schaltet ein und wenn die Kontrollleuchte ausschaltet, die auf den Thermostatbetrieb hinweist, ist die Vorheiztemperatur erreicht.
  • Seite 46 BACKOFEN ACHTUNG: Das Gerät extern nie mit direkten bzw. Hochdruck-Wasserstrahlen waschen, da eventuelle Wassereinsickerungen in die elektrischen Bestandteile den ordnungsgerechten Betrieb des Gerätes und der Sicherheitssysteme beeinträchtigen könnten. Vor jeder Reinigung ist die Stromversorgung abzustellen. Aus Hygienegründen und zur Vermeidung von Betriebsstörungen muß...
  • Seite 47 ÍNDICE CAPÍTULO DESCRIPCIÓN PÁGINA Advertencias generales ........................47 Datos técnicos ............................. 48 Cocinas eléctricas monobloque ......................48 Características técnicas ........................48 Horno GN2/1 ............................48 Calentamiento eléctrico ........................48 Instrucciones para la instalación ......................49 Informaciones sobre las cocinas eléctricas ..................49 Ley, normas y directivas técnicas ......................
  • Seite 48 ADVERTENCIAS GENERALES - Leer atentamente las observaciones contenidas en el presente manual ya que suministran importantes indicaciones respecto a la seguridad de instalación, de uso y de mantenimiento. - Conservar con cuidado el presente manual para cualquier consulta posterior de los distintos operadores. - Después de haber quitado el embalaje, asegurarse que el aparato esté...
  • Seite 49 DATOS TÉCNICOS COCINAS ELÉCTRICAS MONOBLOQUE DIMENSIONES POTENCIA ABSORBIDA* en mm PESO MOD. EXTERIOR HORNO GB 2/1 NETO Horno Total 3500W 3000W 4000W R1 (kW) R2 (kW) Lx Px A Lx Px A 450x900x850 E99/2PQA1 900x900x850 E99/4PQA2 E6FM 1350x900x850 1000x700x310 2x2,5 2x2,5 E99/6PQFM3 21+10...
  • Seite 50 INSTRUCCIONES PARA LA INSTALACIÓN La instalación y la eventual transformación para el uso con otros tipos de gas tiene que ser efectuada por personas expertas, según las normas en vigor. OBSERVACIONES En caso de que el aparato se instale contra una pared, esta última tiene que resistir a los valores de temperatura de 100°C y debe ser incombustible.
  • Seite 51 CONEXIÓN ELÉCTRICA La conexión eléctrica debe ser efectuada según las normas CEI, sólo por personal autorizado y competente. En primer lugar examinar los datos indicados en la tabla de datos técnicos del presente manual, en la placa y en el esquema eléctrico. La conexión prevista es fija.
  • Seite 52 CONEXIONES CON LAS DISTINTAS REDES ELÉCTIRCAS DE SUMINISTRO PE (Tierra) amarillo-verde N (NP) azul 3N AC 380...415 V 50/60 Hz L 3 (T) negro Elementos 230 V L 2 (S) negro L 1 (R) marrón PE (Tierra) amarillo-verde N (NP) azul 2N AC 380...415 V 50/60 Hz Elementos 230 V L 2 (S) negro...
  • Seite 53 E6FM MODELO E6FA E99/6PQFM3 E99/4PQA2 E99/4PQF2 E99/6PQFA3 E99/2PQA1 Mass. Mass. Mass. Mass. Mass. N° cables Mass. N° cables N° cables N° cables N° cables N° cables TIPO DE TENSIÓN 18,3 5 x 2,5 24,6 5 x 2,5 20,84 5 x 2,5 12,5 5x1,5 29,2...
  • Seite 54 F) Sustitución de las bombillas horno - En caso de que sea necesario sustituir una de las bombillas internas del horno, en primer lugar se deberá interrumpir la alimentación eléctrica del aparato. Después habrá que desenroscar la tapa de protección de cristal (A), sustituir la bombilla y volver a montar la tapa de protección.
  • Seite 55 PLANCHA RÁPIDA Ø 305 - 3500W Ø 300 - 3000W Ø 300 - 4000W POS. EMPLEO 3500 3000 4000 COCCIÓN 2500 2250 2500 1700 1500 1500 1000 MANTENIMIENTO APAGADO Tab. 4 USO DEL HORNO VENTILADO ELÉCTRICO IMPORTANTE: Cuando se use el horno por primera vez, hay que hacerlo funcionar en vacío y a máxima potencia durante aproximadamente 1 hora, con las ventanas de la cocina abiertas.
  • Seite 56 PRE-CALENTAMIENTO DEL HORNO Para algunos tipos de cocción es necesario que el horno se caliente previamente bien porque se desea una cocción lo más uniforme posible, o bien para evitar salpicados de grasa, formación de humos e incrustaciones en el horno. TIEMPO DE PRE-CALENTAMIENTO El tiempo de pre-calentamiento está...
  • Seite 57 HORNO ATENCIÓN No lavar el aparato externamente con chorros de agua directos o de alta presión, puesto que las posibles infiltraciones en los componentes eléctricos podrían perjudicar el funcionamiento regular del aparato y de los sistemas de seguridad. Antes de efectuar las operaciones de limpieza, desconectar la alimentación eléctrica. Hay que limpiar diariamente el aparato por razones de higiene y para evitar averías durante el funcionamiento.
  • Seite 58 SCHEMI DI INSTALLAZIONE - INSTALLATION DIAGRAM SCHEMAS D’INSTALLATION - INSTALLATIONSPLÄNE ESQUEMAS DE INSTALACIÓN Uscita cavo elettrico Electric cable output Sortie câble électrique Elektrischkabel ausgang Salida cable eléctrico Le immagini e i disegni sono puramente indicativi Images (or pictures) are indicative only Les image sont indicatives a titre d’exemple Die Schemen (oder die Bilder) sind ganz und gar indikativ Los esquemas (o imagines) son simbolicos...
  • Seite 59 PIANI DI COTTURA - ELECTRIC COOKTOPS - TABLES DE CUISSON - ELEKTRISCHEKOCHFELDER - ENCIMERAS E99/6PQFA3 E6FA - E6A - 58 -...
  • Seite 60 BASE FORNO - OVEN BASE - BASE FOUR - BACKOFEN - BASE HORNO E99/4PQF2 - E99/6PQFA3 E4F - E6FA FASTON G-0.75 BL-0.75 M-2.5 LAMPADA VERDE (x2) OCCHIELLO 160505 FASTON FASTON SUP. G-0.75 COMMUTATORE (x2) RESISTENZA SUP. RTCU 900110 P1 P2 3000W - 240V~ LAMPADA GIALLA (x2) 160506...
  • Seite 61 BASE FORNO - OVEN BASE - BASE FOUR - BACKOFEN - BASE HORNO E99/6PQFM3 E6FM - 60 -...
  • Seite 62 PIANI DI COTTURA - ELECTRIC COOKTOPS - TABLES DE CUISSON - ELEKTRISCHEKOCHFELDER - ENCIMERAS E99/2PQA1 - 61 -...
  • Seite 63 PIANI DI COTTURA - ELECTRIC COOKTOPS - TABLES DE CUISSON - ELEKTRISCHEKOCHFELDER - ENCIMERAS E99/4PQA2 - 62 -...
  • Seite 64 PIANI DI COTTURA - ELECTRIC COOKTOPS - TABLES DE CUISSON - ELEKTRISCHEKOCHFELDER - ENCIMERAS E99/2PQA1 ABBREVIAZIONE N° CODICE CODE n° SHORTNAME ITALIANO ENGLISH FRANCAIS DEUTSCH ESPAÑOL ABREVIATION N° CODE KURZZEICHEN Nr. CODEX N° CODICO ABREVIACION RTBF900045 MORSETTIERA TERMIJNAL BOARD PANNEAU DE KLEMMENLEISTE REGLETA CONTROLE...
  • Seite 65 PIANI DI COTTURA - ELECTRIC COOKTOPS - TABLES DE CUISSON - ELEKTRISCHEKOCHFELDER - ENCIMERAS E99/4PQF2 ABBREVIAZIONE N° CODICE SHORTNAME CODE n° ITALIANO ENGLISH FRANCAIS DEUTSCH ESPAÑOL N° CODE ABREVIATION KURZZEICHEN Nr. CODEX ABREVIACION N° CODICO RTBF900045 MORSETTIERA TERMIJNAL BOARD PANNEAU DE KLEMMENLEISTE REGLETA CONTROLE...
  • Seite 66 BASE FORNO - OVEN BASE - BASE FOUR - BACKOFEN - BASE HORNO E99/4PQF2 - E99/6PQFA3 E4F - E6FA ABBREVIAZIONE N° CODICE CODE n° SHORTNAME ITALIANO ENGLISH FRANCAIS DEUTSCH ESPAÑOL ABREVIATION N° CODE KURZZEICHEN Nr. CODEX N° CODICO ABREVIACION CABLE D’ALIMENTACION CAVO POWER...
  • Seite 67 INFORMAZIONE AGLI UTENTI AI SENSI delle Direttive 2002/95/CE, 2002/96/CE e 2003/108/CE, relative alla riduzione dell’uso di sostanze pericolose nelle apparecchiature elettriche ed elettroniche, nonché allo smaltimento dei rifiuti. Il simbolo del cassonetto barrato riportato sull’apparecchiatura o sulla confezione, indica che il prodotto alla fine della propria vita utile deve essere raccolto separatamente dagli altri rifiuti.