Herunterladen Diese Seite drucken
Dimplex SWM3520-EU Benutzerhandbuch
Vorschau ausblenden Andere Handbücher für SWM3520-EU:

Werbung

Verfügbare Sprachen
  • DE

Verfügbare Sprachen

  • DEUTSCH, seite 26
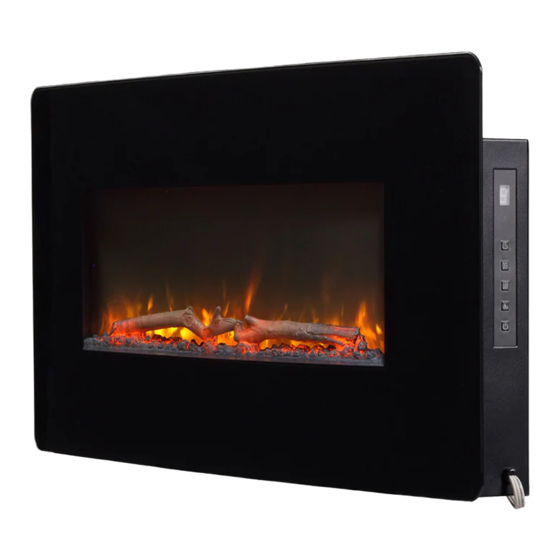
Model Europe: SWM3520-EU / SWM4220-EU / SWM4820-EU
Model UK: SWM3520-UK / SWM4220-UK / SWM4820-UK
Winslow 36" | 42" | 48"
Consumer safety information: please read this manual before installing and operating
this appliance. Failure to follow these instructions may result in a possible electric shock,
fire hazard, and/or injury and will void the warranty.
To view the full range of Dimplex products, please visit out website. These instructions
can also be downloaded from our company website.
The product complies with the Required Product Safety, Electromagnetic Compatibility and Environ-
mental Standards. This product is fully compliant with LVD, EMC,RoHs and Eco Design Directives.
Owner's Manual
EN / NL / DE / FR / PL / IT / ES / TR
08/55044/0/ISSUE 1

Werbung

loading

Inhaltszusammenfassung für Dimplex SWM3520-EU

  • Seite 1 Failure to follow these instructions may result in a possible electric shock, fire hazard, and/or injury and will void the warranty. To view the full range of Dimplex products, please visit out website. These instructions can also be downloaded from our company website.
  • Seite 2 Package Contents Installation WALL-MOUNT INSTALLATION Ensure if wall-mount insatllation "baffle 9" is retained safely as it MUST be used for "On feet installation" if required in the future. - 2 - - 3 -...
  • Seite 3 Installation Installation WALL-MOUNT WALL-MOUNT INSTALLATION INSTALLATION Wall ON FEET INSTALLATION NOTE: Baffle 9 MUST be used for on feet installation - 4 - - 5 -...
  • Seite 4 Installation Installation ON FEET ON FEET INSTALLATION INSTALLATION Baffle 9 MUST be used for “on feet installation” - 6 - - 7 -...
  • Seite 5 Installation Technical Information Heat Output / Warmteafgifte / Heizleis- 230V 240V tung / Production de chaleur / Moc cieplna / Potenza termica / Isı çıkışı Nominal Heat Output / Nominale warmteafgifte / Nennwärmeleistung / Puissance calorifique nominale / Nominalna moc cieplna / Potenza termica nominale / Nominal Isı...
  • Seite 6 Failure to follow these instructions may result in a possible electric shock, fire hazard, and/or injury and will void the warranty. To view the full range of Dimplex products, please visit out website. These instructions can also be downloaded from our company website.
  • Seite 7 Table of Contents Welcome Installation Thank you and congratulations for choosing to purchase an electric fireplace Welcome from Dimplex, the world leader in electric fireplaces. IMPORTANT INSTRUCTIONS Operation Please record your model and serial numbers below for future reference: Maintenance...
  • Seite 8 IMPORTANT INSTRUCTIONS IMPORTANT INSTRUCTIONS CAUTION: In order to avoid a hazard due to inadvertent resetting of the thermal cutout, Read this manual before attempting to install or use the electric fireplace. Always follow the warnings and safety instructions in this manual. When using electrical appliances, this appliance must not be supplied through an external switching device, such as a basic precautions should always be followed to reduce the risk of fire,electric shock or timer, or connected to a circuit that is regularly switched on and off by the utility.
  • Seite 9 Specifications Installation Electrical Dimensions GROUNDING INSTRUCTIONS • This product is equipped with a cord that has a Voltage: 220V~240V 50Hz Winslow 36” grounding conductor and a grounding plug. Watts: 1300~1600 Watts Width: 91.5 cm The plug must be plugged into an appropriate Amps: 6-6.7 A Height:...
  • Seite 10 Operation Operation POWER ON/OFF The wall-mount fireplace can be operated with the multi–function IR remote control or from the touchscreen controls on the front glass of the fireplace. The Power ON/OFF button turns the fireplace ON and OFF. When the fireplace is OFF, pressing the Power ON/OFF button on the remote control or touching the icon Once the fireplace has been properly connected to an earthed electrical socket-outlet, on the front glass will turn ON the fireplace.
  • Seite 11 Operation Operation Changing the temperature unit (�C ↔ �F): Use the Level Selection button while d1 is displayed to change the speed of the colour rotation: 1- Low, 2-Medium, 3- High. With Heat ON and display showing the set temperature, press and hold the Power ON/OFF button on the touchscreen for 5 seconds.
  • Seite 12 Operation Operation Remote control 7 days timer setting Remove the battery cover on the back of the remote by sliding downwards and insert Step 4: Hold 5 seconds to enter the 7 days timer setting. 2 x AA batteries ensuring that the batteries are fitted correctly. Refit the battery cover. NOTE: Please make sure the fireplace is plugged in and the ON / OFF Power Switch Step 5: When flash, press...
  • Seite 13 Operation Operation INSTALL TuyaSmart life This Power button turns the fireplace on or off. It has a memory function, pressing the Power button once to turn power on. Pressing the Power button again will turn the power off. There are two ways to install TuyaSmart; search for “TuyaSmart life” in the APP store on your phone, download and install or scan the The Heater button turns the heat ON or OFF.
  • Seite 14 Operation Maintenance / Troubleshooting Instructional video Tuya app use - Android Disposal of 1 – Turn on the Bluetooth on your device. used batteries 2 – Agree to privacy policy. Batteries may contain hazardous substances that could be endangering to the environment and human health.
  • Seite 15 1) Glen Dimplex will in its sole discretion either repair or replace such defective product applies to the original purchaser of the or part without charge. If Glen Dimplex is unable to repair or replace such product or product only and is not transferable.
  • Seite 16 Ga voor de complete reeks Dimplex-producten naar onze website. Deze instructie kan ook gedownload worden van onze website. Het product voldoet aan de normen voor productveiligheid, elektromagnetische compatibiliteit en milieu.
  • Seite 17 Inhoudsopgave Welkom Montage Dank u en van harte gefeliciteerd met de aankoop van een elektrische haard Welkom van Dimplex, de wereldleider in elektrische haarden. BELANGRIJKE AANWIJZINGEN Bediening Noteer uw model- en serienummer voor als u deze later nodig heeft: Onderhoud het model- en serienummer staat op het "etiket model- en serienummer"...
  • Seite 18 BELANGRIJKE AANWIJZINGEN BELANGRIJKE AANWIJZINGEN LET OP: Om gevaarlijke situaties door het onbedoeld resetten van de thermische Lees deze handleiding door voordat u de elektrische haard gaat installeren of gebruiken. Volg altijd de waarschuwingen en veiligheidsinstructies in deze handleiding. beveiliging te voorkomen, moet dit apparaat geen stroom krijgen via een externe Bij het gebruik van elektrische apparaten moeten steeds de volgende elementaire schakelinrichting, zoals een timer, of worden aangesloten op een stroomkring die voorzorgsmaatregelen nageleefd worden om het risico van brand en elektrische...
  • Seite 19 Specificaties Montage WAARSCHUWING: Deze verwarming mag uitsluitend worden gebruikt voor AARDINGSINSTRUCTIES normaal huishoudelijk gebruik in het land waar deze bij een erkende winkel is • Dit product is voorzien van een snoer met een aangeschaft. aardgeleider en een geaarde stekker. De stekker dient verbonden te worden met een geschikt •...
  • Seite 20 Bediening Bediening STROOM AAN/UIT De wandgemonteerde haard kan worden bediend met de multifunctionele IR afstandsbediening of met behulp van het aanraakscherm op het glazen frontpaneel De AAN/UIT-knop schakelt de haard AAN en UIT. Wanneer de haard UIT is, wordt van de haard. door een druk op de AAN/UIT-knop op de afstandsbediening of het aanraken van het symbool op het glazen frontpaneel de haard ingeschakeld.
  • Seite 21 Bediening Bediening Wijzigen van de temperatuureenheid (�C ↔ �F): Gebruik de knop Niveauselectie terwijl d2 tot en met d9 wordt weergegeven om de helderheid van het gloeibed te wijzigen: 1- laag, 2- middel, 3- hoog. Met Warmte AAN en met de weergegeven ingestelde temperatuur houdt u de Gebruik de knop Niveauselectie terwijl d1 wordt weergegeven om de snelheid van de AAN/UIT-knop op het aanraakscherm 5 seconden ingedrukt.
  • Seite 22 Bediening Bediening Afstandsbediening 7 days timer instellingen Verwijder het batterijklepje aan de achterkant van de afstandsbediening door naar beneden te schuiven en plaats 2 x a batterijen en zorg ervoor dat de batterijen correct Stap 4: Houd 5 seconden ingedrukt om naar de 7-day timer instellingen te gaan. worden geplaatst.
  • Seite 23 Bediening Bediening INSTALLATIE van TuyaSmart Life Met deze hoofdknop wordt de haard aan- en uitgezet. De knop heeft een geheugen: door eenmaal drukken op de hoofdknop wordt het apparaat Er zijn 2 manieren om TuyaSmart te installeren; aangezet. Door nogmaals op de hoofdknop te drukken, wordt het apparaat Zoek in de app-store van uw mobiel op "TuyaSmart Life"...
  • Seite 24 Bediening Onderhoud / Problemen oplossen Instructievideo Tuya app gebruik - Android Wegwerpen van gebruikte batterijen 1 – Zet de bluetooth aan op je device. Batterijen kunnen stoffen bevatten die gevaarlijk zijn voor het milieu en de gezondheid. 2 – Ga akkoord met privacy policy. •...
  • Seite 25 1) Glen Dimplex zal naar eigen inzicht het gebrekkige product of onderdeel kosteloos beperkte garantie geldt uitsluitend voor de originele koper van het repareren of vervangen. Indien Glen Dimplex niet in staat is het product of onderdeel product en is niet overdraagbaar.
  • Seite 26 Schlag, zu Brandgefahr und/oder zu Verletzun- gen führen und führt zu einem Erlöschen der Garantie. Das gesamte Produktsortiment von Dimplex finden Sie auf unserer Website. Dort kön- nen Sie diese Anleitung auch herunterladen. Das Produkt entspricht den europäischen Sicherheitsnormen und der europäischen Norm für elektromag- netische Verträglichkeit (EMV).
  • Seite 27 Inhaltsverzeichnis Willkommen Installation Vielen Dank und herzlichen Glückwunsch, dass Sie sich für den Kauf eines Willkommen Elektrokamins von Dimplex, dem Weltmarktführer für elektrische Kamine, entschieden WICHTIGE HINWEISE haben. Betrieb Wartung Bitte notieren Sie sich Ihre Modell- und Seriennummern für spätere Nachfragen:...
  • Seite 28 WICHTIGE HINWEISE WICHTIGE HINWEISE ACHTUNG: Um eine Gefährdung durch versehentliches Rücksetzen des Lesen Sie dieses Handbuch, bevor Sie den Elektrokamin installieren oder benutzen. Die Sicherheitstemperaturbegrenzers zu vermeiden, darf dieses Gerät nicht über eine Warn- und Sicherheitshinweise in diesem Benutzerhandbuch grundsätzlich beachten. externe Schaltvorrichtung, wie z. B.
  • Seite 29 Spezifikationen: Installation WARNUNG: Dieses Heizgerät darf nur für den normalen Hausgebrauch in dem ERDUNGSVORSCHRIFTEN Land, in dem es von einem anerkannten gewerblichen Einzelhändler gekauft wurde, - Dieses Produkt ist mit einem Kabel ausgestattet, verwendet werden. das einen Geräte-Erdungsleiter und einen Erdungsstecker hat.
  • Seite 30 Betrieb Betrieb STROM EIN/AUS Der wandmontierte Kamin kann mit der multifunktionalen IR-Fernbedienung oder über die Touchscreen-Steuerung auf der Frontscheibe des Kamins gesteuert werden. Die EIN-/AUS-Taste schaltet den Kamin EIN und AUS. Wenn der Kamin AUS ist, schalten Sie ihn ein, indem Sie die EIN-/AUS-Taste auf der Fernbedienung drücken oder das Symbol Nachdem der Kamin ordnungsgemäß...
  • Seite 31 Betrieb Betrieb GLUTBETT Wechseln der Temperatureinheit (�C ↔ �F): Die Glutbetttaste wird verwendet, um die Farbe des Glutbetts einzustellen. Wenn die Heizung eingeschaltet ist und die Digitalanzeige die eingestellte Temperatur anzeigt, die EIN/AUS-Taste auf der Digitalanzeige 5 Sekunden lang drücken und Durch mehrmaliges Drücken der Glutbetttaste, schalten Sie sich durch die gedrückt halten.
  • Seite 32 Betrieb Betrieb Fernbedienung Schritt 3: Wenn blinkt, Entfernen Sie die Batterieabdeckung auf der Rückseite der Fernbedienung, indem Sie sie Drücken Sie oder , um heute auf Dienstag einzustellen. nach unten schieben, und legen Sie 2 x AA-Batterien ein, wobei Sie darauf achten müssen, dass die Batterien richtig eingelegt sind.
  • Seite 33 Betrieb Betrieb INSTALLATION TuyaSmart life Diese EIN-/AUS-Taste schaltet den Kamin ein oder aus. Die Fernbedienung Es gibt 2 Möglichkeiten um TuyaSmart zu installieren; verfügt über eine Speicherfunktion. Einmaliges Drücken der EIN-/AUS- Suchen Sie im App Store Ihres Smartphones nach „TuyaSmart Taste führt zum Einschalten.
  • Seite 34 Wartung Wartung / Fehlersuche Tuya App Nutzung – Android Anleitungsvideo Entsorgung von gebrauchten Batterien 1 – Schalten Sie Bluetooth auf Ihrem Gerät ein. Batterien können gefährliche Substanzen enthalten, die eine Gefahr für 2 – Stimmen Sie der Datenschutzerklärung zu. die Umwelt und die menschliche Gesundheit darstellen können. - Dieses Symbol auf der Batterie und/oder der Verpackung weist darauf hin, dass gebrauchte Batterien nicht mit dem Hausmüll entsorgt werden dürfen.
  • Seite 35 Verarbeitungsfehler aufweist, haben Sie die folgenden Rechte: eingeschränkte Garantie gilt nur für Käufe, die in Europa getätigt wurden. Diese 1) Glen Dimplex wird ein solches defektes Produkt oder Teil nach eigenem Ermessen eingeschränkte Garantie gilt nur für den Erstkäufer des Produkts und ist nicht entweder reparieren oder kostenlos ersetzen.
  • Seite 36 Le non-respect de ces instructions peut entraîner un risque de décharges élec- triques, d’incendie et/ou de blessures et annulera la garantie. Pour découvrir la gamme complète des produits Dimplex, visitez notre site web. Ces instructions peuvent aussi être téléchargées sur notre site web.
  • Seite 37 Table des matières Bienvenue Installation Nous vous remercions d’avoir acheté un foyer électrique de Dimplex, le leader mondial Bienvenue dans le domaine du chauffage électrique. INSTRUCTIONS IMPORTANTES Utilisation Veuillez noter le numéro de votre modèle et le numéro de série ci-dessous pour vous y Entretien référer ultérieurement : ces numéros se trouvent sur l’étiquette des numéros de modèle...
  • Seite 38 INSTRUCTIONS IMPORTANTES INSTRUCTIONS IMPORTANTES MISE EN GARDE : Pour éviter les risques liés à la réinitialisation accidentelle du Lire ce manuel avant d’essayer d’installer ou d’utiliser le foyer électrique. Toujours respecter les avertissements et suivre les instructions de sécurité données dans le disjoncteur thermique, cet appareil ne doit pas être alimenté...
  • Seite 39 Spécifications Installation AVERTISSEMENT : Ce poêle est uniquement prévu pour une utilisation domestique INSTRUCTIONS DE MISE À LA TERRE normal dans le pays où il a été acheté auprès d’un distributeur agréé. • Le cordon électrique de cet appareil comporte un conducteur de mise à...
  • Seite 40 Utilisation Utilisation INTERRUPTEUR MARCHE/ARRÊT Le foyer mural peut être actionné à l’aide de la télécommande infrarouge à fonctions multiples ou à partir des commandes de l’écran tactile situé sur la vitre frontale du foyer. La touche marche/arrêt permet de mettre en marche et d’éteindre le foyer. Lorsque le foyer est éteint, appuyer sur la touche marche/arrêt de la télécommande ou appuyer sur l’icône Une fois que le foyer a été...
  • Seite 41 Utilisation Utilisation Modification de l’unité de température (�C ↔ �F) : Lorsque l’une des options situées entre d2 et d9 est affichée, la touche de sélection du niveau permet de modifier la luminosité du lit de braises sur l’un des trois niveaux Lorsque le chauffage est activé...
  • Seite 42 Utilisation Utilisation Télécommande 7 days timer paramètres Retirez la couvercle de la batterie à l’arrière de la télécommande. Insérez 2x les A piles et assurez-vous que les piles sont correctement installées. Remettez la couvercle. étape 4: Maintenez pendant 5 secondes pour alles dans les paramètres de 7-day. REMARQUE : Avant de régler une fonction : Assurez-vous que le foyer est bien branché...
  • Seite 43 Utilisation Utilisation NSTALLER la vie TuyaSmart Cette touche marche/arrêt permet de mettre en marche ou d’éteindre le foyer. Elle comporte une fonction de mémoire. Une pression sur la touche Il existe deux façons d’installer TuyaSmart : marche/arrêt met en marche le foyer. Une nouvelle pression sur la touche 1.
  • Seite 44 Utilisation Entretien / Dépannage Vidéo d’instruction Utilisation de l’application Tuya - Android Élimination des piles usagées 1 – Activez le Blutooth sur votre appareil. Les piles peuvent contenir des substances dangereuses pouvant être nuisibles pour l’environnement et la santé humaine. 2 –...
  • Seite 45 Autres exclusions à la responsabilité de Glen Dimplex et de ses dépositaires et agents de service : Ce que vous devez faire pour vous prévaloir du service dans le cadre de cette garantie Glen Dimplex, ses gestionnaires, ses administrateurs ou ses agents ne pourront en limitée...
  • Seite 46 Pełną gamę produktów firmy Dimplex można obejrzeć na naszej stronie internetowej. Instrukcję można również pobrać ze strony internetowej naszej firmy. Produkt jest zgodny z wymaganymi normami bezpieczeństwa produktu, kompatybilności elektromagnetycznej i ochrony środowiska.
  • Seite 47 Spis treści Witamy Montaż Dziękujemy i gratulujemy zakupu kominka elektrycznego firmy Dimplex, światowego Witamy lidera w dziedzinie kominków elektrycznych. WAŻNE INSTRUKCJE Obsługa Należy zapisać posiadany model i jego numery seryjne poniżej do wglądu w przyszłości: Konserwacja model i numery seryjne znajdują się na etykiecie modelu i numeru seryjnego Rozwiązywanie problemów...
  • Seite 48 WAŻNE INSTRUKCJE WAŻNE INSTRUKCJE PRZESTROGA: Aby uniknąć zagrożenia spowodowanego przypadkowym Przed przystąpieniem do montażu lub użytkowania kominka elektrycznego należy się zapoznać z niniejszą instrukcją. Należy zawsze stosować się do ostrzeżeń i poleceń zresetowaniem odłącznika termicznego, urządzenie nie może być zasilane przez dotyczących bezpieczeństwa zawartych w tej instrukcji.
  • Seite 49 Specyfikacje Montaż OSTRZEŻENIE: kominek nadaje się wyłącznie do użytku domowego i nie należy INSTRUKCJA UZIEMIENIA z niego korzystać w innych celach. Z produktu należy korzystać w kraju, w którym • Ten produkt jest wyposażony w przewód z został zakupiony od autoryzowanego sprzedawcy detalicznego. przewodnikiem uziemiającym urządzenia i wtyczką...
  • Seite 50 Obsługa Obsługa ZASILANIE WŁ./WYŁ. Działaniem kominka ściennego można sterować przy użyciu wielofunkcyjnego pilota na podczerwień lub za pomocą przycisków dotykowych znajdujących się z przodu kominka. Przycisk WŁ./WYŁ. włącza i wyłącza kominek. Gdy kominek jest wyłączony, naciśnięcie przycisku WŁ./WYŁ. na pilocie lub naciśnięcie ikony na przedniej szybie spowoduje włączenie Po prawidłowym podłączeniu kominka do uziemionego gniazdka elektrycznego należy kominka.
  • Seite 51 Obsługa Obsługa Zmiana jednostki temperatury (�C ↔ �F): Za pomocą przycisku wyboru poziomu podczas wyświetlania od d2 do d9 w celu zmiany jasności żarnika: 1 – niska, 2 – średnia, 3 – wysoka. Po wyświetleniu włączonego nagrzewania i temperatury zadanej należy nacisnąć i przytrzymać...
  • Seite 52 Obsługa Obsługa Pilot zdalnedo sterowania 7-dniowy programator czasowy Usuń pokrywę zasobnika baterii przesuwając ją w dół obudowy pilota. Włóż dwie baterie AA zwracając uwagę na polaryzację biegunów, a następnie załóż z powrotem pokrywę. Krok 4: Przytrzymaj przez 5 sekund, aby wejść w ustawienia programatora czasowego.
  • Seite 53 Obsługa Instrukcja obsługi Instrukcja parowania aplikacji Tuya Smart z kominkiem. 2 sposoby pobierania Tuya Smart na urządzenia mobilne: 1. Wyszukaj Tuya Smart life w APP Store, pobierz aplikację i zainstaluj Ten przycisk zasilania włącza lub wyłącza kominek. Ma on funkcję pamięci, na swoim urządzeniu mobilnym.
  • Seite 54 Instrukcja obsługi Konserwacja / Rozwiązywanie problemów Urządzenia z systemem Android Film instruktażowy Utylizacja 1. Włącz funkcję Bluetooth na swoim urządzeniu zużytych baterii mobilnym. 2. Zaakceptuj warunki Polityki Prywatności. Baterie mogą zawierać substancje niebezpieczne, zagrażające środowisku i zdrowiu ludzi. 3. Pobierz aplikację Tuya Smart, a następnie załóż •...
  • Seite 55 (z wyjątkiem napraw przez firmę Glen Dimplex lub jej autoryzowany serwis) bądź zmodyfikowane w inny sposób. Ta ograniczona gwarancja nie obejmuje również wad Za co firma Glen Dimplex i jej dystrybutorzy oraz zakłady serwisowe nie ponoszą wynikających z niewłaściwego użytkowania, nadużyć, wypadku, zaniedbań, niewłaściwej również...
  • Seite 56 Visita il nostro sito Internet per visualizzare la gamma completa di prodotti Dimplex. È possibile scaricare le presenti istruzioni anche dal nostro sito web aziendale.
  • Seite 57 Installazione Grazie e complimenti per avere scelto di acquistare un caminetto elettrico Benvenuti Dimplex, azienda leader mondiale nel settore dei caminetti elettrici. ISTRUZIONI IMPORTANTI Funzionamento Ti invitiamo a registrare il tuo modello e i numeri di serie qui sotto per riferimento futuro: Manutenzione I numeri del modello e di serie sono riportati nell’apposita etichetta...
  • Seite 58 ISTRUZIONI IMPORTANTI ISTRUZIONI IMPORTANTI CAUTELA: Al fine di evitare un pericolo derivante dalla disabilitazione della Leggere il presente manuale prima di tentare di installare o utilizzare il caminetto elettrico. Segui sempre le avvertenze e le istruzioni di sicurezza del presente manuale. protezione termica, questo apparecchio non deve essere alimentato attraverso un Quando si usano apparecchi elettrici è...
  • Seite 59 Specifiche Installazione AVVERTENZA: L’apparecchio non deve essere utilizzato per scopi diversi da quelli ISTRUZIONI PER LA MESSA A TERRA domestici, abitualmente adottati nel paese in cui esso è stato acquistato presso un • Questo prodotto è dotato di un cavo con un rivenditore commerciale riconosciuto.
  • Seite 60 Funzionamento Funzionamento TASTO ON/OFF apparecchio Il caminetto a parete può essere azionato tramite il telecomando multifunzione RI o dai comandi touchscreen posti sul vetro anteriore del caminetto. Il pulsante ON/OFF accende e spegne il caminetto. Quando il caminetto è in posizione OFF, premendo il tasto ON/OFF sul telecomando o toccando l'icona sul vetro anteriore Una volta che il caminetto è...
  • Seite 61 Funzionamento Funzionamento Variare l'unità di misura della temperatura(�C↔ �F): Premere il pulsante di Selezione del livello mentre sono visualizzate le opzioni da d2 a d9 per cambiare la luminosità del braciere: 1- Bassa, 2- Media 3- Alta. Con il calore in posizione ON e il display che mostra la temperatura impostata, premere e tenere premuto il tasto ON/OFF sul touchscreen per 5 secondi.
  • Seite 62 Funzionamento Funzionamento Telecomando Fase 3: Quando lampeggia, Rimuovere il coperchio delle batterie sul retro del telecomando facendolo scorrere verso il basso e inserire 2 batterie AA assicurandosi che le batterie siano inserite Premere per impostare la data odierna su martedì. correttamente.
  • Seite 63 Funzionamento Funzionamento INSTALLARE TuyaSmart life Questo pulsante di accensione accende o spegne il caminetto. È dotato di una funzione di memoria, premere il pulsante di accensione una volta per Vi sono 2 modi per installare TuyaSmart; accendere. Premendo di nuovo il pulsante di accensione l'alimentazione si 1.
  • Seite 64 Funzionamento Manutenzione / Risoluzione dei problemi Video didattico Utilizzo dell’app Tuya - Android Smaltimento delle 1 - Attiva il Bluetooth sul tuo dispositivo. batterie usate 2 - Esprimi il tuo consenso all’informativa sulla Le batterie possono contenere sostanze pericolose che potrebbero essere dannose per privacy.
  • Seite 65 è trasferibile. senza spese. Se Glen Dimplex non sarà in grado di riparare o sostituire tale prodotto o parte o qualora la riparazione o la sostituzione non sarà commercialmente praticabile Prodotti esclusi da questa garanzia limitata o non può...
  • Seite 66 Para consultar toda la gama de productos Dimplex, visite nuestro sitio web. Estas in- strucciones también se pueden descargar del sitio web de nuestra empresa.
  • Seite 67 Bienvenida Instalación Gracias y enhorabuena por haber decidido comprar una chimenea eléctrica Bienvenida Dimplex, el líder mundial en chimeneas eléctricas. INSTRUCCIONES IMPORTANTES Funcionamiento Guarde el modelo y el número de serie que aparecen en la parte inferior para poder Mantenimiento consultarlos en el futuro.
  • Seite 68 INSTRUCCIONES IMPORTANTES INSTRUCCIONES IMPORTANTES PRECAUCIÓN: Con el fin de evitar el peligro debido a la reconexión inadvertida del Lea este manual antes de intentar instalar o utilizar la chimenea eléctrica. Respete siemprelas advertencias y las instrucciones de seguridad de este manual. Cuando utilice corte térmico, este aparato no debe alimentarse con un dispositivo de conexión electrodomésticos, siempre debe respetar unas precauciones básicas para reducir el externo, como un temporizador, ni conectarse a un interruptor que sea encendido y...
  • Seite 69 Especificaciones Instalación ADVERTENCIA: Este calefactor no se debe utilizar con fines que no sean domésticos, INSTRUCCIONES DE TOMA A TIERRA en el país en el que se ha adquirido a un comerciante reconocido. • Este producto está equipado con un cable que incluye un conductor con toma a tierra y un •...
  • Seite 70 Funcionamiento Funcionamiento ENCENDIDO/APAGADO La chimenea montada en la pared se puede utilizar con el mando a distancia multifunción de infrarrojos o con los controles de la pantalla táctil del cristal delantero La tecla de encendido/apagado sirve para encender y apagar la chimenea. Cuando la de la chimenea.
  • Seite 71 Funcionamiento Funcionamiento LECHO DE BRASAS Cambiar la unidad de temperatura (�C ↔ �F): La tecla del lecho de brasas se utiliza para cambiar el colour del lecho de brasas. Con el calor encendido y la temperatura en la pantalla, mantenga pulsada la tecla de encendido/apagado de la pantalla táctil durante 5 segundos.
  • Seite 72 Funcionamiento Funcionamiento Mando a distancia Paso 3: Cuando parpadee Quite la tapa de las pilas que se encuentra en la parte de atrás del mando, deslizándola Pulse para fijar el día de hoy en martes. hacia abajo, e inserte dos pilas AA. Asegúrese de que las pilas queden bien colocadas. Vuelva a colocar la tapa de las pilas.
  • Seite 73 Funcionamiento Funcionamiento Instalación de TuyaSmart life Esta tecla de encendido/apagado sirve para encender y apagar la chimenea. Tiene una función de memoria. Pulse la tecla de encendido/apagado una vez para encender el aparato. Si pulsa la tecla de encendido/apagado de Hay dos formas de instalar TuyaSmart: nuevo, apagará...
  • Seite 74 Funcionamiento Mantenimiento / Resolución de problemas video instructivo Uso de la aplicación Tuya - Android Eliminación de 1 – Enciende el Bluetooth de tu dispositivo. las pilas usadas 2 – Acepta la política de privacidad. Las pilas podrían contener sustancias peligrosas que pueden resultar peligrosas para el medio ambiente y la salud de los seres humanos.
  • Seite 75 Europa. Esta 1) Glen Dimplex, a su entera discreción, reparará o sustituirá el producto o la pieza garantía limitada se aplica exclusivamente al comprador original del producto y no se defectuosos sin cargo.
  • Seite 76 Bu talimatların izlenmemesi olası elektrik çarpması, yangın tehlikesi ve/veya yaralanmaya neden olabilir ve garantiyi geçersiz kılar. Dimplex ürünlerinin tam listesi için internet sitemizi ziyaret edin. Bu talimatlar, şirketimi- zin internet sitesinden de indirilebilir. Ürün, Gerekli Ürün Güvenliği, Elektromanyetik Uyumluluk ve Çevre Standartlarına uygundur. Bu ürün LVD, EMC, RoHs ve Eko Tasarım Direktifleri ile tamamen uyumludur.
  • Seite 77 İçindekiler Hoş Geldiniz Kurulum Dünyanın lider elektrikli şömine üreticisi Dimplex'ten Hoş Geldiniz elektrikli şömine aldığınız için size teşekkür eder ve tebriklerimizi sunarız. ÖNEMLİ TALİMATLAR Çalışma Lütfen ileride kullanabilmek için aşağıdaki model ve seri numaralarınızı kaydedin: Bakım model ve seri numaraları, şöminenizin Model ve Seri Numarası Etiketi'nde Sorun Giderme bulunabilir.
  • Seite 78 ÖNEMLİ TALİMATLAR ÖNEMLİ TALİMATLAR DİKKAT: Bu cihaz, termal kesme devresinin istenmeden sıfırlanmasından Elektrikli şömineyi kurmaya veya kullanmaya çalışmadan önce bu kılavuzu okuyun. Her zaman bu kılavuzdaki uyarıları ve güvenlik talimatlarını izleyin. Elektrikli cihazlar kaynaklanan tehlikelerden kaçınmak için zamanlayıcı gibi harici bir anahtarlama kullanılırken yangın, elektrik çarpma riskinin azaltılması...
  • Seite 79 Teknik Özellikler Kurulum DİKKAT TOPRAKLAMA TALİMATLARI ELEKTRİK ÇARPMA RİSKİ • Bu ürün, ekipman topraklama teline ve topraklı AÇMAYIN. KULLANICI TARAFINDAN SERVİS fişe sahip bir kabloyla donatılmıştır. Fiş, uygun şekilde monte edilmiş ve tüm yerel yasalar ve UYGULANABİLİR PARÇA YOKTUR kararlar uyarınca topraklanmış uygun bir prize takılmalıdır.
  • Seite 80 Çalışma Çalışma GÜÇ AÇIK/KAPALI Duvardan asılı şömine, çok işlevli IR uzaktan kumanda veya şömine ön camındaki dokunmatik ekran kontrollerinden çalıştırılabilir. Power ON/OFF (Güç Açık/Kapalı) düğmesi şömineyi açar ve kapar. Şömine KAPALI iken, uzaktan kumandadaki Power ON/OFF (Güç Açık/Kapalı) düğmesine Şömine, topraklı bir prize uygun şekilde bağlandıktan sonra basıldığında veya ön camdaki simgeye dokunulduğunda şömine AÇIK duruma gelir.
  • Seite 81 Çalışma Çalışma Sıcaklık birimini değiştirme (�C ↔ �F): d2 ile d9 arası görüntülenirken köz yatağının parlaklığını değiştirmek için Level Selection Isı açıkken ve ekranda ayarlanan sıcaklık gösteriliyorken, dokunmatik (Seviye Seçimi) düğmesini kullanın: 1- Düşük, 2- Orta, 3- Yüksek. ekrandaki Power ON/OFF (Güç Açık/Kapalı) düğmesine 5 saniye süreyle basın. Ekran 3 Renk dönüşüm hızını...
  • Seite 82 Çalışma Çalışma Uzaktan kumanda Adım 3: yanıp sönerse, Uzaktan kumandanın arkasındaki pil kapağını aşağı doğru kaydırarak açın ve doğru Bugünü salı günü olarak ayarlamak için veya basın. taktığınızdan emin olarak içine 2 adet AA pil yerleştirin. Pil kapağını yeniden takın. Saati 16’ye ayarlamak için [ veya basın.
  • Seite 83 Çalışma Çalışma TuyaSmart life KURULUMU Bu Güç Düğmesi, şömineyi açar veya kapar. Bellek işlevine sahiptir ve düğmeye bir kez basıldığında güç açılır. Güç düğmesine tekrar basılırsa güç TuyaSmart 2 şekilde kurulabilir; kapanır. 1. Telefonunuzdaki APP store mağazasında “TuyaSmart life” aratın, indirin ve kurun.
  • Seite 84 Çalışma Bakım / Sorun Giderme eğitim videosu Tuya uygulaması kullanımı - Android Kullanılmış 1 - Cihazınızda Bluetooth’u açın. Pillerin Atılması 2 - Gizlilik politikasını kabul edin. Piller, çevre ve insan sağlığı açısından tehlike olabilecek tehlikeli maddeler içerebilir. 3 - Bir hesap açın ve giriş yapın. Bu zorunlu •...
  • Seite 85 Avrupa'da satın alınan ürünler için geçerlidir. Bu sınırlı garanti 1) Glen Dimplex, karar hakkı yalnızca kendisine ait olmak üzere söz konusu kusurlu yalnızca ürünü ilk satın alan kişi için geçerlidir ürünü veya parçayı ücretsiz olarak onarır veya değiştirir. Glen Dimplex, söz konusu ve başkasına aktarılamaz.
  • Seite 86 Garanti Teknik ve sorun giderme desteği için satıcınızla iletişime geçin. Faturanızı, satın aldığınız yer bilgisini ve ürününüzün model ve seri numarasını hazır bulundurduğunuzdan emin olun. - 170 - - 171 -...
  • Seite 87 In keeping with our policy of continuous product improvement, we reserve the right to make changes without notice. ©Glen Dimplex - 2022 www.dimplex-fires.eu www.dimplex.co.uk 08/55044/0/ISSUE 1...