Inhaltsverzeichnis
Werbung
Quicklinks
ALL STAR™ CHARCOAL TRAY
ALL STAR™ KOHLEBEHÄLTER
ALL STAR™ CHARBON PLATEAU
ALL STAR™ CHARCOAL BAKY
VASSOIO A CARBONE ALL STAR™
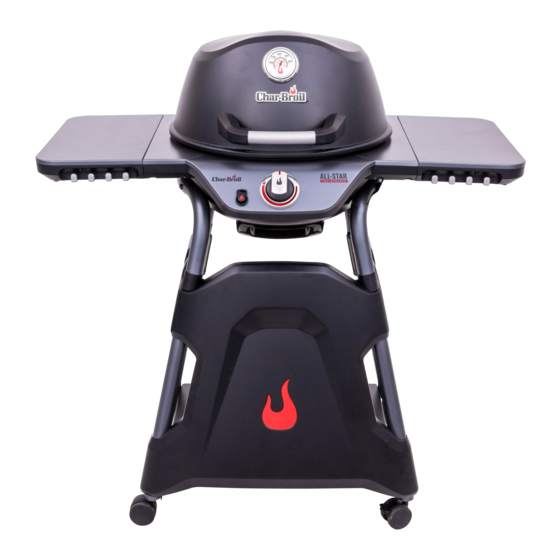
NOTE: This product is for use with the Char-Broil All Star™ Gas grill ONLY!
HINWEIS: Dieses Produkt darf NUR mit dem Char-Broil All Star™ Gasgrill verwen-
det werden!
REMARQUE: Ce produit doit être utilisé UNIQUEMENT avec le gril à gaz Char-
Broil All Star™!
BEMÆRK: Dette produkt er KUN til brug sammen med Char-Broil All Star™
gasgrill!
NOTA: questo prodotto deve essere utilizzato SOLO con la griglia a gas Char-Broil
All Star™!
NOTE: This product is for use with the Char-Broil All Star™ Gas grill ONLY!
HINWEIS: Dieses Produkt darf NUR mit dem Char-Broil All Star™ Gasgrill
verwendet werden!
REMARQUE: Ce produit doit être utilisé UNIQUEMENT avec le gril à gaz Char-
Broil All Star™!
BEMÆRK: Dette produkt er KUN til brug sammen med Char-Broil All Star™
gasgrill!
NOTA: questo prodotto deve essere utilizzato SOLO con la griglia a gas Char-
Broil All Star™!
10/17/19 • 80030563
P RODUCT G U I DE
P RODU KTH I LFE
G U I DE DE P RODU IT
P RODU KTV EJ LE DN I NG
G U I DA AL P RODOTTO
MODEL 9530392R03 • 140392
MODELL 9530392R03 • 140392
MODÈLE 9530392R03 • 140392
MODEL 9530392R03 • 140392
MODELLO 9530392R03 • 140392
©2019 Char-Broil, LLC. Printed in China.
Werbung
Inhaltsverzeichnis

Verwandte Anleitungen für Char-Broil ALL STAR 9530392R03


Inhaltszusammenfassung für Char-Broil ALL STAR 9530392R03
- Seite 1 ALL STAR™ CHARCOAL BAKY MODELLO 9530392R03 • 140392 VASSOIO A CARBONE ALL STAR™ NOTE: This product is for use with the Char-Broil All Star™ Gas grill ONLY! HINWEIS: Dieses Produkt darf NUR mit dem Char-Broil All Star™ Gasgrill verwen- det werden! REMARQUE: Ce produit doit être utilisé...
- Seite 2 Parts included: 4. Beinschützer 2. Riv løfter 1. Charcoal Tray Pièces incluses: 3. Trækulbakken 2. Grate Lifter 1. Plateau de charbon 4. Benbeskyttere Parti incluse: 3. Charcoal Tray Hanger de bois 4. Leg Protectors 2. Lifter de grille 1. Vassoio di carbone Teile enthalten: 3.
-
Seite 3: After Cooking
INSTALLATION/LIGHTING INSTRUCTIONS: 1. Make sure the grill is off and cool to the touch before beginning. 2. Place up to 1.6 kg of charcoal (lump or briquettes) in the charcoal tray. Be sure to spread evenly around the tray. Large pieces of charcoal may need to be broken up in order to fit in the tray. - Seite 4 • DO NOT attempt to add more charcoal to the tray after cooking has begun. • DO NOT use any means to light the charcoal besides the gas burner, including petroleum- or alcohol- based lighter fluids. • After a charcoal fire appears extinguished, unconsumed embers can retain heat for up to 24 hours, and if exposed to fresh air, can burst into flame unexpectedly.
- Seite 5 Parts included: Pièces incluses: 2. Løfter til rist 1. Charcoal Tray 1. Plateau de charbon 3. Bakkeophæng til trækul 2. Grate Lifter de bois 4. Benbeskyttere Parti incluse: 3. Charcoal Tray Hanger 2. Outil de levage pour 4. Leg Protectors grille 1.
-
Seite 6: Anleitung Für Montage Und Anzündung
ANLEITUNG FÜR MONTAGE UND ANZÜNDUNG: 1. Der Grill muss ausgeschaltet und kalt sein. 2. Bis zu 1,6 kg Holzkohle (oder Briketts) in die Holzkohleschale füllen. Dafür sorgen, dass sie gleichmäßig im Tablett verteilt ist. Große Holzkohlestücke müssen vielleicht zerbrochen werden, damit sie in die Schale passen. 3. - Seite 7 • kommen. • NICHT versuchen, die Asche vom Holzkohletablett zu entfernen, während der Grill noch heiß ist, sondern ihn erst abkühlen lassen. • NICHT versuchen, mehr Holzkohle auf das Tablett zu legen, nachdem das Kochen begonnen hat. • Die Holzkohle NICHT mit anderen Mittel als dem Gasbrenner anzünden, auch nicht mit Feuerzeugflüssigkeiten aus Erdöl oder Alkohol.
- Seite 8 Parts included: Pièces incluses: 2. Løfter til rist 1. Charcoal Tray 1. Plateau de charbon 3. Bakkeophæng til trækul 2. Grate Lifter de bois 4. Benbeskyttere Parti incluse: 3. Charcoal Tray Hanger 2. Outil de levage pour 4. Leg Protectors grille 1.
-
Seite 9: Après La Cuisson
INSTRUCTIONS D’INSTALLATION / D’ALLUMAGE : 1. Assurez-vous que le gril est éteint et froid au toucher avant de commencer. 2. Placez jusqu’à 1,6 kg de charbon de bois (en morceaux ou en briquettes) dans le plateau à charbon. Assurez-vous de le répartir uniformément sur le plateau. Il peut être nécessaire de briser les gros morceaux de charbon de bois pour qu’ils aillent dans le plateau. - Seite 10 • N’essayez PAS de vider les cendres du plateau à charbon tant que le gril est encore chaud. Laissez le gril refroidir d’abord. • N’essayez PAS d’ajouter plus de charbon dans le plateau une fois la cuisson commencée. • N’utilisez AUCUN moyen d’allumer le charbon de bois autre que le brûleur à gaz, y com- pris les liquides d’allumage à...
- Seite 11 Parts included: Pièces incluses: 2. Løfter til rist 1. Charcoal Tray 1. Plateau de charbon 3. Bakkeophæng til trækul 2. Grate Lifter de bois 4. Benbeskyttere Parti incluse: 3. Charcoal Tray Hanger 2. Outil de levage pour 4. Leg Protectors grille 1.
-
Seite 12: Sikkerhedsadvarsler
INSTALLATION / TÆNDINGSINSTRUKTIONER: 1. Sørg for, at grillen er slukket og afkølet før du røre ved den, inden du begynder. 2. Anbring op til 1,6 kg trækul (klump eller briketter) i kulbakken. Sørg for at sprede det jævnt rundt i bakken. Store stykker kul skal muligvis brækkes i mindre stykker for at passe ind i bakken. -
Seite 13: Problemløsning
• Selvom at trækulet ser ud til at være slukket, kan ikke-opbrugte gløder opretholde varmen i op til 24 timer, og hvis de udsættes for frisk luft, kan de uventet starte en flamme. Enhver glød uden for grillkammeret udgør en brandfare og kan antænde brændbare overflader, såsom trædæk. - Seite 14 Parts included: Pièces incluses: 2. Løfter til rist 1. Charcoal Tray 1. Plateau de charbon 3. Bakkeophæng til trækul 2. Grate Lifter de bois 4. Benbeskyttere Parti incluse: 3. Charcoal Tray Hanger 2. Outil de levage pour 4. Leg Protectors grille 1.
-
Seite 15: Dopo La Cottura
ISTRUZIONI DI INSTALLAZIONE/ACCENSIONE: 1. Verificare che il grill sia spento e ben raffreddato prima di iniziare. 2. Distribuire uniformemente nel vassoio fino a 1,6 kg di carbone (carbonella o mattonelle), Potrebbe essere necessario rompere i pezzi più grandi per farli entrare nel vassoio. 3. - Seite 16 ISTRUZIONI DI INSTALLAZIONE/ACCENSIONE: 1. Verificare che il grill sia spento e ben raffreddato prima di iniziare. 2. Distribuire uniformemente nel vassoio fino a 1,6 kg di carbone (carbonella o mattonelle), Potrebbe essere necessario rompere i pezzi più grandi per farli entrare nel vassoio. 3.
- Seite 17 STORAGE...
-
Seite 18: Product Use
STORAGE PRODUCT USE... - Seite 19 PRODUCT USE...
- Seite 20 • Visita charbroil.eu per tutte le esigenze relative agli accessori per la gri- glia, ricette, supporto tecnico e coinvolgimento della comunità alla griglia. Share your experiences! 2019 Char-Broil Europe GmbH © Paul-Dessau-Straße 8 Quartier O – 4.OG D-22761 Hamburg The product associated with this guide was manufactured in China.