
Verwandte Anleitungen für urmet AIKO 1716/1


Inhaltszusammenfassung für urmet AIKO 1716/1
- Seite 1 Mod. 1716 DS 1716-001D LBT 8484 VIDEOCITOFONO AIKO AIKO VIDEO DOOR PHONE MONITEUR AIKO VIDÉOINTERFONO AIKO VIDEOSPRECHANLAGE AIKO Sch./Ref. 1716/1 -/2...
-
Seite 2: Descrizione Dei Componenti E Caratteristiche
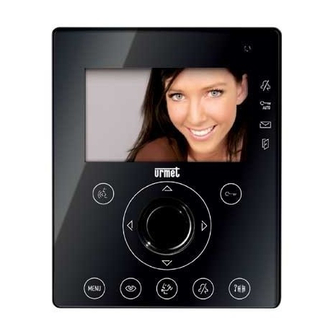
ITALIANO I videocitofoni Aiko Sch. 1716/1 e Sch. 1716/2 sono dedicati all’utilizzo sui sistemi 2Voice. DESCRIZIONE DEI COMPONENTI E CARATTERISTICHE Display Microfono Indicazione mute chiamata inserito (led verde) Indicazione apriporta automatico attivo (led verde) Indicazione messaggi presenti (led verde) Indicazione porta aperta o segnalazione di assenza inserita (led rosso) Pulsante apriporta - Pulsante contestuale OK Pulsanti di navigazione Pulsante apriporta passo carraio... -
Seite 3: Descrizione Dei Morsetti
INSTALLAZIONE Murare la scatola incasso all’altezza indicata nel disegno seguente. Fissare la staffa alla scatola incasso. Eseguire i collegamenti e le impostazioni dei dip-switch. Al termine della programmazione fi ssare il videocitofono alla staffa. DESCRIZIONE DEI MORSETTI LINE IN Connessione al BUS di sistema LINE OUT Connessione al successivo dispositivo per connessione entra e esci Ripetizione di chiamata Ripetizione di chiamata... - Seite 4 § Per le impostazioni dei dip-switch fare riferimento al libretto di sistema fornito a corredo dell’alimentatore Sch. 1083/20. CODE: codice utente. Impostare un numero da 0 a 127 secondo le regole seguenti: • Nella colonna non ci devono essere appartamenti diversi con lo stesso codice utente. •...
- Seite 5 Terminazione Terminazione Terminazione LINE OUT Terminazione LINE OUT LINE OUT LINE IN LINE 3 LINE 1 LINE 3 LINE 1 1083/55 1083/55 LINE 4 LINE 2 LINE 4 LINE 2 LINE IN LINE IN PULIZIA È possibile pulire il videocitofono strofi nando delicatamente un panno umido sul vetrino. PRESTAZIONI RICEZIONE DELLE CHIAMATE E FUNZIONE ‘PALLEGGIAMENTO VIDEO’...
-
Seite 6: Suoneria Supplementare
è possibile monitorare l’effettiva apertura della porta: il led è acceso fi sso se è aperta la porta principale e lampeggia se è aperta la porta secondaria. MUTE ALTOPARLANTE SUONERIA Questa funzione permette di escludere la suoneria di chiamata. Per attivare questa funzione premere il tasto . - Seite 7 seconda pressione del tasto si termina l’autoinserzione. Non è possibile effettuare l’autoinserzione se la colonna è già impegnata in una conversazione. Se quando viene inviata la richiesta di autoinserzione la colonna è già impegnata in un’altra conversazione verrà generato dal videocitofono un tono di dissuasione. CHIAMATA A CENTRALINO Questa funzione permette di entrare in comunicazione con il centralino di portineria: premere il tasto inviare la chiamata al centralino.
- Seite 8 intercomunicanti. Il dispositivo è in grado di interfacciarsi con apparecchi acustici per audiolesi con funzione “T” posti ad una distanza di circa 20 cm. max 20cm Posizionare il selettore in modalità T MENU Per accedere al menu generale del videocitofono premere il tasto MENU. Appare la seguente schermata: In ogni momento è...
-
Seite 9: Apriporta Automatico
APRIPORTA AUTOMATICO Il servizio di apriporta automatico consente di aprire direttamente la porta a seguito della ricezione di una chiamata, per attivare tale funzione: • Premere il tasto MENU per accedere al menu. • Selezionare l’icona e premere OK. A funzione attiva il led si accende. -
Seite 10: Regolazioni Audio
le possibili funzioni sono: Chiamata interna Chiamata all’interno dello stesso appartamento – Chiamata esterna Chiamata all’esterno dell’appartamento ma all’interno della stessa – colonna videocitofonica Richiesta speciale : Richiesta a decodifi ca speciale – • Inserire il nome che si vuole assegnare alla chiamata utilizzando i tasti direzionali (Su e Giù selezionano il carattere, Destra e sinistra spostano il cursore, X cancella) e premere OK per confermare •... -
Seite 11: Regolazioni Video
REGOLAZIONI VIDEO In questo menu è possibile regolare luminosità, contrasto, colore ed i temi (5 temi disponibili) del menu • Premere il tasto MENU per accedere al menu. • Selezionare l’icona e premere OK. • Selezionare l’icona premere OK • Selezionare l’icona per regolare la luminosità... - Seite 12 ENGLISH Aiko video door phones Ref. 1716/1 and Ref. 1716/2 are designed to be used in 2Voice systems. COMPONENTS DESCRIPTION AND CHARACTERISTICS Display Microphone Indication of “mute function” active (green led) Indication of automatic door lock release active (green led) Indication of present messages (green led) Indication of open door or absence active (red led) Door lock release button - Contextual button OK...
- Seite 13 INSTALLATION Fix the fl ush mounting box at the height shown in the following fi gure. Fasten the bracket to the embedding box. Perform connections and dip-switch settings. At the end of programming, fasten the video door phone to the bracket. TERMINAL PINS DESCRIPTION LINE IN Connection to the system BUS...
- Seite 14 CODE: user code. Set a number from 0 to 127, according to the following rules: • In the column there must not be any apartments with the same user code. • If there are apartment stations in parallel in the same apartment, these must have the same user code. •...
- Seite 15 CLEANING Clean the video door phone with a damp cloth, wiping gently the screen. FEATURES CALL RECEPTION AND ‘VIDEO TRANSFER’ FUNCTION When a call is received, the user apartment station rings with the programmed tone, according to the source: • From main door unit •...
- Seite 16 AUDIO / VIDEO SETTINGS DURING CALL When a call is received or during communication, some audio/video adjustments can be performed: by pressing the button MENU, the following screen appears This menu will be displayed over the image coming from the door unit •...
- Seite 17 apartment (the called device must be in the same column). To perform a call from the directory: • Press the button MENU to access the menu. • Select the icon and press OK. • Select the user to be called with directional buttons and press OK. •...
-
Seite 18: Automatic Door Lock Release
MENU To access the video door phone main menu, press the button MENU. The display shows: The device can return to standby mode at any moment by keeping the button X pressed for at least 3 seconds. § If the column is already in conversation, the device will not turn on and emit an alert tone. CALL MENU With this menu the user can call a name previously saved in the directory. - Seite 19 VIDEO DOOR PHONE ANSWERING MACHINE If there are recorded video messages, the led blinks slowly. To receive messages: • Press the button MENU to access the menu. • Select the icon and press OK. § This function is available only if the system is provided with the column video door phone answering machine.
-
Seite 20: Call Tone Selection
• After selecting the record, proceed as described in the previous paragraph “Adding a record to the directory”. Deleting a record of the directory To delete a record in the directory: • Press the button MENU to access the menu. •... - Seite 21 FRANÇAIS Les moniteurs Aiko Réf. 1716/1 et Réf. 1716/2 ont été projetés pour être utilisés dans les systèmes 2Voice. DESCRIPTIONS DES PARTIES ET CARACTÉRISTIQUES Écran Microphone Indication de fonction «appel muet» (mute) actif (led verte) Indication d’ouvre-porte automatique actif (led verte) Indication de présence de messages (led verte) Indication de porte ouverte ou signal d’absence actif (led rouge) Touche ouvre-porte - Touche contextuelle OK...
-
Seite 22: Description Des Bornes
INSTALLATION Fixer le boîtier en encastrement à la hauteur montrée dans le dessin suivant. Fixer la bride sur le boîtier à encastrer. Faire les connexions et confi gurer les dip-switch. A la fi n de la programmation, fi xer le vidéophone/interphone sur la bride. DESCRIPTION DES BORNES LINE IN Connexion au BUS de système... - Seite 23 § Pour les confi gurations des dip switch, consulter le livret de système livré avec l’alimentation Réf. 1083/20. CODE: code utilisateur. Confi gurer un numéro de 0 à 127 selon les règles suivantes: • Dans la colonne il ne doit pas y avoir d’appartements différents avec le même code utilisateur; •...
- Seite 24 Terminaison Terminaison Terminaison LINE OUT Terminaison LINE OUT LINE OUT LINE IN LINE 3 LINE 1 LINE 3 LINE 1 1083/55 1083/55 LINE 4 LINE 2 LINE 4 LINE 2 LINE IN LINE IN NETTOYAGE Le vidéophone peut être nettoyé en frottant avec délicatesse l’écran avec un chiffon humide. PRESTATIONS RÉCEPTION DES APPELS ET FONCTION ‘TRANSFERT VIDÉO’...
- Seite 25 Si les modules d’appel sont équipés d’un senseur de porte ouverte (et le service d’absence n’est pas actif), la led permet de contrôler si la porte est effectivement ouverte: la led est allumée fi xe si la porte ouverte est celle de la porte principale; la led clignote si la porte ouverte est celle de la porte secondaire. FONCTION MUET DU HAUT-PARLEUR DE LA SONNERIE Cette fonction permet d’exclure la sonnerie d’appel.
- Seite 26 avec le poste d’appel sélectionné; en appuyant une deuxième fois sur la touche , l’auto-insertion est terminée. L’auto-insertion ne peut pas être activée si la colonne est déjà en conversation. Si la colonne est déjà occupée avec une autre conversation quand la demande d’auto-insertion est envoyée, le vidéophone émettra une tonalité...
- Seite 27 max 20cm Positionner le sélecteur en mode T MENU Pour accéder au menu général du vidéophone appuyer sur la touche MENU. L’écran affi che: À chaque moment on peut rétablir l’état de repos en appuyant sur la touche X pendant 3 secondes §...
-
Seite 28: Ouvre-Porte Automatique
OUVRE-PORTE AUTOMATIQUE Le service d’ouvre-porte automatique permet d’ouvrir directement la porte à la suite de la réception d’un appel; pour activer cette fonction: • Appuyer sur la touche MENU pour accéder au menu. • Sélectionner l’icône et appuyer sur OK. Quand la fonction est active, la LED s’allume. -
Seite 29: Réglages Audio
Demande spéciale : Demande à décodage spécial – • Entrer le nom qu’on veut attribuer à l’appel en utilisant les touches directionnelles (Haut et Bas pour sélectionner le caractère, Droite et Gauche pour déplacer le curseur, X pour effacer) et appuyer sur OK pour confi... -
Seite 30: Caractéristiques Techniques
• Sélectionner l’icône pour régler la luminosité en utilisant les touches directionnelles Droite/Gauche, sélectionner pour régler le contraste, sélectionner pour régler la couleur et sélectionner pour régler le thème désiré. • Après avoir effectué les réglages, appuyer sur OK pour confi rmer. RESTAURATION Dans ce menu il est possible de réinitialiser le dispositif et de remettre toutes les confi... - Seite 31 ESPAÑOL Los vidéointerfonos Aiko Sch. 1716/1 y Sch. 1716/2 son dedicados para el uso en los sistemas 2Voice. DESCRIPCIÓN DE LOS COMPONENTES Y CARACTERÍSTICAS Pantalla Micrófono Indicación llamada muda activa (led verde) Indicación apertura de la puerta automatica activa (led verde) Indicación mensajes presentes (led verde) Indicación puerta abierta o señalación de ausencia activa (led rosso) Tecla apertura puerta - Tecla Contextual OK...
-
Seite 32: Descripción De Los Bornes
INSTALLATION Tapiar la caja de encaje en la altura indicada en el diseño siguiente. Fijar el soporte a la caja de empotrar. Efectuar las conexiones y las impostaciones de los interruptores dip. Una vez fi nalizada la programación, fi jar el videointerfono al soporte. DESCRIPCIÓN DE LOS BORNES LINE IN Conexión al BUS del sistema... - Seite 33 § Para las impostaciones de los interruptores dip consultar el manual del sistema anexo con el alimentador Sch. 1083/20. CODE: código usuario. Programar un número desde 0 hasta 127 según las siguientes reglas: • En la columna no pueden existir habitaciones diferentes con el mismo código usuario. •...
- Seite 34 Terminación Terminación Terminación LINE OUT Terminación LINE OUT LINE OUT LINE IN LINE 3 LINE 1 LINE 3 LINE 1 1083/55 1083/55 LINE 4 LINE 2 LINE 4 LINE 2 LINE IN LINE IN LIMPIEZA Es posible limpiar el videointerfono frotando suavemente un paño mojado sobre el vidrio. PRESTACIONES RECEPCIÓN DE LAS LLAMADAS Y FUNCIÓN ‘INTERCAMBIO VIDÉO’...
- Seite 35 ausencia), por el led es posible controlar el estado de la puerta: el led está encendido si la puerta principal está abierta y relampaguea si la puerta secundaria está abierta. DESACTIVACIÓN SONERÍA ALTAVOZ Esta función permite de excluir la sonería de llamada. Para activar esta función presionar la tecla Cuando la función es activa el led MUTE se enciende y con la recepción de una llamada el dispositivo no emitirá...
- Seite 36 No es posible efectuar la autoactivación si la columna está ya ocupada en una conversación. Si cuando es mandada la pedida de autoactivación la columna está ya ocupada en otra conversación, el dispositivo emitirá un sonido disuasorio. LLAMADA HACIA CENTRALITA Esta función permite de entrar en comunicación con la centralita de portería: presionar la tecla para mandar la llamada hacia la centralita.
- Seite 37 con función “T” ubicados a una distancia de 20 cm. aprox. max 20cm Coloque el selector en la posición “T” MENU Para entrar en el menú general del vidéointerfono presionar la tecla MENU. Aparece la siguiente pantalla: En cada momento es posible regresar en descanso presionando la tecla X por almenos 3 segundos. §...
- Seite 38 APERTURA DE LA PUERTA AUTOMATICA El servicio de apertura de la puerta automática permite de abrir directamente la puerta en seguida de la recepción de una llamada, para activar esta función: Presionar la tecla MENU para entrar en el menú. Seleccionar el icono y presionar OK.
- Seite 39 Llamada interior Llamada hacia el dispositivo de la misma habitación – Llamada exterior Llamada hacia el externo de la habitación pero hacia dispositivos de – la misma columna vidéointerfonica Pedida especial Pedida con descifre especial – • Introducir el nombre que se desea asignar a la llamada usando las teclas direccionales (Arriba y Abajo para seleccionar el carácter, Derecha y Izquierda mueven el cursor, X para borrar) y presionar OK para confi...
- Seite 40 Presionar la tecla MENU para entrar en el menú. • • Seleccionar el icono y presionar OK. • Seleccionar el icono presionar OK • Seleccionar el icono para regular la luminosidad usando las teclas direccionales Derecha/Izquierda, seleccionar para regular el contraste, seleccionar para regular el color y seleccionar para seleccionar el tema deseado.
-
Seite 41: Beschreibung Der Bestandteile Und Merkmale
DEUTSCH Die Videosprechanlagen Aiko Sch. 1716/1 und Sch. 1716/2 sind speziell für den Gebrauch der 2 Voice Systeme entworfen. BESCHREIBUNG DER BESTANDTEILE UND MERKMALE Display Mikrophon Anzeige lautlose Anrufe eingegeben (grünes Led) Anzeige automatischer Türöffner aktiv (grünes Led) Anzeige vorhandene Nachrichten (grünes Led) Anzeige offene Tür oder Abwesenheitssignal eingegeben (rotes Led) Türöffnertaste - Kontext-Taste OK Navigiertasten... -
Seite 42: Klemmenbeschreibung
INSTALLATION Die Unterputzdose in der angegebenen Höhe, (siehe nachfolgende Zeichnung), einbauen. Befestigen Sie den Bügel am Einbaukasten. Die Anschlüsse und die Einstellungen der Dip-Switch ausführen. Befestigen Sie die Gegensprechanlage nach der Programmierung an dem Bügel. KLEMMENBESCHREIBUNG LINE IN Anschluss ans BUS System LINE OUT Anschluss ans nachfolgende Gerät für die Eingang-/Ausgangsverbindung Anrufwiederholung Anrufwiederholung... -
Seite 43: Einstellung Des Linienabschlusses
§ Für die Einstellungen des Dip-Switch sollte man sich an das mitgelieferte Systemhandbuch des Netzgerätes Sch.1083/20 halten. CODE: Teilnehmercode. Eine Nummer von 0-127 sollte man nach folgenden Richtlinien einstellen: • In derselben Steigleitung darf es keine unterschiedlichen Wohnungen geben, die den gleichen Teilnehmercode haben. -
Seite 44: Reinigung
Abschluss Abschluss Abschluss LINE OUT Abschluss LINE OUT LINE OUT LINE IN LINE 3 LINE 1 LINE 3 LINE 1 1083/55 1083/55 LINE 4 LINE 2 LINE 4 LINE 2 LINE IN LINE IN REINIGUNG Für die Reinigung der Videosprechanlage ein feuchtes Tuch auf dem Bildschirm leicht abreiben. LEISTUNGEN ANRUFERHALT UND VIDEOBILDÜBERTRAGUNGSFUNKTION Bei Erhalt eines Anrufs klingelt die Innenstelle beim Teilnehmer mit der jeweils eingestellten Melodie, je... -
Seite 45: Mute Lautstärkeneinstellung Des Klingeltons
Sollten die Rufmodule mit einem Sensor „offene Tür“ ausgestattet sein (und der Abwesenheitsmodus nicht aktiviert sein), ist es möglich auf dem Led die „effektive“ Öffnung der Tür zu beobachten: falls das Haupttor geöffnet ist, leuchtet das Led ununterbrochen auf, sollte die Nebentür geöffnet sein, blinkt das Led. -
Seite 46: Anruf An Die Zentrale
des Bildes ab (das erste Bild, das man sieht, wird das des Hauptanrufmoduls n°0 sein); die Taste noch einmal drücken, um zu den folgenden Rufmodulen zu gelangen. Erst werden alle Hauptrufmodule angezeigt, dann die Nebenrufmodule der eigenen Steigleitung. Durch die Aktivierung des Sprechkreises über die Taste wird die Video- und Audioverbindung mit der gerade ausgewählten Rufstelle hergestellt;... - Seite 47 HÖRGERÄTBETRIEB Die Gegensprechanlage ist mit einem Gerät versehen, mit dem Gehörgeschädigte, die über ein angebrachtes Hörgerät verfügen, bei Gegensprechgesprächen denjenigen hören können, der von der Rufstelle aus oder weiteren Freisprechanlagen aus spricht. Das Gerät ist in der Lage, eine Verbindung zu Hörgeräten für Hörgeschädigte aufzubauen, die die Funktion “T”...
-
Seite 48: Automatischer Türöffner
MARIO ROSSI PAOLO BIANCHI < > AUTOMATISCHER TÜRÖFFNER Die Funktion des automatischen Türöffners erlaubt es, eine Tür direkt nach Erhalt eines Anrufs zu öffnen. Um diese Funktion zu aktivieren: Die MENU Taste drücken, um in das Menü zu gelangen. • •... -
Seite 49: Namensverzeichnis Der Videosprechanlage
§ Sollte das System belegt sein, ist es nicht möglich, in das Menü zu gelangen. NAMENSVERZEICHNIS DER VIDEOSPRECHANLAGE Ins Namensverzeichnis der Sprechanlage kann man bis zu 32 Anrufe eingeben (Teilnehmeranrufe und Spezialanrufe). Dem Namensverzeichnis einen Datensatz beifügen Um einen Namen im Verzeichnis hinzuzufügen: Die MENU Taste drücken, um in das Menü... -
Seite 50: Audioeinstellungen
AUDIOEINSTELLUNGEN In diesem Menü ist es möglich, die Lautstärke des Klingeltons, die Lautstärke des Sprachsignals und den Tastenbeep einzustellen. • Die MENU Taste drücken, um in das Menü zu gelangen. • Das Symbol wählen und OK drücken. • Das Symbol wählen und OK drücken. - Seite 51 ITALIANO DIRETTIVA 2012/19/UE DEL PARLAMENTO EUROPEO E DEL CONSIGLIO del 4 luglio 2012 sui rifi uti di apparecchiature elettriche ed elettroniche (RAEE) Il simbolo del cassonetto barrato riportato sull’apparecchiatura o sulla sua confezione indica che il prodotto alla fi ne della propria vita utile deve essere raccolto separatamente dagli altri rifi uti. L’utente dovrà, pertanto, conferire l’apparecchiatura giunta a fi...
- Seite 52 Weitere Informationen dazu, wo Sie Ihre Altgeräte zum Recycling abgeben können, erhalten Sie bei Ihrer Gemeindeverwaltung, Ihrem Hausmüll-Entsorgungsdienst oder bei dem Händler, bei dem Sie das Produkt gekauft haben. DS 1716-001D LBT 8484 URMET S.p.A. Area tecnica 10154 TORINO (ITALY) servizio clienti +39 011.23.39.810 VIA BOLOGNA 188/C http://www.urmet.com...