Werbung
MANUAL
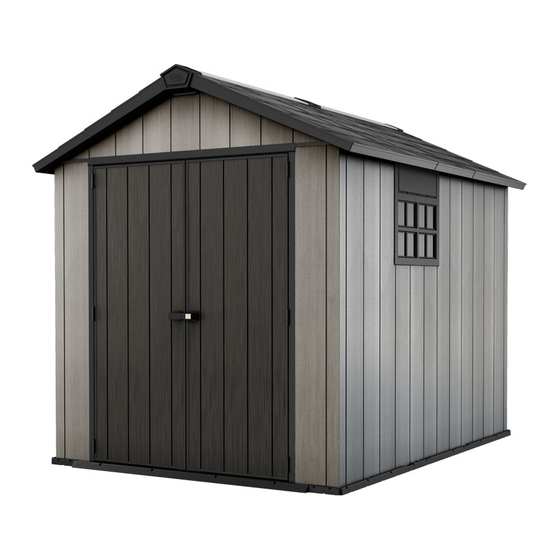
OAKLAND 759
USER MANUAL | MODE D'EMPLOI | MANUAL DEL USUARIO | MONTAGEANLEITUNG|
MONTAGEHANDLEIDING | MANUALE PER L'UTENTE | MANUAL DO UTILIZADOR
IMPORTANT | IMPORTANT | IMPORTANTE
RETAIN FOR FUTURE REFERENCE: READ CAREFULLY
À CONSERVER POUR DE FUTURS BESOINS DE RÉFÉRENCE : À LIRE SOIGNEUSEMENT
CONSERVE PARA FUTURA REFERENCIA. LEA CUIDADOSAMENTE
For outdoor use only. Not for commercial use | Utilisation non commerciale à l'extérieur seulement |
Para uso externo. No para uso commercial.
WARRANTY ACTIVATION
Thank you for your purchase of the Keter shed.
In order to activate your warranty, please log onto
our website and fill in the form under warranty
activation.
Create amazing spaces
WWW.KETER.COM
ACTIVATION DE LA GARANTIE
Nous vous remercions pour l'achat de votre abri
Keter. Pour activer votre garantie, veuillez vous
connecter à notre site Web et remplir le formulaire
d'activation de la garantie.
keter.com/en/warrant-activation
For | Pour | Para | Für | Voor | Per | Para
OAKLAND 7513 :
refer to the user manual within the
extension kit | consulter le manuel
d'utilisation du kit d'extension | el manual
de instrucciones del kit de extensión |
beachten Sie das Benutzerhandbuch im
Erweiterungssatz | u de handleiding in de
uitbreidingsset | riferimento al manuale
utente presente nel kit delle estensioni | o
manual de instruções no kit de extensão
US, Canada
Tel: +1877-638-7056, NACS@keter.com
Mon - Fri | 8am - 6pm ET / Lundi-Vendredi 8h -18h
Sat - Sun | 9am - 6pm ET / Samedi-Dimanche 9h-18h
UK
Tel: +44-121-506-0008, CSUK@keter.com
Mon - Fri | 8:30am - 5pm
For other European countries see the last page
Pour les autres pays d'Europe, voir la dernière page
Para otros países europeos vea la la última página
OAKLAND
7513
!
ACTIVACION DE GARANTIA
Gracias por su compra de una caseta Ket er. Para
activar su garantia, ingrese en nuestro sitio de
internet y complete el formulario que esta bajo la
activacion de garantia.
17201310
Werbung
Inhaltsverzeichnis

Verwandte Anleitungen für Keter DUOTECH OAKLAND 759


Inhaltszusammenfassung für Keter DUOTECH OAKLAND 759
- Seite 1 WARRANTY ACTIVATION ACTIVATION DE LA GARANTIE ACTIVACION DE GARANTIA Thank you for your purchase of the Keter shed. Nous vous remercions pour l’achat de votre abri Gracias por su compra de una caseta Ket er. Para In order to activate your warranty, please log onto Keter.
- Seite 2 US, Canada Tel: +1877-638-7056, NACS@keter.com Mon - Fri | 8am - 6pm ET / Lundi-Vendredi 8h -18h Sat - Sun | 9am - 6pm ET / Samedi-Dimanche 9h-18h Tel: +44-121-506-0008, CSUK@keter.com...
- Seite 3 SITE PREPARATION | PRÉPARATION DU SITE | PREPARACIÓN DEL LUGAR | VORBEREITUNG DES AUFSTELLUNGSORTES | VOORBEREIDING VAN HET TERREIN | PREPARAZIONE DEL LUOGO DI ASSEMBLAGGIO | PREPARAÇÃO DO LOCAL Level the ground surface Nivelez la surface du sol | Nivele la superficie del suelo | Ebnen Sie die Bodenoberfläche | Maak de bodem vlak | Livellare la superficie del terreno | Nivele a superfície do solo Recommendation: Construct a wooden or concrete base as a foundation | Recommandation: fabriquez une base en bois ou en béton en guise de fondation | Recomendación: construya una base de madera o de cemento a modo de cimiento |...
- Seite 4 BEFORE STARTING ASSEMBLY | AVANT DE COMMENCER LE MONTAGE | ANTES DE EMPEZAR EL ARMADO | VOR MONTAGEBEGINN | VOORDAT U BEGINT TE MONTEREN | PRIMA DI INIZIARE L’ASSEMBLAGGIO | ANTES DE INICIAR A Read the care and safety guidelines at the end of this manual | Check to ensure that there are no missing or damaged parts BEFORE starting or arranging assembly | Remove all parts from the package(s) and spread them out on a clean work surface | Review all assembly instructions | Assemble all the parts according to the directions in this manual.
- Seite 5 SHED PARTS | PIÈCES DE L’ABRI | PARTES DEL COBERTIZO | TEILE DES SCHUPPENS | ONDERDELEN VAN HET SCHUURTJE COMPONENTI DEL PORTA ATTREZZI | PEÇAS DO ABRIGO Remove all parts from the package(s) and spread them out on a clean work surface | Code letters are imprinted on each part for easy identification | Retirez toutes les pièces du/des paquet(s) et étalez-les sur une surface de travail propre | Des lettres sont imprimées sur chaque pièce pour une identification facile | Saque todas las piezas del paquete o paquetes y póngalas sobre una superficie de trabajo limpia | El código de letras está...
- Seite 6 ROOF PARTS | PIÈCES DU TOIT | PARTES DEL TECHO | DACHELEMENTE | DAKONDERDELEN | COMPONENTI DEL TETTO | PEÇAS DO TELHADO (x1) (x1) (x1) (x1) (x1) (x1) (x2) (x2) (x2) (x2) METAL PARTS | PIÈCES MÉTALLIQUES | PIEZAS METÁLICAS | METALLTEILE | METALEN DELEN | COMPONENTI IN METALLO | PARTES METÁLICAS (x1) (x2)
- Seite 7 WINDOW PARTS | PIÈCES DE LA FENÊTRE | PARTES DE LA VENTANA | FENSTERELEMENTE | VENSTERONDERDELEN | COMPONENTI DELLE FINESTRE | PEÇAS DA JANELA (x1) (x1) (x2) SMALL PARTS | PETITES PIÈCES | PARTES PEQUEÑAS | KLEINTEILE | KLEINE ONDERDELEN | MINUTERIA | PEÇAS PEQUENAS (x1) (x2)
- Seite 8 FLOOR ASSEMBLY | MONTAGE DU PLANCHER | MONTAJE DEL SUELO | MONTAGE DER BODENPLATTE | VLOERMONTAGE | ASSEMBLAGGIO DEL PAVIMENTO | MONTAGEM DO PISO F9 (x2) sc15 (x4) sc15 sc15...
- Seite 9 FL (x2) Front | Avant | Delante | Vorderseite | Voorkant | Anteriore | Frente sc15 (x36) sc15 sc15 Front | Avant | Delante | Vorderseite | Voorkant | Anteriore | Frente...
-
Seite 10: Ol Pc (X1)
DT (x1) sc15 (x2) No pre-drilled holes | Pas de trous pré-percés | Sin agujeros pretaladrados | Ohne vorgebohrte Löcher | Geen voorgeboorde gaten | Predisposizione per fori non presente | Sem buracos perfurados previamente sc15 Front | Avant | Delante | Vorderseite | Voorkant | Anteriore | Frente WALL ASSEMBLY | MONTAGE DU MUR | MONTAJE DE LAS | MONTAGE DER WÄNDE | MONTAGE VAN DE MUREN | ASSEMBLAGGIO DELLE PARETI | MONTAGEM DA PAREDE... - Seite 11 KP (x1) s13b (x1) s13b Front | Avant | Delante | Vorderseite | Voorkant | Anteriore | Frente P7 (x1) Front | Avant | Delante | Vorderseite | Voorkant | Anteriore | Frente...
- Seite 12 KP (x1) s13b (x1) Faible Bajo Niedrig Laag Bassa Baixa s13b Front | Avant | Delante | Vorderseite | Voorkant | Anteriore | Frente KP (x2) P7 (x2) Front | Avant | Delante | Vorderseite | Voorkant | Anteriore | Frente...
-
Seite 13: Inhaltsverzeichnis
PC (x1) s13b (x1) s13b Front | Avant | Delante | Vorderseite | Voorkant | Anteriore | Frente P7 (x1) KP (x1) s13b (x1) Faible Bajo Niedrig Laag Bassa Baixa s13b Front | Avant | Delante | Vorderseite | Voorkant | Anteriore | Frente... -
Seite 14: Kp (X1)
CHOOSE THE LOCATION OF THE WINDOW | CHOISISSEZ L’EMPLACEMENT DE LA FENÊTRE | ELIJA DÓNDE QUIERE COLOCAR LA VENTANA | WÄHLEN SIE AUS, WO SIE DAS FENSTER ANBRINGEN MÖCHTEN | KIES WAAR U HET VENSTER WILT HEBBEN | SCEGLIERE LA POSIZIONE DELLA FINESTRA | ESCOLHA ONDE QUER COLOCAR A JANELA P7 (x2) PW (x1) - Seite 15 PC (x1) KP (x1) Front | Avant | Delante | Vorderseite | Voorkant | Anteriore | Frente s13b (x2) s13b s13b Front | Avant | Delante | Vorderseite | Voorkant | Anteriore | Frente...
- Seite 16 P7 (x3) KP (x3) OLPC (x1) KP (x1)
- Seite 17 s13b (x2) s13b s13b PF (x2) KP (x2)
- Seite 18 s13b (x4) s13b s13b s13b s13b S45b (x2) s45b...
- Seite 19 WINDOW ASSEMBLY | MONTAGE DE LA FENÊTRE | VENTANA DEL TECHO | FENSTERHMONTAGE | RAAMMONTAGE | ASSEMBLAGGIO DELLA FINESTRA | MONTAGEM DO JANELA WT (x1) WP (x2) WN (x1) sc15 (x11) sc15...
-
Seite 21: S13B (X1)
s13b (x1) MP (x1) Pre-drilled holes Trous pré-percés Agujeros pretaladrados Vorgebohrte Löcher Voorgeboorde gaten Predisposizione per fori Orifícios pré-perfurados s13b MP (x1) s13b (x1) s13b... - Seite 22 ME (x2) sc8 (x2) scn8 (x2) scn8 scn8 MG (x2) MH (x1) MA (x1) sc8 (x6) scn8 (x6) scn8 scn8...
- Seite 23 sc8 (x4) scn8 (x4) scn8...
- Seite 24 CB (x2) CM (x1) Inside | Intérieur | Interior | Innenseite | Binnenkant | Interno | Interior...
- Seite 25 sc15 (x6) sc15 FM (x1) s45b (x2) s45b...
- Seite 26 s45b (x2) s45b LR (x2)
- Seite 27 sc7t (x2) UK (x1) sc7t CL (x1) CR (x1)
- Seite 28 NEDPC (x2) sc15 (x4) sc15 No pre-drilled holes | Pas de trous pré-percés | Sin agujeros pretaladrados | Ohne vorgebohrte Löcher | Geen voorgeboorde gaten | Predisposizione per fori non presente | Sem buracos perfurados previamente...
- Seite 29 ROOF ASSEMBLY | MONTAGE DU TOIT | MONTAJE DEL TECHO | DACHMONTAGE | DAKMONTAGE | ASSEMBLAGGIO DEL TETTO | MONTAGEM DO TELHADO Z3 (x1) Z2 (x1) Z1 (x1) Z6 (x1) Z5 (x1) Z4 (x1) s13b (x8) s13b s13b...
- Seite 30 (x2) AK (x2) s13b (x2) s13b s13b Outside | Extérieure | Exterior | Außenseite | Buitenkant | Esterno | Exterior Inside Intérieur Interior Innenseite Binnenkant Interno Interior...
- Seite 31 KP (x2)
- Seite 33 s13b (x8) s13b MB (x1) sc15 (x6)
- Seite 34 TD (x2) TU (x2) M7 (x4) sc15 (x20) sc15 sc15 sc15 sc15 sc15...
- Seite 35 TD (x1)
- Seite 36 sc15 (x1) sc15 T9 (x1) sc15 (x1) sc15...
- Seite 37 sc15 (x8) sc15 TU (x1)
- Seite 38 sc15 (x1) sc15 sc15 (x8) sc15...
- Seite 39 TD (x1) sc15 (x1) sc15...
- Seite 40 T9 (x1) sc15 (x1) sc15 sc15 (x8) sc15...
- Seite 41 TU (x1) sc15 (x1) sc15 sc15 (x8) sc15...
- Seite 42 M9 (x4) sc15 (x16) sc15 BC9 (x1) sc15 (x4) sc15...
- Seite 43 B9 (x2) PLS (x2) (x2)
- Seite 44 AC (x1) sc15 (x3) sc15 AC (x1) sc15 (x3) sc15...
- Seite 45 sc15 (x24) sc15 TC (x4) sc15 (x8) s45b (x8) sc15 s45b...
- Seite 46 TM (x4) sc15 (x4) s45b (x4) s45b sc15 s13b (x6) Pre-drilled holes Trous pré-percés Agujeros pretaladrados Vorgebohrte Löcher Voorgeboorde gaten Predisposizione per fori s13b Orifícios pré-perfurados s13b...
- Seite 47 s13b (x34) s13b s13b Faible Bajo Niedrig Laag Bassa Baixa sc15 (x6) sc15...
- Seite 48 DOOR ASSEMBLY | MONTAGE DE LA PORTE | MONTAJE DE LA PUERTA | MONTAGE DER TÜR | DEURMONTAGE | ASSEMBLAGGIO DELLA PORTA | MONTAGEM DA PORTA DC (x4) DMC (x8) sf13 (x16) sf13 sf13 HF (x2) DOR (x1)
- Seite 49 DOR (x1) DOL (x1) DSO (x2) DSI (x1) DSW (x1)
- Seite 50 sc15 (x12) sc15 sc15 sc15 HG (x2) HH (x2) sc15 (x4)
- Seite 51 s13b (x28) s13b DH (x6) sc15 (x12) sc15...
- Seite 52 sc7t (x12) sc7t sc7t...
- Seite 53 HB (x1) HA (x1) HC (x1) HD (x1) sc8 (x1) scn8 (x1)
- Seite 54 HE (x1) MB (x2) sc15 (x2) sc15...
- Seite 55 S45b (x30) s45b...
- Seite 57 OPTION | OPCIÓN | OPTIE | OPZION | OPZIONE | OPÇÃOE If you find that the shed is not level, use shims on either side of the shed or door | Si vous trouvez que votre abri n’est pas de niveau, mettez des cales sur chaque côté ou au niveau de la porte | Si usted encuentra que el cobertizo no esta nivelado, utilice cuñas en ambos lados del cobertizo o en la puerta | Nel caso in cui la casetta non dovesse essere in posizione orizzontale, usare degli spessori nella zona interessata...
- Seite 58 s13b (x9) Inside Intérieur Interior Innenseite Binnenkant Interno s13b Interior s13b...
- Seite 59 sc15 (x4) sc15...
- Seite 60 STRONGLY RECOMMENDED | FORTEMENT RECOMMANDÉ | MUY RECOMENDADO| DRINGEND EMPFOHLEN | STERK AANBEVOLEN | SI RACCOMANDA CALDAMENTE | FORTEMENTE RECOMENDADO SECURING THE SHED TO A FOUNDATION A x the shed to the foundation by drilling holes in the shed floor at the pre-marked locations and screwing it into the foundation using appropriate screws (screws not included).
- Seite 61 OPTION | OPTION | OPCIÓN | OPTION | OPTIE | OPZIONE | OPÇÃO 6-10...
- Seite 62 *For your safety - make sure you follow the paint's care & safety guide prior to application. ABRIS KETER DUOTECH™ - PAROIS POUVANT ÊTRE PEINTES Cet abri n’a besoin d’aucun entretien et est fait d’un composé unique permettant de peindre les panneaux muraux brossés.
- Seite 63 Assicurarsi di leggere attentamente la guida per la cura e la sicurezza prima della verniciatura. DEPOSITO KETER DUOTECH™ - PAREDES ÚNICAS PINTÁVEIS Este galpão isento de manutenção é fabricado a partir de um composto exclusivo que permite a pintura dos painéis escovados da parede.
- Seite 64 CARE AND SAFETY GUIDELINES • The shed is intended for storage purposes only. It is not designed for habitation. • It is strongly recommended to secure the shed to an immovable object or anchor to the ground by drilling holes in the shed floor (at the pre-marked locations) and inserting proper screws into the ground (screws are not included).
- Seite 65 • Halten Sie das Dach frei von Schnee und angesammeltem Blattwerk. Große Mengen an Schnee können den Schuppen beschädigen und beim Betreten gefährlich werden. • Die Windrichtung ist ein wichtiger Faktor, der bei der Aufstellung des Schuppens unbedingt berücksichtigt werden muss. Vermeiden Sie zu hohe Windbelastungen, insbesondere einen hohen Winddruck auf die Türen.
- Seite 66 “defects" is defined as imperfections that impair the use of the Product). In such case, consumer shall let Keter or anyone on its behalf inspect and/or test the alleged defective product at Keter laboratory or in any other place at Keter sole discretion.
- Seite 67 (De term "gebreken" wordt gedefinieerd als onvolkomenheden die het gebruik van het product schaden). In dat geval dient de consument het vermeende defecte product door Keter, of door wie dan ook in naam van Keter, te laten inspecteren en/of testen in een laboratorium van Keter, of op een andere plaats met goedkeuring van Keter.
- Seite 68 Made in Israel by | Fabriqué en Israël par | Fabricado en Israel por | Hergestellt in Israel von | Gemaakt in Israël door | Realizzato in Israele da | Fabricado em Israel por Keter Home and Garden Products Ltd., 1 Sapir St. Industrial Area, Herzliya 4685205, Israel...