Keter MANOR 6x5DD Montageanleitung
Vorschau ausblenden
Andere Handbücher für MANOR 6x5DD:
- Montageanleitung (40 Seiten) ,
- Gebrauchsanleitung (19 Seiten) ,
- Montageanleitung (9 Seiten)
Quicklinks
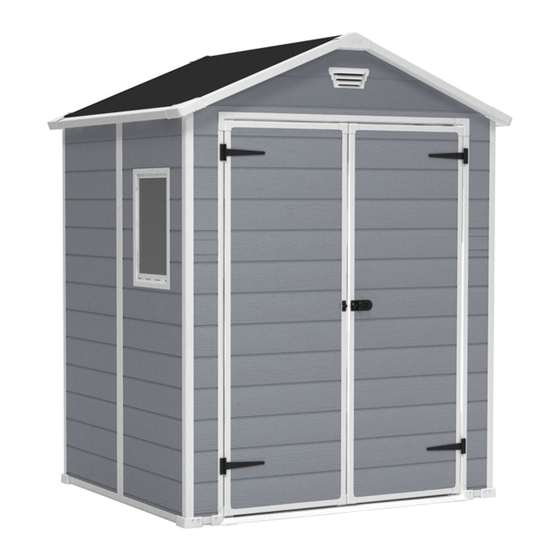
MANOR 6x5DD
ASSEMBLY INSTRUCTIONS | INSTRUCCIONES DE MONTAJE | MONTAGEANLEITUNG | CONSIGNES
DE MONTAGE | SAMLEVEJLEDNING | MONTAGE-VOORSCHRIFTEN | ISTRUZIONI D'ASSEMBLAGGIO
Thank you for your purchase of the Keter shed,
In order to activate your warranty, please enter
WARRANTY
www.keter.com, under storage buildings
ACTIVATION
category and fill in the sheds warranty
activation form.
IF THERE ARE MISSING OR BROKEN PARTS, PLEASE DO NOT RETURN THE PRODUCT TO THE STORE
Please log onto our website, or contact Customer Service at:
S'IL Y A DES PIÈCES MANQUANTES OU CASSÉES, NE RETOURNEZ PAS LE PRODUIT AU MAGASIN
Veuillez visiter notre site Internet, ou contacter notre Service Clientèle:
BITTE
BRINGEN SIE IHR PRODUKT NICHT GLEICH ZUM LADEN ZURÜCK, FALLS TEILE FEHLEN ODER DEFEKT SIND.
Bitte loggen Sie in unsere Website ein oder wenden Sie sich an unseren Kundenservice:
SI HUBIERA ALGUNA PARTE FALTANTE O DAÑADA, NO DEVUELVA EL PRODUCTO A LA TIENDA
Inicie sesión en nuestro sitio en Internet o contáctese con nuestro servicio de atención al cliente:
IN GEVAL
VAN ONTBREKENDE OF GEBROKEN ONDERDELEN NIET HET PRODUCT NAAR DE WINKEL RETOURNEREN.
Ga naar onze website of neem contact op met de Klantenservice:
IN CASO
DI PARTI MANCANTI O DANNEGGIATE, EVITARE DI RESTITUIRE IL PRODOTTO AL NEGOZIO.
Accedere al nostro sito o contattare il Servizio Clienti:
SE HOUVER
PEÇAS EM FALTA OU PARTIDAS, NÃO DEVOLVA O PRODUTO À LOJA.
Entre na nossa página de Internet ou contacte o Serviço de Clientes:
All manuals and user guides at all-guides.com
MANOR 6x5DD
2 easy steps to use a QR-code:
1. Download a FREE QR-Code
reader from your smartphone
application site.
2. Scan the QR-Code.
SKU:
17197128 | 17194151
WWW.KETER.COM
US: # 1-888-374-4262
Canada: # 1-800-661-6721
UK: # 0121-5060008
Other European Countries:
# 31-1612-28301

Verwandte Anleitungen für Keter MANOR 6x5DD


Inhaltszusammenfassung für Keter MANOR 6x5DD
- Seite 1 SKU: MANOR 6x5DD 17197128 | 17194151 2 easy steps to use a QR-code: Thank you for your purchase of the Keter shed, In order to activate your warranty, please enter 1. Download a FREE QR-Code WARRANTY www.keter.com, under storage buildings...
- Seite 2 All manuals and user guides at all-guides.com...
- Seite 3 All manuals and user guides at all-guides.com LEVEL THE GROUND | NIVELLEMENT DU SOL | NIVELE EL SUELO | SORGEN SIE FÜR EINE EBENE GRUNDFLÄCHE MAAK DE GROND WATERPAS | METTERE IL TERRENO A LIVELLO | NIVELAR O SOLO Clear area of stones | Remove all plants, roots and other obstacles | Rake the ground | Make ground level using a long, flat object (e.g.
- Seite 4 All manuals and user guides at all-guides.com GENERAL PARTS LIST roof parts window parts walls parts door parts floor parts FLOOR PARTS LIST (go to stage 1) c1a (x1) 164cm d1a (x1) 138cm t (x4) dsl (x1) dsr (x1) c1c (x2) 134cm c1d (x2) s26b...
- Seite 5 All manuals and user guides at all-guides.com WALL PARTS LIST (stage 9) c1b (x4 ) 186cm fd1b (x2) 17cm x 123cm fu1a (x1) bu1a (x1) rm (x1) h1b (x1) 165cm lm (x1) bd1a (x1) fd1b h1a (x2) 169cm x 109cm 184cm s1a (x1) fd1b...
- Seite 6 All manuals and user guides at all-guides.com FLOOR ASSEMBLY f1c (x1) Folded Black Panel Note : the floor folding line must be underneath f1c (x1)169x139 cm d1a (x1) 138cm...
- Seite 7 All manuals and user guides at all-guides.com dsr (x1) dsl (x1) c1d (x2) 14cm...
- Seite 8 All manuals and user guides at all-guides.com c1a (x1) c1c (x2) t (x4) 164cm 106cm Flip the floor upsidedown...
- Seite 9 All manuals and user guides at all-guides.com s26b (x12) sc15 (x6) 26mm 16mm s26b s15b s26b s26b s15b s15b fully fit the panel inside the porfile Flip the floor upside...
-
Seite 10: Wall Assembly
All manuals and user guides at all-guides.com CHOOSING THE WINDOW PANEL LOCATION Choose where do you want to locate the window WALL ASSEMBLY c1b (x1) w1a (x1) 187cm 67cm x 185cm... - Seite 11 All manuals and user guides at all-guides.com bd1a (x1) s26b (X8) 169cm x 109cm 26mm Fully fit the panel inside the porfile h1b (x1) 165cm Fully fit the panel inside the porfile Outside...
- Seite 12 All manuals and user guides at all-guides.com c1b (x1) s26b (x7) 187cm 26mm bu1a (x1) bu1a Fully fit the panel inside the porfile h1a (x1) c1b (x1) s1a (x1) 187cm 184cm Fully fit the panel inside the porfile Outside...
- Seite 13 All manuals and user guides at all-guides.com w1a (x1) s26b (x5) 187cm x 68cm 26mm Fully fit the panel inside the porfile h1a (x1) w1a (x1) s26b (x5) s13b (x2) 184cm 187cm x 68cm 13mm 26mm s13b inside...
- Seite 14 All manuals and user guides at all-guides.com c1b (x1) s26b (x5) s13b (x2) 186cm 26mm 13mm s13b inside Fully fit the panel inside the porfile FRONT WALL & DOOR FRAME ASSEMBLY s26b (x6) fd1b (x2) 26mm 17cm x 123cm Fully fit the panel inside the porfile...
- Seite 15 All manuals and user guides at all-guides.com lm (x1) rm (x1) Left Right s26b (x4) fu1a (x1) 26mm fu1a...
- Seite 16 All manuals and user guides at all-guides.com ds2b (x2) 12mm dfl (x1) 179cm dfr (x1) 179cm This hole faces outside and down ds2b ds2b (x8) 12mm dt (x2)
- Seite 17 All manuals and user guides at all-guides.com s10b (x8) 12mm Fully fit the panel inside the porfile s26b (x18) 26mm s26b s26b...
- Seite 18 All manuals and user guides at all-guides.com s26b (x12) 26mm Fully fit the panel inside the porfile ROOF ASSEMBLY r1d (x1) folded e1b (x2) 133mm e1a (x4) 87mm rc (x4) Note: The roof folding line, and the “This side Down” label, must be seen at this stage.
- Seite 19 All manuals and user guides at all-guides.com s26b (x8) 26mm Fully fit the panel inside the porfile s26b...
- Seite 20 All manuals and user guides at all-guides.com s26b (x22) 26mm Fully fit the panel inside the porfile s26b roof assembly...
- Seite 21 All manuals and user guides at all-guides.com s26b (x16) 26mm s26b Screwe on the mark line DOOR ASSEMBLY Left Right...
- Seite 22 All manuals and user guides at all-guides.com s13b (x16) dl1a (x1) dr1a(x1) dh (x 4) 12mm s13b s13b (x12) 12mm...
- Seite 23 All manuals and user guides at all-guides.com dpt (x2) dp1 (x2) left door s13b (x7) db1 x1 s13b...
- Seite 24 All manuals and user guides at all-guides.com ROOF CROWN ASSEMBLY s26b (x4) 26 mm kc (x2) click...
- Seite 25 All manuals and user guides at all-guides.com VENT ASSEMBLY V (x2) click Push vent into position. your helper holds the wall from the inside...
- Seite 26 All manuals and user guides at all-guides.com WINDOW ASSEMBLY pls (x1) f - out (x1) acw (x1)
- Seite 27 All manuals and user guides at all-guides.com sc15 (x7) f-in (x1) 16mm sc15 f- in...
- Seite 28 All manuals and user guides at all-guides.com FOUNDATION ATTACHMENT (Optional) Wood concrete NOT INCLUDED INSIDE...
- Seite 29 In case a problem should occur, please address your claim to customer service either by phone or through our web site: www.keter.com. The warranty is valid as of the date of purchase and a dated proof of purchase should be presented on request.
- Seite 30 GARANZIA LIMITATA DI 2 ANNI L’ottima reputazione di cui gode Keter per i suoi prodotti è il risultato di una dedizione e di un impegno costante verso la qualità, il design e l’innovazione. L’intera gamma degli armadietti e dei box viene prodotta con materiali di prima qualità, sotto un controllo e una supervisione rigorosi. Se dovesse presentarsi un problema, presentare reclamo al servizio d’assistenza, per telefono o attraverso il nostro sito Web: www.keter.com.
- Seite 31 In case a problem should occur, please address your claim to customer service either by phone or through our web site: www.keter.com. The warranty is valid as of the date of purchase and a dated proof of purchase should be presented on request.
- Seite 32 All manuals and user guides at all-guides.com...