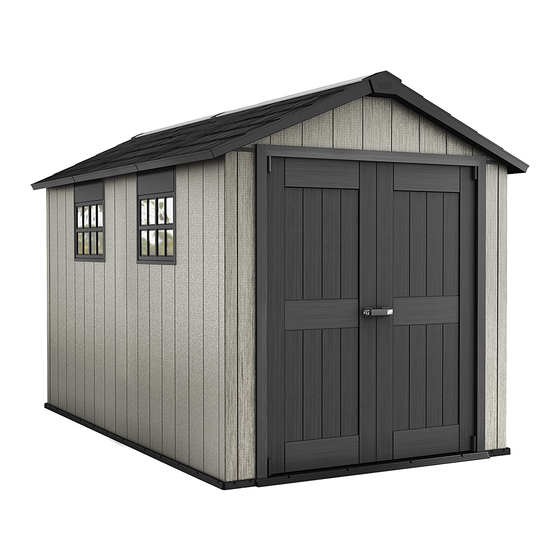
Keter Duotech OAKLAND 7511 Gebrauchsanleitung
Quicklinks
OAKLAND
USER MANUAL I MODE DIEMPLOI I MANUAL
GEBRUIKSHANDLEIDING
DUOTECH
WARRANTY
751 1
DEL USUARIO I GEBRAUCHSANLEITUNG
I MANUALE
PER CUTENTE I MANUAL DO UTILIZADOR
US, Canada:
Tel: +1-877-638-7056
Fax: +1-704-263-9271
I-JK: Tel: +44-121-506-0008
Fax: +44-121-422-0808
Spain: Tif: +34-976-460-006
Fax: +34-976-460-281
Other European
Countries:
Tel: +31-8847-22277.
Fax: +31-1612-27002
Thank you for your purchase of the Keter shed. In order to activate your warranty.
ACTIVATION
please log onto our website and fill in the form under warranty activation.
I
WWW.KETER.COM
SKI-I:
17201421

Verwandte Anleitungen für Keter Duotech OAKLAND 7511


Inhaltszusammenfassung für Keter Duotech OAKLAND 7511
- Seite 1 Spain: Tif: +34-976-460-006 Fax: +34-976-460-281 Other European Countries: Tel: +31-8847-22277. Fax: +31-1612-27002 Thank you for your purchase of the Keter shed. In order to activate your warranty. WARRANTY ACTIVATION please log onto our website and fill in the form under warranty activation.
- Seite 2 SITEPREPARATION I PRÉPARATION D USITEI PREPARACIÖN DELLUGAR I VORBEREITUNG DESAUFSTELLUNGSORTES I VOORBEREIDIN VANHETTERREIN I PREPARAZIONE DELLUOGO DlMONTAGGIO I PREPARAGÄO DOLOCAL Level t he groundsurfaceI Égalisez la surface dusol I Nivelela superficie del sueloI Ebnen SiedieBodenoberfläche I Recommendation: Construct a wooden or concrete baseas a foundation I Recommandation: fabriquez une base en bois ou en béton en guise de fondation I Recomendacién: construya una base de madera o de cemento a modo de cimiento I Empfehlung: Bauen Sie als Fundament eine Grundfläche aus Holz Oder Beton I Aanbeveling: maak een houten of betonnen...
- Seite 3 BEFORE STARTING ASSEMBLY I AVANT DE COMMENCER LE MONTAGE I ANTES DE EMPEZAR EL ARMADO I VOR MONTAGEBEGINN I VOORDAT U BEGINT TE MONTEREN I PRIMA Dl INIZIARE IL MONTAGGIO I ANTES DE INICIAR A MONTAGEM Read the care and safety guidelines at the end of this manual I Check to ensure that there are no missing or damaged parts BEFORE starting or arranging assembly I Reviewall assembly instructions I Assemble all the parts according to the directions in this manual.
- Seite 4 SHED PARTS I PIÉCESDE CABRI I PARTESDEL COBERTIZOI TEILE DESSCHUPPENSI ONDERDELENVAN HETSCHUURTJEI COMPONENTIDEL DEPOSITO ATTREZZII PEGASDOABRIGO Removeall parts from the package(s)and spread them out on a clean work surface I Codeletters are imprinted on each part for easy identication I Retirez toutes les piéces du/des paquet(s) et étalez-les sur une surface de travail propre I Des lettres sont imprimées sur chaque piéce pour une identification facile I Saque todas Ias piezas del paquete o paquetes y p6ngaIas sobre una superficie de trabajo limpia I El c6digo de letras estå...
- Seite 5 PARTS I PIÉCES DUTOIT I PARTES D EL TECHO I DACHELEMENTE I DAKONDERDELEN I PARTI DEL TETTO I PEGAS DO TELHADO (xl) OLZ2 (xl) OLZ3 OLZ4 (xl) OLZ5 (xl) OLZ6 MOBII M0FTU (x2) MOFTD (X2) MOFT9 WINDOWPARTSI PIÉCESDE LA FENÉTREI PARTESDE LA VENTANAI FENSTERELEMENTE I VENSTERONDERDELEN I PARTIDELLAFINESTRAI PEGASDAJANEL-A MOWT MOWN (X2)
- Seite 6 SMALLPARTS I PETITES PIÉCES I PARTES PEQUENAS I KLEINTEILE I KLEINE ONDERDELEN I MINUTERIA I PEGAS PEQUENAS FNCH (X2) MoMA (x2) FNME MOAC (X2) MOFTC(x4) FNTM (x8) M0AK (x2) MOFDC (x2) FNH3 FNHL (xl) FNH5 (xl) FNH6 (x1) FNHl (x1) MOBC9 (xl) FNHD KP (x14)
- Seite 7 FLOOR ASSEMBLY I MONTAGE I ARMADO PISO I MONTAGE BODENPLATTE VLOERMONTAGE I MONTAGGIO DEL PAVIMENTO I MONTAGEM DO PISO MOFF9 (x4) MOFF9 MOFF9 MOFF9 MOFF9 sc15 (x8) sc15 x 4 sc15 : sc15...
- Seite 8 sc15 sc15 sc15x18...
- Seite 9 MOFFL (x2) MOFFL MOFFL Front I Avant I Delante I Vorderseite I Voorkant I Anteriore I Frente sc15 (x36) SC15 sc15 x 36 Front I Avant I Delante I Vorderseite I Voorkant I Anteriore I Frente...
- Seite 10 WALL ASSEMBLY I MONTAGE DU MUR I ARMADO DE PAREDES I MONTAGE DER WÄNDE I MONTAGE VAN DE MUREN I ASSEMBLAGGIO DELLE PARETI I MONTAGEM DA PAREDE OLP7 OLPC Outside Extérieure Exterior Außenseite Buitenkant Esterno Exterior Front I Avant I Delante I Vorderseite I Voorkant I Anteriore I Frente KP (xli s 13b (xI)
- Seite 11 OLP7 (xl) Front I Avant I Delante I Vorderseite I Voorkant I Anteriore I Frente s13b (xI) Faible Bajo Niedrig Laag Bassa Baixa s13b Front I Avant I Delante I Vorderseite I Voorkant I Anteriore I Frente...
- Seite 12 OLP7 (x2) s13b (x2) Front I Avant I Delante I Vorderseite I Voorkant I Anteriore I Frente s13b OLPC s13b (xl) OLPC s13b Front I Avant I Delante I Vorderseite I Voorkant I Anteriore I Frente...
- Seite 13 OLP7 s13b (x1) s13b Front I Avant I Delante I Vorderseite I Voorkant I Anteriore I Frente Choose the location of the window I Choisissez l'emplacement de la fenétre I Elija d6nde quiere colocar la ventana I Wählen sie aus, wo sie das fenster anbringen möchten I Kies waar u het venster wilt hebben I Scegliete dovevolete posizionare la finestra I Escolha onde quer colocar a janela...
- Seite 14 OLPW s13b (x1) Jiliii s13b Front I Avant I Delante I Vorderseite I Voorkant I Anteriore I Frente s 13b (x3) s 13b s13b Front I Avant I Delante I Vorderseite I Voorkant I Anteriore I Frente...
- Seite 15 WINDOW ASSEMBLY I MONTAGE DE LA FENÉTRE I VENTANA DEL TECHO I FENSTERHMONTAGEI RAAMMONTAGE I MONTAGGIO DE LA FINESTRA I MONTAGEM DO JANELA MOWT MOWP MOWN (x2) sc15 (x22) sc15XII...
- Seite 17 s13b (x1) M0MP (xl) M0MP MOMp s 13b xl...
- Seite 18 M0MP s 13b (xI) Pre-drilled holes Trous pré-percés Agujeros pretaladrados Vorgebohrte Löcher Voorgeboorde gaten Fori prestampati Orificios pré-perfurados s13bxI...
- Seite 19 FNME (x2) sc8 (x2) scn8 (x2) FNME FNME sc8 x 1 scn8 x 1 sc8 x I scn8 M0MG (x4) M0MH (x2) MOMA (x2) sc8 (x12) scn8 (x12) sc8 X 1 sc8 x 4 scn8 x I scn8x4 M0MG M0MH M0MG M0MG MOM H...
- Seite 20 SC8 (XL) scn8 (x4) scn8 x 2 —e sc8 x 2...
- Seite 21 (t7X)qtLS (ax) dYl (LXI Md10...
- Seite 23 M0MP (xl) s13b (xI) MOMp M0MP s13bx...
- Seite 24 M0MP s13b (xI) Pre-drilled holes Trous pré-percés Agujeros pretaladrados Vorgebohrte Löcher Voorgeboorde gaten Fori prestampati Orificios pré-perfurados s13bx1...
- Seite 25 FNME (x2) sc8 (x2) scn8 (x2) FNME FNME sc8 X 1 scn8 x 1 sc8 x I scn8 x I sc8 (x4) scn8 (x4) scn8 x 2 sc8 x 2...
- Seite 26 OLPC (x2) 0LPF (x2) s 13b (XL) OLPC b x 2...
- Seite 27 M0MDT s13b (x2) MOFDT M0MDT s13bx1 MOFDC (X2) sc15 (x2) sc15x MOFDC MOFDC...
- Seite 28 MOFDR (xl) MOFDL MOFDL M FDR MOFDR...
- Seite 29 sc15 (x2) Inside Intérieur Interior Innenseite Binnenkant Interno Interior sc15x1 FNCH (X2)
- Seite 30 FNMF sc12 (x4) sc12x4...
- Seite 31 OLCM (xl) Inside I Intérieur I Interior I Innenseite I Binnenkant I Interno I Interior OLCM OLCB OLCB...
- Seite 32 sc15 (x6) OLCR (xl)
- Seite 33 sc15 (x2) sc15xI...
- Seite 34 ROOF ASSEMBLY I MONTAGE DU TOIT I ARMADO DEL TECHO I DACHMONTAGE I DAKMONTAGE MONTAGGIO DEL TETTO I MONTAGEM DO TELHADO OLZ3 (xl) s13b (x8) OLZ3 OLZ2 OLZ6 OLZ5 OLZ4 1 s13b s13bx4...
- Seite 35 s13b (x2) (x2) M0AK (x2) s13bx s 13b M0AK Inside Intérieur Interior Innenseite Binnenkant Interno Interior Outside Extérieure Exterior Außenseite Buitenkant Estemo Exterior 1100 no...
- Seite 36 Inside Intérieur Interior Innenseite Binnenkant Interno Interior Outside Extérieure Exterior Außense Buitenkant Estemo Exterior M0MB (xl) s13b (x8) M0MB s13b s13bx7...
- Seite 37 LV+O 0130B...
- Seite 38 MOFT9 MOFT9 MOFT9 MOFT9 MOFT9 (x2) sc15 (x 16) SC15...
- Seite 39 sc16 sc16 wqoö9 *...
- Seite 40 MOFTD (xl) MOFTD sc15 (xl) sc15xI...
- Seite 41 SC15 (X3) SC15 sc15x3 MOFT9+ MOFT9...
- Seite 42 SC15 (X3) SC15 sc15x3 sc15 (x8) SC 15 x 8...
- Seite 43 M0FTU M0FTU MOFTU sc15 (x1) sc15x1...
- Seite 44 sc15 (x8) sc15x MOFTD (xl) MOFTD...
- Seite 45 sc15(XIJ sc15x 1 sc15(x3) SC15X3 Ill: liiil...
- Seite 46 MOFT9 + MOFT9 sc15 (x3) SC15 X 3 sc15 (x8) sc15 x 8...
- Seite 47 M0FTU(xl) sc15 (xl ) M0FTU sc15xI sc15 (x8) sc15 x 8...
- Seite 48 sc15 (XL) MOBC9 MOBC9 sc15x4 MOBI I(x2) M0PLS (x2) M0PLS MOBII...
- Seite 49 MOAC(XIJ sc15 (x3) sc15 x 3...
- Seite 50 MOAC sc15 (x3J sc15x3 sc 15 (x32J sc15x32...
- Seite 51 MOFTC(x4) s45b (x8) sc15 (x8) s45b x 2 sc15 x 2 sc15 (x8) s45b (x8) FNTM (X8) sc15x s45b...
- Seite 52 s13b (x20) s13b Pre-drilled holes Trous pré-percés Agujeros pretaladrados Vorgebohrte Löcher Voorgeboorde gaten Fori prestampati Orificios pré-perfurados s13b (x58) s13bx2 s 13b...
- Seite 53 sc15(x6) sc15x 6 !M7i11 11/11 1/7/11 Sc 12(X36) 11/11 sc12x 32 SC12...
- Seite 54 DOOR ASSEMBLY I MONTAGE DE LA PORTE I ARMADO DE LA PUERTA I MONTAGE DER TÜR I DEURMONTAGE I MONTAGGIO DELLA PORTA I MONTAGEM DA PORTA sc15 (x12) sc15 x 3 FNHL (xl) FNHD (x2)
- Seite 55 MONW (x2) CLICK CLICK sc15 (x36) sc15x sc15x 18 1...
- Seite 56 MOFMR (X4) + sc15 (x16) sc15x FNHL (xl) FNHD...
- Seite 57 sc15(x2J sc 15x 2 Left Gauche Izquierdo Verließ Links Sinistra FNH5 ( xl) FNH4 ( x1) sc15(xl) sc15x 1...
- Seite 58 sc15 (x2) sc15x2 FNH2 (xl) FNH3 (xl) sc15 (x3) sc15x sc15 x 2...
- Seite 59 FNH8 (X2) FNH9 (X2) FNHA (X2) SC15 (X6) FNHA sc 15 c 15 SC15 sc 15 MOFMS (xl) scl 5 (x8) Gauche Izquierdo Verließ Links Sinistra esquerdo sc15 x 8 MOFMS...
- Seite 60 Levelthe doorsonlyafter the shedhasbeenplacedin its final locationI Mettreå niveauIesportesuniquement a présqueCabri a it été placé dans son emplacement final I Nivele las puertas solamente después de que el cobertizo haya situado en su ubicaciön final I RichtenSiedieTürenerst dannwaagerechtaus,nachdemder Schuppenin seineendgültigePositiongebrachtwurde I Zet de deuren pas waterpas als het schuurtje op de uiteindelijke plek is geplaatst I Mettere a livello le porte solo al termine del montaggio del deposito attrezzi nella sua posizionefinale I Nivele as portas apenas depois do abrigo estar na sua localizagäofinal sc12 (xl 7)
- Seite 61 Keep in mind: Painting requires maintenance. After some time. repainting may be required. * For your safety - make sure you follow the paints care & safety guide prior to application. KETER PLACARD BROSSÉ Ce placard pas besoin d'aucun entretien et est fait d'un composé unique permettant de peindre Ies panneaux muraux brossés.
- Seite 62 KETER SCHRANK GEBÜRSTET Dieser wartungsfreie Schrank besteht aus einer einzigartigen Verbindung. welches es ermöglicht, die gebürsteten Wandpaneele zu streichen. Sie können den Schrank in seiner ursprünglichen Farbe nutzen Oder dessen Wände streichen. um ihn der Landschaft, Terrasse Oder Umgebung anzupassen.
- Seite 63 OPTION I OPTION I OPClåNI OPTION I OPTIEI OPZIONE I opcÄo SECURING THE SHED TO A FOUNDATION Affixtheshed tothefoundation bydrillingholes intheshed flooratthepre-marked locations andscrewing i t intothefoundation using appropriate screws ( screws n otincluded). FIXER CABRI SUR UNE FONDATION Fixez I•abri å la fondation en pergant des trous dans le sol aux endroits pré-marqués et en insérant des vis adéquates dans la fondation (vis non fournies). ASEGURAR EL COBERTIZO A UN CIMIENTO...
- Seite 64 CARE AND SAFETY GUIDELINES • Theshed is intendedfor storage purposesonly. It is not designedfor habitation. • It is strongly recommendedto secure the shedto an immovableobject or anchor to the ground bydrilling holes in the shedfloor (atthe pre-marked locations)and inserting proper screws into the ground (screwsare not included). •...
- Seite 65 • Tragen Sieeine Schutzbrille und befolgen SiebeiVerwendungvon Elektrowerkzeugenimmer dieAnweisungendes Herstellers. • ReinigenSie denSchuppenmit einem Gartenschlauchund einem milden Reinigungsmittel.VerwendenSieauf keinen Fall eine harte Bürste und Scheuer - OderEntfettungsmittel sowieÖl-Oder A cetonhaltige Reinigungsmittel, dadieseFlecken verursachen OderdenSchuppen beschädigen k önnten. • Lagern Siekeine heißenGegenständeim Schuppen,wie etwa kürzlich benutzte Grills OderLötlampen und auch keine flüchtigen Chemikalien. •...
- Seite 66 Keter is not responsiblefor anydamage incurred byconsumer and/or third parties or damageto or loss of objectsinside or near the shed. Upon submitting proof of purchase and evidence of the claimed product failure, and subject to reporting the failure in a timely manner, Keter, at its sole discretion, will replace defectiveparts Ofthe Product.or refundyou a prorated portion Ofthe purchaseprice on a straight line depreciatedbasis,the valuewill depreciate10%...
- Seite 67 [Determ "gebreken"wordt gedefinieerdals onvolkomenhedendie het gebruik van het product schadenl. In dat geval dient de consument het vermeende defecte product door Keter, of door wie dan 00k in naam van Keter, te laten inspecterenen/of testen in een laboratorium van Keter, of op een andere plaats met goedkeuring van Keter.
- Seite 68 17. Postbus 224, Anderson, Indiana 46013, USA Office Park, Halesowen, West Polg. Ind.Miralcampo,19200Azuqueca 5120AERijen,the Netherlands Midlands,8628DY, U nitedKingdom Tel: +1-877-638-7056 de Henares - Guadalajara, Spain Tel: +31-8847-22277 Fax: +1-704-263-9271 Tel: +44-121-506-0008 Tif. +34-976-460-006 Fax: +31-1612-27002 Fax: +44-121-422-0808 Fax +34-976-460-281 WWW.KETER.COM...