
Verwandte Anleitungen für Grundig 01M-GMH1010-4620-03


Inhaltszusammenfassung für Grundig 01M-GMH1010-4620-03
- Seite 1 Micro HIFI System User Manual WMS 3000 BT DAB+ EN - DE - FR 01M-GMH1010-4620-03 01M-GMH1020-4620-03 01M-GMH1030-4620-03...
-
Seite 2: Grundig Kundenberatungszentrum
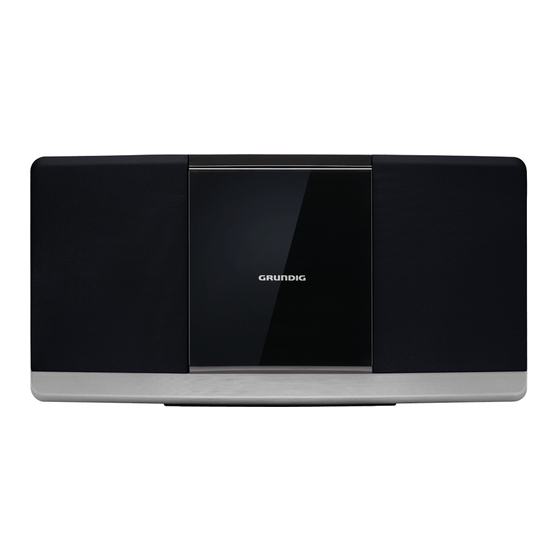
GRUNDIG Kundenberatungszentrum Haben Sie Fragen? Montag bis Freitag von 8.00 bis 18.00 Uhr Unser Kundenberatungszentrum steht Ihnen Deutschland: 0911 / 59 059 730 werktags stets von 8.00 – 18.00 Uhr zur Österreich: 0820 / 220 33 22 * Verfügung. * gebührenpflichtig (0,145 €/Min. aus dem... - Seite 3 PANEL ---------------------------------------------------------------------------------------------------------------------...
-
Seite 4: Remote Control
REMOTE CONTROL ------------------------------------------------------------------------------- STANDBY CLOCK OPEN/CLOSE SLEEP/TIMER SOURCE DIMMER REPEAT/MENU MEMORY/PROG FAST REWIND/ FAST FORWARD/ PREVIOUS NEXT PLAY/ PAUSE INTRO/INFO FOLD - FOLD + TUNE - /10 - STOP/AUTO TUNE +/10+ VOLUME + VOLUME - MUTE Micro HiFi System... - Seite 5 ----------------------------------------------------------------------------------------------------------------------------------------------------------------------------- ENGLISH 06-20 DEUTSCH 21-35 FRANÇAIS 36-50...
-
Seite 6: Setup And Safety
SETUP AND SAFETY ----------------------------------------------------------------------------- Please note the following instructions: Attention should be drawn to the environmen- tal aspects of battery disposal. The hi-fi system is designed for the playback of audio signals. All other uses are expressly DO NOT INGEST THE BATTERY, CHEMI- prohibited. - Seite 7 SETUP AND SAFETY ----------------------------------------------------------------------------- This lightning flash with arrowhead sym- bol within an equilateral triangle is in- tended to alert the user to the presence of non-insulated “dangerous voltage” within the product’s enclosure that may be of suf- ficient magnitude to constitute a risk of electric shock.
- Seite 8 OVERVIEW ---------------------------------------------------------------------------------------------------------------------------------- The hi-fi system controls The back of the device AC POWER INPUT See the figure on page 3. ANTENNA Antenna socket for the the aux- The front of the device iliary antenna or the roof anten- 75 Ω Display screen.
-
Seite 9: The Remote Control
OVERVIEW ---------------------------------------------------------------------------------------------------------------------------------- The remote control CLOCK Setting the time. In external data media mode: se- Switches the hi-fi system to standby lect tracks forwards or backwards. mode and from standby mode to the last input source selected. In standby and timer mode: for set- ting the hours/ minutes. -
Seite 10: Connection And Preparation
CONNECTION AND PREPARATION --------------------------------------- Connecting the antenna Connecting the power cord Notes: Plug the roof antenna cable into the antenna socket » ANTENNA 75 Ω « on the hi-fi sys- Check that the mains voltage on the type tem. plate (on the rear of the hi-fi system) corre- sponds to your local mains supply. -
Seite 11: Tuner Mode
CONNECTION AND PREPARATION --------------------------------------- Loading or Changing the remote Notes: control battery Do not expose the batteries to extreme heat, caused for example by direct sunlight, heat- Remove the battery compartment cover on the ers or fire. back of the remote control. Remove the batteries when they are flat or Load or change one AAA/1.5V battery into when you know that the hi-fi system will not... -
Seite 12: Dab Operation
TUNER MODE ------------------------------------------------------------------------------------------------------------------------ Selecting the tuner input source Then press » TUN - 10- « or » TUN+ 10+ « to scroll the menu options. Select the TUNER input source by pressing – Full scan: Scan and store all the available »SOURCE«... -
Seite 13: Wall Mounting
WALL MOUNTING ----------------------------------------------------------------------------------------------------- In order to prevent injuries, the hi-fi system must Insert the two plugs supplied into two drilled be securely fasten to the wall in accordance with holes and then insert two screws supplied into the below installation instructions. two holes and tighten (Diagram 2). -
Seite 14: General Functions
GENERAL FUNCTIONS --------------------------------------------------------------------------------------- Switching on and off The only way to disconnect the hi-fi system from the mains supply is to pull out the plug. Switch on the hi-fi by pressing » « on the de- vice. – The last input source used is automatically selected. -
Seite 15: Alarm Setting
SETTINGS --------------------------------------------------------------------------------------------------------------------------------------- Time Setting Alarm Setting To set the time, your micro system must be in To program the alarm, your micro system standby mode first. Then press and hold the must first be in standby mode. Then press the CLOCK TIMER »... - Seite 16 EXTERNAL DATA MEDIA MODE ------------------------------------------------------- Using CDs Operation with an MP3 player or USB memory stick The device is suitable for music CDs displaying the The » « socket is not compatible with logo shown here (CD- USB hubs and cannot be connected directly DA) and for CD-Rs and to a PC.
-
Seite 17: Stopping Playback
EXTERNAL DATA MEDIA MODE ------------------------------------------------------- Connecting an MP3 player or a USB Resuming playback memory stick Pause playback by selecting another input Switch the device to standby mode by pressing source or press » «. – If you select the data medium again, play- »... -
Seite 18: Bluetooth Mode
End playback on the Bluetooth auxiliary de- will be displayed on the Bluetooth auxiliary vice. device. Notes: Select the »Grundig WMS 3000« on the Blue- Various functions can also be controlled on tooth auxiliary device and connect to it. the WMS 3000 BT DAB+. Press »... -
Seite 19: Compliance With Rohs Directive
(2012/19/EU). This product bears a classifica- You can find the CE declaration of conformity for tion symbol for waste electrical and electronic the device in the form of a pdf file on the Grundig equipment (WEEE). Homepage www.grundig.com/downloads/doc. This product has been manufactured... -
Seite 20: General Information On Laser Devices
INFORMATION ------------------------------------------------------------------------------------------------------------------ MP3/WMA General information on laser devices Folder and track: Max. 256 folders and 999 tracks per CD This device is a CLASS CLASS 1 1 LASER PRODUCT. File system/folder management: LASER PRODUCT This means that the ISO 9660 Level 1 compatible laser is designed in such a way as to ensure that the maximum per- USB 2.0 for FAT 32/16 format... -
Seite 21: Aufstellenundsicherheit
AUFSTELLENUNDSICHERHEIT --------------------------------------------- Beachten Sie bitte folgende Hinweise: Treten Fehlfunktionen auf, etwa wegen einer kurzzeitigenn Netzüberspannung oder wegen Die HiFi-Anlage ist für die Wiedergabe von einer elektrostatischen Aufladung, setzen Sie Tonsignalen bestimmt. Jede andere Verwen- das Gerät zurück. Ziehen Sie hierzu den Netz- dung ist ausdrücklich ausgeschlossen. -
Seite 22: Achtung:hochfrequenz Strahlung
AUFSTELLENUNDSICHERHEIT --------------------------------------------- Der Netzstecker oder ein Adapterstecker dient Achtung:Hochfrequenz als Trennvorrichtung, diese Trennvorrichtung Strahlung muss immer leicht zugänglich sein. Das Gerät muss in Übereinstimmung mit dieser Bedienungsanleitung angemeldet und betrie- ben werden. Das Gerät hat eine integrierte Antenne, es darf nicht mit anderen Antennen oder Sende- Der Blitz im Dreieck weist auf nicht iso- anlagen betrieben werden. -
Seite 23: Aufeinenblick
AUFEINENBLICK - ----------------------------------------------------------------------------------- DieBedienelementederHiFi-An- DieRückseite lage ACPOWERINPUT Die Abbildungen des Gerätes finden Sie auf Sei- ANTENNA Antennenbuchse für das Ka- te 3. 75Ω bel der Hausantenne oder die beiliegende Behelfsan- DieVorderseite tenne. Anzeigebildschirm. Öffnet und schließt das CD- Fach. Kurz drücken schaltet das Gerät aus Bereitschaft (Stand-by) ein und wieder in Bereitschaft. -
Seite 24: Die Fernbedienung
AUFEINENBLICK --------------------------------------------------------------------------------------------------------- DieFernbedienung DIMMER Passen Sie die Anzeigehelligkeit des Anzeigebildschirms an. Schaltet die HiFi-Anlage in Bereit- REPEAT/ Im externen Datenmedienmodus: schaft (Stand-by) und aus Bereit- MENU Wiederholung eines Titels, einer schaft mit der zuletzt gewählten CD, eines Albums oder einer Wie- Programmquelle ein. -
Seite 25: Antenne Anschließen
ANSCHLIESSEN/VORBEREITEN - ------------------------------------------------------ Antenneanschließen Netzkabelanschließen Hinweise: Antennenkabel der Hausantenne in die An- tennenbuchse »ANTENNA75Ω« der HiFi- Prüfen Sie die auf dem Typenschild (an der Anlage stecken. Rückseite der Hi-Fi-Anlage) angegebene Netzspannung. Diese muss der lokalen Hinweis: Netzspannung entsprechen. Falls nicht, Sollte keine Hausantennenanlage zur Ver- wenden Sie sich bitte an Ihren Fachhändler. -
Seite 26: Tuner-Betrieb
ANSCHLIESSEN/VORBEREITEN - ------------------------------------------------------ Batterie in die Fernbedienung Hinweise: einlegenoderauswechseln Setzen Sie die Batterie keiner extremen Hit- ze wie z.B. durch Sonneneinstrahlung, Hei- Entfernen Sie die Batteriefachabdeckung an zungen, Feuer, etc. aus. der Rückseite der Fernbedienung. Entfernen Sie die Batterie, wenn Sie ver- Installieren oder wechseln Sie eine AAA-Bat- braucht ist oder wenn Sie das Gerät längere terie (1,5 V) unter Beachtung der Ausrichtung... -
Seite 27: Programmquelletunerwählen
TUNER-BETRIEB - ----------------------------------------------------------------------------------------------------------------- ProgrammquelleTunerwählen Danach drücken Sie » TUN – 1 0 – « oder » TUN+10+ « um die Optionen zu sehen: Wählen Sie durch Drücken der Taste – Full scan: Scannen und speichern alle verfüg- »SOURCE« an der Fernbedienung die Tuner- baren DAB-Programme. -
Seite 28: Wandmontage
WANDMONTAGE - -------------------------------------------------------------------------------------------------------- Damit es nicht zu Verletzungen kommt, muss die Schieben Sie die beiden mitgelieferten Dübel Hi-fi System felsenfest an der Wand angebracht in die gebohrten Löcher, drehen Sie dann die werden. Halten Sie sich dabei unbedingt an die beiden mitgelieferten Schrauben in die Dübel, folgenden Hinweise. -
Seite 29: Allgemeine Funktionen
ALLGEMEINEFUNKTIONEN - ------------------------------------------------------------------ Ein-undAusschalten Nur durch Ziehen des Netzsteckers ist die HiFi- Anlage vom Stromnetz getrennt! Schalten Sie die Hi-Fi-Anlage durch Drücken der Taste » « am Gerät ein. – Die zuletzt aktive Programmquelle wird auto- matisch gewählt. Hinweis: Die Hi-Fi-Analge kann auch durch Drücken der Taste »... -
Seite 30: Einstellungen
EINSTELLUNGEN ------------------------------------------------------------------------------------------------------------ Zeiteinstellung Alarmeinstellung Zur Einstellung der Zeit muss Ihr Mikrosystem Zum Programmieren des Alarms muss Ihr Mi- zunächst in den Bereitschaftsmodus versetzt krosystem zunächst in den Bereitschaftsmo- CLOCK werden. Halten Sie dann die » «-Taste dus versetzt werden. Halten Sie dann etwa 2 TIMER etwa 2 Sekunden lang gedrückt. - Seite 31 BETRIEBMITDIGITALENDATENTRÄGER - ---------------------- BetriebmitCD´s Betrieb mit MP3-Player oder USB-MemoryStick Das Gerät ist geeignet für Musik-CDs, die mit Die Buchse » « unterstützt keine USB dem nebenstehenden Hubs und ist auch nicht geeignet zum direk- Logo versehen sind (CD- ten anschließen an einen PC. DA) bzw.
-
Seite 32: Programmquellewählen
BETRIEBMITDIGITALENDATENTRÄGER - ---------------------- MP3PlayeroderUSB-MemoryStick Wiedergabebeenden anschließen Wiedergabe mit » « beenden. – Bei dem erneuten Start der Wiedergabe Gerät mit » « in Bereitschaft (Stand-by) wird diese mit dem ersten Titel begonnen. schalten. AktuellenTitelwiederholen USB-Schnittstelle des MP3 Players über ein handelsübliches USB-Kabel mit der Buchse Während der Wiedergabe »... -
Seite 33: Bluetooth-Betrieb
– Nach kurzer Zeit wird Ihre WMS 3000 BT den. DAB+ am Bluetooth Zuspielgerät angezeigt. Hinweise: Verschiedene Funktionen können auch an Am Bluetooth Zuspielgerät die Grundig WMS der WMS 3000 BT DAB+ gesteuert wer- 3000 auswählen und verbinden. den. Ist das Bluetooth Zuspielgerät mit Ihrem Gerät Wiedergabe-Pause mit »... -
Seite 34: Empfangsteil
Dateisystem/Ordnerverwaltung: 2014/53/EU, 2009/125/ EC und 2011/65/EU. ISO 9660 Level 1 kompatibel Den genauen Wortlaut der Konformitätserklärung USB (DOC) finden Sie auf der GRUNDIG Homepage USB 2.0 für Format FAT 32/16 www.grundig.com/downloads/doc. USB-Ausgang: 5 V 1 A max. Stromverbrauch im Bereitschaftsmodus... -
Seite 35: Abmessungen Und Gewicht
INFORMATIONEN - ------------------------------------------------------------------------------------------------------ Der Zeitraum, nach dem die Energieverwaltungs- funktion das Gerät automatisch in den Bere- itschaftsmodus versetzt: 15 Minuten. Der Stromverbrauch, wenn alle WLAN- Netzwerkanschlüsseaktiviertsind: 7,7 W. AbmessungenundGewicht Abmessungen Gerät: B x H x T 450 X 228 X 124mm Gewicht Gerät: 2.63 kg Technische und optische Änderungen vorbehal- ten! - Seite 36 CONFIGURATIONETSÉCURITÉ - ------------------------------------------------------- Merci de prendre en compte les instructions sui- Le système hi-fi doit uniquement être utilisé vantes : dans un climat modéré. Le système hi-fi est conçu pour la restitution de Ne posez pas de récipients contenant du li- signaux audio.
- Seite 37 CONFIGURATIONETSÉCURITÉ - ------------------------------------------------------- mort en moins de deux heures. Si cela se pro- Le point d'exclamation contenu dans un duit, consultez immédiatement un médecin. triangle équilatéral, avertit l'utilisateur de la présence, dans la documentation Tenez les piles neuves et usagées hors de la accompagne l'appareil, portée des enfants.
-
Seite 38: Vue D'ensemble
VUED'ENSEMBLE ---------------------------------------------------------------------------------------------------------- Lescommandesdusystèmehi-fi Lapartiearrièredel'appareil ACPOWERINPUT Voir le schéma en page 3. ANTENNA Prise d'antenne pour l'antenne Lapartieavantdel'appareil de toit ou l'antenne auxiliaire 75Ω fournie. Écran d’affichage. Ouvre et ferme le compartiment à CD. Appuyez brièvement pour pas- ser l'appareil au mode veille et le quitter. - Seite 39 VUED'ENSEMBLE ---------------------------------------------------------------------------------------------------------- Télécommande d’affichage. Fait passer le système hi-fi en REPEAT/ En mode Support de données mode veille, puis du mode veille à MENU externe : pour répéter une piste, un la source d'entrée précédemment CD, un album ou une liste de lecture ; sélectionnée.
-
Seite 40: Branchement De L'antenne
BRANCHEMENTETPRÉPARATION ------------------------------------------- Branchementdel'antenne Brancherlecordond'alimenta- tion 1Insérez le câble de l'antenne du toit dans la prise de l'antenne »ANTENNA75Ω « sur le Remarques: système hi-fi. Vérifiez que la tension secteur indiquée sur la plaque signalétique (à l'arrière du Remarque: système hi-fi) corresponde à la tension sec- Si aucune antenne de toit n'est disponible, teur locale. -
Seite 41: Modetuner
BRANCHEMENTETPRÉPARATION ------------------------------------------- Chargementouremplacement Remarques: delapiledelatélécommande Évitez d'exposer les batteries à une chaleur extrême, provoquée par exemple par la Retirez le couvercle du compartiment des piles lumière directe du soleil, des appareils de à l'arrière de la télécommande. chauffage, ou du feu. Mettez une pile de type AAA / 1,5V dans Sortez les piles lorsqu'elles sont usagées le boîtier à... - Seite 42 MODETUNER - --------------------------------------------------------------------------------------------------------------------- Sélectiondelasourced'entrée Ensuite, appuyez sur » TUN– 10– « ou sur » TUN+10+ « pour faire défiler les options du dutuner menu: 1Sélectionnez la source d'entrée TUNER en – Full scan: Pour rechercher et enregistrer toutes appuyant sur la touche »SOURCE« de la télé- les stations de radio DAB disponibles.
-
Seite 43: Fixation Murale
FIXATIONMURALE - ------------------------------------------------------------------------------------------------ Afin de prévenir les accidents, le système hi-fi 2Insérez les deux bouchons puis les deux vis être solidement fixé au mur conformément aux fournis dans les deux trous percés et serrez instructions d’installation ci-dessous. (Diagramme 2). Attention: La surface doit être solide et capable de supporter la charge. -
Seite 44: Arrêt Automatique
FONCTIONSD'ORDREGÉNÉRAL ------------------------------------------------- Misesoustensionethorstension Le seul moyen de déconnecter le système hi-fi du secteur consiste à débrancher sa fiche. 1Mettez le système hi-fi en marche en appuyant sur » « de l'appareil. – La dernière source d'entrée utilisée a été sélectionnée automatiquement. Remarque: Le système hi-fi peut également être mis en marche en appuyant sur la touche »... - Seite 45 RÉGLAGES------------------------------------------------------------- Réglagedel’heure Réglagedel'alarme Pour régler l'heure, votre microsystème doit Pour programmer l'alarme, votre microsystème d'abord être mis en mode veille. Appuyez en- doit d'abord être mis en mode veille. Appuyez CLOCK TIMER suite sur le bouton » « et maintenez-le ensuite sur le bouton »...
- Seite 46 MODEMÉDIADEDONNÉESEXTERNES - ------------------------- UtilisationdesCD Connexiond'unlecteurMP3ou d'unecléUSB L'appareil est adapté pour les CD audio por- La prise » « est incompatible avec des tant le logo représenté concentrateurs USB et ne peut être connectée (CD-DA), ainsi que pour directement à un PC. les CD-R ou CD-RW conte- L'interface USB de cet appareil est de type nant des données audio.
-
Seite 47: Sélectiondelasourced'entrée
MODEMÉDIADEDONNÉESEXTERNES - ------------------------- Connexion d'un lecteur MP3 ou Arrêtdelalecture d'unecléUSB Pour arrêter la lecture, appuyez sur » « deux fois. Mettez l'appareil en mode veille en appuyant – Lorsque la lecture reprend, elle commence à par- sur » «. tir de la première piste. -
Seite 48: Mode Bluetooth
Appuyez à nouveau sur » « pour re- liaire Bluetooth. prendre la lecture ; Sélectionnez et connectez le Grundig WMS Appuyez sur la touche» « pour sélec- 3000 sur le périphérique auxiliaire Bluetooth. tionner la piste précédente et sur la touche »... - Seite 49 Sortie USB : 5 V 1 A max Ce produit est conforme aux directives euro- péennes 2014/53/EU, 2009/125/ EC et 2011/65/EU. La déclaration de conformité CE de l'appareil est disponible en format PDF à la page d'accueil de Grundig www.grundig.com/downloads/doc. 49 FRANÇAIS...
-
Seite 50: Dimensions Et Poids
INFORMATIONS - ------------------------------------------------------------------------------------------------------------ La consommation d’énergie en mode veille(ECO)est: < 0,5 W Période de temps après laquelle la fonction de gestion de l'alimentation fait passer automatique- ment l'équipement en mode veille : 15 minutes. Consommation d'énergie si tous les portsréseausansfilsontactivés:... - Seite 51 Beko Grundig Deutschland GmbH Thomas-Edison-Platz 3 D-63263 Neu-Isenburg www.grundig.com...