Sabo 43-A ECONOMY Handbücher
Anleitungen und Benutzerhandbücher für Sabo 43-A ECONOMY. Wir haben 2 Sabo 43-A ECONOMY Anleitungen zum kostenlosen PDF-Download zur Verfügung: Betriebsanleitung
Sabo 43-A ECONOMY Betriebsanleitung (116 Seiten)
Marke: Sabo
|
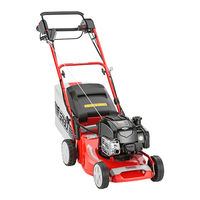
Kategorie: Rasenmäher
|
Dateigröße: 3.82 MB
Inhaltsverzeichnis
-
Deutsch
7-
-
Handhabung10
-
Mähbetrieb
16 -
-
-
Aufbewahrung17
-
-
-
-
Motor20
-
Mäher21
-
Schwingungen21
-
-
-
English
39-
5 Proper Use
41 -
-
15 Mowing
47 -
-
Storage48
-
-
Engine51
-
Mower52
-
Vibrations52
-
-
-
Het Maaien62
-
Italiano
85
Werbung

Sabo 43-A ECONOMY Betriebsanleitung (100 Seiten)
Marke: Sabo
|
Kategorie: Rasenmäher
|
Dateigröße: 5.85 MB
Inhaltsverzeichnis
-
Handhabung10
-
Introduction36
-
Proper Use37
-
Engine38
-
Preparation40
-
Mowing43
-
Mulching43
-
Storage44
-
Het Maaien57
-
Introducción64
-
Siega72
-
Mullido77
-
Introduzione80
-
Uso82
-
Pacciamatura88
-
Dati Tecnici91
-
Motore91
-
Tagliaerba92
-
Oscillazioni92
Werbung