Renfert SIMPLEX Handbücher
Anleitungen und Benutzerhandbücher für Renfert SIMPLEX. Wir haben 4 Renfert SIMPLEX Anleitungen zum kostenlosen PDF-Download zur Verfügung: Originalbetriebsanleitung, Original Bedienungsanleitung, Faq, Inbetriebnahme

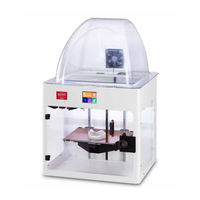
Renfert SIMPLEX Originalbetriebsanleitung (345 Seiten)
3D-Filament-Drucker
Marke: Renfert
|
Kategorie: 3D-Drucker
| Dateigröße: 26 MB
Inhaltsverzeichnis
-
Lieferumfang10
-
Einschalten12
-
Bedienung24
-
Extrudieren25
-
Schmierung31
-
Ersatzteile37
-
Garantie40
-
Introduction44
-
1�1 General Description44
-
1�2 Symbols Used44
-
Safety45
-
2�1 Intended Use45
-
2�2 Improper Use45
-
2�3 Ambient Conditions for Safe Operation45
-
2�4 Ambient Conditions for Storage and Transport45
-
2�5 Hazard and Warning Information45
-
2�5�1 General Information45
-
Specific Information46
-
2�6 Authorized Persons46
-
Product Description47
-
3�1 Assemblies and Functional Elements47
-
3�2 Scope of Delivery48
-
Accessories48
-
Startup48
-
4�1 Unpacking and Setup48
-
4�2 Printer Assembly49
-
Installing the Filament Spool Holder49
-
Installing the Filament Sensor (FMS)49
-
Installing the Filament Guiding Tube49
-
4�2�4 Attaching the Door49
-
4�2�5 Attaching the Cover50
-
4�2�6 Connecting the Power Cord50
-
Getting Started51
-
5�1 Setting the Language51
-
5�2 Setting the Temperature Unit52
-
Wi-Fi Connection52
-
Moving the Print Head Manually54
-
Attaching the Filament Spool55
-
Loading the Filament55
-
Selecting the Filament / Starting Heating55
-
Drawing in / Extruding the Filament55
-
FMS System57
-
Calibrating the FMS System57
-
5�8 Printing an Object58
-
Loading an Object from a USB Flash Drive58
-
Other Settings59
-
Setting the Date/Time / Resetting the Operating Hours Meter59
-
6�2 Setting the Display Backlight60
-
6�3 Activating the Fan60
-
6�4 Audio Settings60
-
6�5 the Cover Menu60
-
Using the SIMPLEX Wi-Fi61
-
The FMS System61
-
6�8 Resetting Settings61
-
Operation62
-
Saved Filaments62
-
7�2 Setting a Custom Print and Bed Temperature62
-
7�3 Heating the Printer62
-
Loading the Filament63
-
Extrusion63
-
Removing the Filament from the Extruder63
-
Moving the Print Head and the Print Bed64
-
Renfert CONNECT App65
-
Installing SIMPLEX Sliceware / SIMPLEX Print65
-
Printing Objects66
-
Printing Using a USB Flash Drive66
-
10�2 Actions During USB Printing67
-
Settings / Optimization67
-
Pause Next Layer68
-
Cleaning / Maintenance69
-
Lubrication of the Z-Axis70
-
Lubrication of the X/Y-Axis70
-
Unblocking the Extruder71
-
11�4 Replacing the Nozzle71
-
11�4�1 Attaching the Nozzle72
-
Applying a New Kapton Film73
-
Firmware - Update73
-
11�7 Replacing the Backup Battery74
-
Tighten X- and Y-Axis Traction Belt74
-
11�9 Spare Parts74
-
Troubleshooting75
-
Technical Data77
-
Warranty78
-
Disposal Information78
-
15�1 Disposing of the Equipment78
-
Disposal Information for Countries in the EU78
-
Introduction82
-
1�1 Description Générale82
-
1�2 Symboles Utilisés82
-
Sécurité83
-
2�1 Utilisation Conforme83
-
2�2 Utilisation Non Conforme83
-
2�3 Conditions Ambiantes pour une Utilisation en Toute Sécurité83
-
2�4 Conditions Ambiantes pour le Stockage et le Transport83
-
2�5 Mentions de Danger et D'avertissement83
-
2�5�1 Remarques Générales83
-
Remarques Spécifiques84
-
2�6 Personnes Autorisées84
-
2�7 Clause de Non-Responsabilité84
-
Description du Produit85
-
3�1 Composants et Éléments Fonctionnels85
-
3�2 Étendue de la Livraison86
-
Mise en Service86
-
4�1 Déballage et Mise en Place86
-
4�2 Assemblage de L'imprimante87
-
Installation du Support de Bobine de Filament87
-
Installation du Capteur de Filament (FMS)87
-
Installation du Tube de Guidage de Filament87
-
4�2�4 Montage de la Porte88
-
4�2�5 Montage du Capot88
-
4�2�6 Raccordement du Câble Secteur88
-
4�3 Mise en Marche88
-
Premiers Pas89
-
5�1 Réglage de la Langue89
-
5�2 Réglage de L'unité de Température90
-
Connexion au Wi-Fi90
-
5�4 Nivellement du Lit D'impression91
-
5�5 Déplacement Manuel de la Tête D'impression92
-
Montage de la Bobine de Filament93
-
Chargement du Filament93
-
Sélection du Filament/Démarrage de la Chauffe93
-
Tension/Extrusion du Filament93
-
Système FMS95
-
Calibrage du Système FMS95
-
5�8 Impression D'un Objet96
-
5�8�1 Chargement D'un Objet depuis une Clé USB96
-
Autres Réglages97
-
Réglage de la Date et de L'heure/Réinitialisation du Compteur D'heures de Service97
-
6�2 Réglage de la Luminosité de L'écran98
-
6�3 Activation des Ventilateurs98
-
6�4 Réglages du Son98
-
6�5 Menu Capot98
-
Utilisation du Wi-Fi de SIMPLEX99
-
Le Système FMS99
-
6�8 Réinitialisation des Réglages99
-
Utilisation100
-
Filaments Enregistrés100
-
7�2 Réglage Individuel de la Température D'impression et du Lit100
-
Chauffe de L'imprimante100
-
Chargement du Filament101
-
Extrusion101
-
Retrait du Filament de L'extrudeuse101
-
Déplacement de la Tête et du Lit D'impression102
-
Application Renfert CONNECT103
-
Installation du Logiciel SIMPLEX Sliceware/Simplex Print104
-
Impression D'objets104
-
10�1 Impression depuis une Clé USB104
-
10�2 Actions pendant L'impression USB105
-
Réglages/Optimisation106
-
10�2�3 Arrêt au Niveau Suivant106
-
Impression Avec SIMPLEX Print107
-
Nettoyage / Entretien107
-
Lubrification108
-
Lubrification de L'axe Z108
-
Lubrification de L'axe X/Y108
-
11�3 Élimination D'une Obstruction de L'extrudeuse109
-
11�4 Remplacement de la Buse109
-
11�4�1 Montage de la Buse110
-
Installation D'un Nouveau Film Kapton110
-
Mise à Jour du Firmware111
-
11�7 Remplacement de la Pile Tampon112
-
Tension de la Courroie de Transport des Axes X et y112
-
11�9 Pièces de Rechange112
-
Élimination des Défauts113
-
Caractéristiques Techniques115
-
Garantie115
-
Consignes D'élimination116
-
15�1 Élimination de L'appareil116
-
Consignes D'élimination pour les Pays de L'ue116
-
Introduzione120
-
1�1 Descrizione Generale120
-
1�2 Simboli Utilizzati120
-
Sicurezza121
-
2�1 Uso Consentito121
-
2�2 Uso Non Consentito121
-
2�3 Condizioni Ambientali Per un Funzionamento Sicuro121
-
2�4 Condizioni Ambientali Per Immagazzinaggio E Trasporto121
-
2�5 Avvertenze E Avvisi121
-
2�5�1 Avvertenze Generali121
-
Avvertenze Specifiche122
-
2�6 Personale Autorizzato122
-
2�7 Esclusione Della Responsabilità122
-
Descrizione del Prodotto123
-
3�1 Gruppi Costruttivi Ed Elementi Funzionali123
-
3�2 Contenuto Della Fornitura124
-
Messa in Funzione124
-
4�1 Disimballaggio E Posa124
-
4�2 Assemblaggio Della Stampante125
-
Installazione del Supporto Bobina Filamento125
-
Installazione del Sensore Filamento (FMS)125
-
Installazione del Tubo DI Guida Filamento125
-
4�2�4 Montaggio Della Porta126
-
Montaggio del Coperchio126
-
4�2�6 Collegamento del Cavo DI Alimentazione126
-
Primi Passi127
-
5�1 Impostazione Della Lingua127
-
5�2 Impostazione Dell'unità DI Temperatura127
-
Collegamento Alla Rete Wifi128
-
5�4 Livellamento del Letto DI Stampa129
-
5�5 Movimentazione Manuale Della Testina DI Stampa130
-
Montaggio Della Bobina del Filamento131
-
Caricamento Filamento131
-
Selezione del Filamento / Inizio del Processo DI Riscaldamento131
-
Inserimento / Estrusione DI un Filamento131
-
Sistema FMS133
-
Calibrazione del Sistema FMS133
-
5�8 Stampa Oggetto134
-
Caricamento DI un Oggetto da Chiavetta USB134
-
Altre Impostazioni135
-
Impostazione DI Data/Ora / Azzeramento del Contatore Delle Ore DI Funzionamento135
-
6�2 Impostazione Dell'illuminazione del Display136
-
6�3 Attivazione Dei Ventilatori136
-
6�4 Impostazioni del Tono136
-
Il Menu del Coperchio136
-
Utilizzo del Wifi del SIMPLEX137
-
Il Sistema FMS137
-
6�8 Ripristinare le Impostazioni137
-
Comando138
-
Filamenti Immagazzinati138
-
7�2 Impostazione Della Pressione Individuale E Della Temperatura del Letto138
-
7�3 Riscaldamento Della Stampante138
-
Caricamento del Filamento139
-
Rimozione del Filamento Dall'estrusore139
-
Spostamento Della Testina DI Stampa E del Letto DI Stampa140
-
App Renfert CONNECT141
-
Installazione DI SIMPLEX Sliceware / SIMPLEX Print141
-
Stampa DI Oggetti142
-
Stampa Tramite Chiavetta USB142
-
Azioni Durante la Stampa USB143
-
Impostazioni / Ottimizzazione143
-
10�2�3 Sospendere Livello Successivo143
-
Pulizia / Manutenzione145
-
Lubrificazione145
-
Lubrificazione Dell'asse Z146
-
Lubrificazione Dell'asse X/Y146
-
11�3 Eliminazione DI Intasamenti Dell'estrusore147
-
11�4 Sostituzione Dell'ugello147
-
11�4�1 Montaggio Dell'ugello148
-
11�5 Applicazione DI una Nuova Pellicola DI Kapton149
-
Firmware - Aggiornamento149
-
11�7 Sostituzione Della Batteria Tampone150
-
Tensionamento Delle Cinghie DI Trasporto Asse X E y150
-
11�9 Pezzi DI Ricambio151
-
Eliminazione DI Anomalie151
-
Dati Tecnici153
-
Garanzia154
-
Avvertenze Per lo Smaltimento154
-
Smaltimento Dell'apparecchio154
-
15�1�1 Avvertenze Per lo Smaltimento Nei Paesi Della UE154
-
Introducción158
-
Descripción General158
-
1�2 Símbolos Empleados158
-
Seguridad159
-
2�1 Utilización Conforme al Uso Previsto159
-
2�3 Condiciones Externas para un Funcionamiento Seguro159
-
2�4 Condiciones Externas para el Almacenamiento y Transporte159
-
2�5 Indicaciones de Peligro y Advertencias159
-
2�5�1 Indicaciones Generales159
-
Indicaciones Específicas160
-
2�6 Personas Autorizadas160
-
2�7 Exención de Responsabilidad160
-
Descripción del Producto161
-
3�1 Conjuntos y Elementos Funcionales161
-
3�2 Volumen de Suministro162
-
Puesta en Servicio162
-
4�1 Desembalaje y Colocación162
-
4�2 Montaje de la Impresora163
-
Instalación del Portabobina de Filamento163
-
Instalación del Sensor de Filamento (FMS)163
-
Instalación del Tubo Guía del Filamento163
-
4�2�4 Montaje de la Puerta164
-
4�2�5 Montaje de la Cubierta164
-
4�2�6 Conexión del Cable de Red164
-
Primeros Pasos165
-
5�1 Ajuste del Idioma165
-
5�2 Ajuste de la Unidad de Temperatura165
-
5�4 Nivelación de la Cama de Impresión165
-
5�5 Movimiento Manual de la Cabeza de Impresión165
-
Montaje de la Bobina de Filamento169
-
Carga del Filamento169
-
Selección del Filamento / Inicio del Proceso de Calentamiento169
-
Sujeción / Extrusión del Filamento169
-
Sistema de FMS171
-
Calibración del Sistema de FMS171
-
5�8 Impresión de Objeto172
-
5�8�1 Carga del Objeto desde el Lápiz de Memoria172
-
Otros Ajustes173
-
Ajuste de la Fecha / Hora / Puesta a Cero del Contador de Horas de Funcionamiento173
-
6�2 Ajuste de la Iluminación de la Pantalla174
-
6�3 Activación de Los Ventiladores174
-
6�4 Ajustes de Sonido174
-
6�5 el Menú de la Tapa174
-
6�6 Uso de WLAN con SIMPLEX175
-
El Sistema de FMS175
-
Restablecimiento de la Configuración175
-
Manejo176
-
Filamentos Almacenados176
-
7�2 Ajuste de la Presión Individual y de la Temperatura de la Cama176
-
7�3 Calentamiento de la Impresora176
-
Carga del Filamento177
-
Extracción del Filamento de la Extrusora177
-
Movimiento de la Cabeza de Impresión y de la Cama de Impresión178
-
Aplicación Renfert CONNECT179
-
Instalación de SIMPLEX Sliceware / SIMPLEX Print179
-
Impresión de Objetos180
-
10�1 Impresión Vía Lápiz de Memoria180
-
10�2 Acciones Durante el Proceso de Impresión desde la Memoria181
-
Ajustes / Optimización181
-
10�2�3 Detención del Siguiente Nivel181
-
10�3 Impresión con SIMPLEX Print183
-
Limpieza / Mantenimiento183
-
11�2�1 Lubricación del Eje Z184
-
Lubricación del Eje X/Y184
-
11�3 Eliminación del Atasco de la Extrusora185
-
11�4 Renovación de la Tobera185
-
11�4�1 Montaje de la Tobera186
-
11�5 Colocación de una Nueva Cinta Kapton187
-
Actualización del Firmware187
-
11�7 Cambio de la Batería Tampón188
-
Tensado de las Cintas Transportadoras de Los Ejes X y y188
-
Piezas de Recambio189
-
Solución de Averías189
-
Datos Técnicos191
-
Garantía192
-
Indicaciones para la Eliminación del Aparato192
-
15�1 Eliminación del Aparato192
-
15�1�1 Indicaciones para la Eliminación en Países de la UE192
-
Introdução196
-
1�1 Descrição Geral196
-
1�2 Símbolos Utilizados196
-
Segurança197
-
2�1 Utilização Prevista197
-
2�2 Utilização Indevida197
-
2�3 Condições Ambientais para O Funcionamento Seguro197
-
2�4 Condições Ambientais para Armazenamento E Transporte197
-
2�5 Indicações de Perigo E Avisos197
-
2�5�1 Indicações Gerais197
-
Indicações Específicas198
-
2�6 Pessoas Autorizadas198
-
2�7 Exoneração de Responsabilidade198
-
Descrição Do Produto199
-
3�1 Módulos E Elementos Funcionais199
-
3�2 Escopo de Fornecimento200
-
Colocação Em Funcionamento200
-
4�1 Desembalar E Instalar200
-
4�2 Montagem da Impressora201
-
Instalação Do Suporte de Bobina de Filamento201
-
Instalação Do Sensor de Filamento (FMS)201
-
Instalação Do Tubo Tracionador Do Filamento201
-
4�2�4 Montagem da Porta202
-
4�2�5 Montagem da Tampa202
-
4�2�6 Conexão Do Cabo de Rede202
-
Primeiros Passos203
-
5�2 Ajustar a Unidade de Temperatura203
-
Ajuste Do Idioma203
-
5�3 Conexão Ao WLAN204
-
Montagem da Bobina de Filamento207
-
Carregar O Filamento207
-
Selecionar O Filamento/Iniciar O Processo de Aquecimento207
-
Fixação/Extrusão Do Filamento207
-
Sistema FMS209
-
Calibrar O Sistema FMS209
-
5�8 Imprimir Objeto210
-
5�8�1 Carregar O Objeto Do Pen Drive210
-
Outros Ajustes211
-
Ajustar a Data/Horas/Reinicializar O Contador de Horas de Serviço211
-
6�2 Ajuste da Iluminação Do Visor212
-
6�3 Ativação Dos Ventiladores212
-
6�5 O Menu da Tampa212
-
6�6 Utilizar O WLAN Do SIMPLEX213
-
O Sistema FMS213
-
6�8 Reinicializar os Ajustes213
-
Operação214
-
Filamentos Salvos214
-
7�2 Ajuste da Temperatura Individual de Impressão E de Mesa214
-
Aquecimento da Impressora214
-
Carregar O Filamento215
-
Remoção Do Filamento Do Extrusor215
-
Movimentar a Cabeça de Impressão E a Mesa de Impressão216
-
Aplicativo Renfert CONNECT217
-
Instalar O SIMPLEX Sliceware/Simplex Print217
-
Imprimir Objetos218
-
10�1 Imprimir Via Pen Drive218
-
Ajustes / Otimizar219
-
10�2�3 Parar Próximo Plano219
-
10�3 Imprimir Com SIMPLEX Print221
-
Limpeza / Manutenção221
-
Lubrificação221
-
Lubrificação Do Eixo Z222
-
Lubrificação Do Eixo X/Y222
-
11�3 Eliminar O Entupimento Do Extrusor223
-
11�4 Substituir O Bico223
-
11�4�1 Montagem Do Bico224
-
Colocar um Novo Filme Kapton225
-
Atualização de Firmware225
-
11�7 Troca da Bateria Tampão226
-
Tensionar as Cintas Transportadoras Do Eixo X E y226
-
11�9 Peças de Reposição227
-
Eliminar Falhas227
-
Dados Técnicos229
-
Garantia230
-
Indicações Relativas Ao Descarte230
-
Descarte Do Equipamento230
-
一般说明234
-
标识使用234
-
安全性235
-
预期用途235
-
错误使用235
-
安全操作的环境条件235
-
储存和运输的环境条件235
-
危险和警告235
-
一般信息235
-
具体信息236
-
认可人员236
-
免责声明236
-
产品说明237
-
组件和功能元件237
-
交付范围238
-
拆箱和设置238
-
打印机组装239
-
安装纤维线轴支架239
-
安装纤维传感器 (Fms239
-
安装纤维导管239
-
安装门239
-
安装盖子240
-
连接电源线240
-
开始使用241
-
设置语言241
-
设置温度单位242
-
Wi-Fi 连接242
-
调平打印床243
-
手动移动打印头244
-
安装纤维线轴245
-
载入纤维245
-
选择纤维 / 开始加热245
-
拉入 / 挤出纤维245
-
Fms 系统247
-
校准 Fms 系统247
-
打印作业件248
-
从 U 盘闪存驱动器载入作业件248
-
其他设置249
-
设置日期 / 时间 / 重置操作小时计249
-
设置显示屏背光250
-
激活风扇250
-
音频设置250
-
封面菜单250
-
使用 SIMPLEX Wi-Fi251
-
Fms 系统251
-
重设设置251
-
Saved Filaments252
-
设置自定打印和床温度252
-
加热打印机252
-
载入纤维253
-
从挤出机取出纤维253
-
移动打印头和打印床254
-
Renfert CONNECT 仁福连接应用程序255
-
安装 Simplex 切片器软件 / Simplex 打印程序255
-
打印作业件256
-
使用 U 盘闪存驱动器打印256
-
U 盘进行打印期间的操作257
-
设置 / 优化257
-
暂停下一层257
-
使用 Simplex 打印程序进行打印258
-
清洁 / 维护259
-
润滑 Z 轴260
-
润滑 X / y 轴260
-
疏通挤出机261
-
更换喷嘴261
-
安装喷嘴262
-
贴上新的 Kapton 薄膜263
-
固件 - 更新263
-
更换备用电池264
-
拉紧 X 轴和 y 轴牵引带264
-
零配件264
-
故障排除265
-
技术参数267
-
废物丢弃处理指引268
-
机器处理268
-
欧盟各国的处理指引268
-
はじめに272
-
概要説明272
-
使用される記号272
-
安全について273
-
使用目的273
-
不適切な使用方法273
-
安全な使用のための周辺環境273
-
保管および輸送のための周囲条件273
-
危険、警告について273
-
一般情報273
-
具体的な情報274
-
権限者274
-
免責事項274
-
商品説明275
-
アセンブリと機能要素275
-
納品範囲276
-
アクセサリー276
-
スタートアップ276
-
開梱とセットアップ276
-
プリンターの組み立て277
-
フィラメントスプールホルダーの取り付け277
-
フィラメントセンサー(Fms)の取り付け277
-
フィラメントガイドチューブの取り付け277
-
ドアの取り付け278
-
カバーの取り付け278
-
電源コードの接続278
-
スイッチを入れる278
-
スタートアップ279
-
言語の設定279
-
温度単位の設定280
-
Wi-Fi接続280
-
プリントベッドを水平にする281
-
プリントヘッドを手動で移動する282
-
フィラメントスプールの取り付け283
-
フィラメントの装填283
-
フィラメントの選択/加熱の開始283
-
Fmsシステム285
-
Fmsシステムのキャリブレーション285
-
Usbメモリーからオブジェクトを読み込む286
-
その他の設定287
-
日付/時刻の設定/稼働時間メーターのリセット287
-
ディスプレイのバックライトを設定する288
-
ファンの起動288
-
オーディオ設定288
-
カバーメニュー288
-
SIMPLEX Wi-Fiを使用する289
-
Fmsシステム289
-
設定のリセット289
-
操作方法290
-
保存されたフィラメント290
-
カスタムプリントとベッド温度の設定290
-
プリンターの加熱290
-
フィラメントの装填291
-
押出成形291
-
フィラメントをエクストルーダーから取り外す291
-
プリントヘッドとプリントベッドの移動292
-
Renfert CONNECTアプリ293
-
Simplex スライスウェア / Simplex プリントのインストール293
-
オブジェクトのプリント294
-
Usbメモリーを使ったプリント294
-
Usbプリント時の動作295
-
設定/最適化295
-
次のレイヤーを一時停止する296
-
一時停止296
-
Simplexプリントでプリントする297
-
清掃/メンテナンス297
-
Z軸の潤滑298
-
X/Y軸の潤滑298
-
エクストルーダーの詰りを解除する299
-
ノズルの交換299
-
新しいカプトンフィルムを貼る300
-
ファームウェアアップデート301
-
バックアップ電池の交換302
-
X軸、Y軸のトラクションベルトの締め付け302
-
スペアパーツ302
-
トラブルシューティング303
-
技術データ305
-
廃棄に関する情報306
-
機器の廃棄について306
-
Eu加盟国の廃棄情報306
-
일반 설명310
-
사용된 기호310
-
안전사항311
-
사용 용도311
-
부적절한 사용311
-
안전한 작동을 위한 주변 조건311
-
보관 및 운송을 위한 주변 조건311
-
위험 및 경고 정보311
-
일반 정보311
-
세부 정보312
-
유자격자312
-
책임의 한계312
-
제품 설명313
-
어셈블리 및 기능 요소313
-
인도 범위314
-
액세서리314
-
포장 풀기 및 설치314
-
프린터 조립315
-
필라멘트 스풀 홀더 설치315
-
필라멘트 센서(Fms) 설치315
-
필라멘트 가이드 튜브 설치315
-
도어 부착316
-
커버 부착316
-
전원 코드 연결316
-
전원 켜기316
-
시작하기317
-
언어 설정317
-
온도 단위 설정318
-
Wi-Fi 연결318
-
프린트 베드 레벨링318
-
프린트 헤드 수동으로 이동320
-
필라멘트 스풀 부착321
-
필라멘트 로딩321
-
필라멘트 선택 / 가열 시작321
-
Fms 시스템323
-
Fms 시스템 보정323
-
대상물 프린트하기324
-
Usb 플래시 드라이브에서 대상물 로드하기324
-
기타 설정325
-
날짜/시간 설정 / 작동 시간계 초기화325
-
디스플레이 백라이트 설정326
-
팬 활성화326
-
오디오 설정326
-
커버 메뉴326
-
SIMPLEX Wi-F 사용327
-
Fms 시스템327
-
설정 초기화327
-
저장되어 있는 필라멘트 정보328

Renfert SIMPLEX Original Bedienungsanleitung (80 Seiten)
3D-Filament-Drucker
Marke: Renfert
|
Kategorie: 3D-Drucker
| Dateigröße: 13 MB
Inhaltsverzeichnis
-
Deutsch
4-
Lieferumfang10
-
Einschalten12
-
Bedienung24
-
Extrudieren25
-
10�2�1 Stopp29
-
10�2�4 Pause30
-
14 Garantie40
-
English
42

Renfert SIMPLEX Inbetriebnahme (19 Seiten)
3D-Filament-Drucker
Marke: Renfert
|
Kategorie: 3D-Drucker
| Dateigröße: 2 MB
Inhaltsverzeichnis
Renfert SIMPLEX Faq (38 Seiten)
Marke: Renfert
|
Kategorie: Laborzubehör & Laborgeräte
Inhaltsverzeichnis
-
Deutsch
1 -
English
9 -
Français
15 -
Italiano
21 -
Español
27 -
Português
33