Herunterladen Inhalt Inhalt Diese Seite drucken
Nibe F750 Serviceanleitung

Nibe F750 Serviceanleitung

Speicherwechsel
Vorschau ausblenden Andere Handbücher für F750:

Werbung

Verfügbare Sprachen

Verfügbare Sprachen

All manuals and user guides at all-guides.com
NIBE F750
SERVICEINSTRUKTION - Byte av beredare
SE
NIBE F750
SERVICE INSTRUCTIONS - Replacing heater on
GB
NIBE F750
SERVICEANLEITUNG - Speicherwechsel für
DE
NIBE F750
SIT 1634-1
431303

Werbung

Inhaltsverzeichnis
loading

Inhaltszusammenfassung für Nibe F750

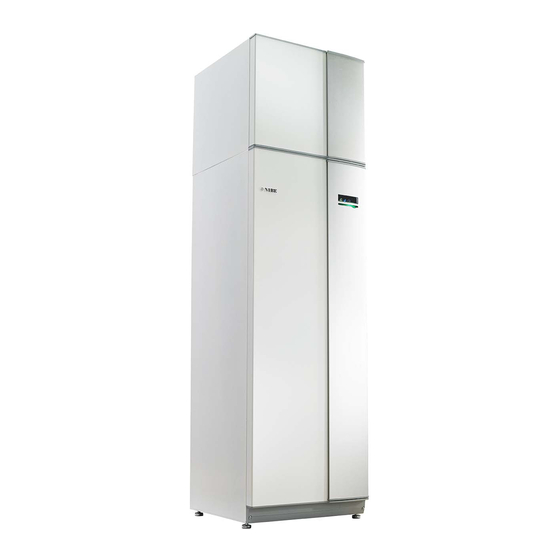
  • Seite 1 All manuals and user guides at all-guides.com NIBE F750 SERVICEINSTRUKTION - Byte av beredare NIBE F750 SERVICE INSTRUCTIONS - Replacing heater on NIBE F750 SERVICEANLEITUNG - Speicherwechsel für NIBE F750 SIT 1634-1 431303...
  • Seite 2 All manuals and user guides at all-guides.com...
  • Seite 3: Inhaltsverzeichnis

    All manuals and user guides at all-guides.com Table of Contents Svenska Allmänt Värmepumpens konstruktion Byte av beredare på NIBE F750 Igångkörning och justering English General The heat pump design Replacing heater on NIBE F750 Commissioning and adjusting German Allgemeines Aufbau der Wärmepumpe Speicherwechsel für NIBE F750...
  • Seite 4: Svenska

    All manuals and user guides at all-guides.com Svenska Allmänt Vid byte av beredare i F750 flyttas luftbehandlingsdel, rörkopplingar, isolering och all elektrisk utrustning över från den befintliga värmepumpen till den nya beredaren med stativ. Innehåll 12 st Brickor, M5 7 st...
  • Seite 5: Värmepumpens Konstruktion

    All manuals and user guides at all-guides.com Värmepumpens konstruktion XL32 QA40 XL31 BT14 GQ10 QM24 BT17 BT20 BT16 AA101 BT15 BT12 BT21 W130 QN10 BT63 AA4-XJ4 AA4-XJ3 BT30 AA23 BT62 BT61 QM10 QM31 QM11 QM23 QM20 QM22 XL10 NIBE F750 | SE...
  • Seite 6 BT14 Temperaturgivare, hetgas BT15 Temperaturgivare, vätskeledning Syns inte på bilden BT16 Temperaturgivare, förångare Beteckningar i komponentplacering enligt standard IEC 81346-1 och 81346-2. BT17 Temperaturgivare, suggas BT20 Temperaturgivare, frånluft BT21 Temperaturgivare, avluft BT30 Termostat, reservvärme BT50 Rumsgivare NIBE F750 | SE...
  • Seite 7: Byte Av Beredare På Nibe F750

    All manuals and user guides at all-guides.com Demontering av luckor Byte av beredare på NIBE F750 OBS! Elinstallation samt eventuell service ska göras under överinseende av behörig elinstallatör. Bryt strömmen med arbetsbrytaren innan eventuell service. Elektrisk installation och led- ningsdragning ska utföras enligt gällande be- stämmelser.
  • Seite 8 2. Vinkla ut locket och plocka bort det. Demontering plastkåpa Demontering lock, elpatronkort Demontera kåpan mellan ellådorna med hjälp av en skruvmejsel. 1. Stick in skruvmejseln (A) och bänd snäppet försiktigt nedåt (B). 2. Vinkla ut locket och plocka bort det. NIBE F750 | SE...
  • Seite 9 1. Greppa i handtaget och drag isoleringen försiktigt mot dig enligt bild. Isolering, topp 1. Lossa kabeln från motorn och demontera motorn från växelventilen enligt bild. 2. Greppa i handtaget och drag rakt ut enligt bild. NIBE F750 | SE...
  • Seite 10 är det lättare att komma åt rörkoppling- arna. Luftbehandlingsdelen är fäst i värme- pumpens framkant med två skruvar. 2. Lossa kondensslagen från luftbehandlingsdelen samt från spillvattenkoppen. TÄNK PÅ! Var försiktig så att inte kondensvattenpipen på luftsbehandlingsdelen skadas. NIBE F750 | SE...
  • Seite 11 All manuals and user guides at all-guides.com 4. När skruvarna lossats, avlägsna luftbehandlingsdelen från beredardelen genom att dra den mot värme- pumpens framkant och sen uppåt. NIBE F750 | SE...
  • Seite 12 Märk upp slangarna för att underlätta vid återmontering på den nya enheten. 7. Demontera clipsen från rördelarna som sitter bakom elpatronskortet och separera röret från elpatronen. Det vänstra röret lossas vid växelventil (QN10) och det högra lossas vid tank. NIBE F750 | SE...
  • Seite 13 (AA1) i isoleringen bakom elpatronen. Placera även slangar till avluftning vär- mebärare (QM20) samt slinga (QM22) bakom elpa- tron innan ellådan och elpatronen monteras på den nya enheten 11. Montera ellåda samt elpatron på den nya enheten. NIBE F750 | SE...
  • Seite 14 4. Ta bort plåtfästet för displayen (två skruvar i stativra- men). 5. Lossa ellådans jordkabel. (Fäst med en skruv i stativ- ramen.) 6. Lossa kablagekontakter anslutna till ellådans under- sida (BT61, BT62 samt PWM-kabel till cirkulations- pump). NIBE F750 | SE...
  • Seite 15 Montera därefter ellådan, inklusive genomföringsslang, på den nya enheten. 10. Montera plåtfästet för displayen (två skruvar) på den nya enheten. 11. Montera displayen och anslut kablagekontakten(er) mot displayen. 12. Fäst jordkabeln i stativramen. NIBE F750 | SE...
  • Seite 16 1. Avlägsna kondensvattenavledningen från baksidan av F750. 2. Lossa kopplingen vid avstängningsventilen enligt bild så att värmebärarpumpen (GP1) frigörs. 4. Avlägsna röret som går från avstängningsventilen och upp på värmepumpens baksida. NIBE F750 | SE...
  • Seite 17 9. Montera rördelen som går från värmebärarpump (GP1), till avstängningsventil och vidare till värme- pumpens baksida på den nya enheten. Använd de bipackade buntbanden för att förankra röret i fästet för expansionskärlet. 10. Lossa rör vid backventil (RM1) enligt bild. NIBE F750 | SE...
  • Seite 18 Manometer TIPS! Spänn inte fästet helt förrän värmebärar- pumpen (GP6) är på plats. 12. Lossa röret vid 4-vägskoppling enligt bild och avlägs- na röret från baksidan av värmepumpen. 4-vägskoppling NIBE F750 | SE...
  • Seite 19 2 (GP6) på den nya enheten. Tryck fast manometern (BP5) i isoleringen och dra fram sladden till framledningsgivare (BT61). 16. Montera rördel bestående av flexslang och växelven- til på den nya enheten. Dra fram sladden till returled- ningsgivare (BT62). NIBE F750 | SE...
  • Seite 20 över till den nya enheten. Använd bipackade skruv/muttrar för montering. 19. Montera rördelarna för varmvatten- (XL4) och kall- vattenanslutningarna (XL3) på den nya enheten. OBS! Montera rördelen till varmvattenanslutning- en (XL4) innan montering av kallvattenan- slutningen (XL3). NIBE F750 | SE...
  • Seite 21 Anslut därefter bandkabel, kablagekontakter, och framledningsgi- vare (BT63). Fäst därefter jordkabeln i stativramen och sätt på ellådans skyddslock. OBS! Kontrollera jordanslutning och säkertsäll elektrisk anslutning mellan jordplint AA1- X1 och stativ genom resistansmätning. NIBE F750 | SE...
  • Seite 22 6. Montera återstående lock- och kåpor till ellådorna. Se avsnitt "Demontering av lock, ellådor" på sida 8. 7. Anslut motorn på växelventilen (QN10). 8. Montera luckor på den nya enheten. Se avsnitt "De- montering av luckor" på sida 7. NIBE F750 | SE...
  • Seite 23: Igångkörning Och Justering

    QM22 (WM1). 7. Starta värmepumpen och låt den arbeta i både vär- me- och varmvattendriftläge. 8. Avlufta klimatsystemet (se avsnitt "Avluftning av klimatsystemet"). Om spillvattenkoppen behöver fyllas på: 1. Vrid säkerhetsventilen för varmvatten (FL1) försiktigt moturs. NIBE F750 | SE...
  • Seite 24: English

    All manuals and user guides at all-guides.com English General When replacing the water heater in F750, the air treat- ment unit, pipe connections, insulation and all electrical equipment are transferred from the existing heat pump to the new water heater with stand.
  • Seite 25: The Heat Pump Design

    All manuals and user guides at all-guides.com The heat pump design XL32 QA40 XL31 BT14 GQ10 QM24 BT17 BT20 BT16 AA101 BT15 BT12 BT21 W130 QN10 BT63 AA4-XJ4 AA4-XJ3 BT30 AA23 BT62 BT61 QM10 QM31 QM11 QM23 QM20 QM22 XL10 NIBE F750 | GB...
  • Seite 26 EMC card QN10 Shuttle valve, climate system/water heater Switch QN27 Reversing valve, circulation climate system W130 Network cable for NIBE Uplink Non-return valve Overflow water container Cooling components Overflow water discharge Evaporator Overflow pipe, safety valve hot water heater Condenser...
  • Seite 27: Replacing Heater On Nibe F750

    All manuals and user guides at all-guides.com Removing the covers Replacing heater on NIBE F750 NOTE Electrical installation and service must be carried out under the supervision of a qualified electri- cian. Cut the current with the circuit breaker before carrying out any servicing. Electrical in- stallation and wiring must be carried out in ac- cordance with the stipulations in force.
  • Seite 28 Remove the cover between the distribution boxes using Removing the cover, immersion heater board a screwdriver. 1. Insert the screwdriver (A) and pry the catch carefully downwards (B). 2. Angle out the cover and remove it. NIBE F750 | GB...
  • Seite 29 1. Grip the handle and pull the insulation carefully to- wards you as illustrated. Insulation, top 1. Disconnect the cable from the motor and remove the motor from the shuttle valve as illustrated. 2. Grip the handle and pull straight out as illustrated. NIBE F750 | GB...
  • Seite 30 2. Disconnect the condensation hose from the air treatment unit and from the overflow cup. Caution Take care not to damage the condensation water pipe on the air treatment section. NIBE F750 | GB...
  • Seite 31 All manuals and user guides at all-guides.com 4. When the screws have been removed, remove the air treatment unit from the heater unit by pulling it towards the front edge of the heat pump and then upwards. NIBE F750 | GB...
  • Seite 32 7. Remove the clips from the pipe sections behind the immersion heater board and separate the pipe from the immersion heater. The left hand pipe is discon- nected at the reversing valve (QN10) and the right hand is disconnected at the tank. NIBE F750 | GB...
  • Seite 33 (QM20) and coil (QM22) behind the immersion heater before installing the distribution box and the immersion heater on the new unit 11. Install the distribution box and the immersion heater on the new unit. NIBE F750 | GB...
  • Seite 34 5. Disconnect the distribution box's ground cable. (Se- cured with a screw in the stand frame.) 6. Disconnect the wiring connectors connected to the underside of the distribution box (BT61, BT62 and the PWM cable to the circulation pump). NIBE F750 | GB...
  • Seite 35 10. Install the panel mounting for the display (two screws) on the new unit. 11. Install the display and connect the wiring connect- or(s) to the display. 12. Secure the ground cable in the stand frame. NIBE F750 | GB...
  • Seite 36 2. Disconnect the connection at the shut off valve as illustrated, so that the heating medium pump (GP1) 4. Remove the pipe running from the shut off valve is released. and up to the rear side of the heat pump. NIBE F750 | GB...
  • Seite 37 Use the enclosed cable ties to secure the pipe on the mounting for the expansion vessel. 10. Remove the pipe at the non-return valve(RM1) as il- lustrated. NIBE F750 | GB...
  • Seite 38 Do not tension the mounting fully until the heating medium pump (GP6) is in position. 12. Disconnect the pipe at the 4-way connector as illus- trated. Remove the pipe from the rear of the heat pump. 4-way connector NIBE F750 | GB...
  • Seite 39 (BT61). 16. Install the pipe section consisting of the flexible hose and the reversing valve on the new unit. Route the cable to the return line sensor (BT62). NIBE F750 | GB...
  • Seite 40 19. Install the pipe sections for the hot water (XL4) and cold water connections (XL3) on the new unit. NOTE Install the pipe section to the hot water connection (XL4) before installing the cold water connection (XL3). NIBE F750 | GB...
  • Seite 41 NOTE Check the ground connection and ensure the electrical connection between the ground terminal block AA1-X1 and stand by measuring the resistance. NIBE F750 | GB...
  • Seite 42 See section "Removing the covers, distribution boxes" on page 28. 7. Connect the motor to the reversing valve (QN10). 8. Install hatches on the new unit. See section "Remov- ing the covers" on page 27. NIBE F750 | GB...
  • Seite 43: Commissioning And Adjusting

    7. Start the heat pump and allow it to run in both heating and hot water modes. 8. Vent the climate system (see section "Venting the climate system"). If the overflow cup requires topping up: 1. Turn the safety valve (FL1) anticlockwise carefully. NIBE F750 | GB...
  • Seite 44: German

    All manuals and user guides at all-guides.com German Allgemeines Bei einem Speicherwechsel in F750 werden Abluftmodul, Rohrkupplungen, Isolierung und sämtliche elektrische Ausrüstung von der vorhandenen Wärmepumpe zum neuen Speicher mit Ständer umgesetzt. Inhalt 12 St. Scheiben, M5 7 St. Kabelbinder 4 St.
  • Seite 45: Aufbau Der Wärmepumpe

    All manuals and user guides at all-guides.com Aufbau der Wärmepumpe XL32 QA40 XL31 BT14 GQ10 QM24 BT17 BT20 BT16 AA101 BT15 BT12 BT21 W130 QN10 BT63 AA4-XJ4 AA4-XJ3 BT30 AA23 BT62 BT61 QM10 QM31 QM11 QM23 QM20 QM22 XL10 NIBE F750 | DE...
  • Seite 46 Nicht auf der Abbildung sichtbar. Fühler, Brauchwasser, Anzeige Bezeichnungen der Komponentenpositionen gemäß BT12 Fühler, Heizkreisvorlauf nach Kondensator Standard IEC 81346-1 und 81346-2. BT14 Heißgasfühler BT15 Flüssigkeitsleitungsfühler BT16 Fühler, Verdampfer BT17 Sauggasfühler BT20 Fühler, Abluft BT21 Fühler, Fortluft NIBE F750 | DE...
  • Seite 47: Speicherwechsel Für Nibe F750

    All manuals and user guides at all-guides.com Speicherwechsel für NIBE F750 HINWEIS! Beim Entleeren des Brauchwasserspeichers kann warmes Wasser austreten. Dabei besteht poten- HINWEIS! zielle Verbrühungsgefahr. Elektrische Installation sowie eventuelle Service- arbeiten müssen unter Aufsicht eines ausgebil- deten Elektroinstallateurs erfolgen. Unterbre-...
  • Seite 48 1. Führen Sie den Schraubendreher (A) ein und biegen Sie die Schnappverriegelung vorsichtig nach unten (B). 2. Winkel Sie die Abdeckung an und nehmen Sie sie 1. Drücken Sie die Schnappverriegelung hinab. 2. Winkel Sie die Abdeckung an und nehmen Sie sie NIBE F750 | DE...
  • Seite 49 1. Führen Sie den Schraubendreher (A) ein und biegen Sie die Schnappverriegelung vorsichtig nach unten (B). 2. Winkel Sie die Abdeckung an und nehmen Sie sie Demontage der Kunststoffabdeckung Demontieren Sie die Abdeckung zwischen den Schalt- schränken mithilfe eines Schraubendrehers. NIBE F750 | DE...
  • Seite 50: Demontage Der Isolierung

    Isolierung vorsichtig zu sich heraus (siehe Abbil- Isolierung, Oberseite dung). 1. Lösen Sie das Kabel vom Motor und demontieren Sie den Motor vom Umschaltventil (siehe Abbildung). 2. Ziehen Sie die Einheit am Griff gerade heraus (siehe Abbildung). NIBE F750 | DE...
  • Seite 51 Rohrkupplungen zu gelangen. Das Abluft- modul ist an der Wärmepumpenvorderseite mithilfe zweier Schrauben befestigt. 2. Entfernen Sie den Kondenswasserschlauch vom Abluftmodul sowie vom Überlaufbehälter. ACHTUNG! Gehen Sie dabei vorsichtig vor, um die Kondenswassertülle am Abluftmodul nicht zu beschädigen. NIBE F750 | DE...
  • Seite 52 All manuals and user guides at all-guides.com 4. Nachdem die Schrauben gelöst wurden, entfernen Sie das Abluftmodul vom Speicherteil, indem Sie es an der Vorderseite der Wärmepumpe herausziehen und dann nach oben ziehen. NIBE F750 | DE...
  • Seite 53 Montage an der neuen Einheit zu er- leichtern. 7. Lösen Sie die Klemmen von den Rohrelementen hinter der Elektroheizpatronenplatine. Trennen Sie das Rohr von der Elektroheizpatrone. Lösen Sie das linke Rohr am Umschaltventil (QN10) und das rechte am Speicher. NIBE F750 | DE...
  • Seite 54 Eingangsplatine (AA1) in der Isolie- rung hinter der Elektroheizpatrone. Positionieren Sie ebenfalls die Schläuche für die Entlüftung des Heizungsmediums (QM20) und den Rohrwärmetau- scher (QM22) hinter der Elektroheizpatrone, bevor Schaltschrank und Elektroheizpatrone an der neuen Einheit montiert werden. NIBE F750 | DE...
  • Seite 55: Rechter Schaltschrank Und Display, Umsetzung

    4. Entfernen Sie die Blechhalterung für das Display (zwei Schrauben im Ständerrahmen). 5. Lösen Sie das Erdungskabel des Schaltschranks. (Die Befestigung erfolgt mit einer Schraube im Ständer- rahmen.) 6. Lösen Sie die Verkabelungskontakte von der Schalt- schrankunterseite (BT61, BT62 und PWM-Kabel zur Umwälzpumpe). NIBE F750 | DE...
  • Seite 56 10. Montieren Sie die Blechhalterung für das Display (zwei Schrauben) an der neuen Einheit. 11. Montieren Sie das Display und verbinden Sie die Verkabelungskontakte mit dem Display. 12. Verbinden Sie das Erdungskabel mit dem Ständer- rahmen. NIBE F750 | DE...
  • Seite 57: Ventilkupplung, Umsetzung

    1. Entfernen Sie die Kondenswasserableitung von der Rückseite von F750. 2. Lösen Sie die Kupplung am Absperrventil gemäß Abbildung, sodass die Heizungsumwälzpumpe (GP1) 4. Entfernen Sie das Rohr, das vom Absperrventil nach gelöst wird. oben zur Wärmepumpenrückseite verläuft. NIBE F750 | DE...
  • Seite 58 (GP1) zum Absperrventil und weiter zur Wärmepumpenrückseite an der neuen Einheit verläuft. Nutzen Sie den beiliegenden Kabelbinder, um das Rohr an der Halterung für das Ausdehnungs- gefäß zu befestigen. 10. Lösen Sie das Rohr am Rückschlagventil (RM1) ge- mäß Abbildung. NIBE F750 | DE...
  • Seite 59 Manometer TIP! Spannen Sie die Halterung erst fest, nach- 12. Lösen Sie gemäß Abbildung das Rohr an der Vierwe- dem die Heizungsumwälzpumpe (GP6) po- gekupplung und entfernen Sie das Rohr von der sitioniert wurde. Wärmepumpenrückseite. Vierwegekupplung NIBE F750 | DE...
  • Seite 60 Einheit. Drücken Sie das Mano- meter (BP5) in die Isolierung und verlegen Sie das Kabel zum Vorlauffühler (BT61). 16. Montieren Sie das Rohrstück, das aus Flexschlauch und Umschaltventil besteht, an der neuen Einheit. Verlegen Sie das Kabel zum Rücklauffühler (BT62). NIBE F750 | DE...
  • Seite 61 Schrauben/Muttern für die Montage. 19. Montieren Sie die Rohrstücke für Brauch- (XL4) und Kaltwasseranschluss (XL3) an der neuen Einheit. HINWEIS! Montieren Sie das Rohrstück für den Brauchwasseranschluss (XL4) vor der Mon- tage des Kaltwasseranschlusses (XL3). NIBE F750 | DE...
  • Seite 62 Vorlauffühler (BT63). Bringen Sie anschlie- ßend das Erdungskabel im Ständerrahmen an und setzen Sie die Schutzabdeckung des Schaltschranks auf. HINWEIS! Kontrollieren Sie den Erdungsanschluss und stellen Sie den elektrischen Anschluss zwi- schen Erdungsklemme AA1-X1 sowie Stän- der per Widerstandsmessung sicher. NIBE F750 | DE...
  • Seite 63 Schaltschränke. Siehe Abschnitt „Demontage der Abdeckungen, Schaltschränke“ auf Seite 48. 7. Verbinden Sie den Motor mit dem Umschaltventil (QN10). 8. Bringen Sie die Abdeckungen an der neuen Einheit an. Siehe Abschnitt “Abdeckungen demontieren“ auf Seite 47. NIBE F750 | DE...
  • Seite 64: Inbetriebnahme Und Einstellung

    7. Starten Sie die Wärmepumpe und lassen sie im Heiz- sowie Brauchwasserbetrieb arbeiten. 8. Entlüften Sie das Klimatisierungssystem (siehe Ab- schnitt "Klimatisierungssystem entlüften"). Wenn der Überlaufbehälter nachgefüllt werden muss: 1. Drehen Sie das Brauchwasser-Sicherheitsventil (FL1) vorsichtig gegen den Uhrzeigersinn. NIBE F750 | DE...
  • Seite 65 All manuals and user guides at all-guides.com...
  • Seite 66 All manuals and user guides at all-guides.com...
  • Seite 67 All manuals and user guides at all-guides.com...
  • Seite 68 All manuals and user guides at all-guides.com WS name: -Gemensamt WS version: a234 WS release date: 2016-08-26 07:28 Publish date: 2016-08-30 15:34 NIBE AB Sweden Hannabadsvägen 5 Box 14 SE-285 21 Markaryd Phone +46 433 73 000 Telefax +46 433 73 190 info@nibe.se...

Inhaltsverzeichnis