WIR DENKEN AN SIE Danke, dass Sie ein Gerät von Electrolux gekauft haben. Sie haben sich für ein Produkt entschieden, in dem jahrzehntelange Berufserfahrung und Innovation stecken. Bei der Entwicklung dieses genialen und eleganten Geräts haben wir an Sie gedacht. Wann immer Sie das Gerät verwenden, können Sie sicher sein, dass Sie jedes Mal großartige Ergebnisse...
SICHERHEITSHINWEISE Geräts eingewiesen wurden und die mit dem Gerät verbundenen Gefahren verstanden haben. Kinder unter 8 Jahren sowie Personen mit schweren Behinderungen oder Mehrfachbehinderung sollten vom Gerät ferngehalten werden, wenn sie nicht ständig beaufsichtigt werden. Kinder müssen beaufsichtigt werden, und es ist sicher zu •...
SICHERHEITSANWEISUNGEN gleichermassen qualifizierten Person ausgetauscht werden, um Gefährdungen durch elektrischen Strom zu vermeiden. Die Mittel zum Trennen des Stromanschlusses müssen • gemäss den Verdrahtungsvorschriften in die feste Verdrahtung integriert sein. WARNUNG: Stellen Sie sicher, dass das Gerät • abgeschaltet ist, bevor Sie das Leuchtmittel ersetzten, um die Gefahr eines elektrischen Stromschlags zu vermeiden.
SICHERHEITSANWEISUNGEN • Installieren Sie das Gerät an einem sicheren, geeigneten Aufstellort, der die Installationsanforderungen erfüllt. • Die Mindestabstände zu anderen Geräten und Küchenmöbeln sind einzuhalten. • Prüfen Sie vor Montage des Geräts, dass sich die Ofentür unbehindert öffnen lässt. • Das Gerät ist mit einem elektrischen Kühlsystem ausgestattet. Es muss mit der Stromversorgung betrieben werden.
SICHERHEITSANWEISUNGEN • Achten Sie darauf, Netzstecker und Netzkabel nicht zu beschädigen. Falls das Netzkabel des Geräts ersetzt werden muss, lassen Sie diese Arbeit durch unseren autorisierten Kundendienst durchführen. • Achten Sie darauf, dass das Netzkabel die Gerätetür nicht berührt oder in ihre Nähe gelangt, insbesondere wenn die Tür heiss ist.
SICHERHEITSANWEISUNGEN – Bewahren Sie kein feuchtes Geschirr oder Lebensmittel im Gerät auf, wenn Sie den Garvorgang beendet haben. – Gehen Sie beim Herausnehmen oder Einsetzen des Zubehörs sorgfältig vor. • Verfärbungen der Emaille- oder Edelstahlbeschichtung haben keine Auswirkung auf die Leistung des Geräts.
GERÄTEBESCHREIBUNG 2.7 Entsorgung WARNUNG! Verletzungs- oder Erstickungsgefahr. • Kontaktieren Sie die Behörden vor Ort, um Informationen darüber zu erhalten, wie Sie das Gerät entsorgen können. • Trennen Sie das Gerät von der Spannungsversorgung. • Schneiden Sie das Netzkabel in der Nähe des Geräteanschlusses ab, und entsorgen Sie es. •...
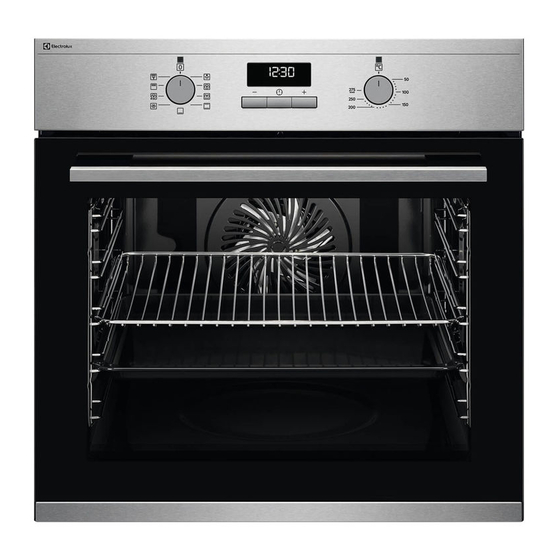
BEDIENFELD 4. BEDIENFELD 4.1 Versenkbare Knöpfe Drücken Sie zum Benutzen des Geräts den Knopf. Der Knopf springt heraus. 4.2 Sensorfelder im Bedienfeld Back‐ Kurz‐ Schnell‐ ofen‐ Verriege‐ Einstellung Drehen Sie den zeitwe‐ aufhei‐ be‐ Drücken Sie lung bestätigen Knopf cker zung leuch‐...
TÄGLICHER GEBRAUCH 5.1 Erste Reinigung Vor der ersten Anwendung reinigen Sie den leeren Ofen und stellen die Zeit ein: 00:00 Stellen Sie die Zeit ein. Drücken Sie 5.2 Erstes Vorheizen Heizen Sie den leeren Ofen vor der ersten Inbetriebnahme auf. Schritt Entfernen Sie das gesamte Zubehör und die herausnehmbaren Einhängegitter aus dem Ofen.
TÄGLICHER GEBRAUCH Stellen Sie die Temperatur ein. Wählen Sie eine Ofenfunktion aus. Drücken Sie - drücken und halten, um die Funktion einzuschalten: Schnellaufheizung. Dies ist für einige Ofenfunktionen verfügbar. 6.2 Ofenfunktionen Standard-Ofenfunktionen Ofenfunktion Anwendung Zum Backen und Braten auf drei Einschubebenen und zum Dörren von Lebensmitteln.
TÄGLICHER GEBRAUCH Ofenfunktion Anwendung Zum Grillieren von dünnen Speisen und zum Toasten von Brot. Grill Zum Braten grosser Fleischstücke oder von Geflügel mit Knochen auf ei‐ ner Einschubebene. Zum Gratinieren und Bräunen. Heissluftgrillen Zur Menüeingabe: VarioGuide, Reinigung, Einstellungen. Menü 6.3 Hinweise für: Feuchte Umluft Diese Funktion wurde verwendet, um der Energieeffizienzklasse und den Ökodesign- Anforderungen gemäss EU 65/2014 und EU 66/2014 zu entsprechen.
TÄGLICHER GEBRAUCH VarioGuide - kann zur schnellen Zubereitung einer Speise mit voreingestellten Funktionen verwendet werden: Rufen Sie das Menü Wählen Sie VarioGui‐ Wählen Sie die Spei‐ Stellen Sie die Speise auf. se aus. Drücken Sie in den Backofen. Be‐ de. Drücken Sie stätigen Sie die Ein‐...
Seite 15
TÄGLICHER GEBRAUCH Speise Gewicht Einschubebene/Zubehör Garzeit Rinderbraten/ 1,5–2 kg 120 Min. 2; Braten der Speise auf dem Git‐ Schmorbraten terrost (Hochrippe, Braten Sie das Fleisch einige Min.uten in Oberschale, di‐ einer heissen Pfanne an. Fügen Sie cke Spannrip‐ Flüssigkeit hinzu. Geben Sie es in den Ofen.
Seite 16
TÄGLICHER GEBRAUCH Speise Gewicht Einschubebene/Zubehör Garzeit Schweinefleisch Schweinebra‐ 1,5–2 kg 120 Min. 2; Speise auf Gitterrost braten ten, Hals oder Wenden Sie das Fleisch nach der Hälfte Schulter der Garzeit. Pulled Pork 1,5–2 kg 215 Min. 2; Backblech (Niedertempe‐ Verwenden Sie Ihre liebsten Gewürze. ratur Garen) Wenden Sie das Fleisch nach der Hälfte der Garzeit für eine gleichmässige Bräu‐...
Seite 17
TÄGLICHER GEBRAUCH Speise Gewicht Einschubebene/Zubehör Garzeit Pouletbrust 180–200 g 25 Min. 2; Auflaufform auf Gitterrost pro Stück Verwenden Sie Ihre liebsten Gewürze. Braten Sie das Fleisch einige Min.uten in einer heissen Pfanne an. Pouletschen‐ 30 Min. 3; Backblech kel, frisch Wenn die Pouletschenkel mariniert sind, garen Sie sie länger und bei niedrigerer Temperatur.
Seite 18
TÄGLICHER GEBRAUCH Speise Gewicht Einschubebene/Zubehör Garzeit Käsekuchen 90 Min 28 cm Blech-Springform auf Gitterrost Apfelkuchen 45 Min. 3; Backblech Apfeltorte 40 Min. 2; Kuchenform Gitterrost Apfeltorte 60 Min. 22 cm Kuchenform auf Gitter‐ rost Brownies 2 kg 30 Min. 3; tiefes Kuchenblech Schokoladen- 25 Min.
UHRFUNKTIONEN Speise Gewicht Einschubebene/Zubehör Garzeit Fleisch/ 1–1,5 kg 45 Min. 2; Auflaufform auf Gitterrost Gemüse-La‐ sagne mit tro‐ ckenen Nu‐ delplatten Kartoffelgra‐ 1–1,5 kg 50 Min. 1; Auflaufform auf Gitterrost tin (rohe Kar‐ Drehen Sie das Gratin nach der Hälfte toffeln) der Garzeit.
UHRFUNKTIONEN Uhrfunktion Anwendung Uptimer. Max. 23 Std. 59 Min. Diese Funktion hat keine Auswirkung auf den Ofenbetrieb. Um die Uptimer ein- und auszustellen, wählen Sie: Menü, Einstellun‐ gen. 7.2 Einstellung: Uhrfunktionen Einstellung: Uhrzeit Schritt 1 Schritt 2 Schritt 3 Zum Ändern der Uhrzeit gehen Sie ins Me‐ Stellen Sie die Uhr ein.
VERWENDUNG: ZUBEHÖRTEILE Einstellung: Garzeit Schritt 1 Schritt 2 Schritt 3 Schritt 4 Im Display er‐ scheint: 0:00 Stellen Sie eine Wiederholt drü‐ Drücken Sie: Ofenfunktion und Stellen Sie die die Temperatur Gardauer ein. cken: ein. Der Timer beginnt sofort mit dem Rückwärtszählen. Einstellung: Zeitverzögerung Schritt Schritt 2...
ZUSATZFUNKTIONEN Gitterrost: Schieben Sie den Gitterrost zwischen die Führungsstäbe des Einhängegitters. Backblech: Schieben Sie das Blech zwischen die Füh‐ rungsstäbe der Einhängegitter. 9. ZUSATZFUNKTIONEN 9.1 Verriegelung Diese Funktion verhindert eine versehentliche Änderung der Gerätefunktion. Schalten Sie sie ein, wenn das Gerät funktioniert – der eingestellte Garvorgang wird fortgesetzt, das Bedienfeld ist gesperrt.
RATSCHLÄGE UND TIPPS (°C) (Std.) 30 - 115 12.5 120 - 195 200 - 245 250 °C – Höchsttemperatur Die Abschaltautomatik funktioniert nicht mit den folgenden Funktionen: Backofenbeleuchtung, Zeitverzögerung. 9.3 Kühlgebläse Wenn das Gerät in Betrieb ist, wird das Kühlgebläse automatisch eingeschaltet, um die Geräteoberflächen zu kühlen.
RATSCHLÄGE UND TIPPS (°C) (Min.) Apfelkuchen aus Biskuitteig (runde Kuchen‐ 160 - 170 70 - 80 form) Weissbrot 190 - 200 55 - 70 10.2 Feuchte Umluft - empfohlenes Zubehör Verwenden Sie dunkle und nicht reflektierende Formen und Behälter. Diese nehmen die Wärme besser auf als helle und reflektierende Behälter.
Seite 25
RATSCHLÄGE UND TIPPS BACKEN AUF EINER EINSCHUBEBENE. Backen in Formen (°C) (min) Apfeltorte, 2 For‐ Ober-/Unterhitze 70–90 men à Ø 20 cm BACKEN AUF EINER EINSCHUBEBENE. Plätzchen Nutzen Sie die dritte Einschubebene. (°C) (min) Buttergebäck / Feingebäck Heissluft 25–40 Buttergebäck / Feingebäck, Ober-/Unterhitze 20–30 heizen Sie den leeren Back‐...
REINIGUNG UND PFLEGE BACKEN AUF MEHREREN EBENEN. Plätzchen (°C) (min) Buttergebäck / Feinge‐ Heissluft 25–45 1 / 4 bäck Törtchen, 20 pro Blech, Heissluft 23–40 1 / 4 heizen Sie den leeren Backofen vor Biskuitkuchen (fettfrei) Heissluft 35–50 1 / 4 GRILL Heizen Sie den leeren Ofen 5 Minuten lang vor.
REINIGUNG UND PFLEGE 11.1 Hinweise zur Reinigung Reinigen Sie die Oberfläche des Geräts nur mit einem Mikrofasertuch, warmem Wasser und einem milden Reinigungsmittel. Verwenden Sie eine Reinigungslösung zum Reinigen der Metalloberflächen. Reinigungs‐ Beseitigen Sie Flecken mit einem milden Reinigungsmittel. mittel Reinigen Sie den Garraum nach jedem Gebrauch.
REINIGUNG UND PFLEGE 11.3 Aus- und Einbau: Tür Die Tür und die inneren Glasscheiben können zur Reinigung ausgebaut werden Die Anzahl Glasscheiben unterscheidet sich von anderen Modellen. WARNUNG! Die Tür ist schwer. VORSICHT! Geben Sie bei der Handhabung der Glasscheiben vorsichtig vor, insbesondere an den Kanten der Frontscheibe.
REINIGUNG UND PFLEGE Schritt Reinigen Sie die Glasscheibe mit Wasser und Seife. Trock‐ nen Sie die Glasscheibe sorg‐ fältig ab. Reinigen Sie die Glasscheiben nicht im Ge‐ schirrspüler. Schritt Führen Sie nach der Reini‐ gung die oben aufgeführten Schritte in umgekehrter Rei‐ henfolge durch.
FEHLERSUCHE 12. FEHLERSUCHE WARNUNG! Siehe Kapitel „Sicherheitshinweise“. 12.1 Was tun, wenn … Bei Fällen, die nicht in dieser Tabelle aufgeführt sind, wenden Sie sich bitte an einen autorisierten Kundendienst. Der Backofen lässt sich nicht einschalten oder heizt nicht auf Problem Prüfen Sie Folgendes: Der Backofen kann nicht eingeschaltet oder Der Backofen ist ordnungsgemäss an die...
MENÜSTRUKTUR EB6L40CN 30.5 kg Gewicht EB6L40SW 30.5 kg EB6L40WE 30.5 kg IEC/EN 60350-1 – Elektrische Kochgeräte für den Hausgebrauch – Teil 1: Herde, Backöfen, Dampfgarer und Grillgeräte – Verfahren zur Messung der Gebrauchseigenschaften. 13.2 Energie sparen Das Gerät verfügt über Funktionen, mit deren Hilfe Sie beim Kochen Energie sparen können.
MENÜSTRUKTUR Menü-Struktur VarioGuide Einstellungen Schritt 1 Schritt 2 Schritt 3 Schritt 4 Schritt 5 O1–10 Passen Sie den Wählen Sie Me‐ Bestätigen Sie Wählen Sie die Bestätigen Sie Wert an und drü‐ nü, Einstellun‐ die Einstellung. Einstellung. die Einstellung. gen. cken Sie Einstellungen Uhrzeit...
MENÜSTRUKTUR Servicestellen Morgenstrasse 131 3018 Bern Langgasse 10 9008 St. Gallen Am Mattenhof 4a/b 6010 Kriens Schlossstrasse 1 4133 Pratteln Comercialstrasse 19 7000 Chur Ersatzteilverkauf Industriestrasse 10, 5506 Mägenwil, Tel. 0848 848 111 Fachberatung/Verkauf Badenerstrasse 587, 8048 Zürich, Tel. 044 405 81 11 Garantie Für jedes Produkt gewähren wir ab Verkauf bzw.
Seite 35
TABLE DES MATIÈRES NOUS PENSONS À VOUS Merci d’avoir choisi un appareil Electrolux. Vous avez choisi un produit qui bénéficie de décennies d'expérience professionnelle et d'innovation. Ingénieux et élégant, il a été pensé pour vous. C'est la raison pour laquelle vous pouvez avoir la certitude d'obtenir d'excellents résultats à...
INFORMATION SUR LA SÉCURITÉ 5. AVANT LA PREMIÈRE UTILISATION..43 10.2 Circulation d'air humide - accessoires recommandés....56 5.1 Nettoyage initial......44 10.3 Tableaux de cuisson pour les 5.2 Préchauffage initial......44 instituts de tests........56 6. UTILISATION QUOTIDIENNE....44 11.
INFORMATION SUR LA SÉCURITÉ physiques, sensorielles ou mentales réduites ou dénuées d’expérience ou de connaissance, s'ils sont correctement surveillés ou si des instructions relatives à l'utilisation de l'appareil en toute sécurité leur ont été données et s’ils comprennent les risques encourus. Les enfants de moins de 8 ans et les personnes ayant un handicap très important et complexe doivent être tenus à...
CONSIGNES DE SÉCURITÉ Si le câble d’alimentation secteur est endommagé, son • remplacement doit être confié exclusivement au fabricant, à son service après-vente ou à toute autre personne qualifiée afin d’éviter tout danger électrique. Un moyen de déconnexion doit être prévu dans le câblage •...
CONSIGNES DE SÉCURITÉ • L’appareil est équipé d’un système de refroidissement électrique. Il doit être utilisé avec l’alimentation électrique. • L’unité intégrée doit répondre aux exigences de stabilité de la norme DIN 68930. Hauteur minimale du meuble (Hauteur minimale 590 (600) mm du meuble sous le plan de travail) Largeur du meuble 560 mm...
CONSIGNES DE SÉCURITÉ • La protection contre les chocs des parties sous tension et isolées doit être fixée de telle manière qu'elle ne puisse pas être enlevée sans outils. • Ne branchez la fiche secteur dans la prise secteur qu'à la fin de l'installation. Assurez-vous que la prise secteur est accessible après l'installation.
CONSIGNES DE SÉCURITÉ • Utilisez un plat à rôtir pour des gâteaux moelleux. Les jus de fruits provoquent des taches qui peuvent être permanentes. • Cuisinez toujours avec la porte de l’appareil fermée. • Si l’appareil est installé derrière la paroi d’un meuble (par ex. une porte), veuillez à ce que la porte ne soit jamais fermée lorsque l’appareil fonctionne.
DESCRIPTION DE L'APPAREIL • Débranchez l'appareil de l'alimentation électrique. • Coupez le câble d'alimentation au ras de l'appareil et mettez-le au rebut. • Retirez le dispositif de verrouillage du hublot pour empêcher les jeunes et les animaux de s'enfermer dans l'appareil. 3.
AVANT LA PREMIÈRE UTILISATION 4.2 Touches tactiles du bandeau de commande Pré‐ Eclai‐ Confirmez Minu‐ chauffa‐ Touches Appuyez sur Tournez la ma‐ rage la configu‐ teur ge rapi‐ Verrouil la touche nette four ration Sélectionnez un mode de cuisson pour allumer le four. Tournez la manette des modes de cuisson sur la position Arrêt pour mettre à...
UTILISATION QUOTIDIENNE 5.1 Nettoyage initial Avant la première utilisation, nettoyez le four à vide et réglez la durée : 00:00 Réglez l’heure. Appuyez sur la tou‐ 5.2 Préchauffage initial Préchauffez le four à vide avant de l'utiliser pour la première fois. Étape 1 Retirez les supports de grille amovibles et tous les accessoires du four.
UTILISATION QUOTIDIENNE Réglez la température. Sélectionnez un mode de cuisson. Appuyez sur la touche - maintenez la touche enfoncée pour activer la fonction : Préchauffage rapide. Disponible avec certaines fonctions du four. 6.2 Modes de cuisson Modes de cuisson standard Mode de cuisson Application Pour faire cuire sur 3 niveaux en même temps et pour sécher des ali‐...
UTILISATION QUOTIDIENNE Mode de cuisson Application Cette fonction est conçue pour économiser de l'énergie en cours de cuis‐ son. Lorsque vous utilisez cette fonction, la température à l’intérieur de la cavité peut différer de la température sélectionnée. La chaleur résiduelle Circulation d'air est utilisée.
UTILISATION QUOTIDIENNE Cuisson assistée - vous pouvez l'utiliser pour préparer un plat rapidement avec les régla‐ ges par défaut : P1 - P45 Accédez au menu. Sélectionner Cuisson Sélectionnez le plat. Placez le plat dans le assistée. Appuyez Appuyez sur la tou‐ four.
Seite 48
UTILISATION QUOTIDIENNE Plat Poids Niveau/Accessoire Durée Bœuf rôti/ 1,5 - 2 kg 120 min 2 ; plat à rôtir sur grille métallique braisé (côte Faire frire la viande pendant quelques de bœuf, intér‐ minutes sur une poêle chaude. Ajoutez ieur de ronde, du liquide.
Seite 49
UTILISATION QUOTIDIENNE Plat Poids Niveau/Accessoire Durée Émincé de 1,5 - 2 kg 215 min 2 ; plateau de cuisson porc (cuisson Utilisez vos épices préférées. Retournez lente) la viande à la moitié du temps de cuisson pour faire dorer de manière homogène. Longe, fraî‐...
Seite 50
UTILISATION QUOTIDIENNE Plat Poids Niveau/Accessoire Durée Canard entier 2 - 3 kg 100 min 2 ; plat à rôtir sur grille métallique Utilisez vos épices préférées. Placez la viande sur un plat à rôtir. Retournez le canard à la moitié du temps de cuisson. Oie entière 4 - 5 kg 110 min...
Seite 51
UTILISATION QUOTIDIENNE Plat Poids Niveau/Accessoire Durée Muffins au 25 min 3 ; bac à muffins sur grille métalli‐ chocolat Quatre-quarts 50 min 2 ; moule quatre-quarts sur grille mé‐ tallique Légumes/Garnitures Pommes de 1 kg 50 min 2 ; plateau de cuisson terre au four Placez les pommes de terre entières avec la peau sur un plateau de cuisson.
FONCTIONS DE L'HORLOGE Plat Poids Niveau/Accessoire Durée Pizza fraîche, 2 ; plateau de cuisson recouvert 15 min fine de papier sulfurisé Pizza fraîche, 25 min 2 ; plateau de cuisson recouvert épaisse de papier sulfurisé Quiche 45 min 2 ; plat de cuisson sur grille métalli‐ Baguette/ 0,8 kg 30 min...
FONCTIONS SUPPLÉMENTAIRES 9. FONCTIONS SUPPLÉMENTAIRES 9.1 Touches Verrouil. Cette fonction permet d’éviter une modification involontaire de la fonction de l'appareil. Activez-la lorsque l'appareil est allumé - la cuisson réglée est maintenue, le bandeau de comman‐ de est verrouillé. Allumez-le lorsque l’appareil est éteint - il ne peut pas être allumé, le bandeau de commande est verrouillé.
Seite 57
CONSEILS CUISSON SUR UN SEUL NIVEAU. Cuisson dans des moules (°C) (min) Génoise allégée Chaleur tournante 140 - 150 35 - 50 Génoise allégée Chauffage Haut/Bas 35 - 50 Tarte aux pommes, Chaleur tournante 60 - 90 2 moules Ø20 cm Tarte aux pommes, Chauffage Haut/Bas 70 - 90...
ENTRETIEN ET NETTOYAGE 11.1 Remarques concernant le nettoyage Nettoyez l’avant de l’appareil uniquement avec un chiffon en microfibre imbibé d’eau tiède et d’un détergent doux. Utilisez une solution de nettoyage pour nettoyer les surfaces métalliques. Agent nettoy‐ Nettoyez les taches avec un détergent doux. Nettoyez la cavité...
ENTRETIEN ET NETTOYAGE 11.3 Comment démonter et installer : Porte Vous pouvez retirer la porte ainsi que les panneaux de verre intérieurs pour les nettoyer. Le nombre de vitres diffère selon les modèles. AVERTISSEMENT! La porte est lourde. ATTENTION! Manipulez soigneusement la vitre, en particulier autour des bords du panneau avant Le verre peut se briser.
DÉPANNAGE Étape 9 Installez d'abord le plus petit des panneaux, puis le plus grand, et terminez par la por‐ Assurez-vous que les panneaux en verre sont insérés dans la bonne position, car la surface de la porte pourrait surchauffer. 11.4 Comment remplacer : Éclairage AVERTISSEMENT! Risque d'électrocution.
DÉPANNAGE Le four ne fonctionne pas ou ne chauffe pas Problème Vérifiez si... Vous ne pouvez pas activer le four ni la faire Le four est correctement branché à l'alimenta‐ fonctionner. tion électrique. Le four ne chauffe pas. L’arrêt automatique est désactivé. Le four ne chauffe pas.
......... Numéro de série (SN) ......... 13. RENDEMENT ÉNERGÉTIQUE 13.1 Informations produits et fiche d’informations produits Nom du fournisseur Electrolux EB6L40CN 944271561 Identification du modèle EB6L40SW 944271572 EB6L40WE 944271562 Indice d’efficacité énergétique 81.2 Classe d’efficacité énergétique Consommation d’énergie avec charge standard, en mode 1.09 kWh/cycle...
STRUCTURE DES MENUS 13.2 Économie d'énergie Cet appareil est doté de caractéristiques qui vous permettent d'économiser de l'énergie lors de votre cuisine au quotidien. Assurez-vous que la porte de l'appareil est fermée lorsque l'appareil est en marche. Évitez d'ouvrir l'appareil trop souvent pendant la cuisson. Nettoyez régulièrement le joint de porte et assurez-vous qu’il est bien en place.
STRUCTURE DES MENUS O1 - 10 Ajustez la valeur Sélectionnez le Confirmez la Sélectionnez la Confirmez la et appuyez sur Menu , Configu‐ configuration. configuration. configuration. rations. Configurations Heure actuelle Modifier Affichage Luminosi‐ 1 - 5 té Son touches 1 - Bip Volume alarme 1 - 4 2 - Clic...
STRUCTURE DES MENUS Points de Service Morgenstrasse 131 3018 Bern Langgasse 10 9008 St. Gallen Am Mattenhof 4a/b 6010 Kriens Schlossstrasse 1 4133 Pratteln Comercialstrasse 19 7000 Chur Points de vente de rechange Industriestrasse 10, 5506 Mägenwil,Tel. 0848 848 111 Conseil technique/Vente Badenerstrasse 587, 8048 Zürich, Tel.
Seite 67
STRUCTURE DES MENUS Concerne la France uniquement : 67/132...
Seite 68
INDICE PENSIAMO A TE Grazie per aver acquistato un elettrodomestico Electrolux. Hai scelto un prodotto che ha alle spalle decenni di esperienza professionale e innovazione. Ingegnoso ed elegante, è stato progettato pensando a te. Quindi, in qualsiasi momento lo utilizzi, avrai la certezza di ottenere sempre i migliori risultati.
INFORMAZIONI DI SICUREZZA 5. PRIMA DEL PRIMO UTILIZZO....76 10.2 Cottura ventilata umida - accessori consigliati......89 5.1 Pulizia iniziale........ 77 10.3 Tabelle di cottura per gli istituti 5.2 Preriscaldamento iniziale....77 di test........... 90 6. UTILIZZO QUOTIDIANO......77 11. PULIZIA E CURA........92 6.1 Come impostare: 11.1 Note sulla pulizia......92 Funzioni cottura........
INFORMAZIONI DI SICUREZZA disabilità diffuse e complesse vanno tenuti lontani dall’elettrodomestico, a meno che non vi sia una supervisione continua. I bambini devono essere sorvegliati per assicurarsi che non • giochino con l’apparecchiatura. Tenere gli imballaggi lontano dai bambini e smaltirli in modo •...
ISTRUZIONI DI SICUREZZA autorizzato o da una persona qualificata per evitare situazioni di pericolo elettrico. I mezzi per lo scollegamento devono essere incorporati nel • cablaggio fisso conformemente alle regole di cablaggio. AVVERTENZA: Assicurarsi che l'elettrodomestico sia • spento prima di sostituire la lampadina per evitare la possibilità...
ISTRUZIONI DI SICUREZZA • L'apparecchiatura è dotata di un sistema di raffreddamento elettrico. Quest’ultimo funziona a corrente elettrica. • L'unità a incasso deve soddisfare i requisiti di stabilità DIN 68930. Altezza minima del mobiletto (mobiletto sotto all'al‐ 590 (600) mm tezza minima del piano di lavoro) Larghezza del mobiletto 560 mm...
ISTRUZIONI DI SICUREZZA • I dispositivi di protezione da scosse elettriche devono essere fissati in modo tale da non poter essere disattivati senza l'uso di attrezzi. • Inserire la spina di alimentazione nella presa solo al termine dell'installazione. Verificare che la spina di alimentazione rimanga accessibile dopo l'installazione.
ISTRUZIONI DI SICUREZZA • Usare una leccarda per torte umide. I succhi di frutta causano macchie che possono essere permanenti. • Eseguire sempre la cottura con lo sportello dell’apparecchiatura chiuso. • Se l'apparecchiatura si trova dietro a un pannello anteriore (ad es. una porta), assicurarsi che questo non sia mai chiuso quando l'apparecchiatura è...
DESCRIZIONE DEL PRODOTTO • Staccare la spina dall'alimentazione elettrica. • Tagliare il cavo elettrico dell'apparecchiatura e smaltirlo. • Togliere il blocco porta per evitare che bambini, o animali restino intrappolati nell'apparecchiatura. 3. DESCRIZIONE DEL PRODOTTO 3.1 Panoramica generale Pannello dei comandi Manopola di regolazione delle funzioni cottura Display...
PRIMA DEL PRIMO UTILIZZO 4.2 Tasti sensore pannello dei comandi Riscal‐ Confermare Luce Ruotare la ma‐ Timer damento Blocco l'imposta‐ Premere forno nopola rapido zione Selezionare una funzione cottura per accendere il forno. Per spegnere il forno, ruotare la manopola delle funzioni di riscaldamento fino a portarla in posi‐ zione off.
UTILIZZO QUOTIDIANO 5.1 Pulizia iniziale Prima della messa in uso, pulire il forno vuoto e impostare l'ora: 00:00 Impostare l’ora. Premere 5.2 Preriscaldamento iniziale Preriscaldare il forno vuoto prima di utilizzarlo per la prima volta. Fase 1 Togliere gli accessori e i supporti ripiano amovibili dal forno. Fase 2 Impostare la temperatura massima.per la funzione: Lasciare in funzione il forno per un'ora.
UTILIZZO QUOTIDIANO - tenere premuto per attivare la funzione: Riscaldamento rapido. È disponibile per alcune fun‐ zioni del forno. 6.2 Funzioni cottura Funzioni cottura standard Funzione cottura Applicazione Per cuocere su massimo tre posizioni della griglia contemporaneamente ed essiccare i cibi. Impostare la temperatura di 20 - 40°C inferiore rispetto a Cottura convenzionale.
UTILIZZO QUOTIDIANO Funzione cottura Applicazione Per grigliare alimenti di ridotto spessore e tostare il pane. Grill Per arrostire grandi tagli di carne o pollame con ossa su una posizione della griglia. Per gratinare e dorare. Doppio grill venti‐ lato Per accedere al Menu: Cottura guidata, Pulizia, Impostazioni. Menu 6.3 Note su: Cottura ventilata umida Questa funzione è...
UTILIZZO QUOTIDIANO Cottura guidata - utilizzare per preparare un piatto rapidamente con le impostazioni prede‐ finite: Accedere al menu. Selezionare Cottura Selezionare la pietan‐ Inserire la pietanza guidata. Premere nel forno. Confermare za. Premere l'impostazione. 6.5 Cottura guidata Legenda Peso automatico disponibile. Preriscaldare il forno prima di iniziare a cucinare.
Seite 81
UTILIZZO QUOTIDIANO Piatto Peso Livello / Accessorio ripiano Durata Roast beef, al sangue (cottu‐ 75 min ra lenta) 2; lamiera dolci Roast beef, 1 - 1,5 kg; Utilizzare le spezie preferite o il semplice cottura media pezzi spessi 85 min pepe macinato.
Seite 82
UTILIZZO QUOTIDIANO Piatto Peso Livello / Accessorio ripiano Durata Costolette di 2 - 3 kg; uti‐ 90 min 3; leccarda maiale lizzare pun‐ Aggiungere il liquido per coprire il fondo tine crude, 2 di un piatto. Girare la carne a metà cottu‐ - 3 cm Agnello Cosciotto d'a‐...
Seite 83
UTILIZZO QUOTIDIANO Piatto Peso Livello / Accessorio ripiano Durata Altro Polpettone 1 kg 60 min 2; ripiano a filo Utilizzare le spezie preferite. Pesce Pesce intero, 0,5 - 1 kg 30 min 2 lamiera dolci grigliato per pesce Farcire il pesce con burro e utilizzare spezie ed erbe preferite.
Seite 84
UTILIZZO QUOTIDIANO Piatto Peso Livello / Accessorio ripiano Durata Spicchi 1 kg 35 min 3 lamiera dolci rivestita con carta da forno Utilizzare le spezie preferite. Tagliare le patate a pezzi. Verdure miste 1 - 1,5 kg 30 min 3 lamiera dolci rivestita con carta da grigliate forno Utilizzare le spezie preferite.
FUNZIONI DEL TIMER Piatto Peso Livello / Accessorio ripiano Durata Impasto per 1 kg 60 min 2; lamiera dolci rivestita con car‐ pane integra‐ ta da forno/ ripiano a filo le / pane di segale /pane nero in uno stampo per pane 7.
Seite 86
FUNZIONI DEL TIMER Come impostare: Contaminuti Passaggio 1 Passaggio 2 Passaggio 3 Il display vi‐ sualizza: 0:00 Imposta Contaminuti Premere: Premere: Il timer inizia subito il conto alla rovescia. Come impostare: Tempo di cottura Passaggio 1 Passaggio 2 Passaggio 3 Passaggio 4 Il display vi‐...
FUNZIONI AGGIUNTIVE Lamiera dolci: Spingere la lamiera tra le guide del sup‐ porto ripiano. 9. FUNZIONI AGGIUNTIVE 9.1 Blocco Questa funzione evita che si cambi per sbaglio la funzione dell’apparecchiatura. Attivarla quando l’apparecchiatura è in funzione: la cottura impostata continua, il pannello dei co‐ mandi è...
CONSIGLI E SUGGERIMENTI UTILI Lo spegnimento automatico non funziona con le funzioni: Luce forno, Ritardo. 9.3 Ventola di raffreddamento Quando l’apparecchiatura è in funzione, la ventola di raffreddamento si attiva in modo automatico per raffreddare le superfici. Dopo aver spento l’apparecchiatura, la ventola di raffreddamento continua a funzionare finché...
CONSIGLI E SUGGERIMENTI UTILI Pirofile mo‐ noporzione Teglia da pizza Pirofila Tortiera per flan Ceramica Scura, non riflettente Scura, non riflettente Scura, non riflettente diametro 8 cm, 28 cm di diametro 26 cm di diametro 28 cm di diametro altezza 5 cm 10.3 Tabelle di cottura per gli istituti di test Informazioni per gli istituti di prova Test conformemente a: EN 60350, IEC 60350.
Seite 91
CONSIGLI E SUGGERIMENTI UTILI COTTURA SU UN LIVELLO Biscotti Utilizzare la posizione del terzo ripiano. (°C) (min) Frollini al burro / Strisce di Cottura ventilata 25 - 40 pasta Frollini al burro / Strisce di Cottura convenzionale 20 - 30 pasta, preriscaldare il forno vuoto Tortine, 20 per teglia, preri‐...
PULIZIA E CURA GRILL Preriscaldare il forno vuoto per 5 minuti. Grigliare con l'impostazione di temperatura massima. (min) Toast Grill 1 - 3 Manzo, bistecca, girare il piat‐ Grill 24 - 30 to a metà cottura 11. PULIZIA E CURA AVVERTENZA! Fare riferimento ai capitoli sulla sicurezza.
PULIZIA E CURA Pulire tutti gli accessori dopo ogni utilizzo e lasciarli asciugare. Utilizzare solo un panno in microfibra imbevuto di acqua tiepida e un detergente delicato. Non pulire gli accessori in lavastoviglie. Non pulire gli accessori anti-aderenti con agenti abrasivi o oggetti appuntiti. Accessori 11.2 Come rimuovere: Supporti del ripiano Rimuovere i supporti ripiano per pulire il forno.
Seite 94
PULIZIA E CURA Pas‐ Aprire completamente la por‐ saggio Pas‐ Sollevare e premere le leve di saggio serraggio (A) sulle due cer‐ niere. Pas‐ Chiudere la porta del forno fino alla prima posizione di apertura (un angolo di circa saggio 70°).
RISOLUZIONE DEI PROBLEMI 11.4 Come sostituire: Lampadina AVVERTENZA! Pericolo di scosse elettriche. La lampada potrebbe essere calda. Prima di sostituire la lampadina: Passagio 1 Passagio 2 Passagio 3 Spegnere il forno. Attendere Estrarre la spina dalla presa di Appoggiare un panno sul fon‐ che il forno sia freddo.
RISOLUZIONE DEI PROBLEMI Il forno non si accende o non riscalda Problema Controllare se... Non è possibile attivare il forno o metterlo in Il forno è stato collegato correttamente all’ali‐ funzione. mentazione di rete. Il forno non scalda. Lo spegnimento automatico è disattivo. Il forno non scalda.
......... Numero di serie (S.N.) ......... 13. EFFICIENZA ENERGETICA 13.1 Informazioni sul prodotto e scheda informativa sul prodotto Nome del fornitore Electrolux EB6L40CN 944271561 Identificazione modello EB6L40SW 944271572 EB6L40WE 944271562 Indice di efficienza energetica 81.2 Classe di efficienza energetica Consumo energetico con carico standard, modalità tradi‐...
STRUTTURA DEL MENU 13.2 Risparmio energetico L'apparecchiatura ha di funzioni che consentono di aiutarvi a risparmiare energia durante le operazioni di cottura di tutti i giorni. Assicurarsi che la porta dell'apparecchiatura sia chiusa quando l'apparecchiatura è in funzione. Non aprire troppo spesso la porta durante la cottura. Tenere pulita la guarnizione della porta e assicurarsi che sia ben fissata nella posizione corretta.
STRUTTURA DEL MENU Servizio dopo vendita Morgenstrasse 131 3018 Bern Langgasse 10 9008 St. Gallen Am Mattenhof 4a/b 6010 Kriens Schlossstrasse 1 4133 Pratteln Comercialstrasse 19 7000 Chur Vendita pezzi di ricambio Industriestrasse 10, 5506 Mägenwil,Tel. 0848 848 111 Consulenza specialistica/Vendita Badenerstrasse 587, 8048 Zürich, Tel. 044 405 81 11 Garanzia Per ogni prodotto concediamo una garanzia di 2 anni a partire dalla data di consegna o dalla sua messa in funzione.
Seite 101
CONTENTS WE’RE THINKING OF YOU Thank you for purchasing an Electrolux appliance. You’ve chosen a product that brings with it decades of professional experience and innovation. Ingenious and stylish, it has been designed with you in mind. So whenever you use it, you can be safe in the knowledge that you’ll get great results every time.
SAFETY INFORMATION 6. DAILY USE..........110 10.3 Cooking tables for test institutes121 6.1 How to set: Heating functions..110 11. CARE AND CLEANING......123 6.2 Heating functions......110 11.1 Notes on cleaning...... 123 6.3 Notes on: Moist Fan Baking..111 11.2 How to remove: Shelf supports .124 6.4 How to set: Assisted Cooking..
SAFETY INFORMATION Children should be supervised to ensure that they do not • play with the appliance. Keep all packaging away from children and dispose of it • appropriately. WARNING: The appliance and its accessible parts become • hot during use. Keep children and pets away from the appliance when in use and when cooling down.
SAFETY INSTRUCTIONS WARNING: The appliance and its accessible parts become • hot during use. Care should be taken to avoid touching heating elements or the surface of the appliance cavity. Always use oven gloves to remove or insert accessories or •...
SAFETY INSTRUCTIONS Width of the front of the appliance 596 mm Width of the back of the appliance 560 mm Depth of the appliance 567 mm Built in depth of the appliance 546 mm Depth with open door 1027 mm Ventilation opening minimum size.
SAFETY INSTRUCTIONS • Do not change the specification of this appliance. • Make sure that the ventilation openings are not blocked. • Do not let the appliance stay unattended during operation. • Deactivate the appliance after each use. • Be careful when you open the appliance door while the appliance is in operation. Hot air can release.
PRODUCT DESCRIPTION 2.5 Internal lighting WARNING! Risk of electric shock. • Concerning the lamp(s) inside this product and spare part lamps sold separately: These lamps are intended to withstand extreme physical conditions in household appliances, such as temperature, vibration, humidity, or are intended to signal information about the operational status of the appliance.
CONTROL PANEL 3.2 Accessories Wire shelf For cookware, cake tins, roasts. Baking tray For cakes and biscuits. 4. CONTROL PANEL 4.1 Retractable knobs To use the appliance press the knob. The knob comes out. 4.2 Control panel sensor fields Fast Confirm Timer Light...
BEFORE FIRST USE Display in‐ Lock Assisted Cook‐ Settings Fast Heat Up dicators: Timer indi‐ cators: Progress bar - for temperature or time. The bar is fully red when the oven reaches the set tempera‐ ture. 5. BEFORE FIRST USE WARNING! Refer to Safety chapters.
DAILY USE 6. DAILY USE WARNING! Refer to Safety chapters. 6.1 How to set: Heating functions Step 1 Step 2 Set the temperature. Select a heating function. Press - press and hold to turn on the function: Fast Heat Up. It is available for some oven functions. 6.2 Heating functions Standard heating functions Heating function...
DAILY USE Heating function Application To bake cakes with crispy bottom and to preserve food. Bottom Heat To defrost food (vegetables and fruit). The defrosting time depends on the amount and size of the frozen food. Defrost This function is designed to save energy during cooking. When you use this function, the temperature in the cavity may differ from the set temper‐...
DAILY USE Assisted Cooking - use it to prepare a dish quickly with default settings: Step 1 Step 2 Step 3 Step 4 P1 - P45 Enter the menu. Select Assisted Select the dish. Press Insert the dish to the oven.
Seite 113
DAILY USE Dish Weight Shelf level / Accessory Duration time Beef roast / 1,5 - 2 kg 120 min 2; roasting dish on wire shelf braised (prime Fry the meat for a few minutes on a hot rib, top round, pan.
Seite 114
DAILY USE Dish Weight Shelf level / Accessory Duration time Loin, fresh 1 - 1,5 kg; 5 55 min 2; roasting dish on wire shelf - 6 cm thick Use your favourite spices. pieces Spare Ribs 2 - 3 kg; use 90 min 3;...
Seite 115
DAILY USE Dish Weight Shelf level / Accessory Duration time Goose, whole 4 - 5 kg 110 min 2; deep pan Use your favourite spices. Put the meat on deep baking tray. Turn the goose af‐ ter half of the cooking time. Other Meat loaf 1 kg...
Seite 116
DAILY USE Dish Weight Shelf level / Accessory Duration time Baked pota‐ 1 kg 50 min 2; baking tray toes Put the whole potatoes with skin on bak‐ ing tray. Wegdes 1 kg 35 min 3; baking tray lined with baking pa‐ Use your favourite spices.
CLOCK FUNCTIONS Dish Weight Shelf level / Accessory Duration time Baguette / 0,8 kg 30 min 3; baking tray lined with baking Ciabatta / paper White bread More time needed for white bread. All grain / 1 kg 60 min 2;...
Seite 118
CLOCK FUNCTIONS How to set: Minute minder Step 1 Step 2 Step 3 The display shows: 0:00 Set the Minute minder Press: Press: Timer starts counting down immediately. How to set: Cooking time Step 1 Step 2 Step 3 Step 4 The display shows: 0:00...
HOW TO USE: ACCESSORIES 8. HOW TO USE: ACCESSORIES 8.1 Inserting accessories A small indentation at the top increases safety. The indentations are also anti-tip devices. The high rim around the shelf prevents cookware from slipping of the shelf. Wire shelf: Push the shelf between the guide bars of the shelf support.
HINTS AND TIPS 9.2 Automatic switch-off For safety reasons the oven turns off after some time, if a heating function works and you do not change any settings. (°C) 30 - 115 12.5 120 - 195 200 - 245 250 - maximum The Automatic switch-off does not work with the functions: Light, Time Delay.
HINTS AND TIPS (°C) (min) Apple cake, made of sponge cake mixture 160 - 170 70 - 80 (round cake tin) White bread 190 - 200 55 - 70 10.2 Moist Fan Baking - recommended accessories Use the dark and non-reflective tins and containers. They have better heat absorption than the light colour and reflective dishes.
Seite 122
HINTS AND TIPS BAKING ON ONE LEVEL. Baking in tins (°C) (min) Apple pie, 2 tins Ø20 cm Conventional Cook‐ 70 - 90 BAKING ON ONE LEVEL. Biscuits Use the third shelf position. (°C) (min) Short bread / Pastry strips True Fan Cooking 25 - 40 Short bread / Pastry strips,...
CARE AND CLEANING Clean the cavity after each use. Fat accumulation or other residue may cause fire. Do not store the food in the appliance for longer than 20 minutes. Dry the cavity only with a microfibre cloth after each use. Everyday Use Clean all accessories after each use and let them dry.
CARE AND CLEANING Step 1 Fully open the door. Step 2 Lift and press the clamping levers (A) on the two door hinges. Step 3 Close the oven door to the first opening position (approximately 70° angle). Hold the door at both sides and pull it away from the oven at an upwards angle. Put the door with the outer side down on a soft cloth on a stable surface.
TROUBLESHOOTING Before you replace the lamp: Step 1 Step 2 Step 3 Turn off the oven. Wait until Disconnect the oven from the Put a cloth on the bottom of the oven is cold. mains. the cavity. Top lamp Step 1 Turn the glass cover to remove it.
Do not remove the rating plate from the appliance cavity. We recommend that you write the data here: Model (MOD.) ......... Product number (PNC) ......... Serial number (S.N.) ......... 13. ENERGY EFFICIENCY 13.1 Product Information and Product Information Sheet Supplier's name Electrolux 127/132...
ENERGY EFFICIENCY EB6L40CN 944271561 Model identification EB6L40SW 944271572 EB6L40WE 944271562 Energy Efficiency Index 81.2 Energy efficiency class Energy consumption with a standard load, conventional 1.09 kWh/cycle mode Energy consumption with a standard load, fan-forced 0.69 kWh/cycle mode Number of cavities...
MENU STRUCTURE When the cooking duration is longer than 30 min, reduce the appliance temperature to minimum 3 - 10 min before the end of cooking. The residual heat inside the appliance will continue to cook. Use the residual heat to warm up other dishes. Keep food warm Choose the lowest possible temperature setting to use residual heat and keep a meal warm.
MENU STRUCTURE Settings Uptimer On / Off Light On / Off Fast Heat Up On / Off Demo mode Activation code: 2468 Software version Check Reset all settings Yes / No GUARANTEE Customer Service Centres Point of Service Industriestrasse 10 Le Trési 6 Via Violino 11 5506 Mägenwil...
Seite 131
appliances. Do not dispose of appliances marked with the symbol with the household waste. Return the product to your local recycling facility or contact your municipal office. For Switzerland: Where should you take your old equipment? Anywhere that sells new equipment or hand it in to official SENS collection points or official SENS recycling firms.