Herunterladen Inhalt Inhalt Diese Seite drucken
Pelgrim RSK595 Anleitung
Vorschau ausblenden Andere Handbücher für RSK595:

Werbung

Verfügbare Sprachen

Verfügbare Sprachen

All manuals and user guides at all-guides.com
RSK595
RSK986
RSK975
RSK981
RSK990
RSK995
RSK999
manual
handleiding - notice d'utilisation - anleitung

Werbung

Inhaltsverzeichnis
loading

Inhaltszusammenfassung für Pelgrim RSK595

  • Seite 1 All manuals and user guides at all-guides.com RSK595 RSK986 RSK975 RSK981 RSK990 RSK995 RSK999 manual handleiding - notice d'utilisation - anleitung...
  • Seite 2: Inhaltsverzeichnis

    All manuals and user guides at all-guides.com inhoud inhoud uw schouwkap handleiding ..........3 – 15 beschrijving .
  • Seite 3: Beschrijving

    All manuals and user guides at all-guides.com uw schouwkap uw schouwkap RSK595 / RSK986 Inleiding Als u deze gebruiksaanwijzing doorleest, bent u snel op de hoogte van alle mogelijkheden die dit toestel u biedt. U vindt informatie voor uw veiligheid en over het onderhoud van het toestel.
  • Seite 4: Waar U Op Moet Letten

    All manuals and user guides at all-guides.com veiligheid gebruik Waar u op moet letten Bediening (RSK595 / RSK986) ■ Laat het toestel aansluiten door een erkend installateur (zie hoofdstuk "Installatie"). Het verwijderen van de panelen dient te gebeuren door ze recht naar ■...
  • Seite 5: Panelen Verwijderen

    All manuals and user guides at all-guides.com gebruik onderhoud Panelen verwijderen Intensiefstand U kunt de afzuigkap tijdelijk in de hoogste stand inschakelen, bijvoorbeeld om snel de geur af te voeren als er iets aangebrand is. Trek de panelen rechtstandig naar beneden uit de vier houders.
  • Seite 6: Lampen Vervangen

    De aansluitpijp van de schouwkap heeft een diameter van 150 mm ■ worden. Plaats de panelen met de openingen naar beneden in de (RSK975/RSK986/RSK981/RSK990/RSK995/RSK999) of 125 mm (RSK595). Het vaatwasmachine zodat het water eruit kan lopen. beste is de afvoerpijp ook met deze diameter uit te voeren.
  • Seite 7: Montage Van De Schouwkap

    All manuals and user guides at all-guides.com installatie installatie Montage van de schouwkap (RSK986 / RSK975) Montage van de schouwkap (RSK981/RSK990/RSK995/RSK999) ■ Bepaal eerst plaats en afstand met betrekking tot de ophangbeugels. Teken de te boren gaten af op de ■...
  • Seite 8: Technische Gegevens

    All manuals and user guides at all-guides.com installatie installatie Montage van de schouwkap (RSK595) Afvoeren verpakking en toestel ■ Bepaal eerst plaats en afstand met De verpakking van het toestel is recyclebaar. Gebruikt zijn: betrekking tot de ophangbeugels. – karton Teken de te boren gaten af op de –...
  • Seite 9 All manuals and user guides at all-guides.com contents your canopy hood description ..........18 introduction .
  • Seite 10: Your Canopy Hood

    All manuals and user guides at all-guides.com your canopy hood your canopy hood RSK595 / RSK986 Introduction When you have read these instructions for use, you will quickly be aware of all the facilities the appliance can offer you. You can read about safety and how you should look after the appliance.
  • Seite 11: Precautions You Must Take

    All manuals and user guides at all-guides.com safety Precautions you must take Controls (RSK595/RSK986) ■ Have the appliance connected by a qualified fitter (see section "Installation"). ■ The panels can be removed by pulling them directly downwards. Use both hands for this purpose.
  • Seite 12: Removing Panels

    All manuals and user guides at all-guides.com maintenance Removing panels Intensive setting You can temporarily switch the extractor hood to the highest setting – in order, for example, to remove the odour quickly if something has burned. Pull the panels straight downwards out of the clips.
  • Seite 13: Changing The Light Bulbs

    ■ The connecting pipe for the extractor hood has a diameter of 150 mm (RSK975/RSK986/RSK981/RSK990/RSK995/RSK999) or 125 mm (RSK595). It is Metal panels best also to use a flue pipe of the same diameter.
  • Seite 14: Mounting The Canopy Hood

    All manuals and user guides at all-guides.com installation Mounting the canopy hood (RSK986/RSK975) Mounting the canopy hood (RSK981/RSK990/RSK995/RSK999) ■ First determine the position and distance with regard to the First determine the position and ■ mounting brackets. Mark the holes distance with regard to the that must be drilled and drill the mounting brackets.
  • Seite 15: Technical Specifications

    All manuals and user guides at all-guides.com installation installation Mounting the canopy hood (RSK595) Disposal of packaging and appliance ■ First determine the position and The packaging of the appliance is recyclable. It is made up off: distance with regard to the –...
  • Seite 16 All manuals and user guides at all-guides.com contenu votre hotte cheminée description ..........32 introduction .
  • Seite 17: Votre Hotte Cheminée

    All manuals and user guides at all-guides.com votre hotte cheminée votre hotte cheminée RSK595 / RSK986 Introduction Ce manuel est un aperçu des possibilités offertes par cet appareil. Il vous fournira des renseignements précieux sur le plan de la sécurité.
  • Seite 18: Recommandations

    All manuals and user guides at all-guides.com sécurité utilisation Recommandations Commande (RSK595 / RSK986) ■ Faites raccorder votre appareil par un installateur agréé (voir chapitre "Installation"). L'élimination des panneaux doit se produire en les tirant droit vers le bas. ■...
  • Seite 19: Elimination Des Panneaux

    All manuals and user guides at all-guides.com utilisation entretien Elimination des panneaux Position intensité Vous pouvez enclencher temporairement la hotte sur la position la plus élevée, par exemple, pour évacuer rapidement des odeurs de brûlé. Enlevez les panneaux des quatre supports en les tirant verticalement vers le bas.
  • Seite 20: Changement D'ampoules

    ■ Le tuyau de connexion a un diamètre de 150 mm permettre à l'eau de s'écouler. (RSK975/RSK986/RSK981/RSK990/RSK995/RSK999) ou de 125 mm (RSK595). Il est conseillé d'utiliser aussi ces diamètres pour le tube de connexion. Panneaux en verre Les panneaux en verre ne doivent pas être nettoyés dans le lave-vaisselle pour ■...
  • Seite 21: Montage De La Hotte Cheminée

    All manuals and user guides at all-guides.com installation Montage de la hotte cheminée (RSK986 / RSK975) Montage de la hotte cheminée (RSK981/RSK990/RSK995/RSK999) ■ Déterminer d'abord l'endroit où la cheminée doit être fixée et l'espace Déterminer d'abord l'endroit où la ■ à...
  • Seite 22: Fiche Technique

    All manuals and user guides at all-guides.com installation installation Montage de la hotte cheminée (RSK595) Élimination de l’emballage et appareil ■ Déterminer d'abord l'endroit où la L’emballage de l’appareil est recyclable. cheminée doit être fixée et l'espace Il contient : à...
  • Seite 23 All manuals and user guides at all-guides.com Inhalt Ihre Haube Beschreibung ..........46 Einleitung .
  • Seite 24: Ihre Haube

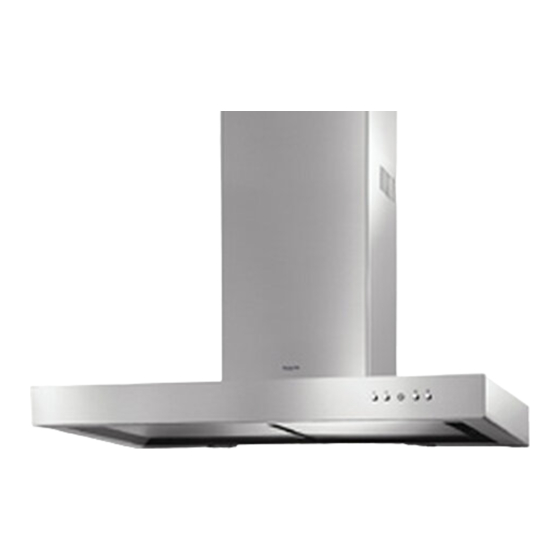
    All manuals and user guides at all-guides.com Ihre Haube Ihre Haube RSK595 / RSK986 Einleitung Wenn Sie diese Gebrauchsanleitung lesen, sind Sie rasch über alle Möglichkeiten informiert, die dieses Gerät Ihnen bieten kann. Sie können sich über Sicherheit und Pflege des Gerätes informieren.
  • Seite 25: Sicherheit

    All manuals and user guides at all-guides.com Sicherheit Gebrauch Worauf Sie achten müssen Bedienung (RSK595 / RSK986) ■ Lassen Sie das Gerät durch einen anerkannten Installateur anschließen. (Siehe Kapitel "Installation"). Entfernen Sie die Blenden, indem Sie diese mit beiden Händen senkrecht ■...
  • Seite 26: Pflege

    All manuals and user guides at all-guides.com Gebrauch Pflege Blenden entfernen Intensivstufe Sie können die Dunstabzugshaube vorübergehend auf die höchste Stufe einschalten, z.B. um den Geruch schnell abzusaugen, wenn etwas Ziehen Sie die Blenden mit beiden Händen aus angebrannt ist. den vier Halterungen senkrecht nach unten.
  • Seite 27: Lampen Auswechseln

    Das Anschlussrohr der Kaminhaube hat einen Durchmesser von 150 mm ■ Die Blenden können im Geschirrspüler gereinigt werden. Setzen Sie die (RSK975/RSK986/RSK981/RSK990/RSK995/RSK9899) oder 125 mm (RSK595). Blenden mit den Öffnungen nach unten in den Geschirrspüler, so dass das Es empfiehlt sich, das Abluftrohr auch mit diesem Durchmesser auszuführen.
  • Seite 28: Montage Der Haube

    All manuals and user guides at all-guides.com Installation Montage der Haube (RSK986 / RSK975) Montage der Haube (RSK981/RSK990/RSK995/RSK999) Bestimmen Sie erst die Stelle und ■ den Abstand für die ■ Bestimmen Sie erst die Stelle und Befestigungsbügel. Zeichnen Sie die den Abstand für die Löcher für die Befestigungsbügel ab Befestigungsbügel.
  • Seite 29: Montage Der Haube (Rsk595)

    All manuals and user guides at all-guides.com Installation Installation Montage der Haube (RSK595) Beseitigung von Verpackung und Gerät Die Verpackung des Geräts ist recycelbar. Als Verpackungsmaterial werden Bestimmen Sie erst die Stelle und gebraucht: ■ den Abstand für die – Karton Befestigungsbügel.

Diese Anleitung auch für:

Rsk986Rsk975Rsk981Rsk990Rsk995Rsk999

Inhaltsverzeichnis