
Verwandte Anleitungen für Sagem PHOTO EASY 155


Inhaltszusammenfassung für Sagem PHOTO EASY 155
- Seite 1 SAGEM PHOTO EASY 155 User guide Livret d’utilisation Bedienungsanleitung Manual del usuario Manuale dell'utente Gebruiksaanwijzing...
-
Seite 2: Inhaltsverzeichnis
ELCOME 155 P ISCOVER HOTO RINTER 155 P REPARE HOTO RINTER Connect the mains supply First ribbon installation To change the ribbon Loading paper RINTING FROM A MEMORY CARD Insert a memory card SER INTERFACE Print your photographs Rapid printing Example of rapid printing from a memory card Create a contact sheet (index) Prepare a series of photographs for printing (shopping... - Seite 3 - II -...
-
Seite 4: Welcome
ELCOME You have just acquired a SAGEM PHOTO EASY 155 printer, and we thank you for choosing our product. With this high quality printer you can get the most out of your digital photos. In a few simple steps you can produce photo prints identical to those from a professional developer, for your personal use or to share with friends and family. -
Seite 5: Discover Your Photo Easy
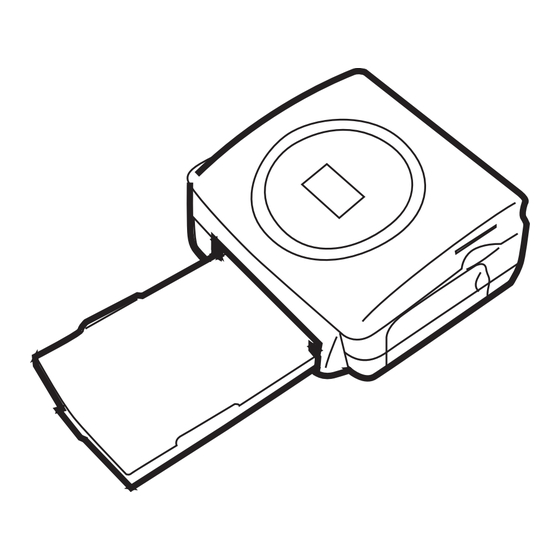
HOTO RINTER Place the box in front of you, open the packaging and check that you have received the items listed below: PHOTO EASY 155 printer User manual CD-ROM with its applications Film cartridge * Photo paper (2 packs of 20 sheets)*... -
Seite 6: Easy 155 Printer
Your printer features a SCSI Mass storage master USB connector (A) and a slave USB connector (B). The latter is used for connection with a master terminal (PC, etc.). Remarque To obtain the list of devices compatible with this USB port (A), visit the site www.sagem.com. - 3 -... -
Seite 7: First Ribbon Installation
IRST RIBBON INSTALLATION Remarque Use DSR400 or DSR400T consumables only. These are specially designed to provide you with optimum print rendering. Switch on the printer. Wait 10 seconds for the printhead to lift, then: 1. Open the external flap located on the right-hand side of the printer. 2. -
Seite 8: To Change The Ribbon
O CHANGE THE RIBBON Remarque Use DSR400 or DSR400T consumables only. These are specially designed to provide you with optimum print rendering. For this purpose, the printer must read the chip card delivered with each consumable kit after any new kit installation. -
Seite 9: Loading Paper
Your SAGEM PHOTO EASY 155 printer is now ready to print your digital photographs. Warning - protect consumable items against prolonged exposure to light, humidly, heat and dust. -
Seite 10: Rinting From A Memory Card
RINTING FROM A MEMORY CARD Your SAGEM PHOTO EASY 155 printer is designed to be used with or without a computer. This chapter describes printer operation without a computer. Refer to the technical data table at the end of thi user manual to check whether your memory card is compatible with the printer. - Seite 11 Warning - Printing of picture by ascending order relatively to the date of the pictures on the memory board will be achieved if parameters "dates and hour" have been set on your camera before the catch of pictures. Otherwise pictures will be read and printed in a random order. Card Slot Location...
-
Seite 12: User Interface
SER INTERFACE 1 - Add a selection to the shopping trolley 2 - Select the number of copies per photograph (between 1 and 20) 3 - Go to the previous photograph number (…, 3, 2, 1) 4 - Start printing 5 - Go to the next photograph number (1, 2, 3…) 6 - Select the print format 7 - Cancel... -
Seite 13: Print Your Photographs
RINT YOUR PHOTOGRAPHS Your printer is switched on, and you have inserted a memory card, or you have transferred photographs from a GSM mobile phone camera using the IR (infrared) link (or Bluetooth optional equipment). The green light blinks while data are being transferred to the printer. After a few seconds, the number of photographs found on the memory card or in the digital camera, or transferred from the GSM mobile phone camera, is displayed on the screen. -
Seite 14: Example Of Rapid Printing From A Memory Card
• Print 20 photographs per page (contact sheet or index) Once the selection is made, press the key to start printing. If printing is interrupted due to a lack of paper, paper jam or empty film cartridge, the printing operation may be restarted where it was interrupted by pressing the after the necessary replacement or defect correction is performed. - Seite 15 Select photograph 3, using the key. Press the key until the figure 4 is displayed (that is 4 copies). Press the key until the 4 images/page graphic is selected. The figure 1 should be displayed as the number of sheets necessary for the printing operation. Press the key to start printing.
-
Seite 16: Create A Contact Sheet (Index)
REATE A CONTACT SHEET INDEX After inserting the memory card, the number of valid photos is displayed on the screen.. Press the key until ALL is displayed on screen. Select the format photographs per sheet format using the key. In the example provided above, 2 sheets will be necessary to print 23 photographs. Press the he key to initiate printing. -
Seite 17: Prepare A Series Of Photographs For Printing (Shopping Trolley Mode)
REPARE A SERIES OF PHOTOGRAPHS FOR PRINTING SHOPPING TROLLEY MODE After inserting the memory card, the number of valid photos is displayed on the screen.. This example describes how to print 4 copies of photograph 3, 1 copy of photograph 8 and 2 copies of photograph 16. - Seite 18 Select photograph 8, using the key, press key to add this to the shopping trolley (the default number of copies is 1). Select photograph 16, using the key, press key until the figure 2, corresponding to the desired number of copies, is displayed. Press the key to add this to the shopping trolley.
-
Seite 19: Print From A Camera (Pictbrigde Mode)
RINT FROM A CAMERA RIGDE MODE Your printer PHOTO EASY 155 SAGEM supports the standard PictBrigde, it thus allows the impression of photographs starting from cameras compatible with this standard. Read the documentation of the camera to check compatibility with the PictBrigde standard and to check the connection with the printer. -
Seite 20: Print In Dpof (Digital Print Order Format) Mode
Remove the memory card from the camera and insert it into the correct slot of your SAGEM PHOTO EASY 155 printer. This starts the data transfer. The DPOF logo on the printer screen is activated and the number of printable photographs is displayed in the lower left-hand corner of the screen. -
Seite 21: Printing From Agsm Mobile Phone Camera
Photographs taken with a GSM mobile phone equipped with a camera can be printed on the SAGEM PHOTO EASY 155 printer. To do this, the photographs need to be transferred to the printer via an IR (infrared) link between the 2 devices. -
Seite 22: Print Starting From A Bluetooth Peripheral (Optional)
After all photographs transferred from your GSM mobile phone camera have been printed, the SAGEM PHOTO EASY 155 printer screen displays the information that was on the screen just before you started the print job. - Seite 23 600 Kbytes. The photo format required is the JPEG format. An error message "Err 75" will be displayed when the maximum storage capacity is reached. To transfer new data to the SAGEM PHOTO EASY-155 printer, you must clear the memory. To do this, press and hold the key for some time The message "...
-
Seite 24: Print From A Pc (Personal Computer)
USB port available. Install the software The SAGEM PHOTO EASY 155 software is installed in three steps: running the Install program, restarting the computer, and performing the final printer installation. Do not connect the printer to the PC before installing the printer driver. After you have installed the software, a message will be displayed asking you to restart the PC. - Seite 25 Connect the USB cable to a USB port on your PC. Connect the other end of the USB cable on the SAGEM PHOTO EASY-155 printer to the USB port (B).
-
Seite 26: Replacement Of Consumables
The consumable items used with the SAGEM PHOTO EASY 155 printer (film cartridge, paper) are SAGEM (PLC) brand products. Consumables may be purchased in all big stores in the photography or printer sections but also on out internet site www.sagem.com or by using the consumables order form supplied with your printer. -
Seite 27: Maintenance
AINTENANCE LEANING THE PRINT HEAD Continuous lines across the length of your photographs may be caused by dirt particles stuck to the printhead. You will need a methylated alcohol based cleaning product and some off-the-shelf cotton tips ("Q-tips"). Switch off your printer, disconnect the main cables and wait for five minutes; since the print head operates at a high temperature, there is a risk of burning if you touch it. -
Seite 28: Paper Jam
APER JAM Follow this procedure if a sheet becomes stuck in the printer and cannot simply be pulled out: Switch off your printer by pressing " O " on the switch behind the printer and disconnect the mains cable . Turn the printer upside down. -
Seite 29: Problems
ROBLEMS Remark: The printer is fitted with an automatic time-out to prevent overheating, this can be tripped when performing large print jobs. The printer automatically restarts the current print job as soon as the temperature drops back to nor- mal. ROBLEMS OLUTIONS •... -
Seite 30: Error Messages
RROR MESSAGES After any intervention on your printer, do not forget to press the key to restart the current print job. Error Icon Error Description Action displayed displayed Type Check that the paper has been correctly inserted Err 01 Paper No paper in the loading tray. - Seite 31 Error Icon Error Description Action displayed displayed Type Authorized The authorized print quantity has been reached. Err 81 SIM card print quantity Replace the consumable. reached Err 82: Card illegible Err 83: Card unknown Err 82 Err 84: Mechanical problem Card illegible or SIM card Err 85: Ribbon problem...
-
Seite 32: Technical Data
1.5 kg (except power supply unit) Power consumption in standby: 7,6 W in print mode: 70 W All data are provided for reference purposes only. SAGEM (PLC) reserves the right to make any changes without prior notice. - 29 -... -
Seite 33: Garantee
In the cases set forth in § B) as well as after expiry of the twelve month guarantee period, the customer must ask SAGEM for an estimate, and he/she must accept the estimate and agree to pay the charges mentioned in it before returning the equipment to SAGEM. - Seite 34 IENVENUE ÉCOUVREZ OTRE MPRIMANTE HOTO RÉPAREZ OTRE MPRIMANTE HOTO Alimentation secteur Première installation du ruban Changez le ruban Chargement du papier MPRIMEZ DEPUIS UNE CARTE MÉMOIRE Insérez une carte mémoire NTERFACE UTILISATEUR Imprimez vos photos Impression rapide Exemple d'impression rapide depuis une carte mémoire Créez une planche contact (index) Préparez une série photos pour l'impression (mode panier)
- Seite 35 - II -...
-
Seite 36: Bienvenue
Recommandations et consignes de sécurité • Ne pas installer votre imprimante PHOTO EASY 155 SAGEM ni dans une pièce humide (salle d'eau, salle de bain, buanderie, cuisine, etc..) à moins de 1,50 m d'un point d'eau ni en extérieur. -
Seite 37: Écouvrez Otre Mprimante Hoto Easy
OTRE MPRIMANTE HOTO Placez votre coffret devant vous, ouvrez l'emballage et vérifiez que les éléments présentés ci-dessous s'y trouvent : Imprimante PHOTO EASY 155 Livret d'utilisation CD ROM avec ses applications Ruban * Papier photo (2 paquets de 20 feuilles)*... -
Seite 38: Réparez Votre Imprimante Photo Easy
Votre imprimante possède un connecteur USB maître Mass storage SCSI (A) et un connecteur USB esclave (B), ce dernier permet de réaliser une liaison vers un terminal maître (PC, ...). Remarque Pour connaître la liste des périphériques compatibles avec ce port USB (A) consulter le site www.sagem.com. - 3 -... -
Seite 39: Première Installation Du Ruban
REMIÈRE INSTALLATION DU RUBAN Remarque Utilisez uniquement les consommables DSR400 ou DSR400T. Ceux-ci sont spécialement conçus pour vous apporter un rendu d’impression exceptionnel. Mettez l'imprimante sous tension. Attendez 10 secondes que la tête d'impression se relève et procédez de la façon suivante : 1. -
Seite 40: Changez Le Ruban
HANGEZ LE RUBAN Remarque Utilisez uniquement les consommables DSR400 ou DSR400T. Ceux-ci sont spécialement conçus pour vous apporter un rendu d’impression optimal. A cet effet, la carte à puce, livrée avec chaque kit consommables, doit être lue par l’imprimante après toute installation d’un nouveau kit. -
Seite 41: Chargement Du Papier
Respectez les conditions d'utilisation (reportez-vous au paragraphe Caractéristiques techniques, page -29). N'utilisez que les consommables de marque SAGEM, prévus pour cette imprimante. Ne mettez qu'un paquet de 20 feuilles à la fois dans le bac papier. -
Seite 42: Mprimez Depuis Une Carte Mémoire
MPRIMEZ DEPUIS UNE CARTE MÉMOIRE Votre imprimante PHOTO EASY 155 SAGEM est prévue pour être utilisée avec ou sans ordinateur. Dans ce chapitre nous décrivons l'utilisation de l'imprimante sans ordinateur. Consultez le tableau des caractéristiques techniques en fin de livret utilisation pour connaître la compatibilité... - Seite 43 Attention - Pour réaliser une impression dans l’ordre croissant des photos présentes sur la carte mémoire, les paramètres "date et heure" doivent être réglés sur votre appareil avant la prise de photo. Si ce n’est pas le cas les photos seront lues et imprimées dans un ordre aléatoire. Carte Fente Représentation...
-
Seite 44: Nterface Utilisateur
NTERFACE UTILISATEUR 1 - Ajoute la sélection dans le panier (chariot) 2 - Sélectionne le nombre de copies par photo (de 1 à 20) 3 - Va au numéro de photo précédent (…, 3, 2, 1) 4 - Lance l'impression 5 - Va au numéro de photo suivant (1, 2, 3…) 6 - Sélectionne le format d'impression 7 - Annule... -
Seite 45: Imprimez Vos Photos
MPRIMEZ VOS PHOTOS Votre imprimante est sous tension, vous avez installé une carte mémoire, ou vous avez transféré des photos depuis un GSM photo en utilisant la liaison sans fil infrarouge (ou Bluetooth équipement optionnel). La LED verte clignote pendant que l'imprimante charge les données. Après quelques secondes, le nombre de photos lues sur la carte mémoire, l'appareil photo numérique ou transférées depuis le GSM photo est affiché... -
Seite 46: Exemple Dimpression Rapide Depuis
• Imprimez 4 photos par page • Imprimez 20 photos par page (planche contact ou d'index) En fin de sélection, appuyez sur la touche pour démarrer l'impression. Si l'impression est interrompue par un manque de papier, un bourrage papier ou un tiroir papier vide, après avoir effectué... - Seite 47 Sélectionnez la photo 3, à l'aide de la touche Appuyez sur la touche jusqu'à l'affichage du chiffre 4 (soit 4 exemplaires). Appuyez sur la touche jusqu'à l'obtention du graphisme 4 images/page. Vous devez obtenir le chiffre 1 en quantité de feuille nécessaire à l'impression. Appuyez sur la touche pour lancer l'impression.
-
Seite 48: Créez Une Planche Contact (Index)
RÉEZ UNE PLANCHE CONTACT INDEX Après introduction de la carte mémoire, la quantité de photos valides s'affiche à l'écran. Appuyez sur la touche , jusqu'à l'apparition de ALL à l'écran. Sélectionnez le format par feuille à l'aide de la touche touche Dans l'exemple illustré... -
Seite 49: Préparez Une Série Photos Pour L'impression (Mode Panier)
RÉPAREZ UNE SÉRIE PHOTOS POUR L IMPRESSION MODE PANIER Après introduction de la carte mémoire, la quantité de photos valides s'affiche à l'écran. Nous voulons imprimer la photo 3 en 4 exemplaires, la photo 8 en 1 exemplaire et la photo 16 en 2 exemplaires. - Seite 50 Sélectionnez la photo 8, à l'aide de la touche , appuyez sur la touche pour l'ajouter au panier (la quantité par défaut est 1). Sélectionnez la photo 16, à l'aide de la touche , appuyez sur la touche jusqu'à l'apparition du chiffre 2, quantité désirée. Appuyez sur la touche pour l'ajouter au panier.
-
Seite 51: Appareil Photo
MODE RIGDE Votre imprimante PHOTO EASY 155 SAGEM supporte le standard PictBrigde, elle permet donc l’impression de photos à partir d’appareils photo compatibles avec cette norme. Lisez la documentation de l’appareil photo pour vérifier la compatibilité avec la norme PictBrigde et pour vérifier le branchement avec l’imprimante. -
Seite 52: Imprimez En Mode Dpof
Placez la carte mémoire dans la fente adéquate, le transfert de données dans votre imprimante PHOTO EASY 155 SAGEM est lancé, le logo DPOF est activé sur l'écran de l'imprimante et le nombre de photos imprimables apparaît sur le côté inférieur gauche de l'écran. -
Seite 53: Imprimez À Partir D'un Gsm Photo
2 ou 4 photos par feuille. Placer votre GSM face à l'imprimante PHOTO EASY 155 SAGEM de manière à ce que les fenêtres infrarouge soient face à face et à une distance ne dépassant pas 30 centimètres. - Seite 54 A la fin de l'impression de photos transférées depuis votre GSM photo, l'écran de l'imprimante PHOTO EASY 155 affiche des informations présentes juste avant de démarrer l'impression. Vous pouvez : • Soit déclencher une nouvelle impression, après avoir éventuellement sélectionné d'autres paramètres (numéro de photo, format, nombre de copies).
-
Seite 55: Imprimez À Partir D'un Périphérique Bluetooth (Optionnel)
La reconnaissance entre les équipements est automatique. Attention - La taille de la photo ou des photos à transférer dans l’imprimante SAGEM PHOTO EASY 155 doit être inférieure à 600 Koctets. Le format de la photos doit être au format JPEG. Un message d’erreur "Err 75"... - Seite 56 Le transfert démarre et pendant toute sa durée, le message " bt " clignote sur l'écran de l'imprimante. A la fin du transfert, les informations suivantes sont affichées à l'écran : Vous pouvez : • Soit déclencher l'impression de la photo transférée, après avoir éventuellement modifié le format d'impression et le nombre de copies.
- Seite 57 Installez le logiciel L'installation du logiciel SAGEM PHOTO EASY 155 se déroule en trois phases : l'exécution du programme d'installation, le redémarrage de l'ordinateur puis l'installation finale de l'imprimante. Ne connectez pas l'imprimante au PC, avant l'installation du pilote d'impression. En fin d'installation un message vous demandera de redémarrer le PC, après le redémarrage vous...
-
Seite 58: Remplacement Des Consommables
EMPLACEMENT DES CONSOMMABLES Les consommables employés sur l'imprimante PHOTO EASY 155 SAGEM, le ruban et le papier sont des produits de marque SAGEM. Vous pouvez vous en procurer dans les magasins grand public aux rayons photos ou imprimantes, mais également sur notre site internet www.sagem.com ou utilisez le bon de commande consommables fourni avec votre... -
Seite 59: Entretien
NTRETIEN ETTOYAGE DE LA TÊTE D IMPRESSION Si vos photos présentent une marque constante sur toute la longueur de la feuille, des impuretés sont peut être collées sur la tête d'impression. Préparez un produit nettoyant à base d'alcool dénaturé et des cotons tige du commerce. Mettez votre imprimante hors tension, débranchez le cordon secteur et attendez cinq minutes, la tête d'impression étant montée à... -
Seite 60: Bourrage Papier
OURRAGE PAPIER Si une feuille est coincée dans l'imprimante et ne peut être extraite simplement de l'appareil, procédez comme suit : Mettez votre imprimante hors tension en appuyant sur le " O " de l'interrupteur situé à l'arrière de votre appareil et débranchez le cordon secteur. Retournez l'appareil pour accéder au dessous de l'imprimante. -
Seite 61: Incidents
NCIDENTS Remarque Si vous réalisez des grandes séries d'impression sur votre appareil, celui-ci est équipé d'un dispositif de tempori- sation automatique pour éviter une surchauffe de l'appareil. L'imprimante redémarre automatiquement l'impres- sion en cours dès que la température a suffisament diminuée. NCIDENTS EMÈDES •... -
Seite 62: Messages D'erreurs
’ ESSAGES D ERREURS Après chaque intervention sur votre imprimante n’oubliez pas d’appuyer sur la touche pour relancer l’impression en cours. Erreur Icone Type Désignation Action affichée affichée d’erreur Vérifiez qu'il y a du papier correctement placé Err 01 Papier Papier absent dans le bac chargeur. - Seite 63 Erreur Icone Type Désignation Action affichée affichée d’erreur Quantité Carte d’impression La quantité d’impression autorisée est atteinte. Err 81 autorisée Procédez au changement du consommable. atteinte Err 82 : Carte illisible Err 83 : Carte inconnue Err 82 Carte illisible Err 84 : Problème mécanique Carte à...
-
Seite 64: Caractéristiques Techniques
1,5 hors alimentation Consommation énergétique en mode repos : 7,6 W en mode impression : 70 W Toutes ces données vous sont fournies à titre indicatif. SAGEM se réserve le droit d'apporter toutes modifications sans aucun préavis. - 29 -... -
Seite 65: Conditions De Garantie
à ses frais le matériel défectueux à l'adresse qui lui sera indiqué par le Service Après-Vente SAGEM dont le numéro de téléphone figure sur le bordereau de livraison. En l'absence de contrat d'entretien spécifique souscrit par le client, la réparation ou l'échange ne sera en aucun cas effectué... - Seite 66 ILLKOMMEN 155 E RUCKER HOTO NTDECKEN 155 V RUCKER HOTO ORBEREITEN Netzversorgung Zum ersten Mal ein Farbband einlegen Das Band ändern Laden des Papiers UF EINER PEICHERKARTE GESPEICHERTE OTOS AUSDRUCKEN Führen Sie eine Speicherkarte ein ENUTZERSCHNITTSTELLE Ihre Fotos ausdrucken Schnelldruck Beispiel für den Schnelldruck von einer Speicherkarte aus Einen Übersichtsbogen bzw.
- Seite 67 - II -...
-
Seite 68: Willkommen
PC-Druckertreiber gibt es auf der in der Lieferung enthaltenen CD-ROM. Empfehlungen und Sicherheitsvorkehrungen • Installieren Sie Ihren Drucker PHOTO EASY 155 nicht in einem feuchten Raum (WC, Badezimmer, Waschküche, Küche usw.), weniger als 1,50 m von einer Wasserstelle entfernt oder im Außenbereich. Ihr Drucker muss bei Raumtemperatur zwischen 10 °C und 35 °C betrieben werden. -
Seite 69: Den Drucker Photo Easy 155 Entdecken
155 E RUCKER HOTO NTDECKEN Öffnen Sie die Verpackung und überprüfen Sie, ob alle nachfolgend aufgeführten Elemente vorhanden sind: 1Drucker PHOTO EASY 155 2Bedienungsanleitung 3CD-ROM mit Treiber & Anwendungen 4Farbband* 5Photopapier (2 Pakete a 20 Blatt)* 6USB-Kabel 7Papierfach 8Netzleitung 9Netzteil 10Adapter für xD Karte... -
Seite 70: Den Drucker Photo Easy 155 Vorbereiten
Ihr Drucker besitzt einen USB-Anschluss Master Massenspeicher SCSI (A) und einen USB-Slave-Anschluss (B). Mit Letzterem können Sie eine Verbindung zu einem Master-Terminal (PC, ...) herstellen. Anmerkung: Für die Liste von Peripheriegeräten, die mit diesem USB-Anschluss (A) kompatibel sind, konsultieren Sie bitte die Site www.sagem.com. - 3 -... -
Seite 71: Zum Ersten Mal Ein Farbband Einlegen
UM ERSTEN AL EIN ARBBAND EINLEGEN Anmerkung: Verwenden Sie nur das Verbrauchsmaterial DSR400 oder DSR400T. Es wurde speziell für eine optimale Druc- kleistung entwickelt. Schalten Sie den Drucker ein. Warten Sie 10 Sekunden, (bis sich der Druckkopf anhebt), und gehen Sie folgendermaßen vor: 1. -
Seite 72: Das Band Ändern
AND ÄNDERN Anmerkung: Verwenden Sie nur das Verbrauchsmaterial DSR400 oder DSR400T. Es wurde speziell für eine optimale Druckleistung entwickelt. Dazu muss die Chipkarte, die mit jedem Verbrauchsmaterial-Kit mitgeliefert wird, vor jeder Installation eines neuen Kits vom Drucker eingelesen werden. Schalten Sie den Drucker ein. Warten Sie 10 Sekunden, (bis sich der Druckkopf anhebt), und gehen Sie folgendermaßen vor: 1. -
Seite 73: Laden Des Papiers
Feuchtigkeit, Hitze und Staub. Halten Sie die im Abschnitt (siehe Abschnitt Technische Daten, Seite -29). angegebenen Verwendungsbedingungen ein. Verwenden Sie nur Verbrauchsmaterialien der Marke SAGEM, die für diesen Drucker vorgesehen sind. Legen Sie immer nur jeweils ein Paket mit 20 Bögen des Fotopapiers in das Papierfach ein. -
Seite 74: Uf Einer Peicherkarte Gespeicherte Fotos
PEICHERKARTE GESPEICHERTE OTOS AUSDRUCKEN Ihr Drucker SAGEM PHOTO EASY 155 kann mit oder ohne Computer verwendet werden. In diesem Kapitel beschreiben wir die Verwendung des Druckers ohne Computer. Der Tabelle mit den technischen Daten am Ende der Bedienungsanleitung können Sie entnehmen, ob Ihre Speicherkarte mit dem Drucker kompatibel ist. - Seite 75 Achtung - Damit, die auf der Speicherkarte befindlichen Fotos in chronologische Reihenfolge ausgedruckt werden, müssen die Parameter "Datum und Uhrzeit" vor der Fotoaufnahme aktiviert werden. Andernfalls werden die Fotos in einer beliebigen Reihenfolge ausgedruckt. ARTE INSCHUB Smart Media Links (SM) Memory Stick Links (MS)
-
Seite 76: Benutzerschnittstelle
ENUTZERSCHNITTSTELLE 1 - Auswahl im Warenkorbablegen 2 - Kopienanzahl pro Foto auswählen (1 bis 20) 3 - Zur vorherigen Fotonummer wechseln (…, 3, 2, 1) 4 - Den Ausdruck starten 5 - Zur nächsten Fotonummer wechseln (1, 2, 3…) 6 - Das Druckformat auswählen 7 - Abbrechen A - Anzahl der zu druckenden Exemplare B - Nummer des aktiven Fotos... -
Seite 77: Ihre Fotos Ausdrucken
OTOS AUSDRUCKEN Der Drucker ist eingeschaltet, Sie haben eine Speicherkarte eingesetzt oder Sie haben die Fotos über die schnurlose Infrarotverbindung von einem Foto-Handy übertragen (oder Bluetooth Sonderausrüstung). Die grüne LED blinkt, während der Drucker die Daten lädt. Nach einigen Sekunden wird die auf der Speicherkarte oder in der Digitalkamera vorhandene bzw. -
Seite 78: Eispiel Für Den Schnelldruck Von Einer Speicherkarte Aus
• 4 Fotos pro Seite ausdrucken • 20 Fotos pro Seite ausdrucken (Übersichtsbogen oder Indexprint) Drücken Sie am Ende der Auswahl auf die Taste , um den Ausdruck zu beginnen. Wenn der Ausdruck durch fehlendes Papier, einen Papierstau oder eine leere Farbbandrolle unterbrochen wird, kann der Ausdruck nach dem Ersetzen oder nach der Behebung der Störung durch Drücken auf die Taste dort wieder aufgenommen werden, wo er unterbrochen... - Seite 79 Wählen Sie mit der Taste das Foto 3 aus. Drücken Sie auf die Taste , bis die Zahl 4 erscheint (d.h. 4 Exemplare). Drücken Sie auf die Taste , bis das Symbol 4 Bilder/Seite erscheint. Die für den Ausdruck erforderliche Kopienanzahl müssen Sie z.B durch die Wahl der Zahl 1 definieren.
-
Seite 80: Einen Übersichtsbogen Bzw. Indexprint Erzeugen
Ü INEN BERSICHTSBOGEN BZW NDEXPRINT ERZEUGEN Nach dem Einfügen der Speicherkarte wird die Anzahl gültiger Fotos auf dem Display angezeigt. Drücken Sie auf die Taste , bis ALL auf dem Display erscheint. Wählen Sie mit der Taste das Format Fotos pro Bogen aus. In dem oben veranschaulichten Beispiel verwenden Sie 2 Bögen für 23 druckbare Fotos. - Seite 81 OTOSERIE FÜR DEN USDRUCK VORBEREITEN ARENKORB ODUS Nach dem Einfügen der Speicherkarte wird die Anzahl gültiger Fotos auf dem Display angezeigt. Sie möchten das Foto 3 in vier Exemplaren, das Foto 8 in einem Exemplar und das Foto 16 in zwei Exemplaren ausdrucken.
- Seite 82 Wählen Sie mit der Taste das Foto 8 aus, und drücken Sie auf die Taste , um es im Warenkorb abzulegen (die Vorgabemenge ist 1). Wählen Sie mit der Taste das Foto 16 aus, und drücken Sie auf die Taste , bis die Zahl 2 erscheint, d.h.
-
Seite 83: Seit Der Kamera Drucken (Pictbrigde Modus)
EIT DER KAMERA DRUCKEN RIGDE MODUS Ihr Drucker SAGEM PHOTO EASY 155 das StandardpictBrigde, es erlaubt stützt folglich, den Eindruck der Fotographien, die von den Kameras abfahren, die mit diesem Standard kompatibel sind. Die Unterlagen der Kamera lesen, um Kompatibilität mit dem Standard PictBrigde zu überprüfen und den Anschluß... -
Seite 84: Im Dpof-Modus Ausdrucken
Mit dieser Funktion können Sie vorab mit Ihrer Digitalkamera auf der Speicherkarte die Fotos auswählen, die Sie auf Ihrem Drucker SAGEM PHOTO EASY 155 ausdrucken wollen. Ihr Fotoapparat muss dazu die Norm DPOF (Digital Print Order Format) erfüllen. Lesen Sie bitte in der Dokumentation Ihres Digitalfotogerätesnach, ob er mit dieser Norm kompatibel ist. -
Seite 85: Von Einem Foto-Handy Aus Ausdrucken
ON EINEM ANDY AUS AUSDRUCKEN Mit dem Drucker SAGEM PHOTO EASY 155 können Sie die mit einem Foto-Handy aufgenommenen Fotos ausdrucken. Die Übertragung des fotos erfolgt über die drahtlose Infrarotverbindung zwischen den beiden Geräten in den Drucker übertragen. Stellen Sie den Schalter am Drucker PHOTO EASY 155 auf " I ". -
Seite 86: Das Abfahren Von Einem Bluetooth Peripherie Drucken (Walhlweise Freigestellt)
Lösung, zum von einem telegraphischen Anschluß zu einem Anschluß ohne Leitung zu überschreiten. Der Adapter macht es möglich, den Druck von SAGEM PHOTO EASY 155 in den Bluetooth Empfänger umzuwandeln, der folglich die Ausrüstung autorisiert, die mit Technologie Bluetooth wie den persönlichen Assistenten, den Bürocomputern, den portables oder anderen der Eindruck der Fotographien ausgerüstet wird. - Seite 87 übertragen werden sollen, muss weniger als 600 KBytes betragen. Die Fotos müssen das Format JPEG haben. Wenn die maximale Speicherkapazität erreicht ist, erscheint die Fehlernachricht "Err 75". Um neue Daten an den Drucker SAGEM PHOTO EASY 155 zu übertragen, müssen Sie den Speicher leeren. Drücken Sie dazu lang auf die Taste Die Übertragung beginnt und während ihrer Dauer blinkt die Meldung "...
-
Seite 88: Von Einem Pc (Personal Computer) Aus Drucken
Freier USB-Port. Die Software installieren Die Software SAGEM PHOTO EASY 155 wird in drei Phasen installiert: Ausführung des Installationsprogramms, Neustart des Computers und Abschluß der Installation des Druckers. Schließen Sie den Drucker nicht an den PC an, solange der Druckertreiber noch nicht installiert ist. -
Seite 89: Ihren Drucker Anschließen
Kabel als auch die Gerätebuchse beschädigt werden. Schließen Sie das USB-Kabel an einen USB-Port Ihres PCs an. Stecken Sie das andere Ende des USB-Kabels in den USB-Anschluss (B) des Druckers PHOTO EASY 155 SAGEM. Die Geräte erkennen sich gegenseitig automatisch. - 22 -... -
Seite 90: Verbrauchsmaterialien
ERBRAUCHSMATERIALIEN Die beim Drucker SAGEM PHOTO EASY 155 verwendeten Verbrauchsmaterialien, d.h. das Farbband und das Papier, sind Produkte der Marke SAGEM. Sie erhalten Sie in Kaufhäusern und größeren Geschäften im Foto- oder Druckerbereich oder aber über Internet auf unserer Webseite www.sagem.com oder über den Stellcoupon für Verbrauchsgüter, der zu Ihrem Drucker geliefert wurde. -
Seite 91: Wartung
ARTUNG EINIGUNG DES RUCKERKOPFS Wenn Ihre Fotos einen durchgängigen Streifen über die gesamte Bogenlänge aufweisen, kleben eventuell Fremdkörper am Druckkopf. Verwenden Sie zur Reinigung Brennspiritus und handelsübliche Wattestäbchen. Schalten Sie Ihren Drucker vom Stromnetz ab, ziehen Sie das entsprechende Kabel, und warten Sie fünf Minuten, das sich der Druckerkopf evtl. -
Seite 92: Papierstau
APIERSTAU Sollte sich ein Blatt im Drucker eingeklemmt haben und sich nicht problemlos aus dem Gerät entfernen lassen, gehen Sie bitte wie folgt vor: Schalten Sie Ihren Drucker aus, indem Sie auf das " O " des Schalters an der Rückseite Ihres Gerätes drücken, und ziehen Sie den Netzstecker. -
Seite 93: Störungen
TÖRUNGEN Anmerkung: Für den Fall, dass Sie große Druckreihen mit Ihrem Gerät anfertigen, ist dieser mit einer automatischen Zeits- chaltvorrichtung versehen, um eine Überhitzung des Gerätes zu vermeiden. Der Drucker geht automatisch mit dem laufenden Druckvorgang weiter, sobald die Temperatur ausreichend abgekühlt ist. Lösungen TÖRUNGEN Prüfen Sie:... -
Seite 94: Fehlermeldungen
EHLERMELDUNGEN Um einen unterbrochenen Druckvorgang neu zu starten, betätigen Sie bitte nach jedem Eingriff an Ihrem Drucker die -Taste. Ange- Angezeigter zeigtes Fehlertyp Bezeichnung Aktion Fehler Symbol Überprüfen Sie, ob das Papierfach Papier enthält Err 01 Papier Papier fehlt und ob dieses korrekt eingelegt ist Ziehen Sie das im Drucker blockierte Papier Err 02 Papier... - Seite 95 Ange- Angezeigter zeigtes Fehlertyp Bezeichnung Aktion Fehler Symbol Zulässige Die maximal zulässige Druckmenge wurde Err 81 SIM-Karte Druckmenge erreicht. Wechseln Sie das Verbrauchsmaterial erreicht aus. Err 82: Karte nicht lesbar Err 83: Karte unbekannt Err 82 Karte nicht lesbar Err 84: Mechanisches Problem SIM-Karte oder nicht Err 85: Problem mit dem Farbband...
- Seite 96 - - - - - - - - - - - - - - - - - - - - - - - - - - - - - - - - - - - - - - - - - - - - - - - - - - - - - - - - - - - - - - - - - Gerätename :- - - - - - - - - - - - - - - - - - - - SAGEM PHOTO EASY 155 Ruckverfahren :Thermoübertragung...
-
Seite 97: Garantie
Nach Ablauf der gesetzlichen Sachmängelgewährleistungsfrist, d.h. also in der Regel nach Ablauf von sechs Monaten ab Lieferung, übernimmt die SAGEM SA bis zu maximal einem Jahr ab Lieferung die Garantie (Ersatzteile und Reparatur) für die Freiheit des Geräts von Fabrikationsfehlern. Während dieses zusätzlichen Garantie- zeitraumes wird das fehlerhafte Gerät kostenlos repariert. - Seite 98 Generalüberholung auf jeden Fall zu Lasten des Kunden gehen. In den oben unter B) genannten Fällen sowie nach Ablauf der Garantiefrist hat der Kunde von der SAGEM SA einen Kostenvoranschlag einzuholen, den er vor der Rücksendung der Geräte an den Kundendienst der SAGEM SA akzeptieren muß.
- Seite 99 - 32 -...
- Seite 100 IENVENIDO ESCUBRA MPRESORA HOTO FOTO EASY 155 REPARE SU IMPRESORA Alimentación eléctrica Primera instalación de la cinta Para cambiar la cinta Carga del papel MPRIMIR DESDE UNA TARJETA DE MEMORIA Insertar una tarjeta de memoria NTERFAZ USUARIO Imprima sus fotos Impresión rápida Ejemplo de impresión rápida desde una tarjeta de memoria Crear una plancha de contacto (índice)
- Seite 101 - II -...
-
Seite 102: Bienvenido
IENVENIDO Acaba de adquirir una impresora PHOTO EASY 155 SAGEM y le agradecemos la confianza que nos demuestra. Con esta impresora de alta calidad, disfrute plenamente de sus fotos digitales. Mediante etapas muy sencillas, realizará impresiones con una calidad idéntica a las de los laboratorios especializados para su uso personal, o para compartirlas con su familia, amigos o compañeros. -
Seite 103: Descubra S U Impresora
ESCUBRA MPRESORA HOTO Coloque la caja frente a usted, abra el embalaje y verifique que se encuentren los elementos siguientes: Impresora PHOTO EASY 155 Manual del usuario CD ROM con sus aplicaciones Cinta* Papel foto (2 paquetes de 20 hojas)*... -
Seite 104: Prepare Su Impresora Foto Easy
Su impresora dispone de un conector maestro USB Mass storage SCSI (A) y un conector USB esclavo (B), este último permite realizar la conexión con una terminal maestra (PC, ...). Observación: Para conocer la lista de periféricos compatibles con este puerto USB (A) consulte el sitio www.sagem.com. - 3 -... -
Seite 105: Primera Instalación De La Cinta
RIMERA INSTALACIÓN DE LA CINTA Observación: Utilice únicamente los consumibles DSR400 o DSR400T. Los mismos están diseñados especialmente para lograr un óptimo rendimiento de la impresión. Ponga en tensión la impresora. Espere 10 segundos que la cabeza de impresión se levante y proceda de la manera siguiente: 1. -
Seite 106: Para Cambiar La Cinta
ARA CAMBIAR LA CINTA Observación: Utilice únicamente los consumibles DSR400 o DSR400T. Los mismos están diseñados especialmente para lograr un óptimo rendimiento de la impresión. A este efecto, la impresora debe leer la tarjeta microchip entregada con cada kit de consumibles antes de la instalación de cualquier kit nuevo. -
Seite 107: Carga Del Papel
Maneje las hojas de papel por los extremos precortados, nunca aplique los dedos sobre la cara brillante antes de la impresión. Ahora, su impresora PHOTO EASY 155 SAGEM está lista para imprimir sus fotos digitales. Atención - Proteja los consumibles contra una exposición prolongada a la luz, contra la humedad, el calor y el polvo. -
Seite 108: Imprimir Desde Una Tarjeta De Memoria
MPRIMIR DESDE UNA TARJETA DE MEMORIA Su impresora PHOTO EASY 155 SAGEM está prevista para ser usada con o sin ordenador. En este capítulo describimos el uso de la impresora sin ordenador. Consulte la tabla de las características técnicas al final del folleto para conocer la compatibilidad de su tarjeta memoria con la impresora, en caso de incompatibilidad, use un ordenador y el software de tratamiento de imagen proporcionado en el CD-Rom. - Seite 109 Atención - Para realizar una impresión en orden creciente de las fotos incluídas en la tarjeta de memoria, los parametros "fecha y hora" deben ser ingresados en vuestro aparato antes de tomar la foto. Si no es el caso, las fotos seran leidas e impresas en orden aleatorio. ARGETA ANURA EPRESENTACIÓN...
-
Seite 110: Interfaz Usuario
NTERFAZ USUARIO 1 - Añade la selección en el Caddie (carro) 2 - Selecciona la cantidad de copias por foto (de 1 a 20) 3 - Va al número de foto precedente (…, 3, 2, 1) 4 - Lanza la impresión 5 - Va al número de foto siguiente (1, 2, 3…) 6 - Selecciona el formato de impresión 7 - Anula... -
Seite 111: Imprima Sus Fotos
MPRIMA SUS FOTOS Su impresora está en tensión, ha instalado una tarjeta de memoria, o ha transferido fotos desde un GSM foto usando el enlace inalámbrico infrarrojo Icono de la tarjeta consumible (SIM). El LED verde parpadea mientras que la impresora carga los datos. Después de algunos segundos, la cantidad de fotos leídas en la tarjeta de memoria, en el aparato foto digital o transferidas desde el GSM foto aparece en la pantalla, el LED se enciende fijo. -
Seite 112: Ejemplo De Impresión Rápida Desde Una Tarjeta De Memoria
• Imprima 20 fotos por página (plancha de contacto o de índice) Al final de la selección, pulse la tecla para lanzar la impresión. Si la impresión se interrumpe por falta de papel, un atasco de papel o un cartucho usado, después de efectuar la sustitución o haber corregido el defecto, puede reanudar la impresión, donde sedetuvo pulsando la tecla Idea -... - Seite 113 Pulse la tecla hasta la visualización de la cifra 4 (es decir, 4 ejemplares). Pulse la tecla hasta obtener el gráfico 4 imágenes/página. Debe obtener la cifra 1 en cantidad de hojas necesarias para la impresión. Pulse la tecla para lanzar la impresión. - 12 -...
-
Seite 114: Crear Una Plancha De Contacto (Índice)
REAR UNA PLANCHA DE CONTACTO ÍNDICE Después de la introducción de la tarjeta de memoria, se muestra en la pantalla la cantidad de fotografías válidas. Pulse la tecla , hasta la aparición de ALL en la pantalla. Seleccione el formato fotos por hoja con la tecla En el ejemplo ilustrado anteriormente, usará... -
Seite 115: Preparar Una Serie Fotos Para La Impresión Modo Caddie
REPARAR UNA SERIE FOTOS PARA LA IMPRESIÓN MODO CADDIE Después de la introducción de la tarjeta de memoria, se muestra en la pantalla la cantidad de fotografías válidas.. Deseamos imprimir la foto 3 en 4 ejemplares, la foto 8 en 1 ejemplar y la foto 16 en 2 ejemplares. Observación: las impresiones en serie se efectuarán todas con el mismo formato de impresión. - Seite 116 Seleccione la foto 8, con la tecla , pulse la tecla para añadirla al caddie (la cantidad por defecto es 1). Seleccione la foto 16, con la tecla , pulse la tecla hasta la aparición de la cifra 2, cantidad deseada. Pulse la tecla para añadirla al caddie.
- Seite 117 OTOGRAFICA ICTBRIGDE Su impresora PHOTO EASY 155 SAGEM apoyan el PictBrigde estándar, él permite así la impresión de las fotografías que empiezan con las cámaras fotográficas compatibles con este estándar. Lea la documentación del equipo fotográfico para verificar la compatibilidad con la norma PictBridge y la conexión con la impresora.
- Seite 118 Coloque la tarjeta de memoria en la ranura adecuada, se lanza la transferencia de datos a su impresora PHOTO EASY 155 SAGEM, el logo DPOF se activa en la pantalla de la impresora y la cantidad de fotos imprimibles aparece en el lado inferior izquierdo de la pantalla.
- Seite 119 Coloque su GSM frente a la impresora PHOTO EASY 155 SAGEM de tal manera que las "ventanas" infrarrojas queden frente a frente, y a una distancia inferior a 30 centímetros. Atención - En el caso de haya mucha luz, se recomienda respetar una distancia de 10 centímetros como máximo entre las dos ventanas infrarroja.
- Seite 120 (selección de los números de fotos a imprimir, selec- ción del formato, selección de la cantidad de copias). PHOTO EASY 155 presenta las informaciones presentes hasta justo antes de lanzar la impresión. Puede: •...
- Seite 121 Atención - El tamaño de la o las fotografías a transferir a la impresora SAGEM PHOTO EASY 155 debe ser inferior a 600 Kbytes. El formato de las fotografías debe ser JPEG. Cuando se alcance la capacidad máxima de la memoria, aparecerá el mensaje de error "Err 75".
-
Seite 122: Instale El Software
Instale el software La instalación del software PHOTO EASY 155 SAGEM se desarrolla en tres fases: la ejecución del programa de instalación, el reinicio del ordenador y luego la instalación finale de la impresora. No conecte la impresora al PC, antes de instalar el controlador de impresión. Al final de la instalación un mensaje la pedirá... -
Seite 123: Sustitución De Los Consumibles
USTITUCIÓN DE LOS CONSUMIBLES Los consumibles empleados en la impresora PHOTO EASY 155 SAGEM, la cinta y el papel son productos de marca SAGEM. Usted puede conseguirlas en los lineales de fotografías o impresoras de los supermercados, y en nuestra Web www.sagem.com. También puede utilizar la orden de pedido de consumibles suministrada con su impresora. -
Seite 124: Mantenimiento
ANTENIMIENTO IMPIEZA DEL CABEZAL DE IMPRESIÓN Si sus fotos tienen una marca constante en toda la longitud de la hoja, quizás la cabeza de impresión tiene impurezas pegadas en ella. Prepare un producto de limpieza a base de alcohol desnaturalizado y bastoncillos de algodón del comercio. -
Seite 125: Atasco De Papel
TASCO DE PAPEL Si una hoja se atasca en la impresora, y no se puede extraer simplemente del aparato procesa de la manera siguiente: Apagar su impresora pulsando el " O " del interruptor situado detrás de su aparato y desconectar el cable de red. -
Seite 126: Incidentes
NCIDENTES Observación: Si realiza grandes series de impresión con su aparato, éste dispone de un dispositivo de temporización automática para evitar que se caliente. La impresora reinicia automáticamente la impresión en curso en cuanto la temperatura haya disminuido lo suficiente. NCIDENTES EMEDIOS •... -
Seite 127: Mensajes De Error
ENSAJES DE ERROR Después de cada intervención en su impresora no deje de pulsar la tecla para relanzar la impresión en curso. Error Icono Typo de Denominación Acción visualizado visualizado erreur Verifique que hay papel correctamente colocado Err 01 Papel Papel aussente la bandeja de carga Retire el papel atascado en la impresora (no... - Seite 128 Error Icono Typo de Denominación Acción visualizado visualizado erreur Se alcanzó la Tarjeta cantidad de Se alcanzó la cantidad de impresiones Err 81 impresiones autorizada. Cambie el consumible. autorizada Err 82: Tarjeta ilegible Err 83: Tarjeta desconocida Err 82 Err 84: Problema mecánico Tarjeta Tarjeta ilegible à...
-
Seite 129: Características Técnicas
1,5 (excepto fuente de alimentación) Consumo de energía en modo reposo: 7,6 W en modo impresión: 70 W Todos estos datos se dan como indicación. SAGEM se reserva el derecho de aportar todas las modificaciones sin ningún aviso previo. - 28 -... -
Seite 130: Garantía
El material está garantizado (piezas y mano de obra) por SAGEM SA contra cualquier defecto de fabricación, durante un período de doce (12) meses contados a partir de la fecha de entrega. Durante este período, SAGEM SA se compromete a proceder gratuitamente, excluyendo la reparación de cualquier otro perjuicio, y a la elección del usuario a:... - Seite 131 En los casos previstos anteriormente en el párrafo B, así como después de la expiración del período de garantía, el cliente pedirá a SAGEM SA un presupuesto que el cliente deberá aceptar antes de cualquier reenvío de material al Servicio posventa de SAGEM SA Los gastos de reparación y los portes (ida y vuelta) serán facturados al cliente.
- Seite 132 ENVENUTI TAMPANTE HOTO REPARAZIONE ELLA TAMPANTE HOTO Alimentazione rete Prima installazione del nastro Per cambiare il nastro Caricamento della carta TAMPA DA UNA SCHEDA DI MEMORIA Inserimento di una scheda di memoria NTERFACCIA UTENTE Stampa delle fotografie Stampa rapida Esempio di stampa rapida da un supporto di memorizzazione Creazione di un foglio di prove fotografiche (indice con miniature) Preparazione di una serie di fotografie per la stampa (modalità...
- Seite 133 - II -...
-
Seite 134: Benvenuti
ENVENUTI Avete acquistato una stampante PHOTO EASY 155 SAGEM e vi ringraziamo per la fiducia che ci avete accordato. Questa stampante di alta qualità vi permette di approfittare di tutti i vantaggi offerti dalle fotografie digitali. Osservando una procedura molto semplice, sarete in grado di produrre copie di qualità... -
Seite 135: A Stampante Photo Easy
TAMPANTE HOTO Disporre la scatola su un piano, aprire l'imballaggio e verificare che contenga i seguenti elementi: Stampante PHOTO EASY 155 Manuale dell'utente CD ROM con applicazioni Cartuccia inchiostro* Carta fotografica (2 pacchi da 20 fogli)* Cavo USB Cassetto carta... -
Seite 136: Reparazione Della Stampante Photo Easy
La stampante è dotata di un connettore USB principale Mass storage SCSI (A) e di un connettore USB secondario (B) che consente un collegamento verso un terminale principale (PC, ecc.). N.B. Per conoscere l'elenco delle periferiche compatibili con la porta USB (A) consultare il sito www.sagem.com. - 3 -... -
Seite 137: Prima Installazione Del Nastro
RIMA INSTALLAZIONE DEL NASTRO N.B. Usare esclusivamente materiali di consumo DSR400 o DSR400T. Essi sono concepiti specificamente per fornire una qualità ottimale di stampa. Mettere la stampante sotto tensione. Attendere 10 secondi affinché la testa di stampa si sollevi e procedere come segue: 1. -
Seite 138: Per Cambiare Il Nastro
ER CAMBIARE IL NASTRO N.B. Usare esclusivamente materiali di consumo DSR400 o DSR400T. Essi sono concepiti specificamente per fornire una qualità ottimale di stampa. Per questo, la stampante deve leggere la carta intelligente fornita con il kit del materiale di consumo dopo ogni installazione di un nuovo kit. -
Seite 139: Caricamento Della Carta
Manipolare i fogli di carta afferrandoli sulle estremità pre-tagliate. Non toccare mai con le dita il lato brillante dei fogli, prima della stampa. La stampante PHOTO EASY 155 SAGEM è ora pronta per la stampa di fotografie digitali. Attenzione - Proteggere i consumabili contro un'esposizione prolungata alla luce, contro l'umidità,... -
Seite 140: Stampa Da Una Scheda Di Memoria
TAMPA DA UNA SCHEDA DI MEMORIA La stampante PHOTO EASY 155 SAGEM è prevista per essere utilizzata con o senza computer. Nel presente capitolo viene descritto l'uso della stampante senza computer. Consultare la tabella delle caratteristiche tecniche a dorso del presente manuale per conoscere la compatibilità... - Seite 141 Attenzione - Per effettuare una stampa in ordine crescente delle foto presenti sulla carta di memoria è necessario regolare i parametri "data e ora" sull'apparecchio fotografico prima dello scatto della foto. In caso contrario le foto saranno visualizzate e stampate in un ordine casuale. UNITÀ...
-
Seite 142: Nterfaccia Utente
NTERFACCIA UTENTE 1 - Aggiunge la selezione nel carrello 2 - Seleziona il numero di copie per fotografia (da 1 a 20) 3 - Va al numero di fotografia precedente (…, 3, 2, 1) 4 - Avvia la stampa 5 - Va al numero di fotografia successivo (1, 2, 3…) 6 - Seleziona il formato di stampa 7 - Annulla A - Numero di esemplari da stampare... -
Seite 143: Stampa Delle Fotografie
TAMPA DELLE FOTOGRAFIE La stampante è sotto tensione, è stata installata una scheda, o sono state trasferite delle fotografie da un GSM photo utilizzando il collegamento senza filo a infrarossi (o Bluetooth apparecchiatura facoltativa). Il LED verde lampeggia mentre la stampante carica i dati. Dopo qualche secondo, il numero di fotografie lette sulla scheda dalla macchina fotografica digitale o trasferite dal cellulare GSM viene visualizzato su schermo e il LED si accende con luce fissa. - Seite 144 • Stampare 4 fotografie per pagina • Stampare 20 fotografie per pagina (indice con miniature) Al termine della selezione, premere il tasto per avviare la stampa. Se la stampa viene interrotta per mancanza di carta, un intasamento carta o una cartuccia da ricaricare, dopo aver effettuato la sostituzione o corretto il difetto, è...
- Seite 145 Selezionare la fotografia 3, mediante il tasto Premere il tasto fino a visualizzare la cifra 4 (ossia, 4 copie) Premere il tasto fino ad ottenere la seguente visualizzazione: 4 immagini/pagina. Si deve ottenere la cifra 1 come quantità di fogli necessari alla stampa. Premere il tasto per avviare la stampa.
-
Seite 146: Creazione Di Un Foglio Di Prove Fotografiche Indice Con Miniature
REAZIONE DI UN FOGLIO DI PROVE FOTOGRAFICHE INDICE CON MINIATURE Dopo l'introduzione della carta memoria, la quantità di fotografie valide viene visualizzata allo schermo. Premere il tasto , fino a visualizzare ALL sul display. Selezionare il formato fotografie per foglio mediante il tasto Nell'esempio di cui sopra, si utilizzano 2 fogli per 23 fotografie da stampare. -
Seite 147: (Modalità Carrello)
REPARAZIONE DI UNA SERIE DI FOTOGRAFIE PER LA STAMPA MODALITÀ CARRELLO Dopo l'introduzione della carta memoria, la quantità di fotografie valide viene visualizzata allo schermo. Si desidera stampare la fotografia 3 in 4 esemplari, la fotografia 8 in 1 esemplare e la fotografia 16 in 2 esemplari N.B. - Seite 148 Selezionare la fotografia 8, mediante il tasto , premere il tasto per aggiungerla al carrello (la quantità predefinita è 1). Selezionare la fotografia 16, mediante il tasto , quindi premere il tasto ,fino a visualizzare la cifra 2, quantità voluta. Premere il tasto per aggiungerla al carrello.
-
Seite 149: Stampare Dalla Macchina Fotografica Modo Di Pict Brigde
TAMPARE DALLA MACCHINA FOTOGRAFICA MODO DI PICT RIGDE La vostra stampatore PHOTO EASY 155 SAGEM sostengono il PictBrigde standard, esso permette così l'impressione delle fotografie a partire dalle macchine fotografiche compatibili con questo campione. Leggere la documentazione della macchina fotografica per controllare la compatibilità con il PictBrigde standard e per controllare il collegamento con la stampante. -
Seite 150: Stampa In Modalità Dpof
Disporre la scheda nella fessura adeguata, il trasferimento di dati nella stampante PHOTO EASY 155 SAGEM viene avviato, il logo DPOF viene attivato sul display della stampante ed il numero di fotografie da stampare appare in basso a sinistra sul display. - Seite 151 Disporre il GSM davanti alla stampante PHOTO EASY 155 SAGEM in modo che le "finestre" ad infrarossi siano l'una davanti all'altra e ad una distanza che non supera i 30 centimetri. Attenzione - In ambienti esposti a luce intensa, è consigliabile una distanza massima di 10 centimetri tra le due porte infrarossi.
-
Seite 152: Stampare A Partire Da Un'unita Periferica Di Bluetooth (Facoltativa)
Al termine della stampa delle fotografie trasferite dal GSM photo, il display della stampante PHOTO EASY 155 SAGEM visualizza le informazioni presenti prima di avviare la stampa. A questo punto, è possibile: •... - Seite 153 EASY 155 deve essere inferiore a 600 K-bytes. Il formato della fotografia deve essere di tipo JPEG. Un messaggio d'errore "Err 75" appare quando la capacità massima della memoria è stata raggiunta. Per trasferire nuovi dati verso la stampante SAGEM PHOTO EASY 155, occorre svuotare la memoria. Per fare questo, premere a lungo sul tasto Il trasferimento viene avviato e durante la sua durata, il messaggio "...
-
Seite 154: Stampa Da Un Pc (Personal Computer)
150 MB di spazio su disco disponibile, Porta USB disponibile. Installazione del programma L'installazione del programma PHOTO EASY 155 SAGEM si svolge in tre fasi: l'esecuzione del programma di installazione, la reinizializzazione del computer e l'installazione finale della stampante. Non connettersi al PC, prima di installare il driver di stampa. Al termine dell'installazione appare un messaggio che chiede di reinizializzare il PC. - Seite 155 Collegare l'altra estremità del cavo USB alla stampante PHOTO EASY 155 SAGEM sulla porta USB (B). Il riconoscimento delle apparecchiature è automatico. - 22 -...
-
Seite 156: Sostituzione Dei Consumabili
OSTITUZIONE DEI CONSUMABILI I consumabili utilizzati dalla stampante PHOTO EASY 155 SAGEM, il nastro di trasferimento e la carta sono prodotti della marca SAGEM. È possibile reperirle nei grandi magazzini al reparto foto o stampanti, ma anche sul nostro sito internet www.sagem.com oppure usufruendo del buono d'ordine cartucce fornito assieme alla stampante. -
Seite 157: Mentenimento
ENTENIMENTO ULIZIA DELLA TESTINA DI STAMPA Se le fotografie presentano un segno costante sulla lunghezza del foglio, è possibile che dei corpi estranei si siano depositati sulla testa di stampa. Preparare un prodotto detergente a base di alcol denaturato e dei bastoncini cotonati. Disattivare la stampante, scollegare il cavo di rete e attendere cinque minuti, poiché... -
Seite 158: Intasamento Carta
NTASAMENTO CARTA Se un foglio è intasato nella stampante e non può essere estratto semplicemente dall'apparecchio, procedere come segue: Disattivare la stampante premendo il pulsante " O " sull'interruttore posto sul retro dell'apparecchio quindi scollegare il cavo di rete. Girare l'apparecchio per accedere alla parte inferiore. Togliere il coperchio inferiore. -
Seite 159: Disfunzionamenti
ISFUNZIONAMENTI N.B. quando si realizzano grandi serie di stampa sull'apparecchio, questo è munito di un dispositivo di temporizza- zione automatica per evitare un surriscaldamento. La stampante riavvia automaticamente la stampa in corso non appena la temperatura diminuisce. ISFUNZIONAMENTI IMEDI • Verificare che il blocco settore sia correttamente collegato ad una presa. - Seite 160 ESSAGGI D ERRORE Dopo qualsiasi intervento sulla stampante, non dimenticare di premere il tasto per riavviare la stampa in corso. Errore Icona Tipo di Designazione Azione correttiva visualizzato visualizzata errore Assenza di Verificare che la carta sia correttamente Err 01 Carta carta posizionata nell'alloggiamento previsto...
- Seite 161 Errore Icona Tipo di Designazione Azione correttiva visualizzato visualizzata errore Carta SIM La carta SIM è già stata usata. Togliere la carta Err 80 Carta SIM scaduta inserita e inserire una carta SIM valida. Quantità di stampa La quantità di stampa autorizzata è stata Err 81 Carta SIM autorizzata...
-
Seite 162: Caratteristiche Tecniche
: 1,5 kg (tranne il gruppo di alimentazione) Consumo energetico : in modalità riposo: 7,6 W in modalità di stampa: 70 W Tutti questi dati sono forniti a titolo indicativo. SAGEM si riserva il diritto di apportare modifiche senza preavviso. - 29 -... -
Seite 163: Garanzia
Nel caso in cui l’apparecchio sia stato acquistato direttamente presso la SAGEM SA si applicheranno le seguenti disposizioni: L'apparecchio è garantito (relativamente ai suoi componenti ed al costo della manodopera) dalla SAGEM SA per un periodo di un anno dalla data della consegna contro qualsiasi difetto di fabbricazione. Durante questo periodo tutti gli apparecchi difettosi saranno riparati gratuitamente (con esclusione della riparazione di altri tipi di danni);... - Seite 164 ELKOM 155 P ENNISMAKEN HOTO RINTER 155 P HOTO RINTER OORBEREIDEN Netvoeding De eerste keer het lint installeren Een afdruklint installeren Papier laden FDRUKKEN VANAF EEN GEHEUGENKAART Een geheugenkaart installeren EBRUIKERSINTERFACE Uw foto's afdrukken Snel afdrukken Voorbeeldsnel afdrukken vanaf een geheugenkaart Een fotoindex maken Een reeks af te drukken foto's voorbereiden (functie met het winkelwagentje)
- Seite 165 - II -...
-
Seite 166: Welkom
Veiligheidsaanbevelingen en -instructies • De PHOTO EASY 155 printer mag niet binnen 1,50 m van een waterbron, in een vochtige ruimte (toilet, badkamer, keuken, bijkeuken, enz.) of buiten worden geïnstalleerd. De vereiste omgevingstemperatuur voor de printer bedraagt tussen 10 °C en 35 °C. -
Seite 167: Hoto Asy 155 Printer
155 P ENNISMAKEN HOTO RINTER Zet de verpakking voor u neer, maak de verpakking open en controleer of de volgende onderdelen aanwezig zijn: PHOTO EASY 155 printer Gebruiksaanwijzing Cd-Rom met toepassingen Afdruklint* Fotopapier (2 pakketten van 20 vel)* USB-kabel Papierlade... -
Seite 168: D E Photo Easy 155 Printer Voorbereiden
Uw printer heeft een primaire USB-aansluiting van het type Mass storage SCSI (A) en een secundaire USB-aansluiting (B). Met deze laatste kunt u een verbinding met de hoofdterminal (pc, enz.) maken. Opmerking: Ga naar www.sagem.com voor een overzicht van randapparaten die compatibel zijn met de USB-poort (A). - 3 -... -
Seite 169: De Eerste Keer Het Lint Installeren
E EERSTE KEER HET LINT INSTALLEREN Opmerking: Gebruik alleen de verbruiksartikelen DSR400 of DSR400T. Deze zijn speciaal ontworpen voor een optimale afdruk. 1. Zet de printer aan. Wacht 10 seconden totdat de printerkop te voorschijn komt en voer de vol- gendehandeling uit: 2. -
Seite 170: Een Afdruklint Installeren
EN AFDRUKLINT INSTALLEREN Opmerking: Gebruik alleen de verbruiksartikelen DSR400 of DSR400T. Deze zijn speciaal ontworpen voor een opti- male afdruk. De chipkaart die bij elke verbruiksartikelenkit wordt geleverd, moet door de printer worden gelezen nadat een nieuwe kit is geïnstalleerd. 1. -
Seite 171: Papier Laden
Houd het papier vast aan de voorgeperforeerde randen ; zorg dat er voor het afdrukken geen vingerafdrukken op de schijnende kant kunnen komen. De SAGEM PHOTO EASY 155 printer is nu klaar om uw digitale foto's af te drukken. Voorzichtig - Bescherm de toebehoren tegen langdurige blootstelling aan licht, vochtigheid, hitte en stof. -
Seite 172: Afdrukken Vanaf Een Geheugenkaart
FDRUKKEN VANAF EEN GEHEUGENKAART Uw SAGEM PHOTO EASY 155 printer is bestemd voor gebruik met of zonder computer. Dit hoofdstuk gaat over het gebruik van de printer zonder computer. Zie de tabel met technische eigenschappen aan het einde van deze gebruiksaanwijzing om te controleren of uw geheugenkaart compatibel is met de printer. - Seite 173 Voorzichtig - Om de foto's van de memory card in chronologische volgorde te kunnen printen, moeten datum en tijd vóór het nemen van een foto op uw fototoestel worden ingesteld. Is dit niet het geval dan worden de fotos in een willekeurige volgorde gelezen en geprint. AART OKATIE Smart Media...
-
Seite 174: Gebruikersinterface
EBRUIKERSINTERFACE 1 - Voeg de selectie toe aan het winkelwagentje 2 - Selecteer het aantal kopieën per foto (1 t/m 20) 3 - Ga terug naar het vorige fotonummer (…, 3, 2, 1) 4 - Start de afdruk 5 - Ga door naar het volgende fotonummer (1, 2, 3, …) 6 - Selecteer het afdrukformaat 7 - Annuleer A - Aantal af te drukken exemplaren... -
Seite 175: U W Foto ' S Afdrukken
W FOTO S AFDRUKKEN De printer staat aan, u heeft een geheugenkaart geïnstalleerd of uw foto's met een draadloze infraroodverbinding vanaf een foto-GSM gedownload (of Bluetooth in optie). Het groene lichtje knippert terwijl de printer de gegevens laadt. Na enkele seconden wordt het aantal foto's weergegeven, afgelezen van de geheugenkaart, het digitale fototoestel of gedownload vanaf de foto-GSM, en het lichtje blijft branden. - Seite 176 · Druk 20 foto's af per vel (fotoindex) Druk na het selecteren op de toets om het afdrukken te starten. Indien er meer papier of een nieuw afdruklint nodig is, kunt u het afdrukproces van uw foto's opnieuw hervatten vanaf het punt waarop u het afdrukproces had onderbroken, door op de toets te drukken.
- Seite 177 Selecteer foto 3 met de toets Druk op de toets totdat het cijfer 4 verschijnt (voor 4 kopieën). Druk op de toets totdat de afbeelding "4 afbeeldingen per vel" verschijnt. Het aantal afdrukvellen moet het cijfer 1 aangeven. Druk op de toets om het afdrukken te starten.
-
Seite 178: Een Fotoindex Maken
EN FOTOINDEX MAKEN Nadat u de geheugenkaart hebt geplaatst, verschijnt het aantal geldige foto's op het scherm. Druk op de toets , totdat ALL op het scherm verschijnt. Selecteer met de toets en het formaat format foto's per vel afdrukk . In het voorbeeld van hierboven, gebruikt u 2 vellen om 23 beschikbare foto's af te drukken. -
Seite 179: Een Reeks Af Te Drukken Fotos Voorbereiden Functie Met Het Winkelwagentje
EN REEKS AF TE DRUKKEN FOTO S VOORBEREIDEN FUNCTIE MET HET WINKELWAGENTJE Nadat u de geheugenkaart hebt geplaatst, verschijnt het aantal geldige foto's op het scherm. We willen foto 3 viermaal afdrukken, foto 8 eenmaal en foto 16 tweemaal. Opmerking: Bij het afdrukken van reeksen wordt voor alle foto's hetzelfde afdrukformaat gebruikt. - Seite 180 Selecteer foto 8 met de toets , druk op de toets om deze aan het winkelwagentje toe te voegen (het standaard aantal is 1). Selecteer foto 16, met de toets , druk op de toets jutotdat het cijfer 2, voor het gewenste aantal, verschijnt.
-
Seite 181: Seit Der Kamera Drucken (Pictbrigde Modus)
EIT DER KAMERA DRUCKEN RIGDE MODUS Ihr Drucker SAGEM PHOTO EASY 155 das StandardpictBrigde, es erlaubt stützt folglich, den Eindruck der Fotographien, die von den Kameras abfahren, die mit diesem Standard kompatibel sind. Lees de documentatie van het fotoapparaat om de compatibiliteit met de norm PictBridge te controleren en de verbinding met de printer te controleren. -
Seite 182: Afdrukken Met De Functie Dpof
DPOF FDRUKKEN MET DE FUNCTIE Met deze functie kunt u de foto's selecteren die u vanaf de geheugenkaart op de SAGEM PHOTO EASY 155 printer wilt afdrukken. Uw fototoestel moet voldoen aan het standaard DPOF (Digital Print Order Format); raadpleeg de documentatie van uw fotoapparatuur of deze met deze standaard compatibel is. - Seite 183 Voorzichtig - In een omgeving met intens licht wordt een afstand van maximaal 10 centimeter tussen de twee infraroodvensters aanbevolen. Selecteer een foto op uw GSM en start het downloaden via de infraroodverbinding. Het downloaden begint en tijdens het downloadproces knippert " Ir " op het printerscherm. Aan het einde van het downloadproces, verschijnen de volgende gegevens op het scherm: U kunt: •...
-
Seite 184: Das Abfahren Von Einem Bluetooth Peripherie Drucken (Walhlweise Freigestellt)
Lösung, zum von einem telegraphischen Anschluß zu einem Anschluß ohne Leitung zu überschreiten. Der Adapter macht es möglich, den Druck von SAGEM PHOTO EASY 155 in den Bluetooth Empfänger umzuwandeln, der folglich die Ausrüstung autorisiert, die mit Technologie Bluetooth wie den persönlichen Assistenten, den Bürocomputern, den portables oder anderen der Eindruck der Fotographien ausgerüstet wird. -
Seite 185: Afdrukken Vanaf Een Pc
De apparatuur wordt automatisch herkend. Voorzichtig - Het formaat van de foto of de foto's die naar de PHOTO EASY 155 moeten worden overgebracht, moet kleiner zijn dan 600 kB. De foto's moeten de indeling JPEB hebben. Het foutbericht "Fout 75" verschijnt zodra de maximumcapaciteit van het geheugen is bereikt. -
Seite 186: De Software Installeren
Sluit de USB-kabel aan op een USB-poort op uw PC. Sluit het andere uiteinde van de USB-kabel van de PHOTO EASY 155-printer van SAGEM aan op de USB-poort (B). -
Seite 187: Toebehoren
U kunt ook de bestelbon gebruiken die bij uw printer is geleverd. Gebruikt u enkel en alleen toebehoren van het merk SAGEM, anders loopt u de kans dat uw garantie op het apparaat niet geldig is. -
Seite 188: Voorzorgsmaatregelen
OORZORGSMAATREGELEN E PRINTKOP REINIGEN Als uw foto's een constante vlek vertonen over de hele lengte van het vel, kan het zijn dat de afdrukkop vuil is. Gebruik een reinigingsmiddel op basis van gedenatureerde alcohol en gewone wattenstokjes. Schakel de printer uit, trek de stekker uit het stopcontact en wacht vijf minuten. De temperatuur van de printkop kan hoog zijn opgelopen en u kunt u verwonden als u de printkop aanraakt. -
Seite 189: Vastgelopen Papier
ASTGELOPEN PAPIER Als een vel papier in de printer is vastgelopen en niet gemakkelijk uit de printer kan worden getrokken, voert u de volgende handeling uit: Schakel de printer uit door op de " O " van de knop te drukken die zich op de achterkant van het apparaat bevindt en trek de stekker uit het stopcontact. -
Seite 190: Incidenten
NCIDENTEN Opmerking: Als u veel foto's achter elkaar afdrukt, wordt oververhitting voorkomen omdat het apparaat is voorzien van een beveiliging die het apparaat tijdelijk onderbreekt. De printer hervat automatisch de lopende afdruk nadat de temperatuur voldoende is afgenomen. Incidenten Oplossingen •... -
Seite 191: Foutberichten
OUTBERICHTEN Als er een fout is opgetreden bij het printen, vergeet dan niet op de knop te drukken om de huidige printopdracht te herstarten. Fout- Icoon Soort fout Omschrijving Actie melding Err 01 Controleer of er papier in de papierlade zit en of Papier Geen papier deze goed is ingevoerd. - Seite 192 Fout- Icoon Soort fout Omschrijving Actie melding Toegestane aantal U hebt het toegestane aantal afdrukken bereikt. Err 81 SIM-kaart afdrukken bereikt Plaats een nieuw verbruiksartikel. Fout 82: Kaart kan niet worden gelezen Fout 83: Onbekende kaart Err 82 Kaart kan niet Fout 84: Mechanisch probleem à...
-
Seite 193: Technische Eigenschappen
201 x 174 x 94 zonder papierlade Gewicht in kg 1,5 (Zonder batterij) Energieverbruik in rust: 7,6 W tijdens afdrukken: 70 W Alle bovenstaande gegevens zijn ter illustratie. SAGEM behoudt zich het recht voor zonder aankondiging wijzigingen aan te brengen. - 28 -... -
Seite 194: Garantie
SAGEM een prijso- pgave te vragen en dient hij / zij deze te accepteren alvorens het apparaat naar SAGEM terug te sturen. De reparatie- en verzendkosten worden aan de klant in rekening gebracht. - Seite 195 ............................................................................................................................................................................................................................................................................................................................
- Seite 196 Manuale dell’utente - Documento privo di valore contrattuale Gebruiksaanwijzing - Geen contractueel document Société anonyme à directoire et conseil de surveillance au capital de 36.405.229 - 562 082 909 R.C.S. PARIS 27, rue Leblanc - 75512 PARIS CEDEX 15 - FRANCE http://www.sagem.com...