Block CVR-100+ MK III Bedienungsanleitung
Inhaltsverzeichnis
Verfügbare Sprachen
Verfügbare Sprachen
Quicklinks
Inhaltsverzeichnis
Fehlerbehebung

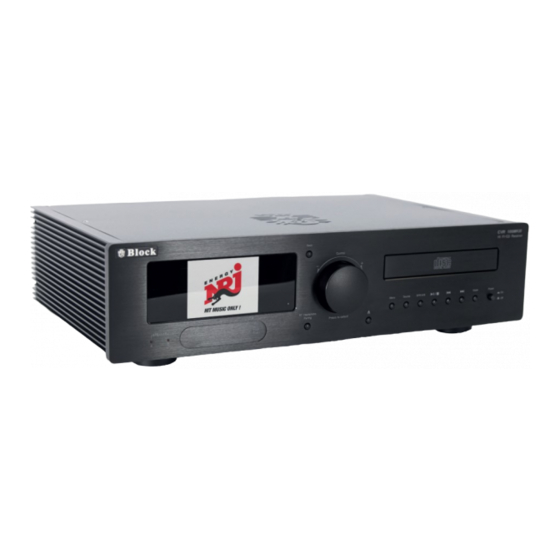
Inhaltszusammenfassung für Block CVR-100+ MK III
- Seite 1 Bedienungsanleitung | Manual CVR-100+ MK III...
- Seite 2 Sehr geehrter Kunde! sere Webseite „www.audioblock.com“, um zu Danke, dass Sie sich für dieses hochwer tige Gerät entschieden haben. Diese Bedienungs- prüfen, ob es neuere Bedienungsanleitungen anleitung soll ihnen eine Übersicht darüber zum Download gibt. Vergleichen Sie hierzu die geben, wie Sie Ihr Gerät bedienen können. Sie Standangabe auf dem Deckblatt mit der Anga- erhalten Sicherheitsinformationen und werden be im Internet.
-
Seite 3: Inhaltsverzeichnis
INHALTSVERZEICHNIS Sicherheitshinweise ................................... 04 Vor der Inbetriebnahme ................................08 Bedienelemente am Gerät ............................... 09 Die Fernbedienung ..................................10 Anschlüsse am Gerät ................................. 11 Aufbau des Gerätes ..................................12 Erste Inbetriebnahme und Installation ..........................13 Manuelle Installation (WLAN) ..............................14 Der Verstärker ....................................15 Das UKW Radio .................................... -
Seite 4: Sicherheitshinweise
Sicherheitshinweise Achtung: Um die Gefahr eines Stromschlages zu vermeiden, darf an diesem Gerät keine Veränderung vorgenom- men werden! Das Öffnen des Gerätes sowie Veränderungen am Gerät dürfen nur durch autorisierte Personen vorgenommen werden. Wichtige Sicherheitshinweise: ▶ Bitte lesen Sie vor der ersten Inbetriebnahme diese Bedienungsanleitung sorgfältig durch. Dieses Gerät ist nur für den Gebrauch in geschlossenen Räumen. - Seite 5 Umgang mit Batterien Batterien können brennbare Stoffe enthalten. Bei unsachgemäßer Behandlung können Batterien auslaufen, sich stark erhitzen, entzünden oder gar explodieren, was Schäden für Ihr Gerät und Ihre Gesundheit zur Folge haben könnte. Befolgen Sie folgende Hinweise: ▶ Halten Sie Kinder von Batterien fern. ▶...
- Seite 6 Sicherer Gebrauch Elektrogeräte nicht in Kinderhand! Lassen Sie Kinder niemals unbeaufsichtigt elektrische Geräte benutzen. Halten Sie auch die Verpackungsfolien von Kindern fern. Es besteht Erstickungsgefahr. Sicheres Aufstellen ▶ Verwenden Sie das Gerät ausschließlich in trockenen Räumen. ▶ Wenn Sie das Gerät von einer kalten in eine warme Umgebung bringen, kann sich im Inneren des Gerätes Feuchtigkeit niederschlagen.
- Seite 7 Sicherer Gebrauch ▶ Ziehen Sie den Netzstecker aus der Steckdose und entfernen Sie das Antennenkabel vom Gerät, wenn Sie das Gerät längere Zeit nicht benutzen oder wenn sich ein Gewitter nähert. ▶ Das Netzkabel darf während des Betriebs nicht um das Gerät gewickelt sein oder heiße Oberflächen be- rühren.
-
Seite 8: Vor Der Inbetriebnahme
Vor der Inbetriebnahme • Bevor Sie Ihr Internetradio, die Streamingfunktionalität oder die Bedienung per Smar tphone- App nutzen können, benötigen Sie: • Einen schnellen Internetzugang. • Einen Router mit WL AN (kabelloser Zugriffspunkt). • Wenn Ihr kabelloses Netzwerk auf Wired Equivalent Privacy (WEP) oder auf Wi-Fi Protected Ac- cess (WPA) eingestellt ist, benötigen Sie den WEP oder WPA Code, damit Ihr Internet Radio mit dem Router Daten austauschen kann. -
Seite 9: Bedienelemente Am Gerät
11 12 13 14 BEDIENELEMENTE AM GERÄT Farbdisplay Taste „Zurück“: Im Radio-Betrieb sucht das Gerät beim Drü- Kopfhörer Anschlussbuchse cken der Taste automatisch den nächst tieferen Sender. Im USB Eingangsbuchse CD- und Medienabspieler-Betrieb wechselt das Gerät zum Taste „Back“: Durch Drücken dieser Taste gelangen Sie zum vorherigen Titel. -
Seite 10: Die Fernbedienung
DIE FERNBEDIENUNG DIE FERNBEDIENUNG Taste „Standby“: Schaltet das Gerät in den „Clock“ Modus (Standby), im Display werden Uhrzeit und Datum angezeigt. Schalten Sie das Gerät am Netzschalter aus, um Energie zu sparen. Taste „Mute“: Schaltet den Ton aus. Taste „A/B“: Schaltet die Ausgabe auf Lautsprecherpaar A, B, A+B oder A+B aus. Betriebsarten-Auswahltasten: •... -
Seite 11: Anschlüsse Am Gerät
Anschlüsse am Gerät 9 10 11 12 13 14 ANSCHLÜSSE AM GERÄT Netzanschluss: Das Netzanschlusskabel darf DVD Eingangsbuchsen: Zum Anschluss eines keine Beschädigungen oder Defekte aufweisen. DVD-Spielers. Warnhinweise. Phono Eingangsbuchsen: Zum Anschluss eines Lautsprecheranschlüsse A: Bitte achten Sie auf Plattenspielers mit MM-System. den richtigen Anschluss von plus und minus! Ground-Schraubanschluss: Zum Anschluss eines Lautsprecheranschlüsse B: Bitte achten Sie auf... -
Seite 12: Aufbau Des Gerätes
▶ Wenn Sie einen weiteren (End-) Verstärker oder einen aktiven Subwoofer am CVR-100+ MK III benutzen möchten, schließen Sie diesen bitte an die Pre-Out Buchsen des CVR-100+ MK III an. Dieser Ausgang gibt das vom CVR-100+ MK III in Lautstärke und Tonregelung beeinflusste Signal weiter. -
Seite 13: Erste Inbetriebnahme Und Installation
Wählen Sie Ihr WLAN-Netzwerk aus. Falls Ihr WLAN nicht erscheint, könnte dies folgende Gründe haben: ▷ WLAN Antenne nicht montiert. ▷ WLAN Signal zu schwach am Aufstellungsort (eventuell Antennen am Router und am CVR-100+ MK III anders ausrichten oder einen WLAN-Repeater einsetzen). -
Seite 14: Manuelle Installation Wlan
▶ Geben Sie nun das Passwort Ihres WLAN-Netzwerkes ein, achten Sie auf korrekte Schreibweise und Groß-/ Kleinschreibung. Bestätigen Sie mit „Enter“. ▶ Der Router und Ihr CVR-100+ MK III sollten nun verbunden sein und ein Internetzugang bestehen,das Gerät zeigt die Anzeige „Verbunden“. -
Seite 15: Der Verstärker
DER VERSTÄRKER Der CVR-100+ MK III ist mit einem hochwertigen Class-AB Verstärker mit einer Leistung von 2 x 60 Watt an 4 Ohm (RMS) ausgestattet. Mit folgenden Einstellungen können Sie das Klangbild verändern: Lautstärke: Mit den Tasten „VOL+“ und “VOL-“ auf Ihrer Fernbedienung oder am Gerät mit dem Multifunktionsdrehknopf können Sie die Gesamtlautstärke des CVR-100+ MK III verändern. -
Seite 16: Das Ukw Radio
DAS UKW RADIO (FM Radio) Sie können Ihr UKW-Radio sowohl mit der beiliegenden Kombiantenne für UKW- und DAB+ Empfang, als auch mit einer Hausantenne (Adapter liegt bei) nutzen. Das UKW-Radio können sie sowohl mit der Fernbedienung, Taste „FM“ als auch am Gerät durch mehrmaliges Drücken der Taste „Source“ oder über das Hauptmenü akti- vieren. -
Seite 17: Das Dab+ Radio
DAS DAB+ RADIO Sie können Ihr DAB+ Radio sowohl mit der beiliegenden Kombiantenne für UKW- und DAB+ Empfang, als auch mit einer Hausantenne betreiben. Ein Anschluss an das Kabelnetz ist zur Zeit nicht möglich, da die DAB+ Sen- der leider nicht eingespeist werden. Das DAB+ Radio können sie sowohl mit der Fernbedienung, Taste „DAB“, als auch am Gerät durch mehrmaliges Drücken der Taste „Source“... -
Seite 18: Das Internetradio
Das Internetradio Wenn Sie Ihren CVR-100+ MK III an das Internet angeschlossen haben, können Sie nun ohne weitere Einstellun- gen Internetradio empfangen. Ihr Internetradio verbindet sich vollautomatisch mit einer der größten Daten- banken für Internetsender, in der weit über 50.000 Sender und über 100.000 Podcasts weltweit gelistet sind. - Seite 19 CVR-100+ MK III eingelesen werden zu können. Je nach Hersteller des Speichermediums kann dieser möglicherweise in seiner Größe beschränkt sein. Der CVR-100+ MK III erkennt MP3-Dateien mit einer maximalen Samplingrate von 48 KHz bei 16 Bit und 320 kBit/s.
- Seite 20 ▶ Bitte wählen Sie Ihren CVR-100+ MK III aus den gefundenen Geräten aus. ▶ Ihr CVR-100+ MK III ist nun mit der App „UNDOK™“ verbunden und Sie können das Gerät fernbedienen: ▷ Funktion „Quelle“: Wählen Sie unter den verfügbaren Signalquellen die Gewünschte aus.
-
Seite 21: Anlernen Von Fremdfernbedienungen
Sie hierzu Ihren Kopfhörer in den Pairingmodus. Drücken Sie auf dem Gerät die Taste „BT Headphone Pai- ring“ , nun schaltet Ihr CVR-100+ MK III in diesen Modus. Anschließend drücken Sie die Taste erneut. In diesem Modus verbindet sich der CVR-100+ MK III automatisch mit Ihrem Kopfhörer (die Verbindung erfolgt nach ca. 10 Sekunden). -
Seite 22: Die Optischen Anschlüsse
Systeme (selten). Bitte ziehen Sie die Bedienungsanleitung des externen Gerätes für den Anschluss zu Rate. Bitte schließen Sie ein gegebenenfalls vorhandenes Erdungskabel an den Plattenspieler und den CVR-100+ MK III an um ein Brummen zu verhindern.Ein geeignetes Plattenspieler-Cinch-Kabel mit Erdung erhalten Sie im Zubehörhandel. -
Seite 23: Der Rec-Out Ausgang
Der rückwärtige Rec-Out Ausgang sendet elektrische Hochpegel-Audiosignale in analoger Form. Diese Signale werden in Klang und Lautstärke nicht von den getroffenen Einstellungen am CVR-100+ MK III verändert, sondern unverändert von der jeweiligen Signalquelle weitergegeben.Dieser Ausgang ist besonders geeignet für ein Auf- nahmegerät wie Tonband oder Kassettenrekorder. -
Seite 24: Systemeinstellungen
Einrichtungsassistenten. Software Update: Der CVR-100+ MK III prüft regelmäßig, ob ein Update im Internet zur Verfügung steht und weist Sie darauf hin. Sie können dann wählen, ob das Update ausgeführt werden soll. Sie können diese Funktion hier abstellen (nicht empfohlen), oder die Betriebssoftware auf Aktualität prüfen. - Seite 25 Wenn nicht, bitte umcodieren. Netzwerk Error Falsche Informationen werden vom Netzwerk Die Daten vom Server sind nicht lesbar, eventuell empfangen Neustart von CVR-100+ MK III und Router Netzwerk nicht Probleme mit der Verbindung zum Router Router einschalten oder neu starten verfügbar Netzwerk Keine Antwort unabhängig vom Netzwerk...
-
Seite 26: Fehlermeldungen Und Problembehebung (Allgemein)
Fehlermeldungen und Problembehebung (Allgemein) Fehlerbeschreibung Mögliche Ursache und Behebung Kein Strom, obwohl das Gerät - Das Stromkabel ist nicht angeschlossen angeschaltet ist - Die Steckdose ist defekt - Die Sicherung im Gerät ist defekt – Fehler muss durch einen Techniker repariert werden - Das Stromkabel ist defekt Kein Ton - Das Gerät ist gar nicht an... -
Seite 27: Pflege Und Transport
Pflege und Transport Pflege und Reinigung des Gerätes Nehmen Sie das Gerät, bevor Sie es reinigen, vom Strom. Benutzen Sie nur saubere und trockene Lappen, um ihr Gerät zu reinigen. Wenn das Gerät sehr stark verschmutzt ist, können Sie das Gerät mit einem handfeuch- ten Lappen und mit milder Reinigungsflüssigkeit reinigen. - Seite 58 Audioblock GmbH Auf der Striepe 3a | 27798 Hude Tel.: +49 (0) 44 84 - 920 090 10 | E-Mail: block@audioblock.com www.audioblock.com...