Clearaudio concept Bedienungsanleitung
Vorschau ausblenden
Andere Handbücher für concept:
- Bedienungsanleitung (32 Seiten) ,
- Bedienungsanleitung (18 Seiten) ,
- Bedienungsanleitung (24 Seiten)

Verwandte Anleitungen für Clearaudio concept


Inhaltszusammenfassung für Clearaudio concept
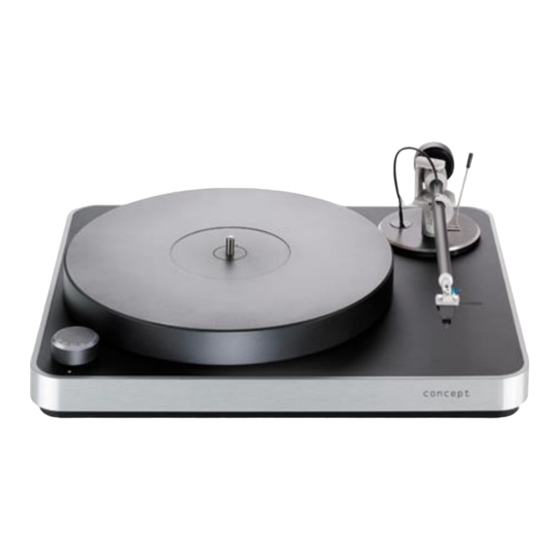
- Seite 1 User manual Bedienungsanleitung Pic. similar / Abb. ähnlich © clearaudio electronic GmbH Made in Germany...
- Seite 11 Störfreiheit (EMC) und denen über Niederspannungsgeräte. GERÄTENETZEINSTELLUNG Ihr clearaudio Produkt wurde so konstruiert, dass es der Haushaltsleistung und den Sicherheitsbestimmungen in Ihrer Region genügt. Dieses Produkt kann mit 110 V (50 Hz) oder mit 230 V (60 Hz) Wechselstrom betrieben werden.
- Seite 12 Inhaltssverzeichnis 1. Verpackungsübersicht ............13 2. Lieferumfang ................13 3. Aufbau und Inbetriebnahme ..........14 - 15 4. Wichtige Informationen ............16 -17 5. Besondere Hinweise .............18 6. Technische Daten ..............19 Garantie Informationen ............20 - 21 Page / Seite 12 © clearaudio electronic GmbH...
-
Seite 13: Verpackungsübersicht
User manual / Bedienungsanleitung 1. Verpackungsübersicht Clearaudio hat eine spezielle Verpackung für Ihr concept Laufwerk entwickelt, welche einen sicheren Transport gewährleistet. Bitte heben Sie diese Verpackung für eventuelle Transporte auf. Obere Verpackungsebene: concept Laufwerkskörper mit integrierter Motoreinheit, Tonarm und Tonabnehmer... -
Seite 14: Aufbau Und Inbetriebnahme
Der Aufbau und die Inbetriebnahme des Plattenspielers gestalten sich sehr einfach, da das Laufwerk, der Tonarm sowie der Tonabnehmer schon werksseitg vormontiert, eingestellt und im Hause clearaudio getestet wurden. concept Plattenspieler benötigt eine waagerechte Aufstellfläche von mindestens 420 x 350 mm. - Seite 15 Phonovorstufe (roter Stecker = rechter Kanal, schwarzer Stecker = linker Kanal). Abb. 8: Netzadapter des Laufwerks Ihr clearaudio concept Plattenspieler ist nun komplett aufgebaut und spielbereit! Clearaudio wünscht Ihnen viel Freude beim Musikhören! Page / Seite 15 Made in Germany...
-
Seite 16: Wichtige Informationen
Ihr Händler hat die Möglichkeit die Tonarmhöhe an der seitlich integrierten Schraube in der Tonarmbasis anzupassen. Abb. 9: Einstellung der Tonarmhöhe Clearaudio übernimmt keine Haftung für Schäden, die durch persönliches Handhaben entstehen. Bitte wenden sie sich immer an Ihren Fachhandel! 4.3 Einstellung des Anti-Skating concept... - Seite 17 User manual / Bedienungsanleitung 4.4 Einstellung der Geschwindigkeit concept Durch die Drehzahleinstellung (Geschwindigkeit) des Laufwerks vor Auslieferung, ist eine Überprüfung vor der Erstinbetriebnahme nicht mehr nötig. Falls Sie im Laufe der Zeit die Drehzahl Ihres Plattenspielers selbst überprüfen und so optimal und präzise wie nur möglich einstellen wollen, empfehlen wir Ihnen die Verwendung einer Stroboscope...
-
Seite 18: Besondere Hinweise
Verpackungsebene eingepackt wird und dass die Laufwerksfüße wieder zurück geschraubt werden! Abb. 12: Korrekte Verpackung des Plattentellers Clearaudio kann für Schäden, die beim Transport entstehen und die durch falsches Einpacken verursacht wurden, keine Haftung übernehmen. 5.3 Service Konnten Sie einen Fehler trotz Beachtung aller hier erwähnten Hinweise nicht beheben oder bestimmen, fragen Sie zunächst Ihren clearaudio Fachhändler um Rat. -
Seite 19: Technische Daten
Kupfer Systemkörper: Aluminium Aluminium-Magnesium Legierung mit keramischer Beschichtung Herstellergarantie: 2 Jahre* 2 Jahre* * Nur bei korrekt ausgefüllter und eingesandter Garantiekarte an clearaudio oder online registrierter Garantie innerhalb von 14 Tagen (https://clearaudio.de/de/service/ registration.php). Page / Seite 19 Made in Germany... -
Seite 20: Warranty Information
The full, extended warranty period for the turntable is 2 years. To receive this full Clearaudio warranty, you must either complete and return the relevant section of the warranty registration card to Clearaudio, or register your product online at https://clearaudio.de/en/service/registration.php, within 14 days of purchase. - Seite 22 User manual / Bedienungsanleitung Page / Seite 22 © clearaudio electronic GmbH...
- Seite 23 User manual / Bedienungsanleitung Page / Seite 23 Made in Germany...
- Seite 24 Irrtümer vorbehalten- Kopien und Abdrucke – auch nur auszugsweise – bedürfen der schriftlichen Genehmigung durch die clearaudio electronic GmbH. Clearaudio Electronic accepts no liability for any misprints. Technical specifications are subject to change or improvement without prior notice. Product availability is as long as stock lasts.