Clearaudio concept active Bedienungsanleitung

Verwandte Anleitungen für Clearaudio concept active


Inhaltszusammenfassung für Clearaudio concept active
- Seite 1 User manual Bedienungsanleitung © clearaudio electronic GmbH, 2019-02 Made in Germany...
-
Seite 14: Bedienungsanleitung
1. Verpackungsübersicht ............16 2. Lieferumfang ................16 3. Aufbau und Inbetriebnahme ..........17 - 18 4. Wichtige Informationen ............19 - 20 5. Einstellmöglichkeiten ............21 - 22 6. Service ..................23 7. Technische Daten ..............24 - 25 Garantie-Informationen ............26 - 27 © clearaudio electronic GmbH, 2019-02... - Seite 15 Störfreiheit (EMC) und denen über Niederspannungsgeräte. GERÄTENETZEINSTELLUNG Ihr clearaudio Produkt wurde so konstruiert, dass es der Haushaltsleistung und den Sicherheitsbestimmungen in Ihrer Region genügt. Dieses Produkt kann mit 110 V (50 Hz) oder mit 230 V (60 Hz) Wechselstrom betrieben werden.
-
Seite 16: Verpackungsübersicht
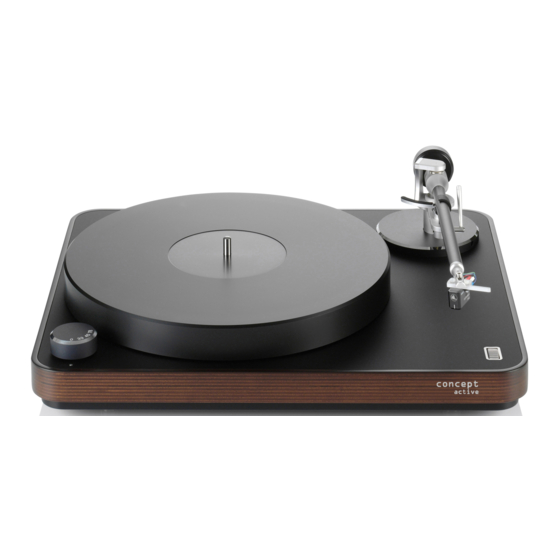
User manual / Bedienungsanleitung 1. Verpackungsübersicht Clearaudio hat eine spezielle Verpackung für Ihr concept active Laufwerk entwickelt, welche einen sicheren Transport gewährleistet. Bitte heben Sie diese Verpackung für eventuelle Transporte auf. Obere Verpackungsebene: concept active Laufwerkskörper mit integrierter Motoreinheit, Tonarm und Tonabnehmer... -
Seite 17: Aufbau Und Inbetriebnahme
User manual / Bedienungsanleitung 3. Aufbau concept active Die Inbetriebnahme des Plattenspielers gestaltet sich sehr einfach, da das Laufwerk, der Tonarm sowie der Tonabnehmer schon werksseitg vormontiert, eingestellt und im Hause clearaudio getestet wurden. concept active Plattenspieler benötigt eine waagerechte Aufstellfläche von mindestens 420 x 350 mm. - Seite 18 Netzbuchse des Plattenspielers und der Stromquelle. Nun verbinden Sie den Plattenspieler mit Ihrem Verstärker oder Aktiv-Lautspechern mithilfe des mitgelieferten Interconnect Kabels. concept active Ihr clearaudio Plattenspieler ist nun komplett aufgebaut und spielbereit! Abb. 8: Netzadapter des Laufwerks © clearaudio electronic GmbH, 2019-02...
-
Seite 19: Wichtige Informationen
Ihr Händler hat die Möglichkeit die Tonarmhöhe an der seitlich integrierten Schraube in der Tonarmbasis anzupassen. Abb. 9: Einstellung der Auflagekraft Clearaudio übernimmt keine Haftung für Schäden, die durch persönliches Handhaben entstehen. Bitte wenden sie sich immer an Ihren Fachhandel! 4.3 Einstellung des Anti-Skating concept active... - Seite 20 - Trimmer links = Einstellung 78 U /min - Trimmer mitte = Einstellung 45 U / min - Trimmer rechts = Einstellung 33 1/3 U / min (in der Nähe des Netzanschlusses) Abb. 11: Platzierung der Trimmer © clearaudio electronic GmbH, 2019-02...
-
Seite 21: Einstellmöglichkeiten
Abb. 12: Einstellmöglichkeiten SUBSONIC Ein- bzw. Ausschalten des Subsonic Filters. GAIN Ermöglicht die Einstellung des Verstärkungsfaktor entsprechend der Ausgangsspannung Ihres Tonabnehmers. Für clearaudio MC Tonabnehmer empfehlen wir grundsätzlich die Einstellung "high" und für clearaudio MM Tonabnehmer "low". high Made in Germany... - Seite 22 Das hätte zur Folge, dass hochfrequente Störungen, zum Beispiel aus dem 230 V Netz bzw. 115 V Netz, die Klangqualität beeinträchtigen könnte. Das Gerät sollte daher nicht in der Nähe von Hochfrequenzerzeugenden Geräten wie z.B. Mobiltelefonen oder Modems bzw. an Stromnetzen die für Datenverkehr genutzt werden (PLC), betrieben werden. © clearaudio electronic GmbH, 2019-02...
-
Seite 23: Service
Bitte entfernen Sie zum Transport den Plattenteller vom Laufwerk (sh. oben) und sichern Sie den Tonarm und den Nadelschutz des Tonabnehmers zusätzlich mit einem Klebestreifen. Clearaudio kann für Schäden, die beim Transport entstehen und die durch falsches Einpacken verursacht wurden, keine Haftung übernehmen. -
Seite 24: Technische Daten
8,0 kg (inkl. Tonarm und Tonabnehmer) Maße (B/T/H): ca. 420 x 350 x 125 mm (mit Tonarm) Herstellergarantie: 3 Jahre* * Nur bei korrekt ausgefüllter und eingesandter Garantiekarte an clearaudio oder online registrierter Garantie innerhalb von 14 Tagen. © clearaudio electronic GmbH, 2019-02... -
Seite 25: Herstellergarantie
9 μ/mN Material der Spulen: Kupfer Kupfer Systemkörper: Aluminium Aluminium-Magnesium Legierung mit keramischer Beschichtung Herstellergarantie: 2 Jahre* 2 Jahre* * Nur bei korrekt ausgefüllter und eingesandter Garantiekarte an clearaudio oder online registrierter Garantie innerhalb von 14 Tagen. Made in Germany... -
Seite 26: Warranty Information
The full, extended warranty period for the turntable is 3 years. To receive this full Clearaudio warranty, you must either complete and return the relevant section of the warranty registration card to Clearaudio, or register your product online at https://clearaudio.de/en/service/registration.php, within 14 days of purchase. - Seite 28 Handmade in Germany. Clearaudio electronic is not responsible for typographical errors in descriptions. Technical specifications subject to change or improvement without prior notice. Product availability is as long as stock lasts. Copies and reprints of this documents, including extracts, require written consent from Clearaudio electronic GmbH;...