Inhaltsverzeichnis
Werbung
Verfügbare Sprachen
Verfügbare Sprachen
Quicklinks
Installations- und Bedienungsanleitung
Installation and operating manual
Notice d'installation et d'emploi
Manual de instalación y uso
Istruzioni per l'installazione e l'uso
Installatie- en bedieningshandleiding
Schaltmodul für Markenschalter –
DE
International
Switch Module for brand switches –
EN
International
Module de commutation pour les
FR
interrupteurs de marque – au niveau
international
Módulo de conmutación para
ES
inter ruptores de marca - internacional
Modulo di commutazione per interrut-
IT
tori di altri marchi – International
Schakelmodule voor merkschakelaars
NL
– internationaal
HmIP-BSM-I
S. 2
p. 24
p. 40
p. 57
p. 74
p. 92
Werbung
Inhaltsverzeichnis
Fehlerbehebung

Verwandte Anleitungen für eQ-3 homematic IP HmIP-BSM-I

Inhaltszusammenfassung für eQ-3 homematic IP HmIP-BSM-I
- Seite 1 Installations- und Bedienungsanleitung Installation and operating manual Notice d‘installation et d‘emploi Manual de instalación y uso Istruzioni per l‘installazione e l‘uso Installatie- en bedieningshandleiding Schaltmodul für Markenschalter – S. 2 International Switch Module for brand switches – p. 24 International Module de commutation pour les p.
-
Seite 2: Lieferumfang
Homematic IP Schaltmodul für Markenschalter – International Bedienungsanleitung Dokumentation © 2022 eQ-3 AG, Deutschland Alle Rechte vorbehalten. Ohne schriftliche Zustimmung des Herausgebers darf diese Anleitung auch nicht auszugsweise in irgendeiner Form reproduziert werden oder unter Verwendung elektronischer, mechanischer oder chemischer Verfahren vervielfältigt oder verarbeitet werden. - Seite 8 Homematic IP...
-
Seite 10: Inhaltsverzeichnis
Inhaltsverzeichnis Hinweise zur Anleitung ................11 Gefahrenhinweise ..................11 Funktion und Geräteübersicht ..............14 Allgemeine Systeminformationen ............15 Adapter für Markenschalter ..............15 Inbetriebnahme ..................15 Installationshinweise ................15 Installationsübersicht .................17 Installation ................... 18 Anlernen ....................19 Fehlerbehebung ..................20 Befehl nicht bestätigt ................ 20 Duty Cycle .................. -
Seite 11: Hinweise Zur Anleitung
Hinweise zur Anleitung Hinweise zur Anleitung Lesen Sie diese Anleitung sorgfältig, bevor Sie Ihr Homematic IP Gerät in Betrieb nehmen. Bewahren Sie die Anleitung zum späteren Nachschla- gen auf! Wenn Sie das Gerät anderen Personen zur Nutzung überlassen, überge- ben Sie auch diese Anleitung. Benutzte Symbole: Achtung! Hier wird auf eine Gefahr hingewiesen. - Seite 12 Gefahrenhinweise Das Gerät ist kein Spielzeug! Erlauben Sie Kindern nicht damit zu spielen. Lassen Sie das Verpackungsmaterial nicht achtlos liegen. Plastikfolien/ -tüten, Styroporteile etc. können für Kinder zu einem gefährlichen Spielzeug werden. Bei Sach- oder Personenschäden, die durch unsachgemäße Hand- habung oder Nichtbeachten der Gefahrenhinweise verursacht wer- den, übernehmen wir keine Haftung.
- Seite 13 Gefahrenhinweise An die Anschlussklemmen der Relaisausgänge dürfen keine SELV-/ PELV-Stromkreise angeschlossen werden. Eine Überlastung kann zur Zerstörung des Gerätes, zu einem Brand oder zu einem elektrischen Schlag führen. Der Stromkreis, an dem das Gerät und die Last angeschlossen wer- den, muss mit einem Leitungsschutzschalter gemäß EN60898-1 (Auslösecharakteristik B oder C, max.
-
Seite 14: Funktion Und Geräteübersicht
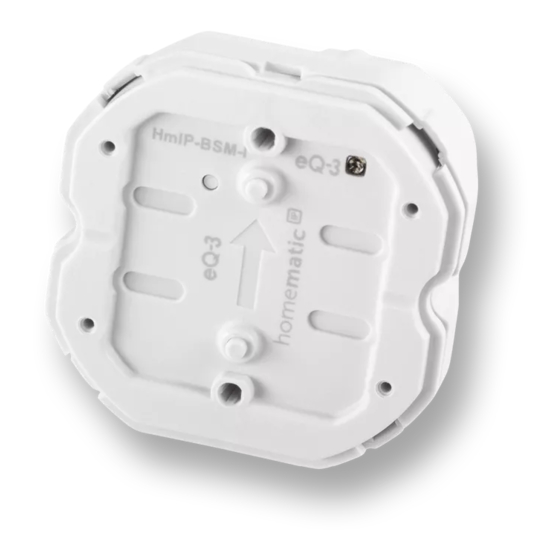
Funktion und Geräteübersicht Das Gerät ist nur für den Einsatz in wohnungsähnlichen Umgebun- gen geeignet. Jeder andere Einsatz, als der in dieser Bedienungsanleitung be- schriebene, ist nicht bestimmungsgemäß und führt zu Gewährleis- tungs- und Haftungsausschluss. Funktion und Geräteübersicht Das Homematic IP Schaltmodul für Markenschalter eignet sich für die Montage in einer Unterputzdose für Schalter verschiedenster Hersteller. -
Seite 15: Allgemeine Systeminformationen
Allgemeine Systeminformationen Allgemeine Systeminformationen Dieses Gerät ist Teil des Homematic IP Smart-Home-Systems und kom- muniziert über das Homematic IP Funkprotokoll. Alle Geräte des Systems können komfortabel und individuell per Smartphone über die Home- matic IP App konfiguriert werden. Alternativ haben Sie die Möglichkeit, Homematic ... - Seite 16 Inbetriebnahme Durch eine unsachgemäße Installation gefährden Sie • Ihr eigenes Leben; • das Leben der Nutzer der elektrischen Anlage. Mit einer unsachgemäßen Installation riskieren Sie schwere Sachschä- den, z. B. durch Brand. Es droht für Sie die persönliche Haftung bei Per- sonen- und Sachschäden.
-
Seite 17: Installationsübersicht
Inbetriebnahme Das Gerät darf nur mit Adapter und einer zugehörigen, montierten Schalterabdeckung betrieben werden. Die Schalterabdeckung darf nur während der Konfiguration entfernt werden. Beachten Sie bei der Installation die Gefahrenhinweise gemäß „2 Ge- fahrenhinweise“ auf Seite 11. Für den Betrieb in einer Wechsel- oder Kreuzschaltung ist eine Min- destlast von 1 W erforderlich. -
Seite 18: Installation
Inbetriebnahme Installation Für die Demontage eines bestehenden Schalters folgen Sie den An- weisungen des jeweiligen Schalterherstellers. Sie können das Schaltmodul in folgenden Schaltungen verwenden: • Ausschaltung (s. Abbildung 3) • Wechselschaltung (s. Abbildung 4) • Kreuzschaltung (s. Abbildung 5) Für die Installation des Schaltmoduls gehen Sie wie folgt vor: •... -
Seite 19: Anlernen
Inbetriebnahme Anlernen Bitte lesen Sie diesen Abschnitt erst vollständig, bevor Sie mit dem Anlernen beginnen. Richten Sie zunächst Ihren Homematic IP Access Point über die Homematic IP App ein, um weitere Homematic IP Geräte im System nutzen zu können. Weitere Informationen dazu finden Sie in der Be- dienungsanleitung des Access Points. -
Seite 20: Fehlerbehebung
Fehlerbehebung LED (A) grün. Das Gerät ist nun einsatzbereit. • Leuchtet die LED rot, versuchen Sie es erneut. • Wählen Sie die gewünschte Lösung für Ihr Gerät aus. • Vergeben Sie in der App einen Namen für das Gerät und ordnen Sie es einem Raum zu. -
Seite 21: Automatisches Abschalten Bei Überlast
Fehlerbehebung Automatisches Abschalten bei Überlast Eine Überlastung des Geräts mit Lastströmen größer 6 A bzw. mit Lasten mit mehr als 1380 W Leistung, führt nach einer kurzen Verzö- gerungszeit zum automatischen Abschalten des Schaltmoduls. Die Sicherheitsabschaltung wird mit einer Fehlermeldung über die App bzw. -
Seite 22: Wiederherstellung Der Werkseinstellungen
Wiederherstellung der Werkseinstellungen Wiederherstellung der Werkseinstellungen Die Werkseinstellungen des Geräts können wiederhergestellt wer- den. Dabei gehen alle Einstellungen verloren. Um die Werkseinstellungen des Geräts wiederherzustellen, gehen Sie wie folgt vor: • Entfernen Sie ggf. die Wippe. • Drücken Sie für 4 s mit einem spitzen Gegenstand (z. B. mit ei- nem Stift) auf die Systemtaste (A), bis die LED schnell orange zu blinken beginnt (s. -
Seite 23: Allgemeine Hinweise Zum Funkbetrieb
Die Reichweite in Gebäuden kann stark von der im Freifeld abweichen. Außer der Sendeleistung und den Empfangseigenschaften der Emp- fänger spielen Umwelteinflüsse wie Luftfeuchtigkeit neben baulichen Gegebenheiten vor Ort eine wichtige Rolle. Hiermit erklärt eQ-3 Maiburger Str. 26789 Leer, Deutschland,... -
Seite 24: Technische Daten
Technische Daten Technische Daten Geräte-Kurzbezeichnung: HmIP-BSM-I Versorgungsspannung: 230 V/50 Hz Stromaufnahme: 6 A max. Leistungsaufnahme Ruhe- betrieb: 0,2 W Mindestlast bei Kreuz- oder Wechselschaltung: Max. Schaltleistung: 1380 W Lastart: Ohmsche Last Relais: Wechsler Leitungsart und -querschnitt: starre und flexible Leitung, 0,75-2,5 mm²... - Seite 25 Technische Daten Lastart Relais Ohmsche Last Glühlampenlast 1000 W Lampen mit internem Vorschaltgerät (LED/Kom- 200 W paktleuchtstofflampe) HV-Halogenlampen 1000 W Elektronische Transformatoren für NV-Halogen- 1000 W lampen Eisenkern Transformatoren für NV-Halogenlam- 1000 W Leuchtstofflampen (unkompensiert) 1000 W Leuchtstofflampen (parallelkompensiert) 1000 W Elektrische Radiatoren und andere elektr.
-
Seite 26: Package Contents
Operating manual Documentation © 2022 eQ-3 AG, Germany All rights reserved. Translation from the original version in German. This manual may not be reproduced in any format, either in whole or in part, nor may it be duplicated or edited by electronic, mechanical or chemical means, without the written consent of the publisher. - Seite 27 Table of contents Information about this manual ............28 Hazard information ................28 Function and device overview ..............31 General system information ..............32 Adapters for brand switch systems ............32 Start-up ......................32 Installation instructions ..............32 Installation overview ................. 34 Installation ................... 34 Pairing ....................
-
Seite 28: Information About This Manual
Information about this manual Information about this manual Please read this manual carefully before beginning operation with your Homematic IP device. Keep the manual so you can refer to it at a later date if you need to. If you hand over the device to other persons for use, please hand over this manual as well. - Seite 29 Hazard information The device is not a toy: do not allow children to play with it. Do not leave packaging material lying around. Plastic films/bags, pieces of polystyrene, etc. can be dangerous in the hands of a child. We accept no liability for damage to property or personal injury caused by improper use or the failure to observe the hazard warn- ings.
- Seite 30 Hazard information No SELV/PELV power circuits may be connected to the connecting terminals of the relay outputs. Exceeding this capacity could lead to the destruction of the device, fires or electric shocks. The circuit to which the device and the load will be connected must be protected by a circuit breaker in accordance with EN60898-1 (tripping characteristic B or C, max.
-
Seite 31: Function And Device Overview
Function and device overview operating manual does not fall within the scope of intended use and will invalidate any warranty or liability. Function and device overview The Homematic IP Switch Module for brand switches is suitable for in- stallation in a flush-mounting box for switches from a wide range of man- ufacturers. -
Seite 32: General System Information
General system information General system information This device is part of the Homematic IP smart home system and works with the Homematic IP protocol. All devices of the system can be con- figured comfortably and individually with the user interface of the Central Control Unit CCU3 or flexibly via the Homematic IP smartphone app in connection with the Homematic IP cloud. - Seite 33 Start-up Incorrect installation also means that you are running the risk of serious damage to property, e.g. from fire. You risk personal liability for personal injury and property damage. Consult an electrician! *Specialist knowledge required for installation: • The following specialist knowledge is particularly important dur- ing installation: •...
-
Seite 34: Installation Overview
Start-up Please observe the hazard information in section see „2 Hazard infor- mation“ on page 28 during installation. A minimum load of 1 W is required for operating in two-way or cross circuits. Permitted cable cross sections for connecting to the device are: Rigid cable [mm flexible cable with/without ferrule [mm 0.75 –... -
Seite 35: Pairing
Start-up • Place a suitable adapter on the switch module and screw it tight using the enclosed screws (see figure 6). For further details on installation, refer to the operating instructions for the adapter. • Connect the Switch Module as required according to figure 3, 4 or 5. -
Seite 36: Troubleshooting
Troubleshooting To add the device, please proceed as follows: • Open the Homematic IP app on your smartphone. Select the menu item “Add device”. • • After installation, the pairing mode remains activated for 3 min- utes. If the time has exceeded, you can manually restart the pairing mode for another 3 minutes by removing the rocker and pressing the sys- tem button (A) briefly with a pointed object (see figure 11). -
Seite 37: Duty Cycle
Troubleshooting Duty cycle The duty cycle is a legally regulated limit of the transmission time of de- vices in the 868 MHz range. The aim of this regulation is to safeguard the operation of all devices working in the 868 MHz range. In the 868 MHz frequency range we use, the maximum transmission time of any device is 1% of an hour (i.e. -
Seite 38: Error Codes And Flashing Sequences
Restoring factory settings Error codes and flashing sequences Flashing code Meaning Solution Short orange flash- Radio transmission/ Wait until the transmission is attempting to trans- completed. mit/data transmis- sion 1x long green flash Transmission con- You can continue operation. firmed 1x long red flash Transmission failed Please try again (see „7.1... -
Seite 39: Maintenance And Cleaning
Hereby, eQ-3 AG, Maiburger Str. 29, 26789 Leer/Germany declares that the radio equipment type Homematic IP HmIP-WUA is in compliance with Directive 2014/53/EU. The full text of the EU declaration of conformity is... -
Seite 40: Technical Specifications
Technical specifications Technical specifications Device short description: HmIP-BSM-I Supply voltage: 230 V/50 Hz Current consumption: 6 A max. Standby power consumption: 0.2 W Minimum load for cross or two-way circuit: Max. switching capacity: 1380 W Load type: Ohmic load Relay: Changeover contact Cable type and cross section: rigid and flexible cable, 0.75-2.5 mm²... - Seite 41 Technical specifications Self-ballasted lamps (LED/compact fluorescent 200 W lamp) HV halogen lamps 1000 W Electronic transformers for LV halogen lamps 1000 W Iron core transformers for LV halogen lamps 1000 W Fluorescent lamps (uncompensated) 1000 W Fluorescent lamps (parallel compensated) 1000 W Electric radiators and other electric heating 3.5 A (200,000...
-
Seite 42: Contenu De La Livraison
– au niveau international Mode d’emploi Documentation © 2022 eQ-3 AG, Allemagne Tous droits réservés. Le présent manuel ne peut être reproduit, en totalité ou sous forme d’extraits, de manière quelconque sans l’accord écrit de l’éditeur, ni copié ou modifié par des procédés électroniques, mécaniques ou chimiques. - Seite 43 Table des matières Remarques sur la notice ................ 44 Mises en garde ..................44 Fonction et aperçu de l’appareil ............47 Informations générales sur le système ..........48 Adaptateurs pour interrupteurs de marque ........48 Mise en service ..................48 Instructions d’installation ..............48 Vue d’ensemble de l’installation .............
-
Seite 44: Remarques Sur La Notice
Remarques sur la notice Remarques sur la notice Lisez attentivement la présente notice avant de mettre votre appareil Ho- mematic IP en service. Conservez la notice pour pouvoir vous y référer ultérieurement ! Si vous laissez d’autres personnes utiliser l’appareil, n’oubliez pas de leur remettre également cette notice d’utilisation. - Seite 45 Mises en garde Cet appareil n’est pas un jouet ! Tenez-le hors de portée des enfants. Ne laissez pas traîner le matériel d’emballage. Les sachets/feuilles en plastique, éléments en polystyrène, etc. peuvent constituer des jouets dangereux pour les enfants. Notre responsabilité ne saurait être engagée en cas de dommages matériels ou de dommages corporels dus au maniement inappro- prié...
- Seite 46 Mises en garde Il est interdit de raccorder des circuits SELV/PELV aux bornes de rac- cordement des sorties relais. Une surcharge peut détruire l’appareil, provoquer un incendie ou une électrocution. Le circuit auquel l’appareil et la charge sont raccordés doit être équipé...
-
Seite 47: Fonction Et Aperçu De L'appareil
Fonction et aperçu de l’appareil L’appareil convient uniquement pour l’utilisation dans des environ- nements d’habitat. Toute application autre que celle décrite dans le présent mode d’emploi n’est pas conforme et entraîne l’exclusion de la garantie et de la responsabilité. Fonction et aperçu de l’appareil Le module de commutation Homematic IP pour les interrupteurs de marque est parfait pour le montage dans un boîtier encastré... -
Seite 48: Informations Générales Sur Le Système
Informations générales sur le système Informations générales sur le système Cet appareil fait partie du système Smart Home de Homematic IP et com- munique par le biais du Homematic IP Protocole radio. Tous les appareils du système peuvent être configurés facilement et individuellement avec un smartphone à... - Seite 49 Mise en service Remarque importante ! La pose doit être effectuée uniquement par des personnes possédant les connaissances et l’expérience en électrotechnique suffisantes.* En procédant à une installation incorrecte, vous • mettez votre propre vie en danger et • celle des utilisateurs de l’installation électrique. Une pose non conforme peut également entraîner des dommages maté- riels lourds (par ex. incendie).
-
Seite 50: Vue D'ensemble De L'installation
Mise en service L’installation ne doit être réalisée que dans les boîtiers d’interrup- teurs (boîtes d’encastrement) du commerce suivants : • conformément à DIN 49073-1 • Boîtiers d’interrupteurs du fabricant Legrand, type Batibox • Boîtiers à encastrer Agro L’appareil ne doit être utilisé qu’avec un adaptateur et un cache in- terrupteur monté... -
Seite 51: Installation
Mise en service Installation Suivez les instructions du fabricant d’interrupteurs respectif pour le démontage d’un interrupteur existant. Vous pouvez utiliser le module de commutation dans les commutations suivantes : • Mise hors tension (voir figure 3) • Commutation va-et-vient (voir figure 4) •... -
Seite 52: Apprentissage
Mise en service Apprentissage Merci de lire attentivement cette section avant de procéder à l’ap- prentissage. Commencez par configurer l’Homematic IP Access Point à l’aide de l’application Homematic IP, afin de pouvoir utiliser d’autres appareils Homematic IP avec votre système. Vous trouverez de plus amples informations à... -
Seite 53: Correction Des Erreurs
Correction des erreurs directement sur l’appareil. • Attendez que la procédure d’apprentissage soit terminée. La LED (A) s’allume en vert pour confirmer que l’apprentissage a • été correctement effectué. L’appareil peut désormais être utilisé. • Si la LED s’allume est rouge, recommencez une nouvelle fois. •... -
Seite 54: Coupure Automatique En Cas De Surcharge
Correction des erreurs de la première installation d’un système par des processus de program- mation multipliés et intensifs. Un dépassement de la limite Duty - Cycle s’affiche par un long clignotement rouge de la LED (A) et peut s’expri- mer par une fonction temporairement manquante de l’appareil. Après quelques instants (1 heure max.), la fonction de l’appareil est restaurée. -
Seite 55: Rétablissement Des Réglages D'usine
Rétablissement des réglages d’usine Clignotement court Mode de programma- Saisissez les quatre der- en orange (toutes tion actif niers chiffres du numé- les 10 secondes) ro de série de l’appareil pour la confirmation (voir v. « 6.4 Apprentis- sage « à la page 52). 6 longs clignote- Appareil défectueux Tenez compte de... -
Seite 56: Entretien Et Nettoyage
Par la présente, eQ-3 AG, basée à Maiburger Str. 29, 26789 Leer, en Allemagne, déclare que l’équipement radioélectrique Homematic IP HmIP-WUA est conforme à la directive 2014/53/EU. L’intégralité de la déclaration européenne de conformité... -
Seite 57: Caractéristiques Techniques
Caractéristiques techniques Caractéristiques techniques Désignation abrégée de l’appareil : HmIP-BSM-I Tension d’alimentation : 230 V/50 Hz Courant absorbé : 6 A maxi. Puissance absorbée en mode veille : 0,2 W Charge minimale en cas de commutation va-et-vient ou en croix : Puissance de commutation max. : 1380 W Type de charge : Charge ohmique Relais :... - Seite 58 Caractéristiques techniques Portée Portée radio en champ libre typ. : 280 m Duty Cycle : < 1 % par h / < 10 % par h Type de charge Relais Charge ohmique Charge de lampe à incandescence 1000 W Lampes avec ballast interne (LED/lampe 200 W fluocompacte) Lampes halogènes HV...
-
Seite 59: Volumen De Suministro
Homematic IP Módulo de conmutación para interruptores de marca - internacional Instrucciones de uso Documentación © 2022 eQ-3 AG, Alemania Todos los derechos reservados. Queda prohibida la reproducción total o parcial de estas instrucciones en todas las formas posibles o utilizando procedimientos electrónicos, mecánicos o químicos, así... - Seite 60 Índice Advertencias sobre estas instrucciones ..........61 Advertencias de peligro ................61 Funciones y esquema del dispositivo ..........64 Información general del sistema ............65 Adaptadores para interruptores de marca......... 65 Puesta en servicio ................... 65 Instrucciones de instalación ............65 Resumen de la instalación ............... 67 Instalación ...................68 Conexión .....................68 Reparación de fallos ................
-
Seite 61: Advertencias Sobre Estas Instrucciones
Advertencias sobre estas instrucciones Advertencias sobre estas instrucciones Lea atentamente estas instrucciones antes de poner en servicio su dispo- sitivo Homematic IP. ¡Conserve estas instrucciones para consultas pos- teriores! Si cede este dispositivo para que lo utilicen otras personas, entregue también estas Instrucciones junto con el dispositivo. - Seite 62 Advertencias de peligro ¡Este dispositivo no es un juguete! No permita que los niños jueguen con él. No deje tirado el material de embalaje de forma descuidada. Las láminas o bolsas de plástico, las piezas de corcho blanco, etc. pueden convertirse en un juguete peligroso para los niños. Se declina toda responsabilidad por lesiones o daños materiales causados por un uso indebido o por incumplimiento de las adver- tencias de peligro.
- Seite 63 Advertencias de peligro En los bornes de conexión de las salidas de relé no se pueden co- nectar circuitos SELV/PELV. Una sobrecarga puede dañar gravemente el dispositivo, provocar un incendio o una descarga eléctrica. El circuito eléctrico, al que se conecte el dispositivo y la carga, tiene que estar protegido por un disyuntor que cumpla la norma EN60898- 1 (característica de disparo B o C, corriente nominal máxima 16 A, capacidad de ruptura mínima 6 kA, clase de limitación de energía 3).
-
Seite 64: Funciones Y Esquema Del Dispositivo
Funciones y esquema del dispositivo Todo uso distinto del indicado en estas instrucciones se considera incorrecto y conlleva la anulación de la garantía y la responsabilidad. Funciones y esquema del dispositivo El módulo de conmutación Homematic IP para interruptores es apropia- do para el montaje en un cajetín empotrado universal para interruptores de diferentes marcas. -
Seite 65: Información General Del Sistema
Información general del sistema Información general del sistema Este dispositivo es parte del sistema smart home Homematic IP y se co- munica por el protocolo de radio Homematic IP. Se puede configurar todos los dispositivos del sistema confortablemente e indivualmente a travès la aplicación Homematic IP. - Seite 66 Puesta en servicio Una instalación incorrecta pone en peligro • su propia vida • la vida de los usuarios de la instalación eléctrica Una instalación incorrecta puede ocasionar costosos daños materiales, por ejemplo, por un incendio. En Usted recae la responsabilidad personal en caso de lesiones físicas y daños materiales.
-
Seite 67: Resumen De La Instalación
Puesta en servicio Solo se permite utilizar el dispositivo con adaptador y la correspon- diente tapa del interruptor montada. La tapa del interruptor solo puede ser retirada durante la configuración. Al realizar la instalación observe las advertencias de peligro señaladas en el capítulo „2 Advertencias de peligro“... -
Seite 68: Instalación
Puesta en servicio Instalación Para desmontar un interruptor existente, siga las instrucciones de su fabricante. Puede utilizar el módulo de conmutación en los siguientes circuitos: • Desconexión (v. figura 3) • Conexión alterna (v. figura 4) • Conexión cruzada (v. figura 5) Para instalar el módulo de conmutación proceda del siguiente modo: •... - Seite 69 Puesta en servicio También puede conectar el dispositivo a Access Point o a la CCU3 central. Para más información al respecto, por favor, consulte el ma- nual de usuario de Homematic IP (lo encontrará en la sección de des- cargas de www.homematic-ip.com). Para integrar el dispositivo en su sistema y que pueda comunicarse con otros dispositivos Homematic IP, es necesario conectarlo primero al Ho- mematic IP Access Point.
-
Seite 70: Reparación De Fallos
Reparación de fallos Reparación de fallos Comando sin confirmar Si alguno de los receptores no confirma un comando se enciende el LED (A) rojo al final de la transmisión errónea. El motivo de una transmisión errónea puede ser un fallo de funcionamiento (v. „10 Indicaciones gene- rales sobre el modo inalámbrico“... -
Seite 71: Apagado Automático Por Sobrecarga
Reparación de fallos Apagado automático por sobrecarga Una sobrecarga del dispositivo con corrientes de carga superiores a 6 A, o con cargas con potencias superiores a 1.380 W, provoca el apagado automático del módulo de conmutación tras un breve tiempo de retardo. El apagado de seguridad se señala mediante un mensaje de error en la aplicación o en WebUI. -
Seite 72: Restablecimiento De La Configuración De Fábrica
Restablecimiento de la configuración de fábrica 1 vez luz naranja Indicación de prue- Cuando se apague la indica- y 1 vez verde ción de prueba puede conti- nuar. Restablecimiento de la configuración de fábrica Se puede restablecer la configuración de fábrica del dispositivo. Al hacerlo se pierden todos los ajustes. -
Seite 73: Indicaciones Generales Sobre El Modo Inalámbrico
AG, Maiburger Str. 29, 26789 Leer, Alemania, declara que la in- stalación inalámbrica, Homematic IP HmIP-WUA, cumple la Di- rectiva 2014/53/UE. El texto de la declaración de conformidad CE está... -
Seite 74: Datos Técnicos
Datos técnicos Datos técnicos Nombre abreviado del dispositivo: HmIP-BSM-I Tensión de alimentación: 230 V/50 Hz Consumo de corriente: máx. 6 A Potencia absorbida en reposo: 0,2 W Carga mínima para la conexión cruzada o alterna: Potencia de ruptura máx.: 1380 W Clase de carga: Carga óhmica Relé:... - Seite 75 Datos técnicos Clase de carga Relé Carga óhmica Carga de lámpara incandescente 1000 W Lámparas con balasto interno (LED/fluores- 200 W cente compacto) Lámparas halógenas HV 1000 W Transformadores electrónicos para lámpa- 1000 W ras halógenas NV Transformadores de núcleo de hierro para 1000 W lámparas halógenas NV Lámparas fluorescentes (no compensadas)
- Seite 76 – International Istruzioni per l'uso Documentazione © 2022 eQ-3 AG, Germania Tutti i diritti riservati. Senza l’approvazione scritta del produttore è vietata la riproduzione di questo manuale o di sue parti in qualsiasi forma o la sua duplicazione o modifica con l’utilizzo di processi elettronici, meccanici o chimici.
- Seite 77 Indice Indicazioni su queste istruzioni .............78 Indicazioni di pericolo ................78 Funzioni e vista d’insieme dell’apparecchio ........81 Informazioni generali sul sistema ............82 Adattatori per interruttori di altri marchi ..........82 Messa in funzione ................... 83 Avvertenze per l’installazione ............83 Installazione in breve ................
-
Seite 78: Indicazioni Su Queste Istruzioni
Indicazioni su queste istruzioni Indicazioni su queste istruzioni Leggere attentamente queste istruzioni prima di mettere in funzione questo dispositivo Homematic IP. Conservare questo manuale per poter- lo consultare anche in futuro! Se si affida l’utilizzo dell’apparecchio ad altre persone consegnare anche queste istruzioni per l’uso. - Seite 79 Indicazioni di pericolo Questo apparecchio non è un giocattolo! Non consentire ai bambi- ni di giocare con l’apparecchio. Non lasciare incustodito il materiale dell’imballaggio. Le pellicole o i sacchetti di plastica, le parti di poli- stirolo, ecc. possono diventare un giocattolo pericoloso. L’azienda declina qualsiasi responsabilità...
- Seite 80 Indicazioni di pericolo Non collegare circuiti elettrici SELV/PELV ai morsetti di collegamen- to delle uscite a relè. Un sovraccarico può causare la distruzione del dispositivo, provoca- re un incendio o generare scosse elettriche. Il circuito elettrico previsto per l’allaccio del dispositivo e del carico deve essere messo in sicurezza con un interruttore magnetotermico conforme alla norma EN60898-1 (caratteristica di intervento di tipo B o C, corrente nominale max.16 A, potere di interruzione min.
-
Seite 81: Funzioni E Vista D'insieme Dell'apparecchio
Funzioni e vista d’insieme dell’apparecchio L’apparecchio è adatto solo all’impiego in ambienti a uso abitativo o analoghi. Qualsiasi impiego diverso da quello descritto nelle presenti istruzio- ni per l’uso non è conforme alle disposizioni e comporta l’esclusione di responsabilità e la perdita dei diritti di garanzia. Funzioni e vista d’insieme dell’apparecchio Il dispositivo Homematic IP Modulo di commutazione per interruttori di altri marchi può... -
Seite 82: Informazioni Generali Sul Sistema
Informazioni generali sul sistema (C) Morsetto di collegamento per 1 (corrispondente a (Normally Closed)) (D) Morsetto di collegamento per N (conduttore neutro) (E) Morsetto di collegamento per L (conduttore esterno) Informazioni generali sul sistema Questo apparecchio fa parte del sistema Homematic IP Smart-Home e comunica tramite il protocollo radio Homematic IP. -
Seite 83: Messa In Funzione
Messa in funzione Messa in funzione Avvertenze per l’installazione Leggere interamente questo paragrafo prima di iniziare ad installare l’apparecchio. Prima dell’installazione prendere nota del numero (SGTIN) riportato sull’apparecchio e del punto previsto per l’installazione, in modo da riuscire più facilmente ad assegnare l’apparecchio nella fase succes- siva. - Seite 84 Messa in funzione • selezionare il materiale per l’installazione elettrica così da garan- tire le condizioni di disattivazione; • gradi di protezione IP; • montare il materiale per l’installazione elettrica; • tipo di rete di alimentazione (sistema TN, sistema IT, sistema TT) e conseguenti condizioni di allaccio (classica messa a terra del neutro, messa a terra di protezione, misure supplementari ne- cessarie etc.).
-
Seite 85: Installazione In Breve
Messa in funzione Installazione in breve Interruttore a Homematic IP bilanciere Modulo di Adattatore Telaio (esempio) commutazione idoneo (esempio) Installazione Per smontare un interruttore già presente sul posto seguire le istruz- ioni del rispettivo fabbricante. Il modulo di commutazione può essere utilizzato nei seguenti circuiti: •... -
Seite 86: Inizializzazione
Messa in funzione • Inserire sulle viti, nella scatola sotto intonaco, il modulo di com- mutazione con l’adattatore montato e avvitare di nuovo le viti (v. figura 7+8). • Applicare il telaio della rispettiva serie di interruttori sopra al mo- dulo di commutazione (v. -
Seite 87: Risoluzione Dei Guasti
Risoluzione dei guasti Se questo tempo è già scaduto, la modalità Inizializzazione può es- sere avviata manualmente per altri 3 minuti premendo per alcuni istanti il tasto di sistema (A) con un oggetto appuntito dopo aver ri- mosso l’interruttore a bilanciere v. figura 11). •... -
Seite 88: Duty Cycle
Risoluzione dei guasti Duty Cycle Il Duty Cycle indica un limite disciplinato dalla legge e applicato al tem- po di trasmissione degli apparecchi nella gamma 868 MHz. Lo scopo di questa disciplina è garantire il funzionamento di tutti gli apparecchi nella gamma 868 MHz. -
Seite 89: Codici Di Errore E Sequenze Di Spie Lampeggianti
Risoluzione dei guasti Codici di errore e sequenze di spie lampeggianti Codice di segnalazione Significato Soluzione Luce arancione lampeg- Trasmissione radio/ Attendere che la tra- giante per breve tempo tentativo d'invio/tra- smissione sia con- smissione dati clusa. Luce verde accesa a lun- Procedura confer- Si può... -
Seite 90: Ripristino Delle Impostazioni Di Fabbrica
Ripristino delle impostazioni di fabbrica Ripristino delle impostazioni di fabbrica L’utente può ripristinare le impostazioni di fabbrica dell’apparecchio. In questo caso tutte le impostazioni andranno perdute. Per ripristinare le impostazioni di fabbrica dell’apparecchio procedere nel modo seguente: • Se necessario rimuovere l’interruttore a bilanciere. •... -
Seite 91: Informazioni Generali Sul Funzionamento Via Radio
Con la presente la eQ-3 AG, Maiburger Str. 29, 26789 Leer, Germania, dichiara che l’apparecchio radio Homematic IP modello HmIP-WUA è conforme alla Direttiva 2014/53/UE. Il testo integrale della dichia- razione di conformità... -
Seite 92: Dati Tecnici
Dati tecnici Dati tecnici Sigla dell’apparecchio: HmIP-BSM-I Tensione di alimentazione: 230 V/50 Hz Corrente assorbita 6 A max. Potenza assorbita nel funzionamento a riposo: 0,2 W Carico minimo con collegamento incrociato o deviatore: Potenza di interruzione massima: 1380 W Tipo di carico: carico ohmico Relè: Invertitore... - Seite 93 Dati tecnici Tipo di carico Relè carico ohmico Carico lampade a incandescenza 1000 W Lampadine con stabilizzatore integrato (a 200 W LED/lampade fluorescenti compatte) Lampade alogene ad alto voltaggio 1000 W Trasformatori elettronici per lampade alogene 1000 W a basso voltaggio Trasformatori con anima di ferro per lampade 1000 W alogene a basso voltaggio...
- Seite 94 Homematic IP Schakelmodule voor Merkschakelaars – internationaal Handleiding Documentatie © 2022 eQ-3 AG, Duitsland Alle rechten voorbehouden. Zonder schriftelijke toestemming van de uitgever mogen deze handleiding of fragmenten ervan op geen enkele manier worden gereproduceerd of met behulp van elektronische, mechanische of chemische middelen worden verveel- voudigd of verwerkt.
- Seite 95 Inhoudsopgave Instructies bij deze handleiding ............96 Gevarenaanduidingen ................96 Werking en overzicht van het apparaat ..........99 Algemene systeeminformatie ............100 Adapter voor merkschakelaar ............100 Inbedrijfstelling ..................100 Installatie-instructies ...............100 Overzicht van de installatie ............102 Installatie .................... 103 Aanleren .....................104 Storingen oplossen ................
-
Seite 96: Instructies Bij Deze Handleiding
Instructies bij deze handleiding Instructies bij deze handleiding Lees deze handleiding zorgvuldig door voordat u uw Homematic IP ap- paraat in gebruik neemt. Bewaar de handleiding, om ze ook later nog te kunnen raadplegen! Als u het apparaat door andere personen laat gebruiken, geef dan ook deze handleiding mee. - Seite 97 Gevarenaanduidingen Het apparaat is geen speelgoed! Laat kinderen er niet mee spelen. Laat verpakkingsmateriaal niet rondslingeren. Plastic folies en zak- ken, vormstukken van styropor enz. kunnen door kinderen als ge- vaarlijk speelgoed worden gebruikt. Voor zaak- of personenschade die door een onjuist gebruik of niet-naleving van de gevarenaanduidingen veroorzaakt is, stellen wij ons niet aansprakelijk.
- Seite 98 Gevarenaanduidingen Op de aansluitklemmen van de relaisuitgangen mogen geen SELV-/ PELV-stroomkringen worden aangesloten. Een overbelasting kan leiden tot de vernieling van het apparaat, brand of elektrische schokken. De stroomkring waarop het apparaat en de last worden aangeslo- ten, moet beveiligd zijn met een installatieautomaat volgens EN 60898-1 (karakteristiek B of C, max.
-
Seite 99: Werking En Overzicht Van Het Apparaat
Werking en overzicht van het apparaat Het apparaat is uitsluitend geschikt voor gebruik in woonruimten en soortgelijke omgevingen. Elk ander gebruik dan wat in deze handleiding beschreven wordt, is oneigenlijk en leidt tot de uitsluiting van garantie en aansprakelijk- heid. Werking en overzicht van het apparaat De Homematic IP Schakelmodule voor Merkschakelaars is geschikt voor montage in een inbouwdoos voor schakelaars van de meest uiteenlo-... -
Seite 100: Algemene Systeeminformatie
Algemene systeeminformatie Algemene systeeminformatie Dit apparaat is een onderdeel van het Homematic IP Smart Home Sys- teem en communiceert via het Homematic IP zendprotocol. Alle ap- paraten van het systeem kunnen comfortabel en individueel via een smartphone met de Homematic IP App worden geconfigureerd. U hebt ook de mogelijkheid om de Homematic IP apparaten via de cen- trale CCU3 of in combinatie met vele partneroplossingen te gebruiken. - Seite 101 Inbedrijfstelling Door een onjuiste installatie brengt u uw eigen • leven en • het leven van de gebruikers van de elektrische installatie in ge- vaar. Met een onjuiste installatie riskeert u ernstige materiële schade, bijv. door brand. Het risico bestaat dat u persoonlijk aansprakelijk wordt gesteld voor personen- en zaakschade.
-
Seite 102: Overzicht Van De Installatie
Inbedrijfstelling Het apparaat mag alleen in combinatie met een adapter en een bij- behorende, gemonteerde schakelaarafdekking worden gebruikt. De schakelaarafdekking mag alleen tijdens de configuratie worden ver- wijderd. Neem bij de installatie de gevarenaanduidingen overeenkomstig ‘2 Gevarenaanduidingen’ op pagina 96 in acht. Voor het gebruik van een wissel- of kruisschakeling is een mini- mumlast van 1 W vereist. -
Seite 103: Installatie
Inbedrijfstelling Installatie Voor de demontage van een voorhanden schakelaar neemt u de instructies van de betreffende fabrikant in acht. U kunt de schakelmodule voor de volgende schakelingen gebruiken: • uitschakeling (zie afbeelding 3) • wisselschakeling (zie afbeelding 4) • kruisschakeling (zie afbeelding 5) Ga als volgt te werk om de schakelmodule te installeren: •... -
Seite 104: Aanleren
Inbedrijfstelling Aanleren Lees dit hoofdstuk volledig door, voordat u met het aanleren be- gint. Configureer eerst uw Homematic IP Access Point via de Homematic IP App om nog andere Homematic IP apparaten in het systeem te kunnen gebruiken. Uitgebreide informatie hierover vindt u in de handleiding van het Access Point. -
Seite 105: Storingen Oplossen
Storingen oplossen • Kies de gewenste oplossing voor uw apparaat. • Geef het apparaat in de app een naam en wijs het toe aan een ruimte. Storingen oplossen Commando niet bevestigd Indien ten minste één ontvanger een commando niet bevestigt, licht de led bij het afsluiten van de mislukte overdracht (A) rood op. -
Seite 106: Automatische Uitschakeling In Geval Van Overbelasting
Storingen oplossen Automatische uitschakeling in geval van overbelas- ting Een overbelasting van het apparaat bij belastingsstromen van meer dan 6 A of bij belastingen met een vermogen van meer dan 1380 W leidt na een korte vertragingstijd tot automatische uitschakeling van de schakelmodule. -
Seite 107: Herstellen Van De Fabrieksinstellingen
Herstellen van de fabrieksinstellingen 1x oranje en 1x Testindicatie Wanneer de testindicatie weer groen oplich- uit is, kunnen u doorgaan. Herstellen van de fabrieksinstellingen De fabrieksinstellingen van het apparaat kunnen worden hersteld. Hierbij gaan alle instellingen verloren. Om de fabrieksinstellingen van het apparaat te herstellen, gaat u als volgt te werk: •... -
Seite 108: Algemene Instructies Voor Het Draadloze Bedrijf
Hierbij verklaart eQ-3 AG, Maiburger Str. 29, 26789 Leer, Duitsland, dat het draadloze apparaattype Homematic IP HmIP-WUA in overeenstemming is met de richtlijn 2014/53/EU. De volledige tekst van de EU- conformiteitsverklaring is beschikbaar onder het volgende internetadres: www.homematic-ip.com... -
Seite 109: Technische Gegevens
Technische gegevens Technische gegevens Apparaatcode: HmIP-BSM-I Voedingsspanning: 230 V/50 Hz Stroomopname: 6 A max. Opgenomen vermogen bij stand-by: 0,2 W Minimumbelasting bij kruis- of wisselschakeling: Max. schakelvermogen: 1380 W Lasttype: ohmse last Relais: wisselaar Kabeltype en -doorsnede: starre en flexibele kabel, 0,75-2,5 mm² Installatie: Alleen in de volgende schakelaardo- zen:... - Seite 110 Technische gegevens Lasttype Relais ohmse last Gloeilampen 1000 W Lampen met intern voorschakelapparaat (led / 200 W compacte tl-buis) HV-halogeenlampen 1000 W Elektronische transformatoren voor LV-halogeen- 1000 W lampen Transformatoren met ijzeren kern voor LV-halo- 1000 W geenlampen Tl-buizen (niet gecompenseerd) 1000 W Tl-buizen (parallel gecompenseerd) 1000 W...
- Seite 111 Kostenloser Download der Homematic IP App! Free download of the Homematic IP app! Bevollmächtigter des Herstellers: Manufacturer’s authorised representative: eQ-3 AG Maiburger Straße 29 26789 Leer / GERMANY www.eQ-3.de...