Herunterladen Inhalt Inhalt Diese Seite drucken

Werbung

Verfügbare Sprachen
  • DE

Verfügbare Sprachen

  • DEUTSCH, seite 40
3 111 11
Keor MOD Top Entry
Instructions d'installation • Installation instructions
Part. LE13568AA-03/22-01 GF

Werbung

Inhaltsverzeichnis
loading

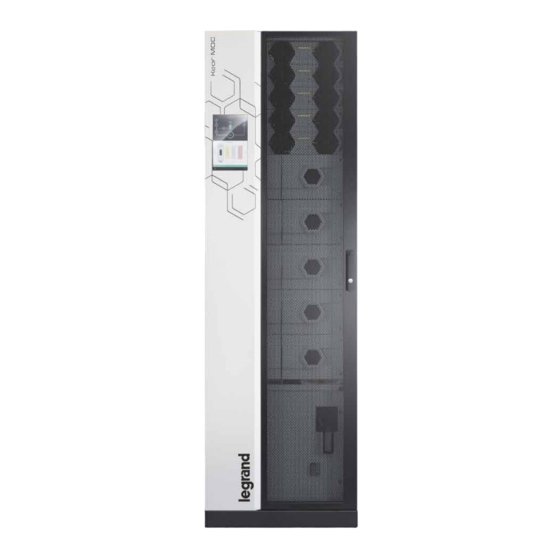
Inhaltszusammenfassung für LEGRAND Keor MOD Top Entry

  • Seite 1 3 111 11 Keor MOD Top Entry Instructions d’installation • Installation instructions Part. LE13568AA-03/22-01 GF...
  • Seite 2 Commutation exchange Keor MOD Top Entry ITALIAN FRANÇAIS ENGLISH ENGLISH ITALIANO DEUTSCH SPANISH...
  • Seite 3: Inhaltsverzeichnis

    Keor MOD Top Entry Table des matières 1. Introduction 2. Transport et installation 2.1 Contrôle visuel 2.2 Transport 2.3 Déballage 2.4 Installation 3. Installation 4. Caractéristiques mécaniques...
  • Seite 4: Introduction

    1. Introduction Le présent manuel décrit l’installation mécanique du Keor MOD Top Entry 311111 sur l’onduleur Keor MOD. Pour toutes les autres informations relatives à l’installation et à l’utilisation, se reporter au manuel d’installation et d’utili- sation de l’onduleur Keor MOD.
  • Seite 5: Transport Et Installation

    Dans le cas d’un possible dommage ou dommage attesté, informer immédiatement : - le transporteur ; - le Service d’assistance technique LEGRAND. S’assurer que l’équipement correspond aux données figurant sur le bon de livraison. L'équipement et les accessoires fournis doivent être en parfait état.
  • Seite 6: Déballage

    2. Transport et installation Déballage Le déballage de la fourniture doit être effectué par deux opérateurs qui doivent respecter la procédure suivante : - amener l'équipement sur le lieu d'installation à l'aide d'un chariot élévateur et/ou d’un transpalette de caractéristiques appropriés (fig.
  • Seite 7 Keor MOD Top Entry (fig. 2) (fig. 3) (fig. 4)
  • Seite 8: Installation

    2. Transport et installation Installation Une fois que l’équipement se trouve dans la position finale avec l’onduleur pour l’installation, dévisser les pieds (sens contraire des aiguilles d’une montre), sur le devant et à l’arrière de l’armoire pour procéder à son positionnement. S’assurer que toutes les roues et les pieds sont parfaitement en contact avec le sol.
  • Seite 9: Installation

    Keor MOD Top Entry 3. Installation 1) Retirer le panneau latéral droit de l'onduleur Keor MOD. Conserver le panneau et les 6 vis hexagonales M6x20 ainsi que les rondelles dentées M6. 2) Retirer le panneau frontal du Top Entry.
  • Seite 10 3. Installation 3) Se munir de 2 plaques de fixation en forme de L et les fixer en haut à gauche de l’équipement avec 2 vis torx M6x12 pour chaque plaque comme indiqué sur le dessin. Se munir de 4 supports et les fixer devant à gauche, derrière à gauche et au bas à gauche de l’équipement avec 2 vis torx M6x12 pour chaque plaque comme indiqué...
  • Seite 11 Keor MOD Top Entry 4) Fixer le Top Entry à l’onduleur et fixer les plaques de l’équipement à l’armoire de l’onduleur avec 2 autres vis torx M6x12 pour chaque plaque.
  • Seite 12 3. Installation 5) Introduire les câbles en utilisant les entrées de câbles situées en haut et en bas de l’équipement. Fixer les câbles à la grille interne.
  • Seite 13 Keor MOD Top Entry 6) Fixer le panneau avant et le panneau latéral (panneau retiré de l’onduleur lors de la phase 1) sur l’équipement.
  • Seite 14: Caractéristiques Mécaniques

    4. Caractéristiques mécaniques...
  • Seite 15 Keor MOD Top Entry Index 1. Introduction 2. Transportation and placement 2.1 Visual check 2.2 Transportation 2.3 Unpacking 2.4 Placement 3. Installation 4. Mechanical data...
  • Seite 16: Introduction

    1. Introduction This manual describes the mechanical installation of the Keor MOD Top Entry 3 111 11 to the UPS Keor MOD. For all the other information related to the installation and the use, consult the installation and user/manual for Keor...
  • Seite 17: Transportation And Placement

    If there is possible or ascertained damage, immediately inform: - the transporter; - the LEGRAND Technical Support Service. Check that the equipment corresponds with the items indicated in the delivery documentation. The equipment and the relative supplied accessories must be in perfect conditions.
  • Seite 18: Unpacking

    2. Transportation and placement Unpacking To remove the packaging material, two people are required and they must comply with the following procedure: - bring the item to the installation site using a forklift and/or a truck pallet with suitable characteristics (fig. 1); - remove the plastic film and cardboards;...
  • Seite 19 Keor MOD Top Entry (fig. 2) (fig. 3) (fig. 4)
  • Seite 20: Placement

    2. Transportation and placement Placement When the equipment is in the final position with the UPS for the installation, unscrew counterclockwise the feet on the front and rear of the cabinet to position it. Make sure that all the wheels and feet adhere to the floor. (all the dimensions are in mm)
  • Seite 21: Installation

    Keor MOD Top Entry 3. Installation 1) Remove the right side panel of the Keor MOD UPS. Save the panel and the 6 hex socket M6x20 screws along with M6 toothed washers. 2) Remove the front panel of the top entry...
  • Seite 22 3. Installation 3) Take 2 L-shaped fixing plates and fix them on the top left of the equipment with 2 M6x12 torx screw for each plate as shown in the picture. Take 4 plate brackets and fix them at the left front, at the left rear sides and at the left bottom of the equipment with 2 M6x12 torx screw for each plate as shown in the picture.
  • Seite 23 Keor MOD Top Entry 4) Attach the top entry to the UPS and fix the plates of the equipment to the UPS cabinet with other 2 M6x12 torx screw for each plate.
  • Seite 24 3. Installation 5) Insert the cables using the cable entries at the top and at the bottom of the equipment. Fasten the cables to the internal grid.
  • Seite 25 Keor MOD Top Entry 6) Fix the front panel and the side panel (the one removed from the UPS during step 1) to the equipment.
  • Seite 26: Mechanical Data

    4. Mechanical data...
  • Seite 27 Keor MOD Top Entry Indice 1. Introduzione 2. Trasporto e posizionamento 2.1 Verifica visiva 2.2 Trasporto 2.3 Disimballaggio 2.4 Posizionamento 3. Installazione 4. Dati meccanici...
  • Seite 28: Introduzione

    1. Introduzione Questo manuale descrive l’installazione meccanica del Keor MOD Top Entry 311111 sull’UPS Keor MOD. Per tutte le altre informazioni relative all’installazione e all’uso, consultare il manuale d’uso e installazione di Keor MOD.
  • Seite 29: Trasporto E Posizionamento

    In caso di danno possibile o accertato informare immediatamente: - il trasportatore; - il Centro Assistenza Tecnica di LEGRAND. Controllare che l’apparecchiatura corrisponda al materiale indicato nella documentazione di consegna. L’apparecchiatura e il relativo corredo di fornitura devono risultare in perfette condizioni.
  • Seite 30: Disimballaggio

    2. Trasporto e posizionamento Disimballaggio Per rimuovere il materiale di imballo sono necessarie due persone e devono attenersi alla seguente procedura: - portare l’apparecchiatura sul luogo di installazione utilizzando un carrello elevatore e/o un transpallet con caratteristiche adeguate (fig. 1); - rimuovere il rivestimento di plastica e i cartoni;...
  • Seite 31 Keor MOD Top Entry (fig. 2) (fig. 3) (fig. 4)
  • Seite 32: Posizionamento

    2. Trasporto e posizionamento Posizionamento Quando l'apparecchiatura si trova nella posizione finale per l'installazione con l’UPS, svitare in senso antiorario i piedini sulla parte frontale e posteriore dell'armadio per posizionarla. Accertarsi che tutte le ruote e i piedini aderiscano al pavimento. (tutte le i dimensioni sono espresse in mm)
  • Seite 33: Installazione

    Keor MOD Top Entry 3. Installazione 1) Rimuovere il pannello laterale destro dell'UPS Keor MOD. Conservare il pannello e le 6 viti a testa esagonale M6x20 con rondelle dentate M6. 2) Rimuovere il pannello frontale del Top Entry...
  • Seite 34 3. Installation 3) Prendere 2 piastre di fissaggio a L e fissarle in alto a sinistra dell’apparecchiatura con 2 viti torx M6x12 per ogni piastra come mostrato in figura. Prendere 4 staffe per piastre e fissarle nella parte frontale sinistra, nella parte posteriore sinistra e nella parte inferiore sinistra dell’apparecchiatura con 2 viti torx M6x12 per ogni piastra come mostrato in figura.
  • Seite 35 Keor MOD Top Entry 4) Unire il Top Entry all’UPS e fissare le piastre dell’apparecchiatura all’armadio dell’UPS con altre 2 viti torx M6x12 per ogni piastra.
  • Seite 36 3. Installazione 5) Inserire i cavi utilizzando gli ingressi dei cavi nella parte superiore e inferiore dell’apparecchiatura. Fissare i cavi alla griglia interna.
  • Seite 37 Keor MOD Top Entry 6) Fissare il pannello frontale e il pannello laterale (quello rimosso dall’UPS durante la fase 1) all’apparecchiatura.
  • Seite 38: Dati Meccanici

    4. Dati meccanici...
  • Seite 39 Keor MOD Top Entry Inhaltsverzeichnis 1. Einleitung 2. Transportieren und Aufstellen 2.1 Sichtliche Prüfung 2.2 Transport 2.3 Auspacken 2.4 Aufstellen 3. Installation 4. Mechanische Daten...
  • Seite 40: Einleitung

    1. Einleitung Diese Anleitung beschreibt die mechanische Installation des Keor MOD Top Entry 311111 an der USV Keor MOD. Für alle anderen Informationen in Bezug auf die Installation und den Gebrauch konsultieren Sie bitte die Installations- und Bedienungsanleitung für Keor MOD.
  • Seite 41: Transportieren Und Aufstellen

    Falls Schäden bemerkt werden oder der Verdacht eines Schadens besteht, sofort: - den Spediteur und - den technischen Kundendienst von LEGRAND benachrichtigen. Kontrollieren, dass das Gerät der Beschreibung auf dem Lieferschein entspricht. Das Gerät und die entsprechende Ausstattung müssen einen einwandfreien Zustand aufweisen.
  • Seite 42: Auspacken

    2. Transportieren und Aufstellen Auspacken Um das Verpackungsmaterial zu entfernen sind zwei Personen erforderlich, die folgende Anweisungen beachten müssen: - das Gerät mit einem Gabelstapler und/oder einer Transportpalette mit geeigneten Eigenschaften zum Aufstellungsort bringen (Abb. 1); - Entfernen Sie die Kunststofffolie und die Kartons; - die an der Palette befestigte Holzrutsche nach unten bringen und lösen Sie die Schrauben der Halterungen, mit denen das Gerät auf der Palette befestigt ist (Abb.
  • Seite 43 Keor MOD Top Entry (fig. 2) (fig. 3) (fig. 4)
  • Seite 44: Aufstellen

    2. Transportieren und Aufstellen Aufstellen Wenn sich das Gerät in der Endposition mit der USV für die Installation befindet, schrauben Sie die Füße an der Vorder- und Rückseite des Schranks gegen den Uhrzeigersinn ab, um sie einzustellen. Achten Sie darauf, dass alle Räder und Füße am Boden fest sitzen. (Alle Maße in mm)
  • Seite 45: Installation

    Keor MOD Top Entry 3. Installation 1) Entfernen Sie die rechte Seitentafel der USV Keor MOD. Bewahren Sie die Tafel und die 6 Schrauben M6x20 mit Innensechskant sowie die M6-Zahnscheiben auf. 2) Entfernen Sie die Fronttafel des Top Entry.
  • Seite 46 3. Installation 3) Nehmen Sie 2 L-förmige Befestigungsplatten und befestigen Sie sie oben links am Gerät mit je 2 Torx-Schrauben M6x12, wie in der Abbildung gezeigt. Nehmen Sie 4 Plattenhalterungen und befestigen Sie diese an der linken Vorderseite, an den linken Rückseiten und an der linken Unterseite des Geräts mit je 2 Torx-Schrauben M6x12, wie in der Abbildung gezeigt.
  • Seite 47 Keor MOD Top Entry 4) Bringen Sie den Top Entry an der USV an und befestigen Sie die Platten des Geräts am USV-Schrank mit weiteren 2 Torx- Schrauben M6x12 für jede Platte.
  • Seite 48 3. Installation 5) Führen Sie die Kabel durch die Kabeleinführungen an der Ober- und Unterseite des Geräts ein. Befestigen Sie die Kabel am internen Gitter.
  • Seite 49 Keor MOD Top Entry 6) Befestigen Sie die Fronttafel und die Seitentafel (die in Schritt 1 von der USV entfernt wurden) am Gerät.
  • Seite 50: Mechanische Daten

    4. Mechanische Daten...
  • Seite 51 Keor MOD Top Entry Índice 1. Introducción 2. Transporte y Posicionamiento 2.1 Control visual 2.2 Transporte 2.3 Desembalaje 2.4 Posicionamiento 3. Instalación 4. Datos mecánicos...
  • Seite 52: Introducción

    1. Introducción Este manual describe la instalación mecánica del Keor MOD Top Entry 311111 en el SAI Keor MOD. Para toda la demás información sobre la instalación y el uso, consultar el manual de instalación y del usuario para Keor...
  • Seite 53: Transporte Y Posicionamiento

    En caso de detectar algún daño, informar inmediatamente de ello: - al transportista; - al Servicio de Asistencia Técnica LEGRAND. Controlar que el equipo corresponda con los artículos indicados en el documento de entrega. El equipo y los accesorios relativos suministrados han de estar en perfectas condiciones.
  • Seite 54: Desembalaje

    2. Transporte y Posicionamiento Desembalaje Se requieren dos personas para retirar el embalaje y han de cumplir el siguiente procedimiento: - llevar el equipo al lugar de instalación usando una carretilla elevadora y/o una transpaleta con características adecuadas (véase la fig. 1); - retirar la película de plástico y los cartones;...
  • Seite 55 Keor MOD Top Entry (fig. 2) (fig. 3) (fig. 4)
  • Seite 56: Posicionamiento

    2. Transporte y Posicionamiento Posicionamiento Cuando el equipo se encuentra con el SAI en la posición final para la instalación, desenroscar en el sentido antihorario los pies delanteros y traseros del armario para posicionarlo. Asegurarse de que todas las ruedas y los pies toquen el suelo. (todas las dimensiones son en mm)
  • Seite 57: Instalación

    Keor MOD Top Entry 3. Instalación 1) Desmontar el panel lateral derecho del SAI Keor MOD. Guardar el panel y los 6 tornillos M6x20 con hueco hexagonales junto a las 6 arandelas dentadas. 2) Desmontar el panel frontal del Top Entry.
  • Seite 58 3. Instalación 3) Tomar 2 placas de fijación en L y fijarlas en la parte superior izquierda del equipo con 2 tornillos Torx M6x12 para cada placa como se muestra en la figura. Tomar 4 soportes de placa y fijarlos en los lados frontal izquierdo, trasero izquierdo y en la parte inferior del equipo con 2 tornillos Torx M6x12 para cada placa como se muestra en la figura.
  • Seite 59 Keor MOD Top Entry 4) Sujetar el Top Entry en el SAI y fijar las placas del equipo en el armario SAI con otros 2 tornillos Torx M6x12 para cada placa.
  • Seite 60 3. Instalación 5) Insertar los cables usando las entradas para cable en la parte superior e inferior del equipo. Sujetar los cables en la rejilla interna.
  • Seite 61 Keor MOD Top Entry 6) Fijar el panel frontal y el panel lateral (el desmontado del SAI en el paso 1) en el equipo.
  • Seite 62: Datos Mecánicos

    4. Datos mecánicos...
  • Seite 63 Keor MOD Top Entry...
  • Seite 64 LEGRAND Pro and Consumer Service BP 30076 - 87002 LIMOGES CEDEX FRANCE www.legrand.com Legrand se réserve le droit de modifier à tout moment le contenu de cet imprimé et de communiquer, sous n’importe quelle forme et modalité, les changements apportés.

Diese Anleitung auch für:

3 111 11

Inhaltsverzeichnis