HOMCOM CHILDREN'S GO KART Bedienungsanleitung
Inhaltsverzeichnis
Verfügbare Sprachen
Verfügbare Sprachen
+
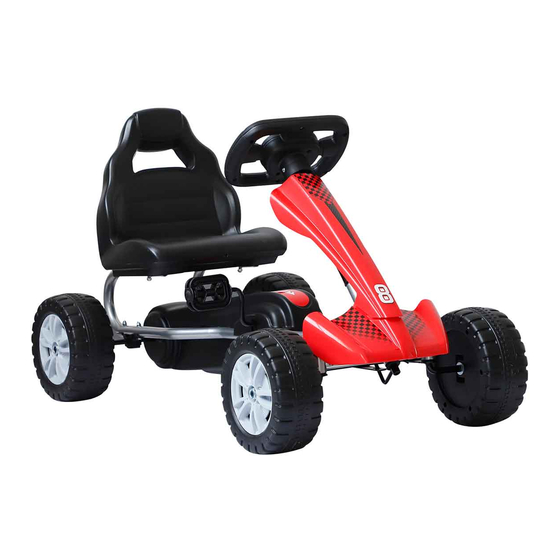
• Suitable for 3
years
• Maximum user weight: 30kg
• Adult assembly required
OWNER'S MANUAL
OWNER'S MANUAL
Read and understand this entire manual before using!
Please keep this manual for future reference as it contains important
information.
Read and understand this entire manual before using!
CHILDREN'S
GO KART
341-027
Inhaltsverzeichnis

Verwandte Anleitungen für HOMCOM CHILDREN'S GO KART


Inhaltszusammenfassung für HOMCOM CHILDREN'S GO KART
- Seite 15 KINDER GO KART 341-027 Geeignet für mehr als 3 Jahre Maximales Benutzergewicht: 30kg Montage durch Erwachsene erforderlich BEDIENUNGSANLEITUNG DES BESITZERS Lesen und verstehen Sie diese Bedienungsanleitung vor Gebrauch! Bitte bewaen Sie dieses Handbuch zum späteren Nachschlagen auf, da es wichtige Informationen enthält. and understand this entire manual before using!
-
Seite 16: Über Ihr Neues Fahrzeug
Inhaltsverzeichnis 1. Über Ihr neues Fahrzeug 2. Stückliste 3. Montageschritte 4 So bedienen Sie Ihr Fahrzeug 5. Wartung Ihres Fahrzeugs Über Ihr neues Fahrzeug Vielen Dank, dass Sie sich für unsere Produkte entschieden haben, wir möchten, dass Ihr Kind dieses Produkt über Jahre hinweg genießen kann. Beachten Sie diese Punkte, wenn Sie diese Anleitung lesen: Jahre Under 30Kg... - Seite 17 Stückliste Teilnu Menge Teilname Menge Teilnu Teilname Bild Bild mmer mmer (Stück) (Stück) Fahrzeugk Sitz arosserie Lenkrad Pedal Lenkwell Linearrohr M5x55 Platte Schraub fixiert M5x40 M5 Mutter SChraube M5X14 M5 Mutter Unterlegsc heibe Bedienun M4X10 gsanleitun Schraube...
- Seite 18 Montageschritte 1. Stecken Sie die Lenkwelle durch das Loch an der unteren Vorderseite des Fahrzeugs. Haken Sie die Lenkwelle in die Drehachse ein. 2. Setzen Sie das Linearrohr auf die Lenkwelle. 3. Das Lenkrad durch die Lenkwelle stecken und mit Schraube M5*40 befestigen, die Sicherung mit Mutter 5mm.
-
Seite 19: Assembly Steps
Assembly Steps 4. Um das Panel am Rahmen zu befestigen, vergewissern Sie sich, dass die beiden Schraubenlöcher an Panel und Rahmen ausgerichtet sind und ziehen Sie sie mit der Schraube M4*10 Platte mit Schraube M4x10 befestigen. 5. Befestigen Sie den Sitz am Rahmen des Fahrzeugs. -
Seite 20: So Bedienen Sie Ihr Fahrzeug
So bedienen Sie Ihr Fahrzeug WARNUNG! VERLETZUNGEN UND TODESFÄLLE ZU VERMEIDEN: LASSEN SIE DAS KIND NIEMALS UNBEAUFSICHTIGT. DIREKTE AUFSICHT VON ERWACHSENEN IST ERFORDERLICH. Halten Sie das Kind immer im Blick, wenn sich das Kind im Fahrzeug befindet. Niemals in Fahrbahnen, in der Nähe von Autos, an oder in der Nähe von steilen Steigungen oder Treppen verwenden, Schwimmbäder oder andere Gewässer. - Seite 21 Maintaining Your Vehicle Es liegt in der Verantwortung der Eltern, die wichtigsten Teile des Spielzeugs vor dem Gebrauch zu überprüfen, muss regelmäßig auf mögliche Fehler untersucht werden. Gefahr, wie z.B. Schrauben, sind Befestigungsgehäuse anderer Teile und dass im Falle einer solchen Beschädigung die Spielzeug darf erst dann verwendet werden, wenn dieser Schaden ordnungsgemäß...